The HTML Presentation Framework
Created by Hakim El Hattab and contributors


Hello There
reveal.js enables you to create beautiful interactive slide decks using HTML. This presentation will show you examples of what it can do.
Vertical Slides
Slides can be nested inside of each other.
Use the Space key to navigate through all slides.
Basement Level 1
Nested slides are useful for adding additional detail underneath a high level horizontal slide.
Basement Level 2
That's it, time to go back up.
Not a coder? Not a problem. There's a fully-featured visual editor for authoring these, try it out at https://slides.com .
Pretty Code
Code syntax highlighting courtesy of highlight.js .
Even Prettier Animations
Point of view.
Press ESC to enter the slide overview.
Hold down the alt key ( ctrl in Linux) and click on any element to zoom towards it using zoom.js . Click again to zoom back out.
(NOTE: Use ctrl + click in Linux.)
Auto-Animate
Automatically animate matching elements across slides with Auto-Animate .
Touch Optimized
Presentations look great on touch devices, like mobile phones and tablets. Simply swipe through your slides.
Add the r-fit-text class to auto-size text
Hit the next arrow...
... to step through ...
... a fragmented slide.
Fragment Styles
There's different types of fragments, like:
fade-right, up, down, left
fade-in-then-out
fade-in-then-semi-out
Highlight red blue green
Transition Styles
You can select from different transitions, like: None - Fade - Slide - Convex - Concave - Zoom
Slide Backgrounds
Set data-background="#dddddd" on a slide to change the background color. All CSS color formats are supported.
Image Backgrounds
Tiled backgrounds, video backgrounds, ... and gifs, background transitions.
Different background transitions are available via the backgroundTransition option. This one's called "zoom".
You can override background transitions per-slide.
Iframe Backgrounds
Since reveal.js runs on the web, you can easily embed other web content. Try interacting with the page in the background.
Marvelous List
- No order here
Fantastic Ordered List
- One is smaller than...
- Two is smaller than...
Tabular Tables
Clever quotes.
These guys come in two forms, inline: The nice thing about standards is that there are so many to choose from and block:
“For years there has been a theory that millions of monkeys typing at random on millions of typewriters would reproduce the entire works of Shakespeare. The Internet has proven this theory to be untrue.”
Intergalactic Interconnections
You can link between slides internally, like this .
Speaker View
There's a speaker view . It includes a timer, preview of the upcoming slide as well as your speaker notes.
Press the S key to try it out.
Export to PDF
Presentations can be exported to PDF , here's an example:
Global State
Set data-state="something" on a slide and "something" will be added as a class to the document element when the slide is open. This lets you apply broader style changes, like switching the page background.
State Events
Additionally custom events can be triggered on a per slide basis by binding to the data-state name.
Take a Moment
Press B or . on your keyboard to pause the presentation. This is helpful when you're on stage and want to take distracting slides off the screen.
- Right-to-left support
- Extensive JavaScript API
- Auto-progression
- Parallax backgrounds
- Custom keyboard bindings
- Try the online editor - Source code & documentation
Create Stunning Presentations on the Web
reveal.js is an open source HTML presentation framework. It's a tool that enables anyone with a web browser to create fully-featured and beautiful presentations for free.
Presentations made with reveal.js are built on open web technologies. That means anything you can do on the web, you can do in your presentation. Change styles with CSS, include an external web page using an <iframe> or add your own custom behavior using our JavaScript API .
The framework comes with a broad range of features including nested slides , Markdown support , Auto-Animate , PDF export , speaker notes , LaTeX support and syntax highlighted code .
Ready to Get Started?
It only takes a minute to get set up. Learn how to create your first presentation in the installation instructions !
Online Editor
If you want the benefits of reveal.js without having to write HTML or Markdown try https://slides.com . It's a fully-featured visual editor and platform for reveal.js, by the same creator.
Supporting reveal.js
This project was started and is maintained by @hakimel with the help of many contributions from the community . The best way to support the project is to become a paying member of Slides.com —the reveal.js presentation platform that Hakim is building.

Slides.com — the reveal.js presentation editor.
Become a reveal.js pro in the official video course.

Powerpoint Assist
Tips for Powerpoint by Regina Griffin
How To Embed HTML In PowerPoint
Enhance your PowerPoint presentations with interactive content by embedding HTML code into your slides.
In this article, we break down the basics of HTML, explore the benefits of how to embed HTML In PowerPoint and provide step-by-step instructions on how to do it.
Discover some tips, tricks, and common mistakes to avoid when incorporating HTML into your presentations. Learn how to take your slides to the next level with insights from Regina Griffin, a teacher from Oregon, US.
Key Takeaways:
- HTML is a markup language used to create and design web pages, and it can also be embedded in PowerPoint presentations.
- Embedding HTML in PowerPoint allows for interactive and dynamic content, enhancing the overall presentation experience for the audience.
- Follow best practices, such as using external CSS files and testing the HTML code before insertion, to ensure a smooth and error-free embedding process.
What is HTML?
HTML , which stands for Hypertext Markup Language, is the standard language used to create and design web pages on the internet.
HTML plays a crucial role in web development by providing the basic structure for web pages. It uses markup tags to define elements such as headings, paragraphs, links, images, and more, enabling the browser to interpret and display the content correctly.
For example, using HTML tags like <h1> for headings and <p> for paragraphs helps organize content hierarchically. Attributes within these tags provide further instructions, such as specifying image sources with src in the <img> tag.
Understanding the Basics of HTML
Understanding the basics of HTML involves learning how to create elements such as headings, paragraphs, and lists, and how to style them using CSS.
HTML, the backbone of web development, relies on various components like tags , which enclose different types of content, attributes that provide additional information to the elements, and elements , consisting of a start tag, content, and an end tag.
When these HTML elements are in place, CSS comes into play, enhancing the visual appeal with styles such as colors, fonts, and layouts. Incorporating CSS allows developers to achieve a polished and professional look on a website.
Why Embed HTML in PowerPoint?
Embedding HTML in PowerPoint presentations can enhance interactivity, visual appeal, and information sharing, creating dynamic and engaging content for viewers.
By incorporating HTML elements into your PowerPoint slides, you can add interactive features such as clickable buttons, image sliders, or embedded forms, allowing viewers to actively engage with the content. This not only captivates the audience but also enhances information retention and understanding.
Integrating HTML content enables seamless data presentation, making complex information more digestible through visually appealing charts, graphs, and tables. The incorporation of HTML also paves the way for multimedia integration, allowing you to seamlessly insert videos, audio clips, and interactive animations to enrich your presentations.
Benefits of Embedding HTML in PowerPoint
The benefits of embedding HTML in PowerPoint presentations include enriched multimedia content, interactive features, and seamless integration of web-based information within slides.
By incorporating HTML elements into your PowerPoint slides, you open up a whole new realm of possibilities. Not only can you enhance the visual appeal of your presentations with dynamic multimedia content like videos and animations, but you can also introduce interactive elements such as clickable buttons and hyperlinks.
The use of HTML allows for the easy integration of web-based information directly into your slides, making it effortless to showcase live websites, online surveys, and real-time data feeds. This dynamic approach keeps your audience engaged and ensures that your content remains up-to-date and relevant.
How to Embed HTML in PowerPoint?
To embed HTML in PowerPoint, you can use tools like PDFelement for Mac, which allows seamless integration of web content into your presentations.
First, open the PowerPoint presentation where you want to insert the HTML content. Next, navigate to the slide where you want to embed the HTML. Then, go to the ‘Insert’ tab in PowerPoint and select ‘Object’ from the dropdown menu. By choosing ‘Create from File’, you can then locate the HTML file on your computer and insert it into the slide.
After inserting the HTML, you may need to adjust the object properties to ensure it displays correctly. This includes resizing the object, positioning it on the slide, and testing how it interacts with other elements in your presentation.
To guarantee compatibility, make sure to save your PowerPoint presentation in a format that supports HTML embedding. Saving it as a PDF can help maintain the integrity of the embedded HTML content across different devices and platforms.
Step 1: Create a New PowerPoint Slide
The first step to embed HTML in PowerPoint is to create a new slide where you want to insert the web object.
Once you have your PowerPoint presentation open, navigate to the top menu and click on the ‘Insert’ tab. From the options that appear, select ‘New Slide’ to add a blank slide to your presentation.
- Now, choose the appropriate slide layout based on how you want to showcase your HTML content. Opt for a layout that provides enough space and arrangement for the web object you plan to insert.
- Before proceeding with the insertion of the HTML content, ensure that you have all the necessary code or content prepared and saved in a format that can be easily inserted into PowerPoint.
Step 2: Insert a Web Object
After creating the slide, the next step is to insert a web object where the HTML content will be embedded.
When inserting a web object, navigate to the ‘Insert’ tab on the PowerPoint ribbon. Click on ‘Web Object’ from the ‘Text’ group.
You will then be prompted to enter the URL of the HTML content you wish to embed. After adding the URL, choose whether you want to display the content as an icon, a clickable object, or in full view.
Adjust the properties of the web object by right-clicking on it and selecting ‘Properties’. Here, you can tweak settings such as size, position, and how the content interacts with the slide.
Step 3: Copy and Paste the HTML Code
Once the web object is inserted, you can copy the HTML code from your source and paste it into the designated area within PowerPoint.
To ensure seamless integration, make sure the HTML code you are copying is clean and free from any errors.
Open your source code editor and locate the section you want to add. Highlight the code, right-click, and select ‘Copy.’
Head back to your PowerPoint slide, right-click in the designated area, and choose ‘Paste.’
Ensure the formatting looks correct by previewing the slide slideshow. Adjust any sizing or alignment if needed.
This method guarantees your HTML content is properly displayed within your PowerPoint presentation.
Step 4: Adjust the Size and Position of the Web Object
To finalize the embedding process, adjust the size and position of the web object containing the HTML content to ensure proper display within the slide layout.
When resizing the HTML content within your PowerPoint slide, keep in mind that maintaining the aspect ratio can prevent distortion. It’s important to strike a balance between a size that is easily viewable and one that doesn’t overpower other elements on the slide.
Consider the visual hierarchy of your content. Placing the web object strategically can enhance the flow of information and guide the viewer’s focus. Remember to align it with other elements on the slide for a polished look.
In terms of responsive design, test how the HTML web object adjusts across different devices and screen sizes. Ensuring that it remains intact and readable on various platforms is crucial for an optimal user experience.
Tips and Tricks for Embedding HTML in PowerPoint
When embedding HTML in PowerPoint, consider using external CSS files for consistent formatting and styling across slides, enhancing the visual appeal and professional presentation of content.
Another important tip for embedding HTML in PowerPoint is to thoroughly test your HTML code beforehand to ensure it displays correctly and functions as intended within the presentation. This can help you identify any potential issues or errors before showcasing your content to an audience.
When incorporating HTML into your slides, it is crucial to source your code from reliable and trusted sources. This not only ensures the integrity and security of your presentation but also helps in maintaining a seamless user experience for your viewers.
Use External CSS Files for Better Formatting
External CSS files can streamline the formatting process when embedding HTML in PowerPoint, ensuring consistent styling and presentation across slides.
By utilizing external CSS files, users can separate the formatting instructions from the HTML content, allowing for easier management and updates. This separation of concerns makes styling adjustments a breeze, as modifications made to the CSS file automatically reflect across all PowerPoint slides.
The use of external CSS promotes visual consistency, ensuring that fonts, colors, and layouts remain uniform throughout the presentation. This not only enhances the overall aesthetic appeal but also saves time by eliminating the need to manually adjust each slide individually.
Test the HTML Code before Inserting it into PowerPoint
Ahead of inserting HTML code into PowerPoint, it is essential to test the code on a web browser to ensure proper functionality and appearance.
Testing HTML code before integrating it into PowerPoint slides serves as a critical step in the process. One must verify that the code behaves as expected and maintains its integrity across different browsers and screen sizes. This testing phase helps in identifying any potential issues related to compatibility and responsiveness, ensuring a seamless visual experience for viewers. By conducting thorough testing, you can rectify any errors or inconsistencies before incorporating the code into your presentation, thus saving time and avoiding surprises during the actual presentation.
Use HTML Code from a Reliable Source
When embedding HTML content in PowerPoint, always use code from trustworthy and verified sources to avoid compatibility issues and security risks.
Thus, it is essential to emphasize the importance of sourcing HTML code from well-established websites and reputable repositories. Remember that utilizing code from unverified sources may expose your presentation to vulnerabilities such as malicious scripts or phishing attempts. By ensuring the authenticity of the code, you not only safeguard your content but also mitigate potential risks of data breaches or unauthorized access to sensitive information. Verify that the HTML code complies with security standards and best practices to maintain a secure environment for your PowerPoint presentations.
Common Mistakes to Avoid
When embedding HTML in PowerPoint, common mistakes to avoid include using complex HTML code, neglecting compatibility checks with different PowerPoint versions, and skipping presentation testing before the actual event.
One of the key errors often seen in HTML embedding in PowerPoint is the inclusion of overly intricate code, which can lead to formatting issues or even malfunctioning elements during the presentation. It’s crucial to remember that varying versions of PowerPoint may interpret HTML components differently, making it essential to thoroughly check for compatibility to ensure a seamless viewing experience for all attendees. Failing to conduct comprehensive presentation testing in advance might result in unexpected glitches or rendering problems, jeopardizing the effectiveness of your message delivery.
Using Complex HTML Code
Avoid using overly complex HTML code in PowerPoint presentations , as it can lead to rendering issues, performance lags, and compatibility challenges across different platforms.
When creating PowerPoint slides, simpler HTML coding is essential for ensuring that your presentation looks consistent and functions properly on various devices and operating systems. Complex HTML structures may not translate well, causing elements to appear distorted or even break altogether.
By focusing on simplicity and efficiency in your HTML coding, you are not only enhancing the visual appeal of your slides but also ensuring a seamless viewing experience for your audience. This approach also improves the chances of your content being accessible and engaging on a wide range of platforms, ultimately boosting cross-platform compatibility.
Not Checking Compatibility with PowerPoint Versions
Ensure compatibility with various PowerPoint versions by testing HTML content across different software iterations to avoid formatting discrepancies and functionality issues.
Verifying the compatibility of your HTML content with different versions of PowerPoint is crucial to guarantee a seamless viewing experience for all users. Running cross-version tests helps identify potential discrepancies in formatting or functionality that may arise when the content is opened in older or newer PowerPoint iterations. Testing systematically across multiple versions allows you to address any issues proactively, ensuring that your presentation looks and operates as intended regardless of the software version being used.
Not Testing the Presentation Before the Actual Presentation
Before delivering a presentation, always conduct thorough testing to ensure that embedded HTML elements function correctly, display as intended, and maintain visual integrity.
Start by reviewing each slide containing embedded HTML content to check for formatting consistency and link functionality. Verify that the HTML code is error-free and compatible with the version of PowerPoint being used.
- Inspect the slides across different devices to assess the responsive design and ensure seamless rendering.
- Test interactive elements, such as buttons or forms, to confirm user interaction responsiveness.
- Conduct accessibility testing to guarantee compliance with web content accessibility guidelines .
A comprehensive pre-presentation testing process helps prevent technical glitches and enhances the overall user experience during the presentation.
Frequently Asked Questions
1. how to embed html in powerpoint.
Embedding HTML in PowerPoint is a simple process that allows you to enhance your presentation with interactive elements and dynamic content. Follow these steps to embed HTML in PowerPoint:
1. Open your PowerPoint presentation and navigate to the slide where you want to insert the HTML. 2. Click on the “Insert” tab and select “Object” from the toolbar. 3. In the “Object” window, switch to the “Create from File” tab and click on “Browse” to select the HTML file you want to embed. 4. Check the “Link” box if you want the content to be linked to the original file. 5. Click “OK” to insert the HTML in your PowerPoint slide.
2. Can I edit the embedded HTML in PowerPoint?
Yes, you can edit the embedded HTML in PowerPoint. Once the HTML is inserted, you can double-click on it to open the editing window. Make the necessary changes and click “Save” to update the embedded content in your presentation.
3. How do I resize the embedded HTML in PowerPoint?
To resize the embedded HTML in PowerPoint, click on it to select it, and then click on the corners and drag to adjust the size. You can also use the “Format” tab to specify the exact height and width of the embedded object.
4. Can I embed external HTML in my PowerPoint presentation?
Yes, you can embed external HTML in your PowerPoint presentation. Simply follow the same steps as embedding a local HTML file, but instead of browsing for the file on your computer, paste the link to the external HTML in the “File name” field.
5. How can I test the embedded HTML in my PowerPoint presentation?
To test the embedded HTML in your PowerPoint presentation, click on the “Slide Show” tab and select “From Beginning” or “From Current Slide” to view your presentation in full-screen mode. Interact with the embedded HTML to make sure it functions as intended.
6. Is it possible to embed multiple HTML files in one PowerPoint slide?
Yes, it is possible to embed multiple HTML files in one PowerPoint slide. Simply repeat the steps for embedding HTML and add each file on a separate slide. You can then use the “Transitions” tab to set the timings for each slide to create a seamless presentation of your embedded HTML elements.
Similar Posts
How to make a pecha kucha in powerpoint.
Looking to create a dynamic and engaging presentation using PowerPoint? We explore the concept of Pecha Kucha and discuss why PowerPoint is the perfect tool for this unique presentation format. Delve into the benefits of using PowerPoint for Pecha Kucha and get a step-by-step guide on creating your presentation. Discover some tips for a successful…
How To Add Text In PowerPoint Without Text Box
Are you tired of using text boxes in PowerPoint to add text to your presentations? Do you want to learn a more efficient way to add text without the constraints of a box? In this article, we will explore the importance of knowing how to add text in PowerPoint without a text box, the benefits…
How To Add Timer In PowerPoint
Looking to enhance your PowerPoint presentations and keep your audience engaged? Adding a timer can help you stay on track and ensure your presentation runs smoothly. In this tutorial by Regina Griffin, a teacher from Oregon, US, learn how to easily add a timer to your slides. From inserting a text box to setting the…
How To Change Background In PowerPoint
Looking to enhance your PowerPoint presentations and impress your audience? Changing the background can make a world of difference. Explore the reasons why changing the background in PowerPoint is important, along with a step-by-step guide on how to do it. Get tips on choosing the right background, learn about common mistakes to avoid, and elevate…
How To Border In PowerPoint
Borders in PowerPoint can enhance the visual appeal of your slides, organize content effectively, and highlight important information. From solid line borders to customized designs, there are various types of borders you can use in PowerPoint to make your presentation more engaging. In this tutorial by Regina Griffin, a teacher from Oregon, US, we will…
How To Embed Video In PowerPoint Without File
Looking to enhance your PowerPoint presentations with engaging video content? We explore the benefits and requirements of embed video in PowerPoint in this tutorial. From compatible video formats to troubleshooting common issues, we cover everything you need to know to seamlessly integrate video into your slides. Whether you are a teacher like Regina Griffin in…
Just $59.95 for a limited time (normally $99.95).

How to embed a PowerPoint presentation into a website or blog
Do you want to know how to add a powerpoint presentation to your website or blog without having to upload multiple slide images or a video of the entire presentation .
In this guide, I'll show you how to make your presentation more interactive and engaging for your audience on the web. I'll explain how to upload your presentation slideshow directly to your blog, so your readers can enjoy all the functions of a PowerPoint presentation directly on your website or blog page.
To help you understand better, I'll show you an example of a presentation that has already been uploaded to this blog. With the help of PowerPoint for the Web, you can make your presentations more accessible and engaging for your audience. So, let me guide you through the process of seamlessly integrating your PowerPoint presentation into your website or blog.
This presentation is part of our Law PowerPoint Template . You can use this template or any other template from the PresenterMedia PowerPoint Templates library.
This template can be accessed and download at no cost by simply signing up for the PresenterMedia free basic plan .

The only version of PowerPoint that allows users to create embed code is PowerPoint for the Web .
Historically, consumers were able to save a presentation as a video and embed it onto a website. But it wasn't the same as allowing readers to click through the slides, and download if needed. Microsoft heard from their clients and added the ability to embed the web application into the latest iteration of PowerPoint (for Web). With that said, let's check out this feature from Microsoft!
Let's get started Embedding!
Now that you've seen what a PowerPoint looks like once embedded, let's get into the process of completing the task at hand.
Begin by opening the PowerPoint 365 Web Application (link here !) Note* You may need to sign into your Microsoft Office account before you start.
After the site is open, select the presentation you'd like to embed into your website if already uploaded (or start from scratch).

If you haven't uploaded your presentation to PowerPoint for the web, choose the upload option.

Okay, once you've upload or selected your PowerPoint file it will load into the PowerPoint web application.

Next, click "File" from the upper left corner of PowerPoint and select "Share" from the options on the left side.

Then, select "Embed" from the two option on the right.
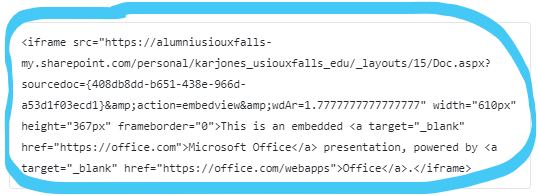
The default embed code in my PowerPoint is 476 x 288. As a rule, 610 x 367 will fit on most websites comfortably, but if you want your viewer to have a full-screen experience, then 1186 x 691 dimensions would be preferable. However, this option is customizable, so you can choose any size you desire.

Copy the Embed Code and paste it into the body of your website or blog.
Last, but not least, be sure to save the code in your site or blog, and voila! You've successfully embedded a PowerPoint presentation into your website.
To recap: How to embed a PowerPoint presentation into a website includes 4 simple steps:
Open your presentation in Office 365's version of PowerPoint
Click File > Share > Embed
Copy the embed code
Paste the embed code to your website.
Thanks so much for checking out this tutorial! Let us know if you have any burning questions about PowerPoint or Office 365!
This embedding a PowerPoint Presentation tutorial is also available on our YouTube video here:
Why is embedding a PowerPoint Presentation in a blog or website a Smart Move?
When it comes to showcasing presentations on your website or blog, embedding a PowerPoint slideshow is a great way to make them more engaging and interactive. Unlike static images, an embedded presentation allows your audience to navigate through slides, interact with content, and absorb information in a more immersive way. This not only enhances the visual appeal of your presentations but also makes it easier for your viewers to explore the content at their own pace .

Categories:
Recent posts:.
- Enhanced Editable Design Area for Clipart Design Templates
- PresenterMedia Info Icons Legend
- March 2024 Suggestions
- Save and Link a PPSX File in PowerPoint
- PresenterMedia February 2024 Newsletter - Graphics, Updates, News
- New Artwork and Illustrations for February
- Improvements Update: SlideClips Video Maker | February 2024
- PresenterMedia January 2024 Newsletter - Graphics, Updates, News
- January 2024 Suggestions
- How to Convert PPTX to Google Slides and Enhance Your Presentations

Your presentations are going to be amazing! See Plans and Pricing

© 2009-2021 Eclipse Digital Imaging, Inc.
Quality PowerPoint Templates , Animations, videos, and 3D Clipart. PowerPoint® is a registered trademark of Microsoft Corporation.
Notification Title!
This is the message.
Home Blog PowerPoint Tutorials How to Embed HTML in PowerPoint
How to Embed HTML in PowerPoint

Embedding an HTML file in PowerPoint can enable directly opening the file during a PowerPoint presentation. While PowerPoint is not a web browser with limitations regarding such files, you can embed HTML in PowerPoint.
How to Embed HTML into PowerPoint
To add embed code in PowerPoint, you can simply add it to a textbox. You might also want to see which PowerPoint templates or Google Slides templates to use with PowerPoint to make your code prominently visible. However, to embed an HTML file, it needs to be added as an object.
HTML files can be embedded as objects in PowerPoint via Insert -> Text -> Object .

From the dialog box, select a file and browse to select the HTML file. You can choose to display the file as an icon by checking the Display as Icon option. Check the Link option if you want the linked file to be updated with the latest version. This will help ensure that changes made to the HTML file are reflected when you open it.

How to Open Embedded HTML File in Normal Mode
The HTML file added to PowerPoint can be opened by clicking Normal mode.

How to Open Embedded HTML File in Slide Show Mode
Once the HTML object is added, you will require hyperlinking it to ensure it opens in Slide Show mode. Select the HTML object embedded in your slide and go to Insert Link via the Insert tab.

Browse to select the HTML file to hyperlink it to the embedded HTML object in your slide.

Hyperlinking the HTML file will make it clickable in Slide Show mode.

Final Words
If you link to an HTML file, your PowerPoint file will refer to the linked file, whereas not linking it will embed your PowerPoint presentation. Hence, if you want to embed an HTML file in your slide, you shouldn’t link your file. To ensure the file can open in Slide Show mode, it will require a hyperlink to become clickable directly during a Live presentation session. Otherwise, you must exit Slide Show mode to launch the file.

Like this article? Please share
HTML, Microsoft PowerPoint Filed under PowerPoint Tutorials
Related Articles

Filed under PowerPoint Tutorials • June 7th, 2024
How to Change Theme Fonts in PowerPoint
Customize your presentation slides by changing theme fonts in PowerPoint. Instructions for Slide Master, Design tab, and more.

Filed under PowerPoint Tutorials • June 3rd, 2024
How to Align Text Boxes in PowerPoint
Organize your presentation slides layout in seconds by mastering how to align text boxes in PowerPoint. Step-by-step instructions with images here.

Filed under PowerPoint Tutorials • May 31st, 2024
How to See Notes in PowerPoint
Optimize your presentation slides by knowing how to see notes in PowerPoint. Instructions for slide design and Presenter View modes.
Leave a Reply
Presenting Slides
This article covers the mechanics of presenting slides with Reveal. Basic navigation is done using the following keyboard shortcuts:
You will often want to enter fullscreen mode when presenting. You can do this by pressing the F key.
In addition to basic keyboard navigation, Reveal supports several more advanced capabilities, including:
- Navigation menu and overview mode
- Speaker view (w/ speaker notes,timer, and preview of upcoming slides)
- Printing to PDF and publishing as self contained HTML
- Drawing on top of slides & chalkboard/whiteboard mode
- Multiplex, which allows your audience to follow the slides of the presentation you are controlling on their own phone, tablet or laptop.
These capabilities are described below.
Navigation Menu
You can also open the navigation menu by pressing the M key.
The navigation menu also includes a Tools pane that provides access to the various other navigation tools including Fullscreen, Speaker View, Overview Mode, and Print to PDF.
Use the following options to customize the appearance and behavior of the menu:
For example:
You can hide the navigation menu by specifying the menu: false option:
Note that you can still open the menu using the M key even if the button is hidden.
Overview Mode
Overview mode provides an alternate view that shows you a thumbnail for each slide:

You can enable Overview Mode by pressing the O key.
Hold down the Alt key (or Ctrl in Linux) and click on any element to zoom towards it. Try zooming in on one of these images:
Alt or Ctrl click again to zoom back out.
Speaker View
The speaker view shows the current slide along with the upcoming slide, a timer, and any speaker notes associated with the current slide:

You can enable Speaker View by pressing the S key.
You can add speaker notes to a slide using a div with class .notes . For example:
Slide Numbers
You can add slide numbers to your presentation using the slide-number option. You can also control in which contexts slide numbers appear using the show-slide-number option. For example, here we configure slides numbers for printed output only:
In addition to a simple true or false value, the slide-number option can also specify a format. Available formats include:
See Vertical Slides for additional information on vertical slides.
The show-slide-number option supports the following values:
Print to PDF
Reveal presentations can be exported to PDF via a special print stylesheet.
Note: This feature has been confirmed to work in Google Chrome , Chromium as well as in Firefox .
To Print to PDF, do the following:
- Toggle into Print View using the E key (or using the Navigation Menu )
- Open the in-browser print dialog (CTRL/CMD+P).
- Change the Destination setting to Save as PDF .
- Change the Layout to Landscape .
- Change the Margins to None .
- Enable the Background graphics option.
- Click Save 🎉
Here’s what the Chrome print dialog would look like with these settings enabled:

Print Options
There are a number of options that affected printed output that you may want to configure prior to printing:
For example, the following specifies that we want to print speaker notes on their own page and include slide numbers:
Preview Links
Reveal makes it easy to incorporate navigation to external websites into the flow of presentations using the preview-links option.
When you click on a hyperlink with preview-links: true , the link will be navigated to in an iframe that overlays the slide. For example, here we’ve clicked on a Matplotlib link and the website opens on top of the slide (you’d click the close button at top right to hide it):

Available values for preview-link include:
For example, here we set preview-links to auto :
You can also set this option on a per-link basis. These two links respectively enable and disable preview:
Previewing website in HTML format will use an <iframe> , which not all websites will allow (e.g. they could set in their respone header X-Frame-Options to deny , or frame-ancestor restriction in their Content-Security-Policy ). If a website disallow iframe usage, the preview will not be working in the Quarto document output.
Slide tone plays a subtle sound when you change slides. It was requested by a blind user and enables presenters to hear an auditory signal of their progress through the slides. Enable slide tone with:
The tones increase in pitch for each slide from a low C to a high C note. The tone pitch stays the same for incremental slides.
The implementation of slide tone was adapted from the slide tone plugin in xaringanExtra.
Presentations can be configured to step through slides automatically, without any user input. To enable this you will need to specify an interval for slide changes using the auto-slide option (the interval is provided in milliseconds). The loop option can additionally be specified to continue presenting in a loop once all the slides have been shown.
For example, here we specify that we want to advance every 5 seconds and continue in a loop:
A play/pause control element will automatically appear for auto-sliding decks. Sliding is automatically paused if the user starts interacting with the deck. It’s also possible to pause or resume sliding by pressing A on the keyboard.
You can disable the auto-slide controls and prevent sliding from being paused by specifying auto-slide-stoppable: false .
Slide Timing
It’s also possible to override the slide duration for individual slides and fragments by using the autoslide attribute (this attribute also works on Fragments ). For example, here we set the auto-slide value to 2 seconds:
There are two main ways to publish Reveal presentations:
As a PDF file—see Print to PDF above for details on how to do this.
As an HTML file. For HTML, it’s often most convenient to distribute the presentation as a single self contained file. To do this, specify the embed-resources option:
All of the dependent images, CSS styles, and other assets will be contained within the HTML file created by Quarto.
Note that specifying embed-resources can slow down rendering by a couple of seconds, so you may want to enable embed-resources only when you are ready to publish. Also note that Reveal plugin Chalkboard is not compatible with embed-resources — when Chalkboard plugin is enabled, specifying embed-resources: true will result an error.
See the documentation on Publishing HTML for details on additional ways to publish Reveal presentations including GitHub Pages and Posit Connect.
Navigation Options
There are several navigational cues provided as part of Reveal presentations and corresponding options that control them:
For example, the following configuration hides the progress bar and specifies that we want to use browser history:
Quarto includes a built-in version of the reveal.js-chalkboard plugin. Specify the chalkboard: true option to enable the plugin, which enables you to draw on a notes canvas on top of your slides and/or open up an empty chalkboard within your presentation:
Note that Reveal plugin Chalkboard is not compatible with embed-resources output — when Chalkboard plugin is enabled, specifying embed-resources: true will result an error.
Here are what the notes canvas and chalkboard look like when activated:

Here are all of the keyboard shortcuts associated with the notes canvas and chalkboard:
The following mouse and touch gestures can be used for interacting with drawings:
Click on the buttons at the bottom left to toggle the notes canvas or chalkboard
Click on the color picker at the left to change the color (the color picker is only visible if the notes canvas or chalkboard is active)
Click on the up/down arrows on the right to switch among multiple chalkboard (the up/down arrows are only available for the chalkboard)
Click the left mouse button and drag to write on notes canvas or chalkboard
Click the right mouse button and drag to wipe away previous drawings
Touch and move to write on notes canvas or chalkboard
Touch and hold for half a second, then move to wipe away previous drawings
Restoring Drawings
The D key downloads any active drawings into a JSON file. You can then restore these drawings when showing your presentation using the src option. For example:
Chalkboard Options
The following options are available to customize the behavior and appearance of the chalkboard:
For example, the following configuration specifies that we want to use the whiteboard theme with a (thicker) boardmarker width, and that we want to hide the chalkboard buttons at the bottom of each slide:
If you disable the chalkboard buttons globally you can selectively re-enable them for inidvidual slides with the chalkboard-buttons attribute. For example:
You can also use chalkboard-buttons="false" to turn off the buttons for individual slides.
Quarto includes a built-in version of the Reveal Multiplex plugin. The multiplex plugin allows your audience to follow the slides of the presentation you are controlling on their own phone, tablet or laptop. When you change slides in your master presentations everyone will follow and see the same content on their own device.
Creating a Reveal presentation that supports multiplex is straightforward. Just specify the multiplex: true option as follows:
Rendering the presentation will result in two HTML files being created by Quarto:
The two versions of the presentation will be synchronized such that when the speaker version switches slides the viewers also all switch to the same slide.
Multiplex Server
Behind the scenes there is a multiplex server that is synchronizing slide events between the viewer and speaker versions of the presentation. Note that the this server does not actually see any of the slide content, it is only used to synchronize events.
By default, a server created and hosted by the Revealjs team is used for this: https://reveal-multiplex.glitch.me/ . This server is used by default when you specify multiplex: true .
Running your own server
If you want to run your own version of this server its source code is here: https://github.com/reveal/multiplex/blob/master/index.js .
You can then configure multiplex to use an alternate server as follows:
Note that Quarto calls the multiplex server behind the scenes to provision a id and secret for your presentation. If you want to provision your own id and secret you can do so at https://reveal-multiplex.glitch.me/ (or using your custom hosted server URL) and provide them explicitly in YAML:
Note that the secret value will be included in only the speaker version of the presentation.
Learning More
See these articles lo learn more about using Reveal:
- Reveal Basics covers the basic mechanics of creating presentations.
- Advanced Reveal delves into transitions, animations, advanced layout and positioning, and other options available for customizing presentations.
- Reveal Themes talks about using and customizing existing themes as well as creating brand new themes.

How to Create Beautiful HTML & CSS Presentations with WebSlides
Share this article

Getting Started with WebSlides
Create a web presentation with webslides.
- Frequently Asked Questions (FAQs) about Creating Beautiful HTML & CSS Presentations with WebSlides

This article was peer reviewed by Ralph Mason , Giulio Mainardi , and Mikhail Romanov . Thanks to all of SitePoint’s peer reviewers for making SitePoint content the best it can be!
Presentations are one of the best ways to serve information to an audience. The format is short and sharp, made up of small, digestible chunks, which makes any topic under discussion engaging and easier to understand. A presentation can contain all kinds of data, represented by many different elements, such as tables, charts, diagrams, illustrations, images, videos, sounds, maps, lists, etc, all of which lends great flexibility to this medium of expression.
Particularly on the web, presentations come in handy on many occasions, and there are loads of tools at your disposal to create some nifty ones. Today, I’ll introduce you to WebSlides — a small and compact library with a nice set of ready-to-use components, which you can leverage to build well-crafted and attractive web presentations:
WebSlides “is about telling the story, and sharing it in a beautiful way.”
In fact, one of WebSlides’ main benefits is that you can share your story beautifully and in a variety of different ways. With one and the same architecture — 40+ components with semantic classes, and clean and scalable code — you can create portfolios, landings, longforms, interviews, etc.
Besides, you can also extend WebSlides’ functionality by combining it with third-party services and tools such as Unsplash , Animate.css , Animate On Scroll , and so on.
WebSlides is easy to learn and fun to use. Let’s see it in action now.
To get started, first download WebSlides . Then, in the root folder, create a new folder and call it presentation . Inside the newly created presentation folder, create a new file and call it index.html . Now, enter the following code, which contains the needed references to the WebSlides’ files (make sure the filepaths correspond to the folder structure in your setup):
In this section you’re going to create a short, but complete presentation, which explains why SVG is the future of web graphics. Note: If you are interested in SVG, please check my articles: SVG 101: What is SVG? and How to Optimize and Export SVGs in Adobe Illustrator .
You’ll be working step by step on each slide. Let’s get started with the first one.
The first slide is pretty simple. It contains only one sentence:
Each parent <section> inside <article id="webslides"> creates an individual slide. Here, you’ve used two classes from WebSlides’ arsenal, i.e., bg-gradient-r and aligncenter , to apply a radial gradient background and to align the slide content to the center respectively.

The second slide explains what SVG is:
The code above uses the content-left and content-right classes to separate the content into two columns. Also, in order to make the above classes work, you need to wrap all content by using the wrap class. On the left side, the code uses text-subtitle to make the text all caps, and text-intro to increase the font size. The right side consists of an illustrative image.

The next slide uses the grid component to create two columns:
The snippet above shows how to use the grid and column classes to create a grid with two columns. In the first column the style attribute aligns the text to the left (Note how the aligncenter class on the <section> element cascades through to its .column child element, which causes all text inside the slide to be center aligned). In the second column, the browser class makes the illustrative image look like a screenshot.

In the fourth slide, use the grid component again to split the content into two columns:

In this slide, place half of the content to the left and the other half to the right using the content-left and content-right classes respectively:

In this slide, use the background class to embed an image as a background with the Unsplash service . Put the headline on light, transparent background by using the bg-trans-light class. The text’s color appears white, because the slide uses a black background with the bg-black class, therefore the default color is inversed, i.e., white on black rather than black on white. Also, for the text to be visible in front of the image, wrap it with <div class="wrap"> :

In this slide, put the explanation text on the left and the illustrative image on the right at 40% of its default size (with the alignright and size-40 classes on the <img> element). For this and the next three slides, use slideInRight , which is one of WebSlides’ built-in CSS animations:

Do a similar thing here:

This slide also uses a similar structure:

Here, divide the content into left and right again. In the second <p> tag, use the inline style attribute to adjust the font-size and line-height properties. Doing so will override the text-intro class styles that get applied to the element by default. On the right side, use <div class="wrap size-80"> to create a container for the SVG code example:

Here, leverage some of the classes you’ve already used to illustrate browser support for SVG:

In this slide, show some of the use cases for SVG in the form of an image gallery. To this end, use an unordered list with the flexblock and gallery classes. Each item in the gallery is marked up with a li tag:

This section shows a typical SVG workflow, so you need to use the flexblock and steps classes, which show the content as a sequence of steps. Again, each step is placed inside a li tag:
For each step after the first one, you need to add the process-step-# class. This adds a triangle pointing to the next step.

In the last slide, use another one of WebSlides’ built-in CSS animations, i.e., zoomIn :

Congratulations! You’re done. You can see the final outcome here:
See the Pen HTML and CSS Presentation Demo with WebSlides by SitePoint ( @SitePoint ) on CodePen .
Et voilà! You have just created a beautiful, fully functional and responsive web presentation. But this is just the tip of the iceberg, there’s a lot more you can quickly create with WebSlides and many other WebSlides features which I didn’t cover in this short tutorial.
To learn more, explore the WebSlides Components and CSS architecture documentation , or start customizing the demos already available to you in the downloadable folder.
Then, focus on your content and let WebSlides do its job.
Frequently Asked Questions (FAQs) about Creating Beautiful HTML & CSS Presentations with WebSlides
How can i customize the design of my webslides presentation.
WebSlides allows you to customize your presentation to suit your style and needs. You can change the color scheme, fonts, and layout by modifying the CSS file. If you’re familiar with CSS, you can easily tweak the styles to create a unique look. If you’re not, there are plenty of online resources and tutorials that can help you learn. Remember, the key to a great presentation is not only the content but also the design. A well-designed presentation can help keep your audience engaged and make your content more memorable.
Can I add multimedia elements to my WebSlides presentation?
How can i share my webslides presentation with others.
Once you’ve created your WebSlides presentation, you can share it with others by hosting it on a web server. You can use a free hosting service like GitHub Pages, or you can use your own web server if you have one. Once your presentation is hosted, you can share the URL with anyone you want to view your presentation. They’ll be able to view your presentation in their web browser without needing to install any special software.
Can I use WebSlides for commercial projects?
Yes, WebSlides is free to use for both personal and commercial projects. You can use it to create presentations for your business, for your clients, or for any other commercial purpose. However, please note that while WebSlides itself is free, some of the images and fonts used in the templates may be subject to copyright and may require a license for commercial use.
How can I add interactive elements to my WebSlides presentation?
You can add interactive elements to your WebSlides presentation by using JavaScript. For example, you can add buttons that the user can click to navigate to different slides, or you can add forms that the user can fill out. This can be done by adding the appropriate HTML and JavaScript code to your slides. If you’re not familiar with JavaScript, there are plenty of online resources and tutorials that can help you learn.
Can I use WebSlides offline?
Yes, you can use WebSlides offline. Once you’ve downloaded the WebSlides files, you can create and view your presentations offline. However, please note that some features may not work offline, such as loading external images or fonts. To ensure that all features work correctly, it’s recommended to host your presentation on a web server.
How can I add transitions and animations to my WebSlides presentation?
You can add transitions and animations to your WebSlides presentation by using CSS. CSS allows you to control the appearance and behavior of elements on your slides, including transitions and animations. For example, you can use the transition property to animate the change of a property from one value to another, or you can use the animation property to create more complex animations.
Can I use WebSlides on mobile devices?
Yes, WebSlides is designed to be responsive and works well on both desktop and mobile devices. However, please note that due to the smaller screen size, some elements may not display as intended on mobile devices. It’s recommended to test your presentation on different devices to ensure that it looks and works well on all platforms.
How can I add navigation controls to my WebSlides presentation?
You can add navigation controls to your WebSlides presentation by using the built-in navigation options. You can add arrows to navigate between slides, or you can add a slide counter to show the current slide number and the total number of slides. This can be done by adding the appropriate HTML and CSS code to your slides.
Can I use WebSlides with other web development tools?
Yes, you can use WebSlides with other web development tools. For example, you can use it with a text editor to write your HTML and CSS code, or you can use it with a version control system like Git to manage your project files. You can also use it with a build tool like Gulp or Grunt to automate tasks like minifying your code or compiling your CSS.
I am a web developer/designer from Bulgaria. My favorite web technologies include SVG, HTML, CSS, Tailwind, JavaScript, Node, Vue, and React. When I'm not programming the Web, I love to program my own reality ;)

Create beautiful stories
WebSlides makes HTML presentations easy. Just the essentials and using lovely CSS.
WebSlides 1.5.0 Github
Why WebSlides?
Good karma & Productivity.
An opportunity to engage.
WebSlides is about good karma. This is about telling the story, and sharing it in a beautiful way. HTML and CSS as narrative elements.
Work better, faster.
Designers, marketers, and journalists can now focus on the content. Simply choose a demo and customize it in minutes.
WebSlides is really easy
Each parent <section> in the #webslides element is an individual slide.
Code is clean and scalable. It uses intuitive markup with popular naming conventions. There's no need to overuse classes or nesting. Making an HTML presentation has never been so fast .
→ Simple Navigation
Slide counter, 40 + beautiful components, vertical rhythm, 500 + svg icons, webslides demos.
Contribute on Github . View all ›

If you need help, here's just some tutorials. Just a basic knowledge of HTML is required:
- Components · Classes .
- WebSlides on Codepen .
- WebSlides Media: images, videos...

Built to expand
The best way to inspire with your content is to connect on a personal level:
- Background images: Unsplash .
- CSS animations: Animate.css .
- Longforms: Animate on scroll .
Ready to Start?
Create your own stories instantly. 120+ premium slides ready to use.
Free Download Pay what you want.
People share content that makes them feel inspired. WebSlides is a very effective way to engage young audiences, customers, and teams.
@jlantunez , @ant_laguna , and @luissacristan .
Navigation Menu
Search code, repositories, users, issues, pull requests..., provide feedback.
We read every piece of feedback, and take your input very seriously.
Saved searches
Use saved searches to filter your results more quickly.
To see all available qualifiers, see our documentation .
- Notifications You must be signed in to change notification settings
Create HTML presentations in seconds —
webslides/WebSlides
Folders and files, repository files navigation, webslides = create stories with karma.
Finally, everything you need to make HTML presentations, landings, and longforms in a beautiful way. Just a basic knowledge of HTML and CSS is required. Designers, marketers, and journalists can now focus on the content. — https://webslides.tv/demos .
Simply choose a demo and customize it in seconds. Latest version: webslides.tv/webslides-latest.zip .
What's in the download?
The download includes demos and images (devices and logos). All content is for demo purposes only. Images are property of their respective owners.
- Navigation (horizontal and vertical sliding): remote presenters, touchpad, keyboard shortcuts, and swipe.
- Slide counter.
- Permalinks: go to a specific slide.
- Click to nav.
- Simple CSS alignments. Put content wherever you want (vertical centering...)
- 40+ components: background images/videos, quotes, cards, covers...
- Flexible blocks with auto-fill and equal height.
- Fonts: Roboto, Maitree (Serif), and San Francisco.
- Vertical rhythm (use multiples of 8).
- Code is clean and scalable. It uses intuitive markup with popular naming conventions. There's no need to overuse classes or nesting.
- Each parent <section> in the #webslides element is an individual slide.
Vertical Sliding
Css syntax (classes).
- Typography: .text-landing , .text-data , .text-intro ...
- Background Colors: .bg-primary , .bg-apple , .bg-blue ...
- Background Images: .background , .background-center-bottom ...
- Cards: .card-50 , .card-40 ...
- Flexible Blocks: .flexblock.clients , .flexblock.metrics ...
You can add:
- Unsplash photos
- animate.css
- particles.js
- Animate on scroll (Useful for longform articles)
- Do not miss our demos .
- Plugin Docs
- Plugin Development
- WebSlides was created by @jlantunez using Cactus .
- Javascript: @Belelros and @LuisSacristan .
- Based on SimpleSlides , by @JennSchiffer .
Releases 12
Used by 192.
Contributors 14
- JavaScript 49.3%
HTML References
Html <embed> tag.
An embedded image:
An embedded HTML page:
An embedded video:
Definition and Usage
The <embed> tag defines a container for an external resource, such as a web page, a picture, a media player, or a plug-in application.
Most browsers no longer support Java Applets and Plug-ins.
ActiveX controls are no longer supported in any browsers.
The support for Shockwave Flash has also been turned off in modern browsers.
To display a picture, it is better to use the <img> tag.
To display HTML, it is better to use the <iframe> tag.
To display video or audio, it is better to use the <video> and <audio> tags.
Advertisement
Browser Support
Global attributes.
The <embed> tag also supports the Global Attributes in HTML .
Event Attributes
The <embed> tag also supports the Event Attributes in HTML .
Related Pages
HTML DOM reference: Embed Object
Default CSS Settings
Most browsers will display the <embed> element with the following default values:

COLOR PICKER

Contact Sales
If you want to use W3Schools services as an educational institution, team or enterprise, send us an e-mail: [email protected]
Report Error
If you want to report an error, or if you want to make a suggestion, send us an e-mail: [email protected]
Top Tutorials
Top references, top examples, get certified.
- For Business
How to embed PowerPoint presentation in HTML?
Have you ever needed to add a slideshow to your website or blog without inserting it just as an image? In this article, we’ll show several ways on how to embed PowerPoint in HTML. Read on and select a suitable option.

Why embed a PowerPoint in HTML?
Embedding a PowerPoint presentation into HTML pages offers a convenient way to showcase, distribute and share your slides on the web.
By integrating a presentation into your site or application, you provide a more interactive and engaging experience for users since they are able to access the slideshow online and don’t need to have PowerPoint software installed on their computers or mobile devices.
Additionally, if you embed PowerPoint in HTML iframe, you can customize the appearance and functionality of the presentation, such as adding navigation controls or interactive elements.
1. Embed PPTX in HTML via ONLYOFFICE Workspace
In ONLYOFFICE Workspace , a productivity platform for managing your files, emails, projects, etc., there is an option to generate an embedding code for any file, including presentations.
- Go to the Documents module and click Share next to the required PPTX file.
- Click Add link -> Save.
- In the drop-down menu, select Embedding settings .
- If needed, adjust the settings such as width and height.
- Copy the embedding code and insert it to your HTML page.

Alternatively, you are able to do the same actions right from the opened presentation editor via the Collaboration tab.
GET ONLYOFFICE WORKSPACE
2. How to embed PowerPoint into HTML on your WordPress or Drupal site
The ONLYOFFICE Docs suite is seamlessly integrated with popular and widely-used CMS platforms like WordPress and Drupal . This way, you can easily insert presentations into your WordPress or Drupal website.
For example, when creating a new WordPress post, you can add the ONLYOFFICE block and then upload a new file or select one from the Media Library.

The added PPTX will be displayed as the ONLYOFFICE logo with the file name in the currently edited post. After the post is published, your WordPress site visitors will have access to this file for viewing in the Embedded mode.
GET ONLYOFFICE DOCS
Check our tutorials to learn more about ONLYOFFICE integration with WordPress and Drupal .
3. Embedding options for developers
For developers and integrators, a further option to embed a PowerPoint in HTML is provided via ONLYOFFICE DocSpace .
It is a room-based collaborative environment which empowers you with an extensive array of customization options, enabling you to enhance the functionality of your web applications and tailor them precisely to your requirements.
CREATE FREE ACCOUNT
So, you can seamlessly integrate specific DocSpace rooms with the needed slides into your web application.
Check the detailed guide
If you are an experienced user, you can also embed PowerPoint in HTML iframe using the basic concepts of the open API as well as a tutorial for inline editors .
ONLYOFFICE DOCS FOR DEVELOPERS
Useful links
ONLYOFFICE Presentation Editor
ONLYOFFICE Workspace
ONLYOFFICE DocSpace
ONLYOFFICE for developers
Integrations with popular services & platforms
Recent posts

How to show and use a ruler in Word document

ONLYOFFICE Assign Submission plugin v2.1.0 for Moodle: use documents, spreadsheets and presentations in your assignments

Best Google Sheets alternatives in 2024
How to Embed HTML in Google Slides? [Complete Guide!]
By: Author Shrot Katewa
![How to Embed HTML in Google Slides? [Complete Guide!]](https://artofpresentations.com/wp-content/uploads/2022/11/Featured-Image-7.jpg "html embed presentation")
HTML is a great way of including “more information” into your presentations which can open up a whole new world of possibilities to present an interactive presentations. Although Google has not introduced a feature to embed HTML in Google Slides yet, we can use “insert” option to embed Objects like URLs, images, videos etc. easily.
If you want to display some information outside your presentation and also want to keep the flow at the same time, there are two ways to add links of web pages in Google Slides.
Either you select the text and choose “Link” from the “Right-click” menu or select “Link” from the dropdown menu of “Insert” tab. It will open a dialog box where you can paste the link of your website, padlet, Instagram post etc. and click “apply” to embed the link into the slide.
In this article, we will also teach you how to embed a Google Slide on a website. So, let’s start out this complete guide:
1. How to Embed HTML in Google Slides?
Google Slides does not have any feature to embed HTML in a presentation slide. Unfortunately, you cannot embed HTML in a Google Slides presentation.
However, using the “Insert” menu in the menu bar, you can insert embedded objects like images, audio, videos, etc. To learn more about inserting embedded media into a Google Slides presentation, you can read my article here .
2. How to Embed a Website in Google Slides?
In Google Slides, you cannot embed a website into a slide. However, you can add the link of a website to the text in a slide. All you have to do is follow 2 easy steps.
Step-1: Click on the “Link” option

The first step is to select the text where you want to link the website. Then “Right Click” on the text. In the right-click menu, click on the “Link” option. Alternatively, you can press the “Ctrl+K” keys on your keyboard.
Step-2: Click on the “Apply” option
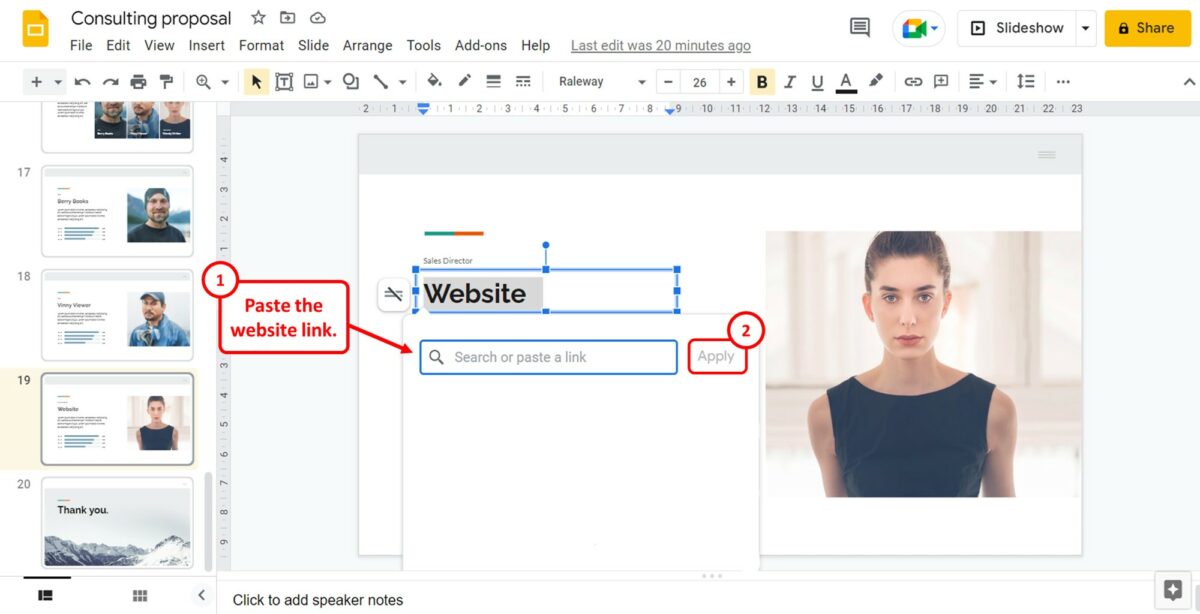
In the pop-up dialog under the selected text, click on the “Search or paste a link” box. You can now paste the website link that you want to embed. Then click on the “Apply” option to hyperlink the text.
3. How to Embed iframes in Google Slides?
You cannot embed iframes in Google Slides. Since there is no feature for HTML codes, the application cannot embed iframes. However, you can copy the iframe code for the Google Slides presentation to embed it into websites. Refer to section 6 for detailed steps on obtaining the iframe code for a Google Slides presentation.
4. How to Embed Padlet in Google Slides?
To embed your Padlet wall in Google Slides, you have to first copy the link from Padlet. Since Google Slides does not have any feature that allows you to embed a code, you have to add Padlet as a link. To do so, follow the 3 quick steps.
Step-1: Click on the “Insert” tab
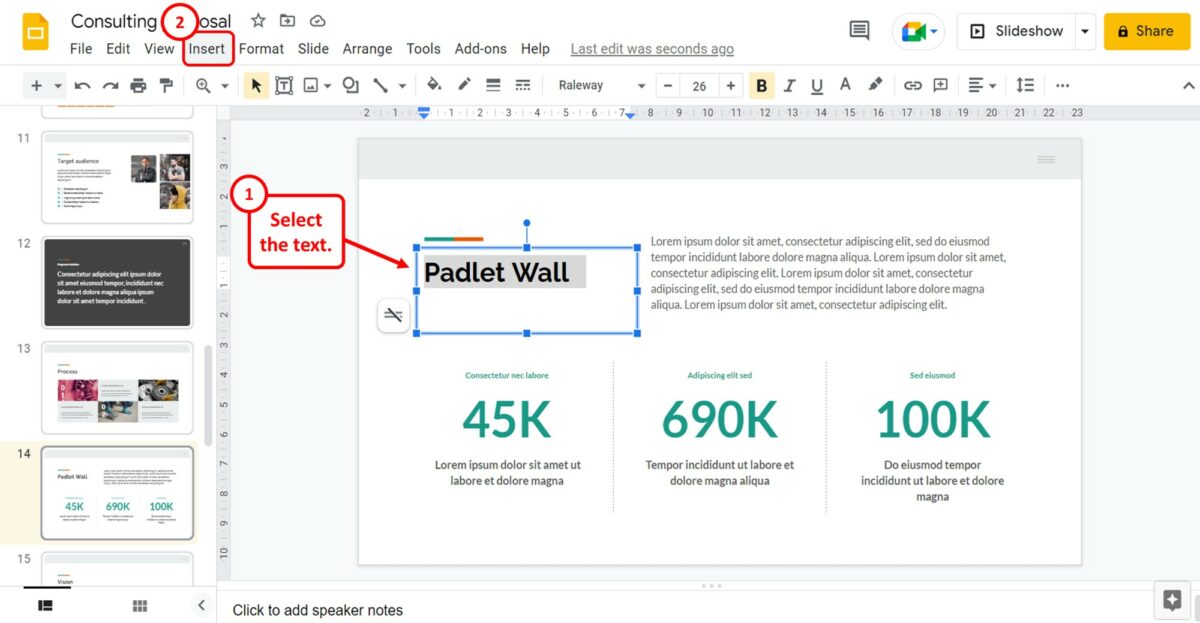
The first step is to select the text or image where you want to link the Padlet wall. Then click on the “Insert” tab in the menu bar located at the top of the screen.
Step-2: Click on the “Link” option

In the dropdown menu under the “Insert” tab, click on the “Link” option. You can alternatively press the “Ctrl+K” keys on your keyboard.
Step-3: Paste the Padlet link
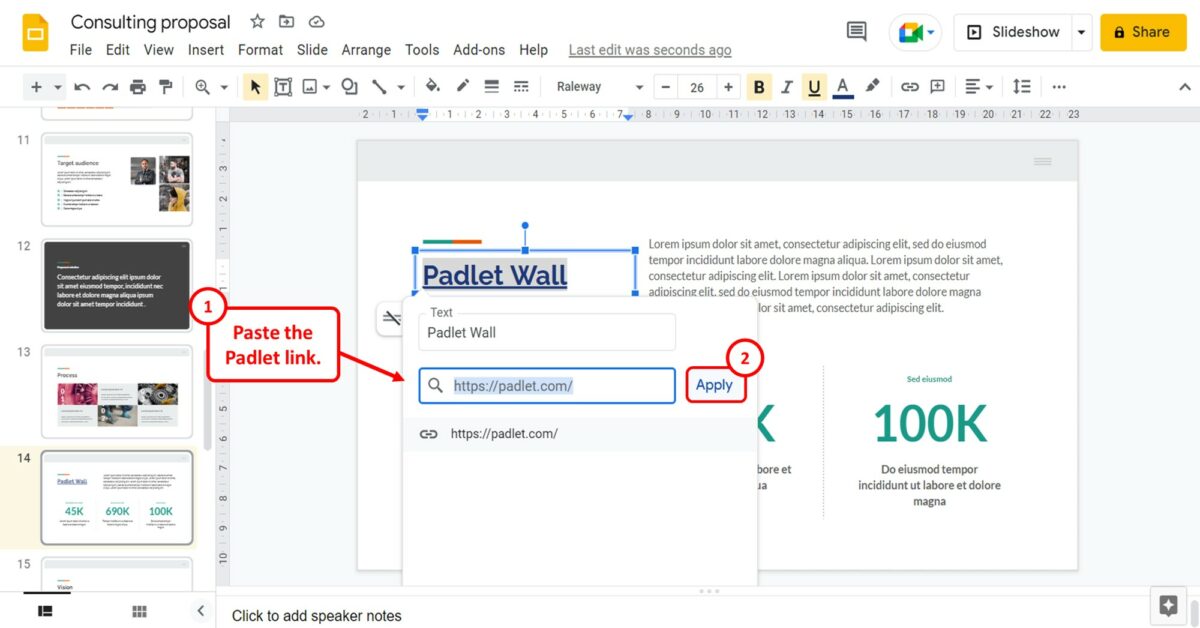
In the pop-up dialog box, you can now paste the Padlet link. Finally, all you have to do is click on the “Apply” button to add the Padlet link to the selected text or image.
5. How to Embed Instagram Post in Google Slides?
In Google Slides, you cannot embed an Instagram post using the embed link available on Instagram. However, you can insert the picture and link it to the Instagram post. All you have to do is follow the 5 simple steps.
Step-1: Click on the “Insert” menu
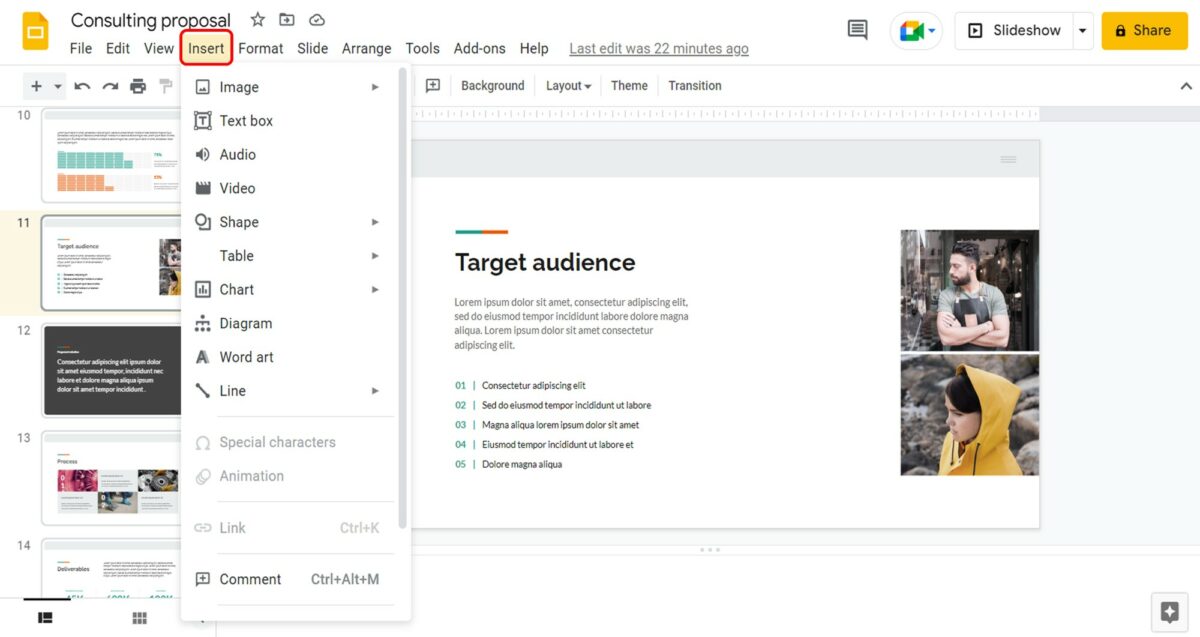
The first step is to insert the Instagram image into the presentation slide. To do so, you have to click on the “Insert” menu in the menu bar located at the top of the screen.
Step-2: Click on the “Image” option
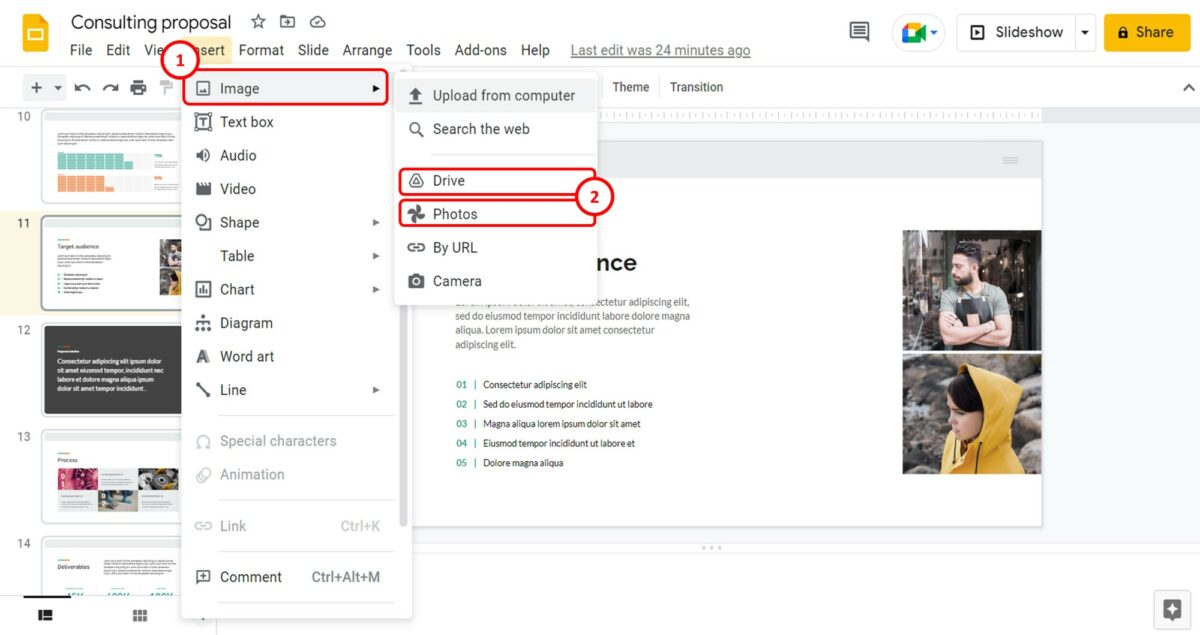
In the “Insert” dropdown menu, click on the “Image” option. In the pop-up menu by the “Image” option in the “Insert” menu, click on the “Drive” or “Photos” option.
Since you cannot insert the image directly using the Instagram link, you must first upload the Instagram picture to Google Drive or Google Photos.
Step-3: Click on the “Insert” option
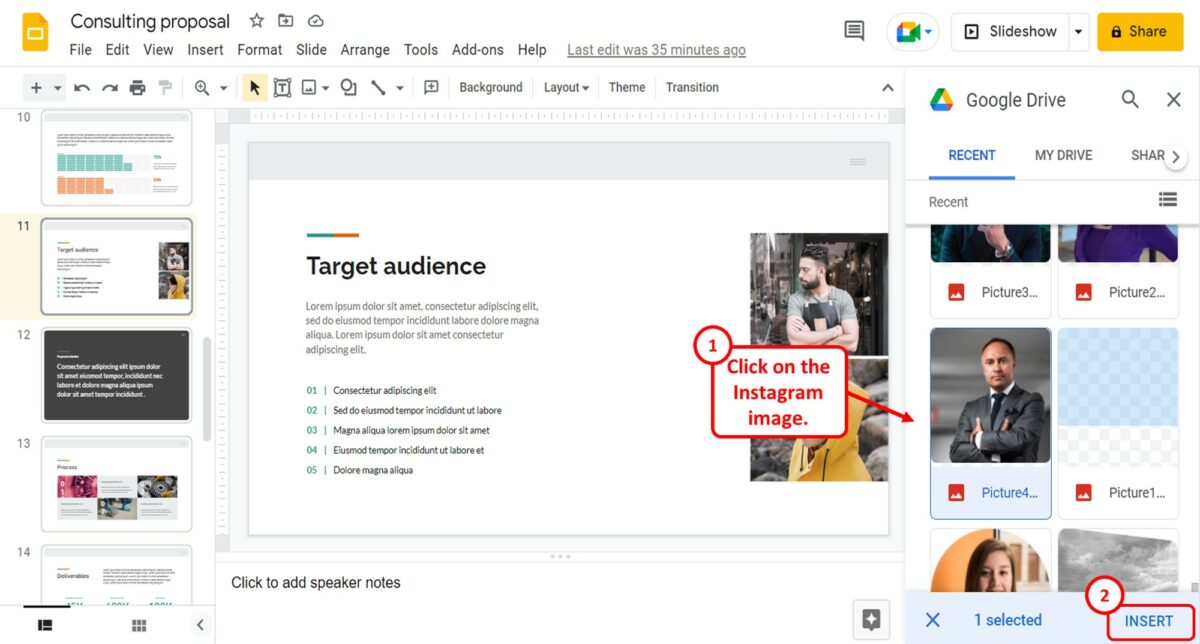
In the “Google Drive” sidebar on the right side of the screen, click on the Instagram image. Then click on the “Insert” option at the bottom of the sidebar to insert the image into the slide.
Step-4: Click on the “Insert link” option
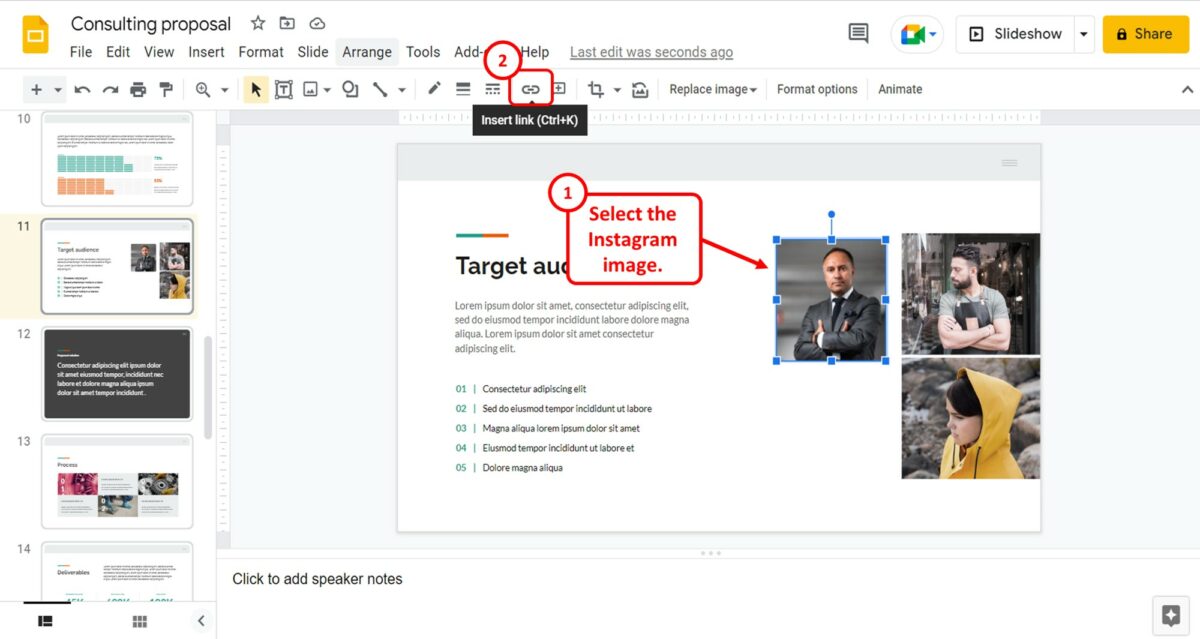
The next step is to click on the Instagram picture inserted into the slide to select it. Then click on the “Insert link” option in the toolbar located under the menu bar at the top of the screen.
Alternatively, you can press the “Ctrl+K” keys on your keyboard.
Step-5: Paste the Instagram link
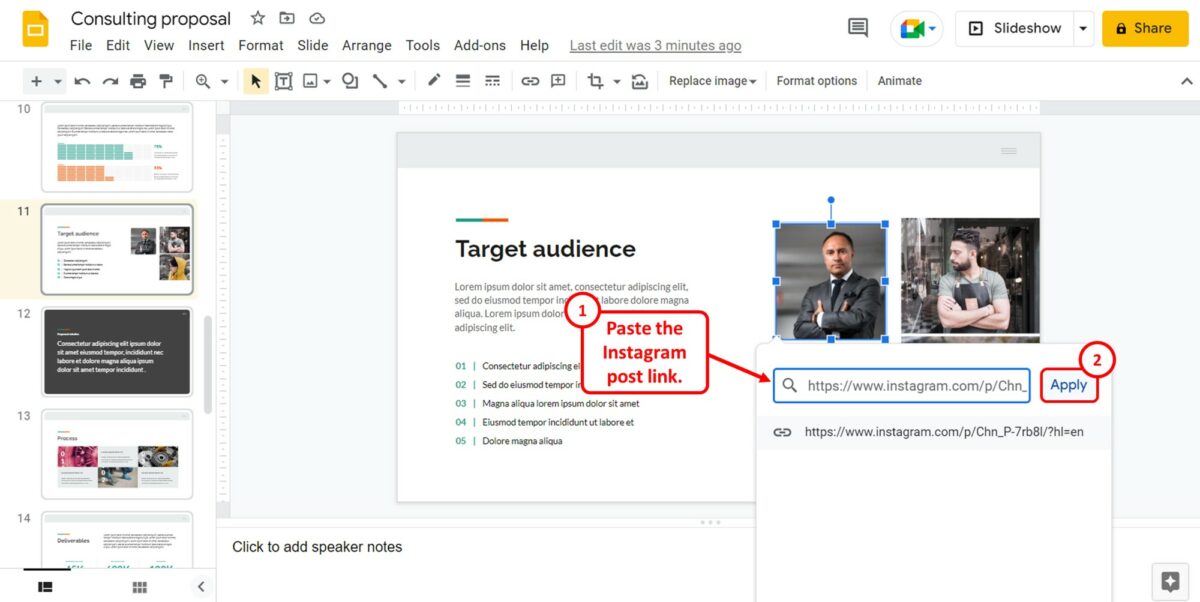
In the pop-up dialog under the picture, you can now paste the link to the Instagram post in the “Search or paste a link” box. Then all you have to do is click on the “Apply” button next to the box to embed the Instagram post to the picture in the presentation.
6. How to Embed a Google Slides on a Website?
Google Slides offers the “Publish to the web” feature that gives you the embed code that you can copy and paste to a website to embed the presentation. To embed the Google Slides presentation to a website, follow the 5 quick steps.
Sep-1: Click on the “File” menu
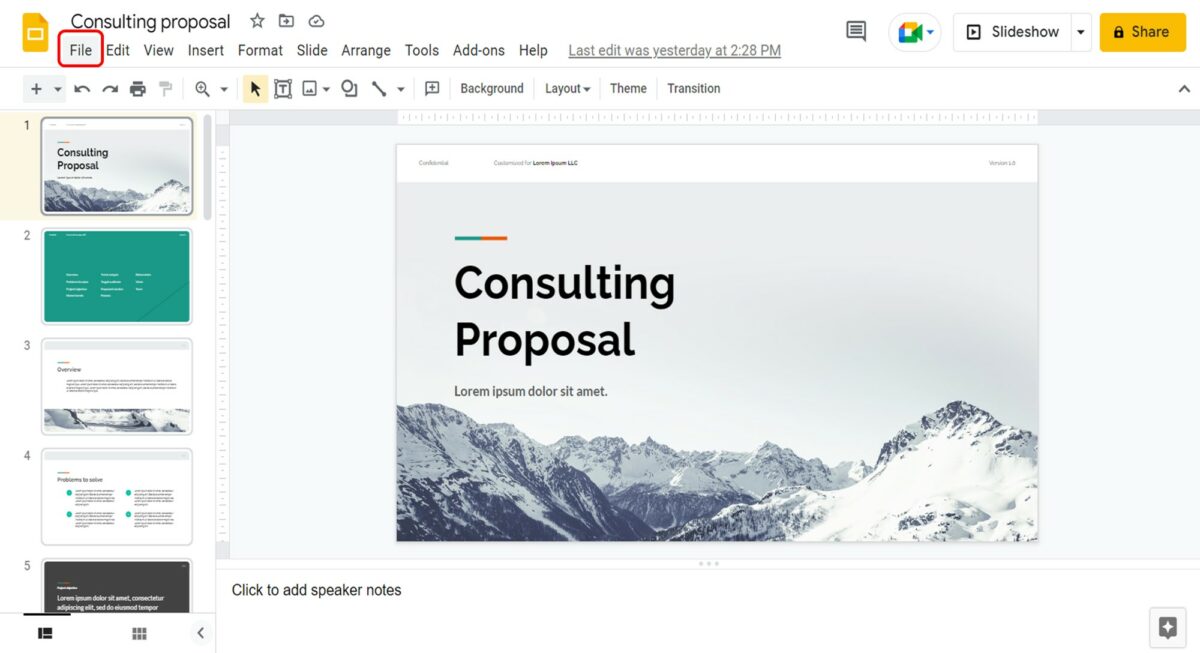
In the menu bar located at the top of the screen, click on the “File” menu. It is the first tab in the menu bar.
Step-2: Click on the “Publish to the web” option
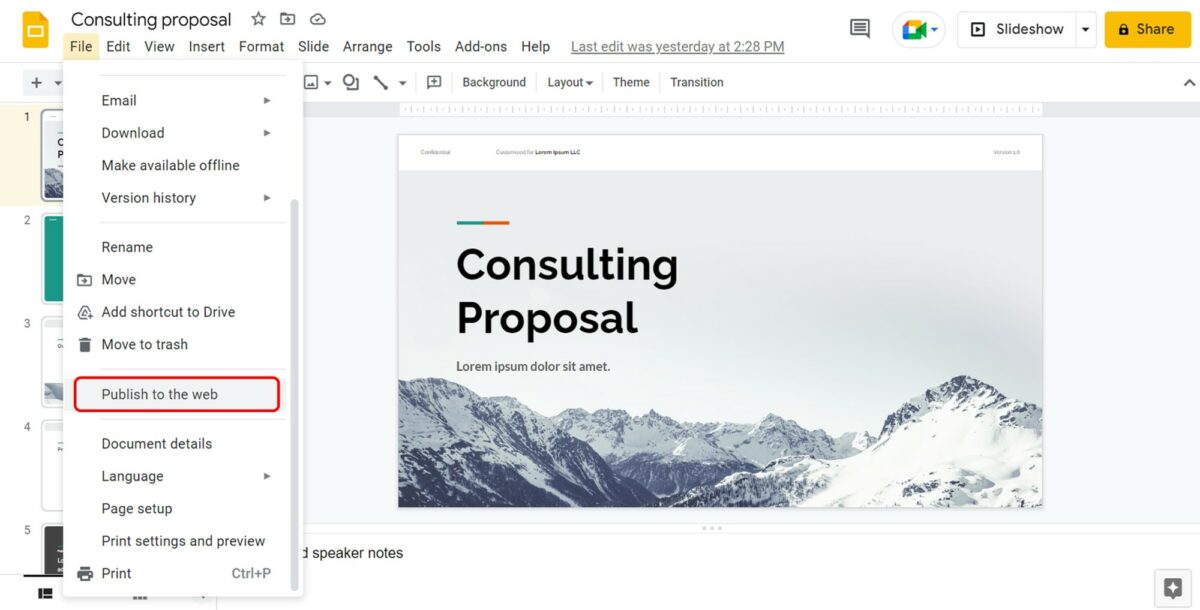
The next step is to scroll down in the dropdown menu under the “File” tab. Click on the “Publish to the web” option in the “File” menu. This will open the “Publish to the web” dialog box.
Step-3: Click on the “Embed” option
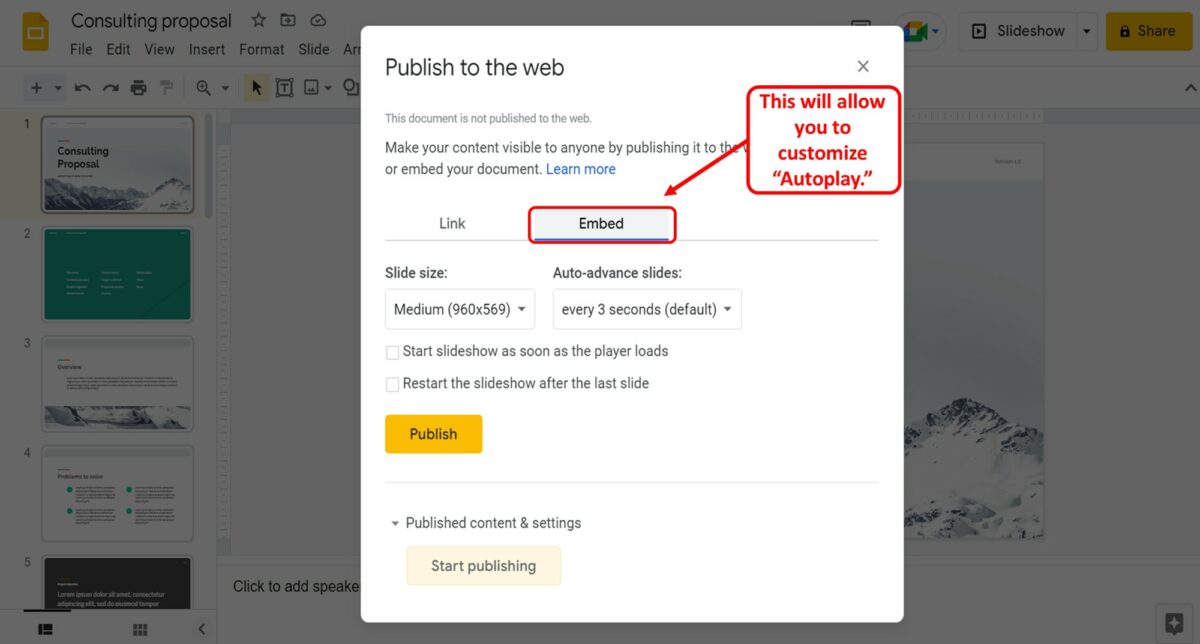
In the “Publish to the web” dialog box, click on the “Embed” option. Then you can customize autoplay options for the embedded presentation.
Step-4: Click on the “Publish” button
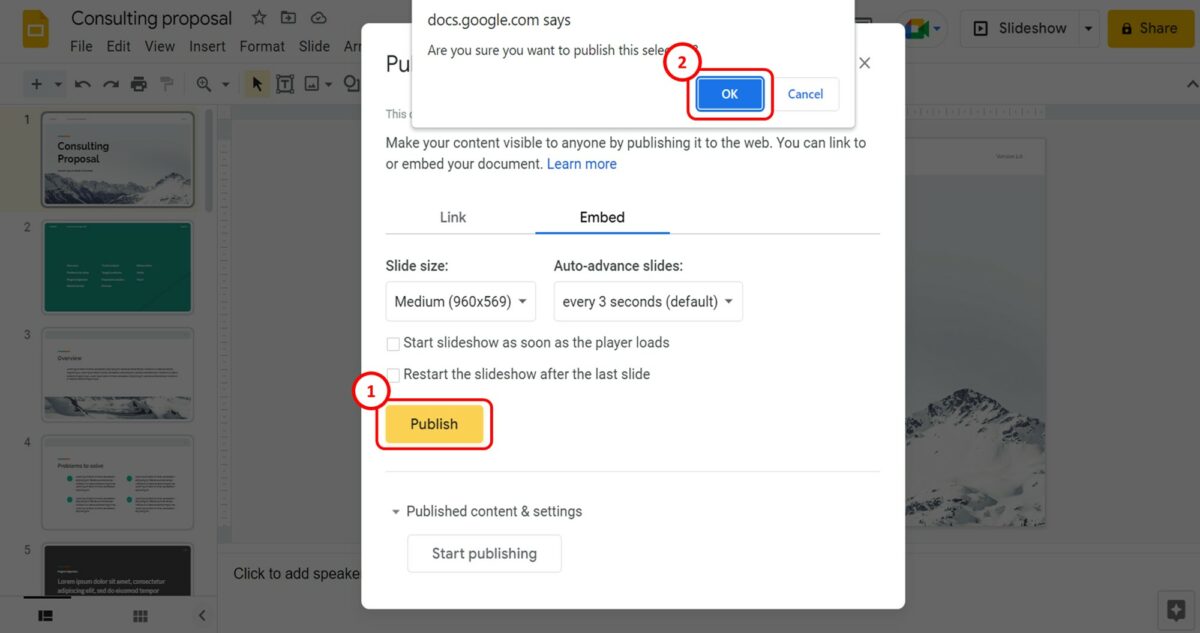
The next step is to click on the “Publish” button at the bottom of the “Publish to the web” dialog box. This will prompt a pop-up dialog box. Click on the “OK” button in the pop-up dialog.
Step-5: Copy the embed link
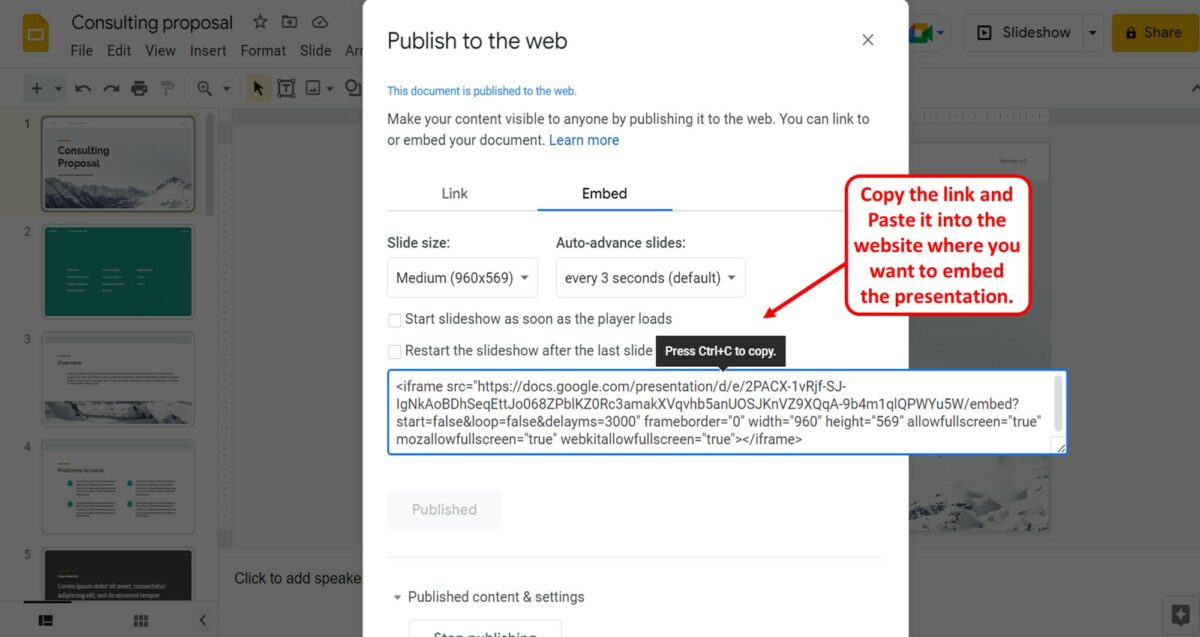
You can now see the embed code for the presentation in the “Publish to the web” dialog box. All you have to do is copy the code and paste it into the website where you want to embed the presentation. To copy the code, press the “Ctrl+C” keys on your keyboard.
How to Add HTML Embed Codes to Your Website [Quick Tip]
Published: April 03, 2024
If you want to curate others' content from social media or just make your own visual social media content work harder for your overall content strategy, you need to know how to embed HTML code onto your blog or website.

But wait a second ... before we get into the nitty-gritty of this tip, what the heck does "embed" mean? And what is HTML? If you don't know how to code at all, no worries — embedding external content is extremely easy. Let's take a second to break down the basics.
![Download Now: 50 Code Templates [Free Snippets]](https://no-cache.hubspot.com/cta/default/53/34adf7eb-7945-49c4-acb8-f7e177b323e5.png "html embed presentation")
What does embed mean?
Embed means to integrate external content into another website or page. You embed something when you place a block of code — called an embed code — into the HTML editor of another website. When you hit ‘Save’ or ‘Publish,’ the media then renders on the published page.
Embedded content is referenced with HTML . HTML is one of the most basic languages used on the web to design and lay out web pages.
You often see this code when you're in the "back end" of your blog post. There’s where you’ll add your embed code.
What is an embed code?
An embed code is a block of HTML that is placed in another page and renders a visual element — a video, social media post, form, or page — from another website or source. You can embed YouTube videos, Twitter posts, GIFs, and other multimedia objects on another website.
Most social and multimedia websites have an option to generate an embed code right in each individual post. Here’s an example of an embed code for a HubSpot YouTube video:
And here’s the embedded result.
Want to do the same thing on your blog posts and pages? Let’s go over how you can generate an embed code for the top social sites.
How to Add HTML Embed Code to Your Site
- Go to the social post or webpage you’d like to embed.
- Generate the embed code using the post’s options.
- If applicable, customize the embed post, such as the height and width of the element.
- Highlight the embed code, then copy it to your clipboard.
- In your content management system, open up your HTML viewer.
- Paste the HTML snippet you just copied into your HTML viewer window. Then click 'OK' or 'Save.'
- Finished! You have now embedded content onto your website or blog.
Below, we cover these steps in more detail for each platform. In general, you’ll want to:
- Generate the embed code.
- Access your content management system and paste the embed code in your HTML viewer.
- Finished! You have embedded content into your website or blog.
Let’s dive into each step.

50 Free Coding Templates
Free code snippet templates for HTML, CSS, and JavaScript -- Plus access to GitHub.
- Navigation Menus & Breadcrumbs Templates
- Button Transition Templates
- CSS Effects Templates
Download Free
All fields are required.
You're all set!
Click this link to access this resource at any time.
Free HTML Coding Templates
Fill out the form to get the free code snippets., 1. generate the embed code..
Before embedding external content, you must first generate an embed code for the post or page you want to embed on your website.
We’ll go over how you can do that on most of the major social and content networks.
Embed a Facebook Post
To embed a Facebook post, do the following:
- Navigate to Facebook on your desktop browser and go to the post that you’d like to embed.
- Click on the three dots on the upper right-hand corner of the post.
- On the drop-down menu, click Embed .

- A pop-up will appear, where you have the option to include the full post and access advanced settings. For beginners, we recommend leaving the options as they are and simply clicking Copy Code .

- Finished! You’ve got your embed code.
Embed an Instagram Post
Want to embed an Instagram post? The process is similar to Facebook’s. Note that you can only embed posts from the desktop version and not the mobile app.
- Click the three dots in the upper right-hand corner of the post.
- A popup will come up with several options. Click Embed , the second-to-last option.

- A pop-up will come up with your embed code. You have the option of including or excluding the caption.
- After you’ve finished customizing your options, click Copy Embed Code .

- Complete! You’ve got your Instagram embed code.
Embed a YouTube Video
YouTube videos can take your blog posts to the next level, and the best part is that you can embed its wealth of content on your blog posts for free.
To do so, take the following steps:
- Navigate to the video that you’d like to embed on your website.
- Under the video, next to where the likes are located, click Share .

- A pop-up will come up with several options, including sharing the post to other social networks. Click Embed .

- YouTube will create an embed code, which you can customize. You can start the video at a certain point or hide the player controls.
- After choosing your options, click Copy on the lower right-hand corner of the pop-up.

- Complete! Your YouTube video is ready to get embedded.
Embed a Tweet
If you embed a Tweet on your website pages or blog, you can generate engagement for your Twitter profile without relying on your Twitter followers. Website visitors can engage with your Twitter content, too.
To embed a Twitter post, do the following:
- On a desktop browser, navigate to the post that you’d like to embed.
- A drop-down menu will appear. Click Embed Tweet .

- Twitter will take you to an external page on publish.twitter.com , where you can then further customize the look of the Tweet before embedding it on your site. For instance, you can set it to dark mode and change the display language of the Tweet.

- Once you’ve customized it, click Update.
- Click Copy Code.
- Finished! The Tweet is ready to embed on your site.
There’s another way to generate an embed code for Twitter. Go to publish.twitter.com and insert the URL of the post that you’d like to embed. Twitter will then generate the embed code, and you can customize it using the same process as the last method.
Embed a Pinterest Post
Embedding a Pinterest post can lead website users back to your Pinterest profile and help you grow your Pinterest following. To get started, do the following:
- Navigate to the Pinterest post you’d like to embed.
- Click on the three dots right next to the image (or under the image, if you’re using the mobile website).
- On the drop-down menu, click Get Pin embed code .

- A pop-up will appear with the embed code. You have the option of creating a small, medium, large, or extra-large embedded pin.

- Once you customize the size, highlight the code and click Command + C or CTRL + C .
- Finished! Your Pin is ready to get embedded.
Embed a SlideShare Presentation
While SlideShare presentations are not as popular these days, they can still be a handy multimedia tool for spicing up blog posts and pages. Here’s how to embed a SlideShare presentation:
- Go to the SlideShare presentation you’d like to embed.
- Click Share under the presentation.
- In the same window where the presentation appears, you’ll see the option to share it via social channels. The embed code will be underneath that.

- Choose the size of the embed window and which slide you’d like the presentation to start on.
- Highlight the embed code and click Command + C or CTRL + C .
- Ready! You can now embed the SlideShare presentation in a web page or post.
Embed an External Webpage
Don’t want to embed a social post but rather a web page? You can embed an external web page using the iframe HTML tag .
All embed codes, including the ones for social sites, use iframe tags. This is what they look like:
You can use these same tags to embed an external webpage. Here’s how:
- Navigate to the webpage you’d like to embed into your site.
- Open up the notepad app on your computer. Paste the following code into it:
- Return to the webpage and copy the URL.
- Paste the entire URL where it says url in your iframe code. Don’t forget to include https:// at the beginning of your URL and to place the link inside the quote marks. Here’s what your code should look like:
- Change the width and height of the frame if desired.
- Copy the entire line of code. After, the webpage is ready to get embedded on your website.

Free Guide: 25 HTML & CSS Coding Hacks
Tangible tips and coding templates from experts to help you code better and faster.
- Coding to Convention
- Being Browser-Friendly
- Minimizing Bugs
- Optimizing Performance
2. Access your content management system and paste the embed code in your HTML viewer.
Although every CMS is different, you can probably find the HTML viewer with similar steps. We’ll go over how you can do it in Content Hub and WordPress .
Content Hub
In Content Hub, you actually don’t need to add your embed content using the HTML editor (although you have the option to). Here’s how:
- In your HubSpot dashboard, navigate to Marketing > Website > Blog . If you’re planning to add the code to a website page, navigate to Marketing > Website > Website Pages.

- Find the post or page that you’d like to add the embed code to. Hover over it, then click Edit .

- Click into the module where you’d like to add the embed code. An options bar will appear near the top of the screen. In the right-hand side, click Insert .
- Choose Embed from the drop-down menu.

- A pop-up will appear. Paste the iframe code into the text bar.

- Click Insert .
- Finished! You can edit the width and height of the embed content to customize it further.
To access the HTML editor, complete steps 1-3 above. On the top options bar, click Advanced > Source Code . You can then paste your embed code manually. Note that the end result is the same.
To paste an embed code into your WordPress website, use the following steps:
- Access your admin area and go to either Pages or Posts .
- Click the title of the post that you want to add the embed code to. This action will take you to the post editor.
- Click the Text tab on the upper right-hand corner of the text editor.

- Paste your embed code where you want the module to appear.
3. Finished! You have embedded content onto your website or blog.
Once you reload the page, your embedded social post will appear.
Add Embedded Content to Increase User Engagement
By embedding external content on your pages and posts, you can increase engagement on your website and get your site visitors to interact with the content you post on social media. The best part is that it’s easy to do — simply generate the embed code, paste it into your HTML editor, and watch your user engagement grow.
Editor's note: This post was originally published in September 2013 and has been updated for comprehensiveness.

Don't forget to share this post!
Related articles.

The 11 Best Content Management Software Tools in 2024
![7 Best Free Website Builders to Check Out in 2024 [+Pros & Cons]](https://blog.hubspot.com/hubfs/free-website-builder.png "html embed presentation")
7 Best Free Website Builders to Check Out in 2024 [+Pros & Cons]

Does My Business Need a Website? 12 Reasons Why & 5 Reasons Why Not

12 of the Best Programming Languages to Learn in 2024

The 7 Best Leadpages Alternatives in 2022

Coding for Web Design 101: How HTML, CSS, and JavaScript Work

The 12 Best ClickFunnels Alternatives & Competitors in 2023

How to Hire a Freelance Web Developer

Do I Still Need a .com TLD For My Business?

7 of the Best Website Builders for 2020
Dozens of free coding templates you can start using right now
Marketing software that helps you drive revenue, save time and resources, and measure and optimize your investments — all on one easy-to-use platform

< Go back to Login
Forgot Password
Please enter your registered email ID. You will receive an email message with instructions on how to reset your password.

How To Embed PowerPoint In HTML/Website?
Ever wonder how to post a PowerPoint presentation to your website or blog without just posting an image of it? Embedding PowerPoint presentations in an HTML website can do this. You can share your beautifully designed PowerPoint presentations on your webpage, attracting many people and increasing traffic.
You can present dynamic material and attract users by integrating interactive slideshows right into web pages. Embedding PowerPoint in the website enables users to access the content without the requirement of additional software and makes them extensively utilized for business, education, and various other uses.
Let us check out how to embed PowerPoint in HTML or a website.
How to Embed PowerPoint in HTML/Website?
Using the following two methods, you can embed PowerPoint on a website or HTML. Both of these methods are compatible with Windows, Mac, and Web. Let’s check them out:
- Using PowerPoint Web
- Using OneDrive
Method 1: Using PowerPoint Web
To embed PowerPoint presentation in HTML using PowerPoint Web:
- Open “PowerPoint Web” from your browser and go to “File.” You will see the “Open option.” Select the presentation you want to embed on your website.
- Again, go to “File” and select “Share.”
- Click on” Embed” from the “drop-down menu.” Wait a few seconds for a “new menu” to show up, and hit “Generate.” Now, your presentation will be previewed in front of you.
- You can change the dimensions of your presentation according to your audience.
- Next, from the “Embed Code textbox,” copy the code.
- Paste the code into the body of your website.
- Save your site. And now you have successfully embedded a PowerPoint presentation into a website.
Method 2: Using OneDrive
To embed PowerPoint presentations in HTML using OneDrive:
- Open your Presentation. Remove any notes or personal details if you have any.
- Next, upload your “PPT” to your personal OneDrive account.
- On your OneDrive, go to recent documents and select your presentation.
- Click on the “Embed button” appearing at the top of the page.
- Copy the “HTML code” that appears in front of your screen.
- Paste the copied code on your website and save it. Your PowerPoint presentation will now be embedded in your website.
READ MORE: How To Covert Keynote To PowerPoint
However, the imbibing option is not entirely functional because you won’t be able to update or change the fonts. There are no extra features because it is only available for viewing on the web. But you can resize it, search the document for particular phrases, print the paper, download it, and use several other tools that Microsoft offers.
Embedding PPT in HTML is an effective way to increase engagement on your website. You can share the required information through an amazing slideshow. By following the steps above, you can easily embed PowerPoint in your website. You can either use PowerPoint Web or your OneDrive account at your convenience.
Stay updated on our website to keep reading such useful blogs.
Can I Change The Font Of My PowerPoint Presentation After Embedding It On A Website?
No, changing the font after embedding PowerPoint in HTML or a website is impossible as it is converted into a PDF or PPTX form. If you wish to change the font, you must do it in your original presentation and reupload the file.
Can I Embed Multiple PowerPoint Files On The Same Website?
Yes, you certainly can. You can embed as many PowerPoint presentations as you want, repeating the same procedure.
Is There Any Limitation On The Size Of The PowerPoint File To Be Uploaded To A Website?
No, there is no limitation on the size of the PowerPoint presentation. The upload time may be affected depending on the size of your PPT file.
Can I Include Videos In My PowerPoint Presentation While Embedding Them On A Website?
Yes, you can include videos within the presentation. However, it may sometimes not function properly and contain some lags. So it is always advisable to include the videos separately if you are embedding PowerPoint in website.
Can I Use The Embed Function Directly From The PowerPoint Application On My Device?
No, you cannot directly use the embed function from the PowerPoint application. You have to either use PowerPoint Web or upload it to your OneDrive account and then embed it.
Table Of Content
Related presentations.

Customer Testimonial Template

Contact Us Template

About Me Template
Related posts from the same category.

8 Apr, 2020 | SlideUpLift
How To Embed A YouTube Video In PowerPoint
There may be many occasions where you'd like your audiences to watch a video to better understand your argument or notion. Adding a video to your presentation can help retain

15 May, 2023 | SlideUpLift
How To Embed Fonts In PowerPoint
Have you ever opened a PowerPoint presentation only to comprehend that the fonts used in it are completely different from the ones you have on your computer? This can be

3 Feb, 2023 | SlideUpLift
How To Make A Graph In PowerPoint?
Do you need help communicating data effectively in your presentations? Data visualization is an essential tool in today's world as it helps represent complex data sets in a simple and

25 Jan, 2018 | SlideUpLift
How To Add Annotations In PowerPoint | How To Add Comments In PowerPoint
This PowerPoint tutorial explains how to add annotations in PowerPoint in simple steps. Often presentations are used in business discussions and interactive sessions. During the discussion, you might need to

8 Dec, 2022 | SlideUpLift
How To Use Transparency In PowerPoint?
PowerPoint's user-friendly design has made it a top choice among many, one of the key contributing factors to its immense popularity. Microsoft PowerPoint is one of the most used software

30 Apr, 2021 | SlideUpLift
Learn How To Communicate In Several Languages In PowerPoint
In this tutorial, we will learn how to change language in PowerPoint. Presentations are an essential part of the business world. Businesses and professionals use presentations to inform, educate, motivate

28 Feb, 2023 | SlideUpLift
How To Track Changes in PowerPoint: Methods and Best Practices
PowerPoint is a widely used presentation tool frequently used in group settings where several people can make additions to the same presentation. When multiple persons edit the same file, tracking

20 Oct, 2022 | SlideUpLift
How To Make Jigsaw Puzzle In PowerPoint – PowerPoint Tutorial
The jigsaw puzzle is a perfect design element to add to your strategy presentations. They are a powerful storytelling tool that can be used to showcase how the pieces of

18 Oct, 2022 | SlideUpLift
How to make a Curved Arrows in PowerPoint | PowerPoint Tutorial
Curved Arrows Cyclic diagrams show the process and series of events that interact repetitively through the cycle. Such diagrams depict the flow of one step following another repeatedly, which means

PowerPoint Hack: How To Create Sections In PowerPoint And How To Zoom In PowerPoint
This PowerPoint tutorial is about How To Create Sections In PowerPoint. Imagine that you are about to begin your business presentation to a room full of clients, and you remember
Related Tags And Categories
Forgot Password?
Privacy Overview
Necessary cookies are absolutely essential for the website to function properly. This category only includes cookies that ensures basic functionalities and security features of the website. These cookies do not store any personal information
Any cookies that may not be particularly necessary for the website to function and is used specifically to collect user personal data via ads, other embedded contents are termed as non-necessary cookies. It is mandatory to procure user consent prior to running these cookies on your website.
Stack Exchange Network
Stack Exchange network consists of 183 Q&A communities including Stack Overflow , the largest, most trusted online community for developers to learn, share their knowledge, and build their careers.
Q&A for work
Connect and share knowledge within a single location that is structured and easy to search.
How to embed an HTML file into a PowerPoint presentation?
Is there anyway to embed an HTML file that is stored locally into a PowerPoint presentation?
I know I can paste the link in the presentation and then click the link to open it in the browser but I'm wondering if it is possible to actually render the HTML, CSS, and JavaScript in the presentation itself?
To be clear I'm looking for a way to do this with a local HTML file without any 3rd party software or add-ins b/c strict IT regulations on my offices computers.
- microsoft-office
- microsoft-powerpoint
- microsoft-powerpoint-2016
You can't with PowerPoint by itself but there are add-ins such as LiveWeb: http://skp.mvps.org/liveweb.htm
LiveWeb is just one example and their website is pretty self explanitory how to use it.
In order to install an Add-In:
- Click the Office button at the top left of PowerPoint, click PowerPoint Options, and then Add-Ins
- In the Manager list, click Powerpoint Add-ins, then Go.
- In the Add-Ins dialog, click Add New
- In the Add New PowerPoint Add-In box browse for the one you wish to add (in this case wherever you saved LiveWeb to) and click OK
- Click Enable Macros and then Close.
- 2 I saw this add-in somewhere as a solution to this similar problem on Quora or something. And I'm sure it's great but I'm working in an office where our computers are super-locked-down by IT so we can't go installing anything. I'm looking for a way to do this with a local HTML file without any 3rd party software. I appreciate the effort though and will up-vote for that. – James Draper Jun 22, 2017 at 19:27
- It appears then it will not work with just PowerPoint. The closest you can get is an image of the site and then link the url to that image. – Eric F Jun 22, 2017 at 19:29
- I understand that there is no conventional way to do this but I'm hoping that someone might know some kind of hack or workaround. – James Draper Jun 22, 2017 at 19:39
- Have a look here: support.microsoft.com/en-us/help/291926/… – Steve Rindsberg Jun 23, 2017 at 2:46
- 1 @EricF Yes, thanks for adding that. I'd forgotten that MSNanny was going to declare that a no-no and make us wash our hands after touching it. ;-) – Steve Rindsberg Jun 23, 2017 at 17:27
You must log in to answer this question.
Not the answer you're looking for browse other questions tagged microsoft-office microsoft-powerpoint microsoft-powerpoint-2016 ..
- The Overflow Blog
- Introducing Staging Ground: The private space to get feedback on questions...
- How to prevent your new chatbot from giving away company secrets
Hot Network Questions
- A phrase that means you are indifferent towards the things you are familiar with?
- How much extra did a color RF modulator cost?
- Why do airplanes sometimes turn more than 180 degrees after takeoff?
- My vehicle shut off in traffic and will not turn on
- A story about a boy with a fever who falls in the creek and is saved by an angel and grows up to be Hitler
- Travelling with two passports, both are valid from the same country
- VS Code not launching after incorrect command execution on Ubuntu 22.04
- Post Apocalyptic Military
- Book recommendation introduction to model theory
- connect sides by arrows in any contour, polygonal figure, closed curve, etc
- US Permanent Resident operating in Canada
- Is it true that engines built in Russia are still used to launch American spacecraft?
- Character movement if either DEX or STR equal to SIZ and the other one greater than SIZ?
- Python matrix class
- Handling cases of "potential" ChatGPT-generated reviews in non-anonymous program committees (as a PC member)
- Looping counter extended
- Extra indentation added in enumitem after item 10
- How to block and jack up an engine
- Effects if a human was shot by a femtosecond laser
- How to attract hummingbirds to my feeder when my neighbor also has an established feeder
- What can I plant to retain a steep slope?
- Is this a valid PZN?
- Homebrew spell acting as one-way mirror
- I see rainbow effect on the borders of objects and text, adjusting ClearType or driver reinstall doesn't resolve the issue
Mr•Techie
Learning about electronics.
By CSS Templates For Free
- Programming
- Calculators
How to Embed a PowerPoint File on a Web Page using plain HTML
Related Resources
You’re using an older browser version. Update to the latest version of Google Chrome , Safari , Mozilla Firefox , or Microsoft Edge for the best site experience.
- Products iSpring Suite iSpring Learn
- Use Cases Onboarding Compliance Training Induction Training Product Training Channel Partner Training Sales Training Microlearning Mobile Learning
- Company About Us Case Studies Customers Partnership Course Development Contact Us Academy Blog Webinars Guides Experts on iSpring
- Knowledge Hub Knowledge Hub Academy Webinars Articles Guides Experts on iSpring
- Language EN English Français Deutsch Español Italiano Nederlands Português Polski 中文 日本語 العربية Indonesia
- Shopping Cart
How to embed your HTML5 presentation into a website or blog
Do you want to embed a PowerPoint presentation into your website? The best way is to convert it to HTML5 format. A great advantage of HTML5 slides is that they can be viewed on virtually any PC or mobile device, including iPads.
In this article, you'll learn how to turn a PPT presentation into HTML5 with iSpring Converter Pro and ins ert it in your website or blog. Follow this simple step-by-step guide:
Publish an HTML5 presentation for uploading to the Web
Get the presentation’s URL on the server
Ins ert your HTML5 presentation in a website
Step 1: Publish a presentation for uploading to the Web
When your PowerPoint is ready to convert to HTML5, you can publish and put the presentation on a website using the Publish button on the iSpring toolbar.

Once the publishing process is complete, you need to upload the entire folder of the specified file name to the server.
Step 2: Get the presentation’s URL
You need to find out the HTTP URL of the uploaded HTML5 presentation and copy the URL to the clipboard. The URL of the presentation depends on the specific settings of your server.
Tip: Make sure that the selected URL starts with ‘http://’ and not ‘ftp://’
Step 3: Ins ert your HTML5 presentation into a website
To have your PowerPoint presentation logically fit into a website, you can choose one of the following ways to play it:
- play on a separate webpage;
- open in a pop-up;
- ins ert in to an iframe.
a) Play HTML5 Presentation on a Separate Webpage
One of the easiest ways to share your presentation via a website is to provide a hyperlink to the presentation somewhere in a webpage. To ins ert a hyperlink, switch to the HTML editing mode and use the following code:
You can choose to open the presentation in a new browser tab (target=”_blank”) or in the same tab (target=“_self”)
b) Open HTML5 Presentation as a pop-up
To open your presentation in a pop-up window, make sure that your website allows using JavaScript code.
You can use the following code to create an on-click pop-up:
You can customize the width and height and add different elements to your pop-up ( learn more ).
Alternatively, you can se t the pop-up window to appear as soon as the webpage is loaded:
c) Insert HTML5 presentation in to iframe
If you want to show your HTML5 presentation right within your webpage, you can ins ert it in to an iframe using the following HTML code ( learn more ):
Published on your website in one of the described ways, your HTML5 presentation can be delivered to much wider audiences using modern Web browsers, mobile devices and iPads. To make sure that your HTML5 presentation will be played back properly, check out iSpring Converter’s tech specs .
Related Articles
- Four Ways to Protect Your Content with iSpring
- Output options Flash / HTML5
- Share PPT with iSpring Cloud
We use cookies to collect info about site visits and personalize your experience. See our Cookie Policy for more details.
Manage your cookies
Essential cookies are always on. You can turn off other cookies if you wish.
Essential cookies
Analytics cookies
Social media cookies
Police in Burlington, Vermont apologize to students for mock shooting demonstration

Police in Burlington, Vermont have apologized to a group of high school students who were shaken up by a role-playing presentation that involved a mock shooting .
The presentation took place Wednesday when about 20 students from Burlington High School's Year End Studies forensics class visited the Burlington Police Department's headquarters for a field trip, according to a statement from Russ Elek, spokesperson for the Burlington School District, to the VTDigger .
The news outlet, citing an email school officials sent parents and families of the students involved, reports that police reenacted a crime and students unexpectedly heard screaming and fake gunshots behind where they were seated.
The purpose of the presentation "was to make a point about how witness statements can be unreliable, and detectives wanted the event to be as realistic as possible," the VTDigger reports, citing an email written by interim principal Sabrina Westdijk and two teachers in attendance.
"First and foremost, the Burlington Police Department apologizes to any students in attendance who were upset by the specific scenario and crime scene portion of the presentation," the department said in a news release Thursday.
'About as real-life as you can get'
The department stated that the role-playing scenario involved "three department personnel simulating a robbery scenario" and was not directed toward any students or faculty. Police also said the district contacted them in April about conducting the presentation after a "previous successful presentation" between the programs in the fall of 2023.
According to Elek, school officials "didn't realize the presentation would happen without warning," a claim the Burlington Police Department disputes, according to the VTDigger.
The Burlington Police Department said it communicated details of the scenarios to the school program's staff in May, including saying that the training incident would involve "using fake firearms in a mock shooting." The department said it told program staff the presentation "is about as real life as you can get, and is certainly exactly the sort of thing we deal with most frequently."
'A reflective growth opportunity'
Police said the program staff responded, "I think these students will be fine with the simulation. We will give a heads up to parents and students."
The police department said in the statement it will meet with students and staff Friday to discuss the presentation and its impact.
"We hope that this can be a reflective growth opportunity for all parties," the department said in the statement.
Gabe Hauari is a national trending news reporter at USA TODAY. You can follow him on X @GabeHauari or email him at [email protected]
Advertisement
Read Justice Clarence Thomas’s Financial Disclosures for 2023
- Share full article
The Supreme Court justice also included an amendment for his 2019 filing.
A PDF version of this document with embedded text is available at the link below:
Download the original document (pdf)
AO 10 Rev. 3/2023 FINANCIAL DISCLOSURE REPORT FOR CALENDAR YEAR 2023 Report Required by the Ethics in Government Act of 1978 (5 U.S.C. app.. 13101-13111) 1. Person Reporting (last name, first, middle initial) THOMAS, CLARENCE 2. Court or Organization SUPREME COURT OF THE UNITED STATES 3. Date of Report 05/15/2024 4. Title (Article III judges indicate active or senior status; magistrate judges indicate full- or part-time) ASSOCIATE JUSTICE 5a. Report Type (check appropriate type) 5b. Nomination Initial Date Annual Amended Report Final 6. Reporting Period 01/01/2023 to 12/31/2023 7. Chambers or Office Address SUPREME COURT OF THE UNITED STATES 1 FIRST STREET, N.E. WASHINGTON, D. C. 20543 IMPORTANT NOTES: The instructions accompanying this form must be followed. Complete all parts, checking the NONE box for each part where you have no reportable information. I. POSITIONS. (Reporting individual only; see Guide to Judiciary Policy, Volume 2D, Ch. 3, § 345 Trustees, Executors, Administrators, and Custodians; § 350 Power of Attorney; § 355 Outside Positions.) NONE (No reportable positions.) POSITION 1. Honorary Member, Board of Directors 2. 3. 4. 5. NAME OF ORGANIZATION/ENTITY Horatio Alger Association II. AGREEMENTS. (Reporting individual only; see Guide to Judiciary Policy, Volume 2D, Ch. 3, § 340 Agreements and Arrangements.) NONE (No reportable agreements.) DATE PARTIES AND TERMS 1. 2. 3.
FINANCIAL DISCLOSURE REPORT Page 2 of 7 Name of Person Reporting THOMAS, CLARENCE Date of Report 05/15/2024 III. NON-INVESTMENT INCOME. (Reporting individual and spouse; see Guide to Judiciary Policy, Volume 2D, Ch. 3, § 320 Income; § 360 Spouses and Dependent Children.) A. Filer's Non-Investment Income NONE (No reportable non-investment income.) 1. 2. 3. 4. DATE SOURCE AND TYPE INCOME (yours, not spouse's) B. Spouse's Non-Investment Income - If you were married during any portion of the reporting year, complete this section. (Dollar amount not required except for honoraria.) NONE (No reportable non-investment income.) 1.2023 2. 3. 4. DATE SOURCE Liberty Consulting, Inc. - salary and benefits IV. REIMBURSEMENTS -- transportation, lodging, food, entertainment. (Includes those to spouse and dependent children; see Guide to Judiciary Policy, Volume 2D, Ch. 3, § 330 Gifts and Reimbursements; § 360 Spouses and Dependent Children.) NONE (No reportable reimbursements.) 1. 2. 3. 4. 5. SOURCE DATES LOCATION PURPOSE ITEMS PAID OR PROVIDED
FINANCIAL DISCLOSURE REPORT Page 3 of 7 Name of Person Reporting THOMAS, CLARENCE Date of Report 05/15/2024 V. GIFTS. (Includes those to spouse and dependent children; see Guide to Judiciary Policy, Volume 2D, Ch. 3, § 330 Gifts and Reimbursements; § 360 Spouses and Dependent Children.) NONE (No reportable gifts.) SOURCE DESCRIPTION 1. Terrence and Barbara Giroux Two photo albums 2. 3. 4. 5. VALUE $2,000.00 VI. LIABILITIES. (Includes those of spouse and dependent children; see Guide to Judiciary Policy, Volume 2D, Ch. 3, § 335 Liabilities; § 360 Spouses and Dependent Children.) NONE (No reportable liabilities.) 1. 2. 3. 4. 5. CREDITOR DESCRIPTION VALUE CODE
FINANCIAL DISCLOSURE REPORT Page 4 of 7 Name of Person Reporting THOMAS, CLARENCE Date of Report 05/15/2024 VII. INVESTMENTS and TRUSTS -- income, value, transactions (Includes those of spouse and dependent children; see Guide to Judiciary Policy, Volume 2D, Ch. 3, § 310 Reporting Thresholds for Assets; § 312 Types of Reportable Property; § 315 Interests in Property; § 320 Income; § 325 Purchases, Sales, and Exchanges; § 360 Spouses and Dependent Children; § 365 Trusts, Estates, and Investment Funds.) NONE (No reportable income, assets, or transactions.) A. B. D. C. Description of Assets (including trust assets) Place "(X)" after each asset exempt from prior disclosure Income during reporting period (1) (2) Amount Code 1 (A-H) Gross value at end Transactions during reporting period of reporting period Type (e.g., div., rent, or int.) (1) Value (2) (1) (2) Code 2 (J-P) Value Method Code 3 (Q-W) Type (e.g., Date (3) Value (4) Gain buy, sell, mm/dd/yy Code 2 Code 1 redemption) (J-P) (A-H) 1. MONY Flexible Premium Adjustable Life n/ C Dividend M T k/a AXA Universal Life Policy 2. Equitable Variable Universal Life Policy (H) 3. S&P 500 Index account 4. Guaranteed account C Dividend L T A Interest K T 5. Wells Fargo IRA CD A Interest J T 6. Ginger Holdings, LLC, Douglas County, NE F Rent O W 7. Congressional Federal Credit Union (Cash A Interest N T Accounts) 8. Liberty Consulting, Inc. None K U 9. Vanguard IRA (H) 10. -VANGUARD FEDERAL MONEY B Dividend L T Buy 03/06/23 K MARKET FUND 11. -VANGUARD EMERGING MARKETS A Dividend K T STOCK INDEX ADMIRAL CL (VEMAX) 12. -VANGUARD 500 INDEX ADMIRAL CL B Dividend M T (VFIAX) Sold (part) 09/06/23 K 13. -VANGUARD HEALTHCARE A Dividend K T INVESTOR CL (VGHCX) 14. -VANGUARD SMALL CAP VALUE B Dividend L T Sold 09/06/23 K INDEX ADMIRAL CL (VSIAX) (part) 15. -VANGUARD TOTAL INTL STOCK A Dividend K T INDEX ADMIRAL CL (VTIAX) 16. -VANGUARD VALUE INDEX ADMIRAL CL (VVIAX) B Dividend L T 17. -VANGUARD WELLINGTON ADMIRAL B Dividend L T CL (VWENX) D Ꭰ Ꭰ D 1. Income Gain Codes: (See Columns B1 and D4) 2. Value Codes (See Columns C1 and D3) 3. Value Method Codes (See Column C2) A $1,000 or less F=$50,001 - $100,000 J=$15,000 or less N=$250,001 - $500,000 P3 $25,000,001 - $50,000,000 Q=Appraisal U=Book Value B $1,001 - $2,500 G=$100,001 - $1,000,000 K-$15,001 - $50,000 O $500,001 - $1,000,000 R=Cost (Real Estate Only) V=Other C $2,501 $5,000 H1=$1,000,001 - $5,000,000 L=$50,001 - $100,000 P1 =$1,000,001 - $5,000,000 P4 More than $50,000,000 S Assessment W Estimated D=$5,001 - $15,000 H2 More than $5,000,000 M $100,001 - $250,000 P2 $5,000,001 - $25,000,000 T=Cash Market E=$15,001 - $50,000
FINANCIAL DISCLOSURE REPORT Page 5 of 7 Name of Person Reporting THOMAS, CLARENCE Date of Report 05/15/2024 VII. INVESTMENTS and TRUSTS -- income, value, transactions (Includes those of spouse and dependent children; see Guide to Judiciary Policy, Volume 2D, Ch. 3, § 310 Reporting Thresholds for Assets; § 312 Types of Reportable Property; § 315 Interests in Property; § 320 Income; § 325 Purchases, Sales, and Exchanges; § 360 Spouses and Dependent Children; § 365 Trusts, Estates, and Investment Funds.) NONE (No reportable income, assets, or transactions.) A. B. D. C. Description of Assets (including trust assets) Place "(X)" after each asset exempt from prior disclosure Income during reporting period (1) (2) Amount Code 1 (A-H) Gross value at end Transactions during reporting period of reporting period Type (e.g., (1) Value (2) (1) (2) div., rent, Code 2 or int.) (J-P) Value Method Code 3 (Q-W) Type (e.g., buy, sell, redemption) Date mm/dd/yy (3) Value (4) Gain Code 2 Code 1 (J-P) (A-H) Sold 09/06/23 M A 18. -VANGUARD WELLESLEY INCOME D Dividend ADMIRAL CL (VWIAX) 19. -CENTERSTATE BANK WINTER A Interest L T HAVEN FL CD FDIC#33555 CPN 1.000% DUE 3/31/25 20. US TREASURY NOTE CPN 1.5% DUE 9/30/24 Y A Interest L T Buy 09/06/23 K 21. US TREASURY NOTE CPN 3.125% DUE 8/15/25 Y B Interest L T Buy 09/06/23 L 22. US TREASURY NOTE INFL INDX NOTE CPN 1.25% DTD 4/15/23 FC 10/15/23 Y A Interest K T Buy 09/06/23 L 1. Income Gain Codes: (See Columns B1 and D4) 2. Value Codes (See Columns C1 and D3) 3. Value Method Codes (See Column C2) A $1,000 or less F=$50,001 - $100,000 J=$15,000 or less N $250,001 - $500,000 P3 $25,000,001 - $50,000,000 Q=Appraisal U=Book Value B $1,001 - $2,500 G=$100,001 - $1,000,000 K-$15,001 - $50,000 O $500,001 - $1,000,000 R=Cost (Real Estate Only) V=Other C=$2,501-$5,000 H1=$1,000,001 - $5,000,000 L=$50,001 - $100,000 P1 =$1,000,001 - $5,000,000 P4 More than $50,000,000 S Assessment W Estimated D=$5,001 - $15,000 H2 =More than $5,000,000 M $100,001 - $250,000 P2 $5,000,001 - $25,000,000 T=Cash Market E $15,001 $50,000
FINANCIAL DISCLOSURE REPORT Page 6 of 7 Name of Person Reporting THOMAS, CLARENCE Date of Report 05/15/2024 VIII. ADDITIONAL INFORMATION OR EXPLANATIONS. (Indicate part of report.) During the preparation and filing of this report, filer sought and received guidance from his accountant and ethics counsel. Consistent with the review of prior filings that the filer began last year, report for calendar year 2019 is hereby amended to include the following entries under the reimbursement section, which was inadvertently omitted at the time of filing: Source: Harlan & Kathy Crow Dates: July 12, 2019 Hotel Location: Bali, Indonesia Purpose: Guests of Source Items Paid or Provided: Food and Lodging at Source: Harlan Crow Private Club Dates: July 18-21, 2019 Location: Monte Rio, CA Purpose: Guest of Source Items Paid or Provided: Food and Lodging at Part VII, lines 3 and 4 - Asset description changed to reflect the allocation during the covered period as detailed by the insurance agent.
FINANCIAL DISCLOSURE REPORT Page 7 of 7 Name of Person Reporting THOMAS, CLARENCE IX. CERTIFICATION. Date of Report 05/15/2024 I certify that all information given above (including information pertaining to my spouse and minor or dependent children, if any) is accurate, true, and complete to the best of my knowledge and belief, and that any information not reported was withheld because it met applicable statutory provisions permitting non-disclosure. I further certify that earned income from outside employment and honoraria and the acceptance of gifts which have been reported are in compliance with the provisions of 5 U.S.C. app. § 13141 et. seq., 5 U.S.C. § 7353, and Judicial Conference regulations. Signature: S/CLARENCE THOMAS NOTE: ANY INDIVIDUAL WHO KNOWINGLY AND WILLFULLY FALSIFIES OR FAILS TO FILE THIS REPORT MAY BE SUBJECT TO CIVIL AND CRIMINAL SANCTIONS (5 U.S.C. app. § 13106) Committee on Financial Disclosure Administrative Office of the United States Courts Suite G-330 One Columbus Circle, N.E. Washington, D.C. 20544
- Marketplace
- Marketplace Morning Report
- Marketplace Tech
- Make Me Smart
- This is Uncomfortable
- The Uncertain Hour
- How We Survive
- Financially Inclined
- Million Bazillion
- Marketplace Minute®
- Corner Office from Marketplace
- Latest Stories
- Collections
- Smart Speaker Skills
- Corrections
- Ethics Policy
- Submissions
- Individuals
- Corporate Sponsorship
- Foundations

Nanobubbles help this lakeside cope with toxic algae — and the changing climate

Share Now on:
- https://www.marketplace.org/2024/06/05/nanobubbles-moleaer-lake-elsinore-climate-change-algae/ COPY THE LINK
HTML EMBED:
Get the Podcast

- Amazon Music
It’s been 15 years since Danny Taylor last visited Lake Elsinore . He said the water was “brown [and] smelly.” He has family nearby and has been in the area, but skipped lakeside visits. “I just never came back down to the water because of that.”
Climate change is wreaking havoc on some freshwater lakes. They’re getting warmer, and that is spawning lots of toxic algae . When the algae runs rampant like it did 15 years ago, it can kill every other living thing in the lake. Sometimes the city of Lake Elsinore , situated halfway between Los Angeles and San Diego, has to close the lake to prevent people from getting sick.
New freshwater in the lake makes the bloom recede. Sometimes the city pumps it in, or a strong rainy season can help. After a while, the algae dies off and the cycle starts again.

The city wants to keep the algae to a minimum because it relies on tourists like Danny Taylor who spend time and dollars when they visit the lake. The city has invested in a marina, hosts a big annual fishing tournament and spruced up the lakeside recreational vehicle camp, Jack Ferguson of the Elsinore Valley Municipal Water District said.
“It’s already booked out for the weekends through the summer,” Ferguson said.
But when the bloom is bad enough, business dries up.
Fresh water bodies across the globe are falling victim to this problem as the climate crisis makes water warmer. According to the Environmental Protection Agency, 40,000 bodies of water are “impaired” just in the United States.
Lake Elsinore is the largest natural freshwater lake in Southern California. Now the city on its shores is spending $2 million to try out a new technology to fix it.

“This is a very natural process that occurs in all healthy, balanced, water ecosystems,” said Moleaer CEO Nick Dyner. His company’s tech is in the lake now, and he explained it doesn’t use any chlorine or harmful chemicals. Instead, it uses trillions of tiny oxygen bubbles.
“Nanobubbles are extremely small bubbles of gas, hence the word, ‘nano.’ They’re 2,500 times smaller than a grain of salt,” Dyner said.
Bubbles that small aren’t light enough to float to the surface. They stay at the bottom of the lake where oxygen is in shortest supply. Plants and animals then get the oxygen they need to stand a fighting chance, and the algae starves.
“In simplest terms, nanobubble treatment is helping the lake restore itself,” Dyner said.

Standing on the shoreline next to a pair of fishermen, the water district’s Jack Ferguson points to a big, white cube sitting quietly about a stone’s throw from the water’s edge.
“That’s the nanobubble machine right there on that barge,” he said. “It’s probably 80-90 feet offshore.”
The machine has been there since December, and so far, it seems to be working. A kayaker peering over the edge can see 12-14 feet down. It’s some of the best visibility the city has ever recorded. And the water is a deep blue. It was a rainy year, and that usually helps the lake’s water quality. In the hot summer months, the bubbles will have more work to do.
“We’re waiting to see how long this lasts and the water stays clear and dark blue. But I’ve never seen it like this,” Ferguson said.

The city says its measurement of the water’s resiliency has doubled. Algae concentrations have dropped by half in the worst spots and disappeared almost entirely in the best ones.
The owners of the RVs in the lakeside campsite have noticed.
Among the campers is Danny Taylor’s sister. Her trip brought Taylor back to the lake 15 years after that first disappointing trip.
“It’s very clean. I’m really impressed,” Taylor says. “I’ll be back here, definitely. It’s really, really nice.”
Stories You Might Like

Unprecedented toxic algal bloom kills thousands of fish across the San Francisco Bay

Canadian greenhouse industry seeks methods to reduce pollution into Lake Erie

Rising Great Lakes water levels benefit some, but cost others

Sometimes it takes a big prize to solve big tech problems

Study finds persistent coal ash pollution in lakes

Panama Canal faces uncertain future because of climate change, drought
There’s a lot happening in the world. Through it all, Marketplace is here for you.
You rely on Marketplace to break down the world’s events and tell you how it affects you in a fact-based, approachable way. We rely on your financial support to keep making that possible.
Your donation today powers the independent journalism that you rely on . For just $5/month, you can help sustain Marketplace so we can keep reporting on the things that matter to you.
Also Included in
- Climate change
Latest Episodes From Our Shows

American capitalism isn't working for everyone

Does Texas need its own stock exchange?

Coworking spaces are trying to put a new lease on the WeWork business model

Share your wedding spending regrets!
Behind ‘Suicide Squad,’ the Year’s Biggest Video-Game Flop
After seven years of tumultuous development, Warner Bros. took a $200 million loss on the Rocksteady game.

Suicide Squad: Kill the Justice League has been a critical and commercial failure for Warner Bros. Discovery
David Haddad, the head of video games for Warner Bros. Discovery Inc., visited the London offices of subsidiary Rocksteady Studios in mid-February for an all-hands meeting. While previous gatherings with the executive had been peppered with tactful euphemisms, this time Haddad was blunt, according to two people briefed on his remarks. Weeks after its release, the studio’s latest game, Suicide Squad: Kill the Justice League , was tanking.
Haddad shared few details on the exact scope of the Suicide Squad misfire, said the people, who asked not to be identified discussing nonpublic information. But it didn’t take long for them to find out the extent of the damage.
Press Release Details
Nvidia nim revolutionizes model deployment, now available to transform world’s millions of developers into generative ai developers.
- 150+ Partners Across Every Layer of AI Ecosystem Embedding NIM Inference Microservices to Speed Enterprise AI Application Deployments From Weeks to Minutes
- NVIDIA Developer Program Members Gain Free Access to NIM for Research, Development and Testing
TAIPEI, Taiwan, June 02, 2024 (GLOBE NEWSWIRE) -- COMPUTEX -- NVIDIA today announced that the world’s 28 million developers can now download NVIDIA NIM ™ — inference microservices that provide models as optimized containers — to deploy on clouds, data centers or workstations, giving them the ability to easily build generative AI applications for copilots, chatbots and more, in minutes rather than weeks.
These new generative AI applications are becoming increasingly complex and often utilize multiple models with different capabilities for generating text, images, video, speech and more. NVIDIA NIM dramatically increases developer productivity by providing a simple, standardized way to add generative AI to their applications.
NIM also enables enterprises to maximize their infrastructure investments. For example, running Meta Llama 3-8B in a NIM produces up to 3x more generative AI tokens on accelerated infrastructure than without NIM. This lets enterprises boost efficiency and use the same amount of compute infrastructure to generate more responses.
Nearly 200 technology partners — including Cadence, Cloudera , Cohesity , DataStax , NetApp , Scale AI and Synopsys — are integrating NIM into their platforms to speed generative AI deployments for domain-specific applications, such as copilots, code assistants and digital human avatars. Hugging Face is now offering NIM — starting with Meta Llama 3 .
“Every enterprise is looking to add generative AI to its operations, but not every enterprise has a dedicated team of AI researchers,” said Jensen Huang, founder and CEO of NVIDIA. “Integrated into platforms everywhere, accessible to developers everywhere, running everywhere — NVIDIA NIM is helping the technology industry put generative AI in reach for every organization.”
Enterprises can deploy AI applications in production with NIM through the NVIDIA AI Enterprise software platform. Starting next month, members of the NVIDIA Developer Program can access NIM for free for research, development and testing on their preferred infrastructure.
40+ NIM Microservices Power Gen AI Models Across Modalities NIM containers are pre-built to speed model deployment for GPU-accelerated inference and can include NVIDIA CUDA ® software, NVIDIA Triton Inference Server ™ and NVIDIA TensorRT™-LLM software.
Over 40 NVIDIA and community models are available to experience as NIM endpoints on ai.nvidia.com , including Databricks DBRX , Google’s open model Gemma, Meta Llama 3, Microsoft Phi-3, Mistral Large, Mixtral 8x22B and Snowflake Arctic.
Developers can now access NVIDIA NIM microservices for Meta Llama 3 models from the Hugging Face AI platform. This lets developers easily access and run the Llama 3 NIM in just a few clicks using Hugging Face Inference Endpoints, powered by NVIDIA GPUs on their preferred cloud.
Enterprises can use NIM to run applications for generating text, images and video, speech and digital humans. With NVIDIA BioNeMo ™ NIM microservices for digital biology, researchers can build novel protein structures to accelerate drug discovery.
Dozens of healthcare companies are deploying NIM to power generative AI inference across a range of applications, including surgical planning, digital assistants, drug discovery and clinical trial optimization.
With new NVIDIA ACE NIM microservices , developers can easily build and operate interactive, lifelike digital humans in applications for customer service, telehealth, education, gaming and entertainment.
Hundreds of AI Ecosyst em Partners Embedding NIM Platform providers including Canonical , Red Hat , Nutanix and VMware (acquired by Broadcom) are supporting NIM on open-source KServe or enterprise solutions. AI application companies Hippocratic AI , Glean , Kinetica and Redis are also deploying NIM to power generative AI inference.
Leading AI tools and MLOps partners — including Amazon SageMaker, Microsoft Azure AI, Dataiku, DataRobot, deepset , Domino Data Lab, LangChain , Llama Index , Replicate , Run.ai, Saturn Cloud , Securiti AI and Weights & Biases — have also embedded NIM into their platforms to enable developers to build and deploy domain-specific generative AI applications with optimized inference.
Global system integrators and service delivery partners Accenture, Deloitte, Infosys, Latentview , Quantiphi , SoftServe, TCS and Wipro have created NIM competencies to help the world’s enterprises quickly develop and deploy production AI strategies.
Enterprises can run NIM-enabled applications virtually anywhere, including on NVIDIA-Certified Systems ™ from global infrastructure manufacturers Cisco, Dell Technologies , Hewlett-Packard Enterprise , Lenovo and Supermicro, as well as server manufacturers ASRock Rack , ASUS , GIGABYTE , Ingrasys , Inventec , Pegatron , QCT, Wistron and Wiwynn. NIM microservices have also been integrated into Amazon Web Services , Google Cloud , Azure and Oracle Cloud Infrastructure .
Titans of Industry Amp Up Gener ative AI With NIM Industry leaders Foxconn, Pegatron, Amdocs , Lowe’s, ServiceNow and Siemens are among the businesses using NIM for generative AI applications in manufacturing, healthcare, financial services, retail, customer service and more:
- Foxconn — the world’s largest electronics manufacturer — is using NIM in the development of domain-specific LLMs embedded into a variety of internal systems and processes in its AI factories for smart manufacturing, smart cities and smart electric vehicles.
- Pegatron — a Taiwanese electronics manufacturing company — is leveraging NIM for Project TaME, a Taiwan Mixtral of Experts model designed to advance the development of local LLMs for industries.
- Amdocs — a leading global provider of software and services to communications and media companies — is using NIM to run a customer billing LLM that significantly lowers the cost of tokens, improves accuracy by up to 30% and reduces latency by 80%, driving near real-time responses.
- Lowe’s — a FORTUNE ® 50 home improvement company — is using generative AI for a variety of use cases. For example, the retailer is leveraging NVIDIA NIM inference microservices to elevate experiences for associates and customers.
- ServiceNow — the AI platform for business transformation — announced earlier this year that it was one of the first platform providers to access NIM to enable fast, scalable and more cost-effective LLM development and deployment for its customers. NIM microservices are integrated within the Now AI multimodal model and are available to customers that have ServiceNow’s generative AI experience, Now Assist, installed.
- Siemens — a global technology company focused on industry, infrastructure, transport and healthcare — is integrating its operational technology with NIM microservices for shop floor AI workloads. It is also building an on-premises version of its Industrial Copilot for Machine Operators using NIM.
Availability Developers can experiment with NVIDIA microservices at ai.nvidia.com at no charge. Enterprises can deploy production-grade NIM microservices with NVIDIA AI Enterprise running on NVIDIA-Certified Systems and leading cloud platforms. Starting next month, members of the NVIDIA Developer Program will gain free access to NIM for research and testing.
Watch Huang’s COMPUTEX keynote to learn more about NVIDIA NIM.
About NVIDIA NVIDIA (NASDAQ: NVDA) is the world leader in accelerated computing.
For further information, contact: Anna Kiachian NVIDIA Corporation +1-650-224-9820 [email protected]
Certain statements in this press release including, but not limited to, statements as to: the benefits, impact, performance, features, and availability of NVIDIA’s products and technologies, including NVIDIA NIM, NVIDIA CUDA, NVIDIA Triton Inference Server, NVIDIA TensorRT-LLM software, NVIDIA Developer program, NVIDIA BioNeMo, NVIDIA-Certified Systems, and NVIDIA AI Enterprise; our collaborations and partnerships with third parties and the benefits and impacts thereof; third parties using or adopting our products or technologies; every enterprise looking to add generative AI to its operations; and NVIDIA NIM helping the technology industry put generative AI in reach for every organization are forward-looking statements that are subject to risks and uncertainties that could cause results to be materially different than expectations. Important factors that could cause actual results to differ materially include: global economic conditions; our reliance on third parties to manufacture, assemble, package and test our products; the impact of technological development and competition; development of new products and technologies or enhancements to our existing product and technologies; market acceptance of our products or our partners' products; design, manufacturing or software defects; changes in consumer preferences or demands; changes in industry standards and interfaces; unexpected loss of performance of our products or technologies when integrated into systems; as well as other factors detailed from time to time in the most recent reports NVIDIA files with the Securities and Exchange Commission, or SEC, including, but not limited to, its annual report on Form 10-K and quarterly reports on Form 10-Q. Copies of reports filed with the SEC are posted on the company's website and are available from NVIDIA without charge. These forward-looking statements are not guarantees of future performance and speak only as of the date hereof, and, except as required by law, NVIDIA disclaims any obligation to update these forward-looking statements to reflect future events or circumstances.
© 2024 NVIDIA Corporation. All rights reserved. NVIDIA, the NVIDIA logo, BioNeMo, CUDA, NVIDIA NIM, NVIDIA Triton Inference Server and TensorRT are trademarks and/or registered trademarks of NVIDIA Corporation in the U.S. and other countries. Other company and product names may be trademarks of the respective companies with which they are associated. Features, pricing, availability and specifications are subject to change without notice.
A photo accompanying this announcement is available at: https://www.globenewswire.com/NewsRoom/AttachmentNg/4fe99b19-66e7-4473-b9ff-f1380eae0ff8
NVIDIA NIM revolutionizes model deployment for every layer of the AI ecosystem.
Quick links.
- Email Alerts
- Request Printed Materials
- Download Library
To receive notifications via email, enter your email address and select at least one subscription below. After submitting your information, you will receive an email. You must click the link in the email to activate your subscription. You can sign up for additional subscriptions at any time.
Email Alert Sign Up Confirmation
Investor contact.
2788 San Tomas Expressway Santa Clara, CA 95051
- Contact Investor Relations
Investor Resources
- Request Information
- Stock Quote & Chart
- Historical Price Lookup
- Investment Calculator
- Fundamentals
- Analyst Coverage
- Management Team
- Board of Directors
- Governance Documents
- Committee Composition
- Contact the Board
- Corporate Sustainability
- Events & Presentations
Financial Info
- Financial Reports
- SEC Filings
- Quarterly Results
- Annual Reports and Proxies
Investors and others should note that we announce material financial information to our investors using our investor relations website, press releases, SEC filings and public conference calls and webcasts. We intend to use our @NVIDIA Twitter account, NVIDIA Facebook page, NVIDIA LinkedIn page and company blog as a means of disclosing information about our company, our services and other matters and for complying with our disclosure obligations under Regulation FD. The information we post through these social media channels may be deemed material. Accordingly, investors should monitor these accounts and the blog, in addition to following our press releases, SEC filings and public conference calls and webcasts. This list may be updated from time to time.

- Privacy Policy
- Manage My Privacy
- Do Not Sell or Share My Data
- Terms of Service
- Accessibility
- Corporate Policies
IMAGES
VIDEO
COMMENTS
Create Stunning Presentations on the Web. reveal.js is an open source HTML presentation framework. It's a tool that enables anyone with a web browser to create fully-featured and beautiful presentations for free. Presentations made with reveal.js are built on open web technologies. That means anything you can do on the web, you can do in your ...
In the power point presentation click Save As and select GIF. Pick the quality you want to display the presentation at. Power Point will save one GIF image for each slide and name them Slide1.GIF, Slide2.GIF, etc..... Create a HTML page and add a image tag to display the Power point GIF images.
1. Open your PowerPoint presentation and navigate to the slide where you want to insert the HTML. 2. Click on the "Insert" tab and select "Object" from the toolbar. 3. In the "Object" window, switch to the "Create from File" tab and click on "Browse" to select the HTML file you want to embed. 4.
In the function moveToLeftSlide, we basically access the previous sibling element (i.e. the previous slide), remove the .show class on the current slide, and add it to that sibling. This will move the presentation to the previous slide. We do the exact opposite of this in the function moveToRightSlide.Because nextElementSibling is the opposite of previousElementSibling, we'll be getting the ...
To recap: How to embed a PowerPoint presentation into a website includes 4 simple steps: Open your presentation in Office 365's version of PowerPoint. Click File > Share > Embed. Copy the embed code. Paste the embed code to your website. Thanks so much for checking out this tutorial!
However, to embed an HTML file, it needs to be added as an object. HTML files can be embedded as objects in PowerPoint via Insert -> Text -> Object. From the dialog box, select a file and browse to select the HTML file. You can choose to display the file as an icon by checking the Display as Icon option. Check the Link option if you want the ...
There are two main ways to publish Reveal presentations: As a PDF file—see Print to PDF above for details on how to do this. As an HTML file. For HTML, it's often most convenient to distribute the presentation as a single self contained file. To do this, specify the embed-resources option:---
Getting Started with WebSlides. To get started, first download WebSlides. Then, in the root folder, create a new folder and call it presentation. Inside the newly created presentation folder ...
WebSlides is the easiest way to make HTML presentations. Just choose a demo and customize it in minutes. 120+ slides ready to use. Good karma. WebSlides is a beautiful solution for telling stories. ... HTML and CSS as narrative elements. Work better, faster. Designers, marketers, and journalists can now focus on the content. Simply choose a ...
WebSlides = Create stories with Karma. Finally, everything you need to make HTML presentations, landings, and longforms in a beautiful way. Just a basic knowledge of HTML and CSS is required. Designers, marketers, and journalists can now focus on the content. — https://webslides.tv/demos.
About HTML Preprocessors. HTML preprocessors can make writing HTML more powerful or convenient. For instance, Markdown is designed to be easier to write and read for text documents and you could write a loop in Pug. ... ↑ Insert the most common viewport meta tag. CSS. CSS Preprocessor ... // get elements let presentation = document ...
Today I'm starting a series of short videos on Reveal.js, an HTML Presentation Framework for making beautiful web presentations. In this first video, we'll l...
Definition and Usage. The <embed> tag defines a container for an external resource, such as a web page, a picture, a media player, or a plug-in application.
Click Add link -> Save. In the drop-down menu, select Embedding settings. If needed, adjust the settings such as width and height. Copy the embedding code and insert it to your HTML page. Alternatively, you are able to do the same actions right from the opened presentation editor via the Collaboration tab. GET ONLYOFFICE WORKSPACE.
Step-3: Click on the "Embed" option. In the "Publish to the web" dialog box, click on the "Embed" option. Then you can customize autoplay options for the embedded presentation. Step-4: Click on the "Publish" button. The next step is to click on the "Publish" button at the bottom of the "Publish to the web" dialog box.
If you're planning to add the code to a website page, navigate to Marketing > Website > Website Pages. Find the post or page that you'd like to add the embed code to. Hover over it, then click Edit. Click into the module where you'd like to add the embed code. An options bar will appear near the top of the screen.
To embed PowerPoint presentation in HTML using PowerPoint Web: Open "PowerPoint Web" from your browser and go to "File.". You will see the "Open option.". Select the presentation you want to embed on your website. Again, go to "File" and select "Share.". Click on" Embed" from the "drop-down menu.".
In order to install an Add-In: Click the Office button at the top left of PowerPoint, click PowerPoint Options, and then Add-Ins. In the Manager list, click Powerpoint Add-ins, then Go. In the Add-Ins dialog, click Add New. In the Add New PowerPoint Add-In box browse for the one you wish to add (in this case wherever you saved LiveWeb to) and ...
The best way to embed a microsoft powerpoint file on a web page is to use the API provided by microsoft, which allows you to embed a powerpoint right on your website. And the code is extremely simple. It is shown below. In the above code, where you see, specify path here, you replace that and put the complete path to your PowerPoint file.
Step 1: Publish a presentation for uploading to the Web. When your PowerPoint is ready to convert to HTML5, you can publish and put the presentation on a website using the Publish button on the iSpring toolbar. Choose Publish to My Computer. You can sele ct a local folder for the HTML5 presentation, where a new folder with the specified file ...
Multimedia presentations can be presented or shared in several ways. For interactive presentations that include clicking or filling in forms, give your audience the best experience by: Embedding the presentation into a website; Sharing the presentation with a live link; Downloading the presentation as an HTML5 file
0:07. 0:45. Police in Burlington, Vermont have apologized to a group of high school students who were shaken up by a role-playing presentation that involved a mock shooting. The presentation took ...
The Bureau of Labor Statistics said the U.S. added 42,000 jobs in that category — up about 0.2% from the previous month. We are well into leisure and hospitality season with summer travel ...
The U.S. economy is kind of a strange beast. It's a mix of free market, government regulation, individual entrepreneurship, and corporate governance that has evolved and grown over the last 240 ...
Ok. I found an alternative solution - I am now using RevealJS. I can use their https://www.slides.com to create slides using a UI, then I download it as HTML and embed in my website. It does require a $14 monthly subscription for their "PRO" but I ended up paying, just to be able to create slideshows that I can control when the next slide is used.
The Supreme Court justice also included in his 2023 form an amendment for his 2019 filing. A PDF version of this document with embedded text is available at the link below: AO 10 Rev. 3/2023 ...
WASHINGTON—Acting Comptroller of the Currency Michael J. Hsu today discussed improving customer financial health during a presentation at the Emerge Financial Health conference in Chicago. Mr. Hsu's written remarks in support of his presentation discussed the Office of the Comptroller of the Currency's work to describe financial health ...
Nanobubbles help this lakeside cope with toxic algae — and the changing climate. Caleigh Wells Jun 5, 2024. Heard on: After a new investment and a wet winter, Lake Elsinore is the bluest and ...
Warner Bros. revealed that it was taking a $200 million loss on Suicide Squad Photographer: Warner Bros. Games. For years, Warner Bros. has been struggling to transform its DC Comics assets into a ...
150+ Partners Across Every Layer of AI Ecosystem Embedding NIM Inference Microservices to Speed Enterprise AI Application Deployments From Weeks to Minutes NVIDIA Developer Program Members Gain Free Access to NIM for Research, Development and Testing TAIPEI, Taiwan, June 02, 2024 (GLOBE NEWSWIRE) - COMPUTEX - NVIDIA today announced that the world's 28 million developers can now download ...