How-To Geek
How to record voiceover narration in powerpoint.
If you're not able to physically present your slideshow, record a voiceover narration to make sure no points are missed.

Quick Links
Preparation, record a voiceover for your presentation.
If you’re sending out your presentation instead of giving it in front of an audience, but you feel adding a vocal explanation would better help to deliver the message, record a voiceover narration. Here’s how to do it.
Before you begin your PowerPoint narration, you’ll need to make sure you’ve made the proper preparations.
Set Up Your Mic
First, you’ll need a microphone. Most modern computers have a built-in microphone that gets the job done, but investing in a USB microphone will increase the audio quality of the narration by quite a bit.
The built-in microphone will be set as your input device by default, so if you plan on using it for the PowerPoint narration, you don’t need to take any additional steps in setting it up. However, if you plan to use a USB microphone for the narration, be sure to set it as the input device.
To do this on Windows, right-click the volume icon found on the right of the taskbar. In the menu that appears, select “Open Sound Settings.”
The “Sound Settings” window will appear. Here, scroll down to the “Input” section and click the box under “Choose your input device.”
If you’re using a USB microphone, it will appear here. Select it to set it as the input device.
The steps for Mac users are extremely similar. The only difference is you should go to "System Settings" and select "Sound" instead of right-clicking the volume icon like on Windows. From there, the steps are the same.
Take Notes and Rehearse
With your mic set up, you’re ready to start recording, right? Well, not quite. While you may not be physically standing in front of the audience delivering this presentation, you still need to treat it as though you are. This means going through the basics---taking notes and rehearsing your delivery.
One thing you can do to help you record a successful narration is to write out a script. As with a live presentation, though, you don’t want to sound like you’re reading straight from your notecards. Practice reading through the script a few times so that it sounds natural and fluid.
Once you’re confident in your delivery, it’s time to start recording.
Open the PowerPoint presentation in which you would like to record a voiceover narration. Head over to the “Slide Show” tab and, in the “Set Up” group, select “Record Slide Show.” Once selected, a drop-down menu will appear. Here, you can choose to start the narration from the beginning or from the current slide. If you choose to start recording from the current slide, make sure that you’re on the slide you’d like to start recording from.
Related: How to Record Your Screen with Microsoft PowerPoint
In this example, we’ll choose “Record from Beginning.”
Now, you’ll be in full-screen mode. You’ll notice a few extra tools appear, including a record button at the top-left corner of the screen. When you’re ready to start recording, click this button.
When you select the record button, a countdown timer will appear, giving you a three-second delay between clicking the button and starting your recording.
You can now start recording your voiceover narration! Continue through the presentation by clicking the right arrow to go to the next slide.
You can pause the recording at any time by pressing the pause button in the top-left corner of the window. The recording will automatically end when you make it to the last slide. Alternatively, you can press the stop button, also located at the top-left corner of the screen.
If you want to play your narration back, you can select the replay button.
A speaker icon will appear at the bottom-right corner of each slide that has a recorded narration. You can also play your narration back on each slide by hovering over the icon and pressing the play button.
If you’re not satisfied with the narration, simply repeat these steps to re-record.
Blog > Record voice narration for PowerPoint
Record voice narration for PowerPoint
01.11.21 • #presentation #powerpoint #voiceover #narration.
In this blog post, you'll learn how you can add a narration for your PowerPoint presentation. Adding audio or video narration can be very helpful, especially in a time where many seminars and meetings have to be conducted online. If you would rather give your presentation using a live stream (which has many benefits), scroll down to the bottom and learn how you can do that!
Here's what you need for recording:
- a microphone (your computer's microphone should do)
- a finished set of PowerPoint slides
- a video camera (only if you want to record video as well)
- Open your PowerPoint presentation or create a new one.
- In the taskbar, select Slide Show . Then click Record Slide Show .
- Choose the option Record from Beginning .

- You'll now get to a different view, which we'll call "Recorder View". Here's an overview:

- In the bottom right corner, you'll see three icons. The one on the left is for switching the microphone on/off. Make sure this function is turned on. The icon in the middle is for turning on/off your camera. You can choose if you want to switch the video recording on or not. The last icon is only available if you've chosen the video recording function. If the function is enabled, you'll be able to see a video preview.
- In the top right corner under "Settings", you can choose what microphone (and camera) you'd like to use. This is only relevant if you have an external recording device that you would like to use. If you're recording with your computer, you don't have to set anything here.
- Now it's time to record. Click the big red Record button on the top left and start speaking.
- Tip: You can either record all the slides at once without pressing pause, or you record each slide individually, then click pause, then go on to the next slide and record again. However, it's important to note that PowerPoint creates an individual audio file for each slide, even if you record all at once.
- Important : PowerPoint does not record during transitions, so only speak when you're on a slide.

- You can also draw on your slides with the painting tools on the bottom. These drawings will be saved to your presentations.
- On the bottom left corner, you'll see what slide you're on. You can also see two time counts. The first one is for the recording on the current slide, the second one is for the recording of the presentation overall.
- If you want to delete the whole voiceover, click Clear and Clear Recordings on all Slides . If you only want to delete the recording on the specific slide you are on, click Clear Recording on current Slide.
- If you want to re-record the audio from one slide after deleting it, just go to that slide and click Record again. Record what you want to say, then click Stop when you're done.
- Once you're done, leave the Recorder View. Click the small x in the top right corner or hit Esc .
- You can now either save the presentation as a regular PowerPoint file (just click Save and you're done) or as a video. If you'd like a video, follow the instructions below:
Save Presentation as Video
- Go to File in the PowerPoint taskbar

- Choose Export on the left, then Create a Video .

- Select the quality you'd like. We recommend Full HD (1080p).
- In the following drop-down menu, make sure Use Recorded Timings and Narrations is selected.

- The setting Seconds spent on each slide is only for the slides where there is no recording (if you have recordings on all of your slides, you can just ignore this setting.)
- Click Create Video and choose where the video should be saved. The video creation might take a while, so don't close PowerPoint right away!

Live interaction with polls & quizzes
If you prefer to give a talk where you can also interact with your audience, then the free software SlideLizard is the ideal solution! Using live polls , Q&A and feedback , your presentations will become even more exciting and interactive. SlideLizard integrates directly with PowerPoint, making it a breeze to use.

Can I record a presentation in PowerPoint?
Yes, PowerPoint also allows you to record your presentation with voice and video narration. You can read about how this works in our blog .
How can I record a presentation in PowerPoint with audio and video?
At first create your presentation. For the recording you will need a microphone (the one on your computer should do), your finished presentation and a video camera (if you also want to record a video). We have created a tutorial on our blog where you can read the further steps.
Related articles
About the author.

Pia Lehner-Mittermaier
Pia works in Marketing as a graphic designer and writer at SlideLizard. She uses her vivid imagination and creativity to produce good content.

Get 1 Month for free!
Do you want to make your presentations more interactive.
With SlideLizard you can engage your audience with live polls, questions and feedback . Directly within your PowerPoint Presentation. Learn more
Top blog articles More posts

Insert Harvey Balls in PowerPoint

How to embed fonts in PowerPoint (2010, 2013, 2016, 2019)

Get started with Live Polls, Q&A and slides
for your PowerPoint Presentations
The big SlideLizard presentation glossary
Leading questions.
Leading questions subconsciously make the respondent think in a certain direction.
Nonverbal Communication
Nonverbal communication means that the communication is based on someone's voice and body instead on the use of words.
Student Response System (SRS)
With Student Response Systems (SRS) it is possible to get live student feedback in the classroom. Questions and answers can usually be asked and given anonymously, which increases participation and engagement. An SRS may be used for any grade, including university.
.potm file extension
A .potm file is a template for macro-enabled presentations. They are used for creating more .pptm files with the same macro settings and the same formatting.
Be the first to know!
The latest SlideLizard news, articles, and resources, sent straight to your inbox.
- or follow us on -
We use cookies to personalize content and analyze traffic to our website. You can choose to accept only cookies that are necessary for the website to function or to also allow tracking cookies. For more information, please see our privacy policy .
Cookie Settings
Necessary cookies are required for the proper functioning of the website. These cookies ensure basic functionalities and security features of the website.
Analytical cookies are used to understand how visitors interact with the website. These cookies help provide information about the number of visitors, etc.
- Tech Gift Ideas for Mom
- Hot Tech Deals at Target Right Now
How to Do a Voiceover on PowerPoint
Narrate your presentations with ease
:max_bytes(150000):strip_icc():format(webp)/ColettaTeske-af57404a91b342578a97252b7dbd720f.jpg "how to record your voice over a powerpoint presentation")
- Central Washington University
What to Know
- Single slide: Select a slide. Go to Insert > Audio > Record Audio . Type a name, select Record , then read your script. Select Stop .
- Entire slideshow: Select View > Normal and choose the first slide. Select Slide Show > Record Slide Show > Record from Current Slide .
- To review the recording, click the sound indicator (it looks like a speaker) and then select Play to hear your recording.
This article explains how to record a voiceover on PowerPoint for a single slide or for the entire slideshow. The instructions apply to PowerPoint for Microsoft 365 , PowerPoint 2019, PowerPoint 2016, and PowerPoint 2013.
How to Record a Voiceover for a Single Slide
Before narrating your PowerPoint presentation, be prepared:
- You’ll need a microphone attached to, or built into, your computer. Test the microphone to make sure it is working. Set the sound level so your audio is easy to hear.
- Prepare yourself for the narration. Write a script you can follow while recording the voiceover. Practice the presentation a couple of times so your voiceover will sound smooth.
- Decide whether to record the voiceover one slide at a time or record a voiceover for the entire presentation in one go.
The simplest way to record audio for a voiceover is to record one slide at a time. To get started, select the slide where you want to add the narration, then go to Insert > Audio > Record Audio .
Here’s how to record a voiceover on the slide:
Type a Name for the voiceover narration.
Select Record (the button with a red dot).
Read your script or ad-lib the narration.
Select Stop when you’re finished recording.
The Record Sound dialog box disappears, and a speaker indicating sound appears in the center of the slide.
To review the recording, click that sound indicator and then select Play to hear your recording.
When you're finished, click anywhere outside the playback controls to accept the recording.
You’ll see an audio icon in the middle of the slide. Move this icon anywhere on the slide to get it out of the way of other elements on the slide.
How to Record a Voiceover for an Entire Presentation
The voiceover for the entire presentation can be recorded at one time. In addition to recording a voiceover, you can record a video of yourself giving your presentation.
To set up your presentation when you want to narrate an entire slideshow:
Select View > Normal
Select the first slide in the presentation where you want to record audio.
Select Slide Show > Record Slide Show > Record from Current Slide .
In PowerPoint 2019, the Recording window opens.
In PowerPoint 2016 and earlier versions, a Record Slide Show dialog box prompts you for further options. In the Record Slide Show box, select options to set up the slideshow:
- Slide and animation timings: When recording, PowerPoint automatically tracks the timing of slide changes and any animations that occur.
- Narrations, ink, and laser pointer: When recording, PowerPoint automatically tracks when narrations, any inking, or laser pointing occurs.
Leave both checked to make automating your slideshow easier.
Select Record .
In PowerPoint 2016, select Start Recording .
Select Pause to temporarily stop the recording if you need a break.
If you made a mistake and want to start over, select Clear > Clear Recordings.
In PowerPoint 2016 select Clear > Clear Recordings on Current Slide .
When you’ve finished recording a slide, select the Advance button to advance to the next slide or press the spacebar on your keyboard.
When you’re done recording your narration on the slide, select Stop and close the recording window to return to the presentation.
You may have noticed some controls at the bottom left side of the screen. These are a few controls to aid you in your presentation.
These handy handy tools include the Laser Pointer , Highlighter , and Eraser . As you advance through your presentation, mark or highlight parts of your slides as you narrate. PowerPoint records the timing of these marks (if you left the boxes checked) to go along with your narration. Likewise, using the laser pointer shows a simulated red laser dot so that you can point out different things on your slides as you narrate your presentation.
How to Listen to the Recorded Voiceover
Once you’ve recorded your narration, you can go back to the slides and listen to your voiceover.
Here’s how to play a narration:
Select the slide containing the voiceover you want to hear.
Look for the recording icon on the slide. It should appear as either a small video screenshot or a speaker icon on the slide.
Hover over select this icon and then click Play to preview the recording.
How to Turn a Voiceover Off
If you don’t want to hear your narrations when playing a slideshow, but want to keep the narrations with the slide, turn voiceover off.
To turn voiceover off, select Slide Show and click to deselect the Play Narrations checkbox.
How to Delete a Voiceover
There are a couple of ways to delete voiceover audio in your presentation. To delete the audio on a single slide, find and select the recording on that slide, then press the Delete key.
To delete the voiceover from all the slides in a presentation: Select Slide Show and then select the down arrow to open the Record Slide Show menu. Then, select Clear Narration on All Slides .
Embedding Versus Linking Audio Files in PowerPoint
When you use the PowerPoint tools to record a voiceover narration, the audio file is embedded in PowerPoint. This means the audio is part of the PowerPoint file and not stored in a separate file, making it easy to play your presentation on any device.
If you have audio you recorded using other software and it's stored on your computer, you can link to the audio file. Linked files keep your presentation size smaller, but links can be broken if the audio file isn't available to the PowerPoint presentation. To prevent broken links, store the presentation file and the audio files in the same folder on your computer.
Get the Latest Tech News Delivered Every Day
- How to Add Audio to PowerPoint
- How to Make a Slideshow on PowerPoint
- Adding Sounds, Music or Narration to PowerPoint Slide Shows
- How to Make and Add Your Own Sound on TikTok
- Edit Music, Sound, or Other Audio Settings in PowerPoint
- How to Get PowerPoint on a Mac
- Loop a PowerPoint Slide Show
- How to Convert PowerPoint to Video
- How to Add Music to PowerPoint
- Using Design Themes in PowerPoint
- How to Use Speaker Notes in PowerPoint
- How to Change a Black-and-White Picture to Color in PowerPoint
- How to Add Page Numbers in PowerPoint
- How to Print PowerPoint Slides
- Change Order of Animations for PowerPoint Slides
- Create Family Trees Using PowerPoint Organization Chart
How to Record a PowerPoint Presentation with Narration
Can be helpful in creating a dramatic narrative
Microsoft PowerPoint has a built-in recording tool that allows you to narrate your presentations using recorded audio. You can export and share recorded presentations as video files.
This tutorial covers everything about recording PowerPoint presentations on Windows and Mac computers.

Record PowerPoint Presentation with Narration
Open the PowerPoint file/presentation you want to record and follow the steps below.
Record PowerPoint Presentation on Windows
- Select the slide you want to start recording from on the slide thumbnail pane.

- Head to the Record tab on the ribbon and select the Record button to start recording from the current/selected slide.

To record from the first slide, select the down-facing arrow icon below the Record button and select From Beginning .

You can also record a presentation from the Slide Show tab. Select Slide Show on the ribbon and select Record , From Current Slide , or From Beginning .

That’ll open PowerPoint’s presentation recorder in a fullscreen window.
- Select the Record icon and start speaking after the three seconds countdown.

PowerPoint records the presentation window and captures your voice and webcam feed as you navigate the slides. Select the left-facing and right-facing arrows to move to the previous and next slides in the presentation.
Record PowerPoint Presentation in macOS
- Open the Slide Show tab and select Record Slide Show .

- Select the Record button on the toolbar to start recording your narration.

Use your keyboard arrow keys to move back and forth between slides. Press N or Space Bar to move to the next slide or animation in the presentation. Press P or Backspace to return to the previous slide or animation.
Select Tips in the top-left corner for more keyboard shortcuts and other presentation tips .

Note: The narration tool doesn’t record slide transitions. When moving between slides, wait for the destination slide to appear on the screen before speaking.
PowerPoint Recorder Control/Settings
You’ll find a handful of controls and options on the recording tool. We’ll show you how to use these controls to include voiceovers or audio recordings in your presentation.

Using Presentation Pointer Tools
PowerPoint provides several tools to mark up your slides when narrating your presentation. There’s a pen tool, eraser, laser pointer, and highlighter.
With the Pen tool, you can draw on slides during narration/recording. Press Ctrl + P (Windows) or Command + P (Mac) to use the pen tool. You can also select the Pen icon to convert the pointer to a pen.

The Laser pointer tool converts your cursor to an onscreen laser. Use the laser pointer to draw attention to something on a slide/presentation.
Press Ctrl + L (Windows) or Command + L (Mac) to use the laser pointer. There’s also a Laser pointer icon on the toolbar.

Pressing Ctrl + I (or selecting the Highlighter tool ) converts your cursor to a highlighter.

Use the Eraser tool to remove inks and highlight from slides. Select the Eraser icon or press Ctrl + E and select the ink to erase.

On macOS, select the Erase Pen icon (or press E ) to erase all drawings and highlights on the slide.

You can change the pointer tools ink from the color selection boxes. However, one major limitation is that you can’t change the size of these pointer tools.
Pause and Resume Your Recording
In Windows, press I on your keyboard or select the Pause button in the top-left corner to pause your recording.

Press I again or select the Record icon to resume the recording.

If you use a Mac, select the Pause icon in the top toolbar to pause the recording.

Unmute or Mute Microphone
Check that your microphone is unmuted before recording. Select the microphone icon in the bottom-right corner to mute or unmute your mic.

PowerPoint for Windows allows you to mute and unmute your microphone in real time while recording video/audio narrations. The macOS version of PowerPoint only lets you configure your camera and microphone settings before recording.
Switch Microphone or Camera
Want to record your presentation with an external microphone or camera? Press Ctrl + M or select the audio/camera settings icon in the top-right corner and choose your preferred microphone/camera.

In macOS, select the microphone icon to mute or unmute your microphone. Select the arrow-down icon next to the microphone or camcorder icons to switch input devices.

Enable and Disable Camera
The recorder displays your camera or webcam feed in the bottom-right corner of the presentation slides.
Select the camcorder icon to remove your webcam feed from the recording. Select the icon again to display your webcam feed in the presentation.

You can also use the Ctrl + K keyboard shortcut on Windows computers to enable or disable your camera.
On Mac computers, you’ll find the video control icon on the top toolbar.

Note: The recording tool greys out the camcorder icon if your microphone is turned off.
Enable or Disable Camera Preview
PowerPoint allows you to disable the camera preview without turning off your camera or webcam.
Press Ctrl + J (Windows) or select the Camera Preview icon in the bottom-right corner to disable or enable the camera preview.

End a Recording
Press S on your Windows keyboard or select the Stop icon to end the recording.

Replay or Preview Your Recording
When you end a narration, press V on your keyboard or select Replay to preview or watch the recording.

The recorded narration will include all pen inks, highlights, and laser pointer gestures made during the presentation.
You can also preview/replay the narration outside the recording tool. Open the Slide Show tab and choose to watch the playback From Beginning or From Current Slide .

PowerPoint allows you to preview the playback on individual slides. A speaker/audio icon appears in the bottom-right of PowerPoint slides with narrations.
Choose the slide you want to preview, hover your cursor on the speaker icon in the bottom-right corner, and select Play .

Delete Current Narration/Recording
Did you spot an error when previewing your presentation? Want to delete the current narration and start from scratch?
Select the Clear existing recordings icon and choose whether to Clear Recordings on Current Slide or Clear Recordings on All Slides .

On Mac, select the Bin icon to delete the entire narration/recording.

Close the Narration Tool
Select the X icon on the title bar to close the presentation narration tool and return to Powerpoint.

Select End Show in the top-left corner to close the recording tool on a Mac computer.

Delete Narrations from Slides
Want to delete the narration or timing on an individual slide or the entire presentation? Select the slide with the narration you want to delete and follow the steps below.
- Open the Record tab and select the down-facing arrow below the Record icon.
- Select Clear and choose to clear timing or narration on current or all slides.

Export Recorded or Narrated Presentation
You can export a narrated PowerPoint presentation as a video file. The video output includes ink strokes, recorded audio/video, laser pointer gestures, and webcam/camera recording.
- Open the Record tab and select Export to Video .

Alternatively, open the File menu, select Export on the sidebar, and select Create a Video .

- Choose the quality of the video export in the first drop-down box—Ultra HD (4K), Full HD (1080p), HD (720p), Standard (480p).

- Choose Use Recorded Timings and Narrations in the next drop-down box and select Create Video .

- Give the recorded presentation a file name and select Save .

Narrate Your PowerPoint Presentations
The Microsoft PowerPoint web app doesn’t have a recording tool. As a result, you can only record presentations with narrations using PowerPoint for Windows or Mac.
You might meet issues recording a slide show if you use an outdated version of PowerPoint. Also, the recording tool on older versions of PowerPoint has a different interface and lacks some controls. Update PowerPoint and restart your computer if you cannot record a slide show.

Sodiq has written thousands of tutorials, guides, and explainers over the past 4 years to help people solve problems with Android, iOS, Mac, and Windows devices. He also enjoys reviewing consumer tech products (smartphones, smart home devices, accessories, etc.) and binge-watching comedy series in his spare time. Read Sodiq's Full Bio
Read More Posts:

Leave a Reply
Your email address will not be published. Required fields are marked *

How to Record Audio in PowerPoint for Narration or Voice-Over | Step-by-Step
I’ve scrolled through a lot of slideshows and, let’s face it, they’re not always the easiest to follow or understand what’s going on. I’m sure you have felt this too.
Have you ever thought, it would be great if the slides came with audio so that the presenter could explain and talk through each slide?
In this article, we’re going to show you how to record audio in PowerPoint as a narration or voice-over so your audience can feel as if you are presenting live and in person.
All you have to do is record yourself talking through each slide and PowerPoint will take care of the rest!
Related topic : If you are only looking to insert or add an audio that does not advance or move a slideshow in time and in synch your voice, this article: Adding Music to PowerPoint Slideshow explains how.
How to record audio as a voice-over or narration in PowerPoint – Quick Guide
- In PowerPoint, choose a slide.
- From Slide Show menu > click lower part Record Slide Show button
- Select a slide to Record from Current Slide, or Record from Beginning from the sub-menu
- NOTE: PowerPoint versions 2013-2016 only: A “Slide Show Settings” dialog box will appear for animation timings etc. You can leave both checked.
- PowerPoint will then open into full-screen Recording Mode
- NOTE: Microsoft Office PowerPoint versions 2013-2016 and Microsoft for Mac 365 will start recording immediately.
- In Recording Mode > click the Record button in the top left to start recording countdown.
- You are now ready to talk through your presentation and record your voice.
- To Stop or Pause recording > click Pause button or Stop / End Show (x) button.
- Jump to the full step-by-step tutorial below
Why use narrations or voice-overs in PowerPoint Presentation?
Adding a narration or voice-over into a presentation will enable your slideshow to be played and move forward in time or sync with your voice.
Recording audio for your slideshow is a widely used feature and has many benefits. For example:
- It’s useful in situations when a speaker is not available and when people want to view presentations on their own and at their leisure.
- It is also an effective way for speakers to rehearse and time specific slides or the entire presentations before they happen.
- And you may have watched many instructional videos or online courses with a recorded voice over, just because it makes the content easier to understand, is more engaging and lively than just written words alone.
After you finish the audio recording you can share or export your presentation by converting or exporting your PowerPoint (.ppt) file into a video (.mp4 or .mov file) which will have both your audio and visuals contained in one file.
Before recording your narration or voice-over – tips.
Make sure your microphone works..
An important step to take before recording your audio is to ensure your microphone is set up correctly and your voice can be played back clearly. The video below runs through how to set up an external mic for your Windows or Mac .
First, plug in your headset or microphone to your computer if you are not using the inbuilt mic. Or if you are using a Bluetooth headset, make sure it’s paired/connected properly.
To make sure everything is working OK, access the audio device settings on your computer as shown in the video above. While you are in the device settings menu, select your microphone and set it as default.
You can test the playback quality by using the free software tools on your machine:
- Windows 10 – Use Voice Recorder (previously called Sound Recorder)
- Mac – Use Voice Memos
- Chromebook – New in 2021 from OS 88. Use Screen Capture to test your audio recording by pressing the Ctrl, Shift, and Overview keys to bring up the capture bar. ( You may need to enable by entering chrome://flags in the URL address bar and search for “capture” in the search bar or by entering chrome://flags/#screen-capture in the URL address bar.)
Note – In PowerPoint 2016, you cannot change which microphone device you want to record in screen recording mode (so do it first!), however in 2019/Office 365 it is possible to do so, by using the settings link in the full-screen recording mode.
How to Record Audio in PowerPoint Step-by-Step Instructions.
Versions Covered: PowerPoint 2013, 2016, 2019, 2020, Office 365, PowerPoint for PC / Windows, PowerPoint for macOS and Chromebook.
- Start by opening the PowerPoint presentation in which you want to record your audio.

- Stop Recording. To end the slideshow recording, click the Stop (square button) at the top left. Or keyboard shortcut – Press Alt+S. You’re done recording your captivating and engaging PowerPoint slideshow with a voice-over / narration!
- Exit full screen recording window. Click the (x) button int the corner. To save your slide timings, click “yes” if prompted. When you return to your slide view, a small icon of a microphone appears on the bottom right corner of each slide. Click this icon to hear your voice over for any particular slide.
Advanced PowerPoint Audio Recording Options.
Add annotations to your recorded powerpoint slide show..
Adding annotations to your PowerPoint presentation is an optional step and can help your presentation stand out. But, what are annotations, and how should you use them when recording your voice-over?
If you want to draw a user’s attention to a specific area or to add some interactivity; using annotations is the way to do it. It is basically a virtual marker you can use to highlight elements in your presentation slides e.g by circling a word or picture, underlining a phrase, writing additional notes on-screen, or pointing to specific items.
To use the Annotation Tool in PowerPoint: Scroll to the bottom of the full screen recording view (as shown in the image below). Then, select any of the tools available (the laser pointer, highlighter or pen) and annotate your slide, by drawing with them using any mouse or other pointing device.
Note, this will not make a permanent change to your slides, it’s only visible in the recorded playback!

Using the Timings Function to Adjust Recording Speed.
As you record your narration, you will be able to see a clock in the bottom left corner showing how much time you spend on each slide, against the total amount of time recorded so far.
While this is very helpful for rehearsing your presentation, it’s quite common to have issues with timings with your recorded slideshow. For example when you have switched to the next slide too quickly.
To Change the Timings of Your Recording: Navigate to the Slide Show tab in the top ribbon > (Next to the Record Slide Show icon, we used before) > click the Rehearse Timings icon. The presentation will now once again go to full-screen mode, and you can use your arrow keys to change the slides and set new timings.
Clearing or Deleting your narration and / or timings
If you are not happy with your voice-over on a slide or wish to start the recording from the beginning, PowerPoint gives you some easy options to do so.
To Delete a Narration or Timings: Navigate to the Slide Show tab in the top ribbon OR the Recording Tab. Select the down arrow on the “ Record Slide Show ” button > from the menu choose “ Clear ” > Select the appropriate timings and/or narration option.
Save and Distribute the Presentation with Audio as a Movie / Video file.
Now that you are finished recording your PowerPoint presentation, your voice audio will be attached to the same file and it’s time to distribute it by exporting your PowerPoint (PPT file) into a video (.mp4 or .wmv) .
To Export your Presentation as a video: In PowerPoint navigate to File Menu > Export > Select your preferred options. (E.g.) File Format: MP4 . Quality Width 1,920 Height 1,080
Recording Audio Tips and Tricks
Macos 2019 – powerpoint audio recording tip.
To give PowerPoint access to record your screen in macOS you need to set up the right security and privacy permissions:
- Open System Preferences
- Select Security & Privacy
- Select Privacy tab.
- In the left panel scroll to Screen Recording > click “ +” icon .
- In the “Applications” window select PowerPoint

Microsoft 365, 2016, 2019 for Windows PC – Recording tab in PowerPoint
Microsoft 365 subscribers with the Click-to-Run version of Microsoft 365 for Windows PC can use the Recording tab .
The Recording tab shows the recorded video , screenshots, and screen recording options in a single menu for easy access. To turn on the Recording tab of the ribbon in PowerPoint 365 Windows PC
- Select the File menu > click Options .
- In the PowerPoint Options dialog box > click Customize Ribbon
- In the right-panel > select the Recording check box.
- Click OK .

If you click the button on the bottom of the “Record Slide Show” button, you can start from the beginning of the slideshow or from where you are.

Knowing the basics of recording audio in PowerPoint is a powerful tool for anyone who wants to make a downloadable slideshow, create an internet streamed webinar, upload a video for YouTube, Vimeo, or any other digital platform such as your website or other digital platforms.
You may also like: How to Turn a PowerPoint Into a Video

Related Posts
How to add music to powerpoint slideshow and find free music, [solved] how to upload powerpoint to google drive, 10s method: how to add bullet points in powerpoint.
How to do a voiceover on a PowerPoint presentation and add pre-recorded audio to your slides
- You can record a voiceover in PowerPoint and insert it into your next presentation using the software's Audio recording feature through the Insert menu.
- Recording and inserting a voiceover into PowerPoint is a relatively similar process on an Apple Macbook and Windows PC.
- Once you've recorded your audio, you can click the microphone icon that appears on your slide and playback your recording.
- Visit Business Insider's Tech Reference library for more stories .
Public speaking is a valid and common fear. And although you might be trying to hone your public speaking with your free time at home , there's a way you can incorporate your voice into your next PowerPoint presentation without the pressure of speaking on the spot.
How? Microsoft PowerPoint has a feature that lets you create narration for all slides as you see fit. This way, you can record — and re-record — voiceovers for your presentations that won't make you cringe.
The process is virtually identical for both Mac and PC users and you can use your computer's built-in mic or a headset. Whatever your operating system of choice is, easily record narration over a PowerPoint slide in a few quick steps.
Check out the products mentioned in this article:
Microsoft office (from $149.99 at best buy), apple macbook pro (from $1,299.00 at apple), acer chromebook 15 (from $179.99 at walmart).
SteelSeries Arctis 1 Wireless Headset (From $92.49 at Amazon)
How to record a voiceover for PowerPoint on a PC
1. Open a new or existing or presentation in PowerPoint.
2. From the top toolbar, select "Insert."
3. Toward the far right side, click "Audio."
4. Choose "Record Audio…"
5. Name your audio file.
6. Click the circle icon when you're ready to start recording.
7. Select "OK" when you're done recording.
8. A microphone icon will indicate the narration has been added to the slide.
How to record a voiceover for PowerPoint on a Mac
1. Open a new or existing or presentation in PowerPoint for Mac.
2. Find and select "Insert" from the top toolbar.
4. Select "Record Audio…"
5. Name the audio file, and click the circle icon when you're ready to start recording.
6. Click "Insert" when you're ready to finalize.
7. You can click the microphone icon on the slide to hear your recording.
Related coverage from Tech Reference :
How to download and access microsoft powerpoint on your mac computer, how to add a border to slides in powerpoint, and give your slideshow a sleek design, how to change and format the background of your powerpoint slides to custom designs, how to change your language settings in microsoft powerpoint in 3 different ways, how to copy or duplicate a powerpoint slide and put it anywhere in your slideshow.
Insider Inc. receives a commission when you buy through our links.
Watch: Apple just launched a $6,000 Mac Pro, available this fall
- Main content
#1 Screen Recorder
Free Video Course
Mini AI Tools
Best Product Videos
Try Tella for free
October 16, 2023
How to Record a PowerPoint Presentation (with Audio)

Elevate your PowerPoint presentations with this comprehensive guide on creating captivating, self-paced narrations, enhanced with transformative tools and the power of software like Tella.
Table of contents
Record with powerpoint's built-in features, record with obs, record with tella.
Other solutions
Things to do before you start recording
Tips for creating engaging powerpoint recordings.
Engaging virtual presentations are essential in today's world. This guide will walk you through recording a PowerPoint presentation with voiceover. Doing this makes your presentation more professional and polished for your audience. Let's begin.
Step 1: Open your PowerPoint presentation
First, open the presentation you'd like to record with voice-over. This guide will be for he 365 version of PowerPoint, but bear in mind you can still do this in PowerPoint versions all the way back to 2013. The settings are pretty much the same, just maybe in a slightly different place.
This doesn't work, however, on the Web version of PowerPoint.
Whatever version you're using, ensure all your slides and content are ready for narration. This will save time and provide a smoother recording experience. Far better than simply making it up as you go along.
Step 2: Prepare for recording
Navigate to the slide where you want to start your recording. If you're planning to record the entire presentation, start with the first slide.
Step 3: Start the recording

In the PowerPoint menu, select the Slide Show tab. From here, click on Record Slide Show. This will open the recording window with two options to choose from:

Record from Current Slide : This option allows you to start recording from your selected slide.
Record from Beginning : This option enables you to record the entire presentation starting from the first slide.
Click on your preferred option to proceed with the recording.
Step 4: Recording the narration and timings
When you're ready to start recording, click on the red Record button (round circle with a dot in the center). A three-second countdown will begin, and once it reaches zero, start speaking to record your voiceover.
Remember that the transition between slides isn't recorded, so pause your narration during slide transitions and resume speaking once the next slide appears.
Step 5: Manage your recording
During the recording, you have several tools at your disposal:
Pause: Use this button to pause your recording if needed.
Stop: Click this button to end your recording.
Replay: This allows you to review your recording.
Pen, Highlighter, or Eraser: Use these tools to mark up your slides during the recording, if desired.
Step 6: Edit or remove narration and timings
If you're not satisfied with your narration or timings, you can remove or edit them:
If you're still in recording mode, click on Clear.
Choose one of the following options:
Clear Recording on Current Slide: To delete the narration and timings on the current slide.
Clear Recording on All Slides: To delete the narration and timings from all slides at once.
Consider re-recording the sections that need improvement.
Step 7: Save and share your presentation

Once you're satisfied with your recording, save and share your presentation as either a PowerPoint file or a video:
Click on File and select an option like Save or Export.
Follow the on-screen instructions to save or export your presentation.
Now your voice-over presentation is ready for your audience. They'll be able to view and listen to your narration as they go through the slides.
We hope this step-by-step guide helps you create a polished PowerPoint presentation with a voice-over. Good luck, and happy presenting!

For added flexibility and features, you may want to swing by other recording software.
For instance, OBS Studio offers a good deal of control, allowing you to tweak all sorts of audio and visual settings. However, it may be a little complicated if you're new to the game. Here are the steps to do this.
Step 1: Install OBS Studio
If you haven't already, first download and install OBS Studio from the official website . The software is available for Windows, macOS, and Linux.
Step 2: Open OBS Studio
Open OBS Studio. You'll see a black screen; this is your canvas where you'll be recording your content.
Step 3: Setting Up Your Scene
Click the '+' button under 'Scenes', name your new scene. This allows you to create different recording settings for different types of needs.
Step 4: Setting Up Sources
Underneath 'Sources', click the '+' button. This allows you to add different sources to your scene. You'll want to add two sources:
Display Capture: This captures your entire screen. Name the source, click OK, then OK again.
Audio Input Capture: This captures your microphone. Again, name the source, select your microphone from the dropdown, and hit OK.

Step 5: Positioning Your Sources
You may see the 'Display Capture' source covering up everything. Click on 'Display Capture' source and drag it down the list until it's under your 'Audio Input Capture'. This ensures your voice is picked up over your presentation.
Step 6: Open PowerPoint Presentation
Open your PowerPoint presentation but don't start the slide show yet.
Step 7: Adjust OBS Studio Settings
Go back to OBS. Make sure your Display source is selected, then hover over the canvas. A red border will appear around your display source. You can resize and reposition this to only capture the portion of your screen that your PowerPoint presentation will take up.
Step 8: Start Your Presentation
In PowerPoint, start your slide show. OBS should now be capturing your presentation. Any slides you progress through in PowerPoint will be captured by OBS.
Step 9: Start Recording

When you're ready to start your presentation, go back to OBS Studio and click on the 'Start Recording' button located in the lower right. Once you hit this button, everything captured in OBS is recorded until you hit 'Stop Recording.'
Step 10: Save Your Recording
Once you've finished your presentation, click 'Stop Recording'. Your video is automatically saved in a specific location. To find where your recordings are saved, go to the 'File' > 'Show Recordings' in OBS.
And that's it! Now you know how to use OBS Studio to record a PowerPoint Presentation and voiceover using a microphone.
If you're looking for something simpler, ScreenPal (formerly Screencast-O-Matic) is a great choice. It's ideal for getting the job done without any distractions. However, you get less control over your content and the final product. OBS has a few other contenders, including Streamlabs . Check it out if OBS doesn't do it for you.
Comparatively, this software fares well with a broader set of controls than PowerPoint. However, they might demand a steeper learning curve, so brace yourself for a bit of a climb.
Now you're all prepped and cozy with your goals, spruced-up presentation, and audio equipment, it's time to step into the recording booth.
And folks, today, we'll spotlight this cool little tool called Tella. It's like your Swiss army knife for screen recording, fully equipped to integrate smoothly with PowerPoint, too.
Talk about a dream team!
Step #1 - Getting started with Tella

Alright, first things first. We've got to get Tella onto your computer.
There are several ways you can do this, including;
Running the Web App
Running the Chrome extension
Running the Mac App
Simply download or log into the one you want to use. It's as easy as pie.
Once you've installed Tella through the app, run it, and you'll see a slick little control bar that'll be your best friend throughout this process. If you're working through the web app, just click "New Video" to get started in your browser. Don't worry, you can still screen record through the web app.

Have your presentation ready already?
You can actually upload the presentation to Tella and run the PowerPoint through the app. Just click the "New Video" option, More, and then import your slides. All major presentation formats are compatible!

Now, we've got a couple of settings to tweak.
Click on the mic icon to configure your audio input settings. Make sure it's capturing the right microphone (yes, the one we picked out earlier). Next up, choose your recording area.

You'll want to adjust the recording frame to fit your PowerPoint presentation just right—think of it like framing the perfect picture!
Step #2 - Roll cameras, action!
Start recording your PowerPoint by hitting the red button. As you present, Tella will record your voice and slides.
You can pause, restart, or stop anytime using the controls. If you go off-topic, pause and restart.
When moving between slides, adjust your voice volume to match the mood. Keep a smooth rhythm, and your audience will follow along.
Step #3 - Wrapping it up
Breathe out; you made it!
But before we call it a day, let's give our recording a quick polish. Click on 'stop' when you're done, and Tella will save your recording.
Now, fire up Tella's editing tools and trim any unnecessary bits—like when you knocked over your coffee mid-slide (we've all been there!). You can also add captions, effects, and basically anything you need to bring your presentation to life.

Aaand cut! With your shiny new feed of your PowerPoint presentation, you're all set to captivate your audience, one slide at a time. Isn't Tella just swell?
Other solutions to record a PowerPoint
There's a whole parade of cloud-based tools like CloudApp ( now Zight ) or Loom that lets you record right from your browser! They store your recordings in the cloud, allowing you to access or share your work from anywhere.

If you're using Zight, a basic step-by-step guide would look like this:
Open Zight: Start up the Zight application on your device. Zight is available for Mac, Windows, and Chrome.
Prepare Your Presentation: Open your PowerPoint presentation that you wish to record. Make sure it's in view on your screen.
Capture & Record: In Zight, choose the ' Screen Recorder ' feature to capture and record your screen. Make sure your entire PowerPoint window is in the capture area.
Voice-Over: As Zight records the screen, start your PowerPoint presentation and provide your voice-over. Ensure your device's microphone is on and working. Zight will record the PowerPoint and your voice simultaneously.
Edit & Annotate (Optional): If needed, make use of Zight's editing capabilities. You can trim segments of your recording, add text or highlight areas for emphasis.
Save & Share: Once you're satisfied with the recording, save the file. You can also share your recorded presentation directly from Zight through a generated link.
While easy, remember, even clouds have their gray days. With these tools, you rely on internet speeds to keep things running smoothly. Plus, you might stumble upon some limitations in editing features compared to our pals like Tella.

Before recording, you need to plan and set up. Envision your end product so you can make the right choices. This lays the groundwork for great content. This plan includes;
Setting your goals

Know the purpose of your presentation. This gives it clear direction, like finding your true north.
The purpose could be educating, convincing, or rapport building. Align it with your company or personal goals.
Once you know the purpose, you're halfway there.
Creating content to fit your audience
Tailor your content to your audience. Understand their backgrounds, needs, and preferences.
Align your content accordingly. Use familiar examples and anecdotes to create a personal, engaging experience.
Let your audience know you speak their language.
Polishing your presentation

Use good design - neat layouts, color schemes, legible fonts. Make it visually appealing.
Add informative visuals like diagrams, charts, and images to convey information effectively.
Sprinkle in interactivity - polls, links, videos. This engages your audience.
Review every slide carefully to fix any errors. Consistency is key.
Polish your presentation to make it the best it can be. This will engage your audience and get your message across clearly.
Prepare your audio equipment

Pick a good microphone for clear audio . A USB mic is simple. A condenser mic offers high quality. A lapel mic leaves your hands free.
Tune your audio settings for the best sound quality. Monitor your audio live to avoid background noise.
With your microphone and settings ready, you're set to start recording high-quality audio.

Creating an engaging PowerPoint presentation takes skill. Follow these tips to boost engagement:
Speak clearly and expressively. Your voice guides the audience, so use a friendly, steady tone.
Use visuals. Graphics, charts, and animations complement narration. Strike a balance between visuals and audio.
Provide resources. Include downloads, links, or CTAs to encourage interaction after the presentation.
Edit thoroughly. Refine audio levels and flow. Even basic video editing goes a long way in delivering a seamless presentation.
With these techniques, you can create compelling presentations that captivate your audience.
Wrapping up
We've covered every tool to record PowerPoint presentations with audio. Tella stands out for its easy interface, audio settings, and editing tools. It works seamlessly with PowerPoint, too. But the tool is only part of the equation.
You must also speak clearly, use visuals, provide resources, and edit your recording.
Whether making webinars, tutorials, or virtual classes, you've got this.
Are you ready to record your next award-winning PowerPoint?
Try Tella for your recording needs. Let your ideas take flight. Use Tella to captivate your audience, one slide at a time. Create presentations that engage, excite, and inspire.
Happy recording! Go make memorable presentations that resonate with audiences.

Jul 24, 2023
The Ultimate Chrome Screen Recorder Extension (with Audio)

May 19, 2022
How to Record Your Screen on a Mac

Aug 18, 2022
How To Record Your Screen And Webcam Simultaneously

Tella — Screen recording for creators
Learn more ->
Learn more about Tella ->
Create Your Course
How to do a voiceover on google slides or powerpoint, share this article.
Voice-over presentations offer a better learning experience because they are a more engaging way to learn.
Some students learn better through visual cues, while others learn by listening. However, adding voice-over narration to your presentations enables students to benefit from the best of both worlds. It allows adding important information and context to explain what’s on the slides – as if your students were attending a live lecture!
Now, you may assume adding voice-over to your presentations is complicated. However, it isn’t as tricky as you probably think! Once you have your slides ready, there are just a few extra steps you’ll need to take to add narration.
In this blog, we share four ways to do a voiceover presentation – voice-over Google Slides, PowerPoint, screen recording, and the Presentation lesson feature on Thinkific.
Before we get into the options, let’s quickly cover the only ground rule regarding recording voice-overs: Don’t sacrifice sound quality. Viewers are willing to put up with rough visuals but don’t forgive poor sound. Most computers have built-in microphones that sort of get the job done, but we recommend headphones or a USB Microphone to improve the quality of your voiceover.
Related: How To Set Up A DIY Home Video Recording Studio For Cheap
Now, let’s get into your voice-over options. Toward the end of the article, you will also find five tips for adding a good voice-over. If you’d like to sit back and learn, check out this video we created on how to easily add voiceover to your slides:
4 ways to do voice-over presentations
There are two main routes you can take to record a voiceover for your presentations :
You may want to use PowerPoint or Google Slides to add voiceover to each slide that plays as students make their way through the presentation. PowerPoint has recording functionality built-in, but with Google Slides, some extra steps are involved with recording your audio, then uploading it to Google Drive before you can embed it on each slide.
Alternatively, you may want to ditch the slides and create a screen recording of the presentation. To do this, you can use any screen recording software as you talk through the slides and turn your presentation into a video lesson. And if you’re a Thinkific user, you can create voiceover slides with the Presentation lesson feature.
Use this list to skip to your preferred voice-over narration method:
- How to do a voice-over on Google Slides
- How to do a voice-over on PowerPoint (Microsoft Office)
- How to do a voice-over screen recording
- How to do voice-over slides with Thinkific
Option 1: How to do a voice-over on Google Slides
Google Slides doesn’t have built-in functionality to record your slides, but you can still accomplish the same with it with an extra step. You can add voiceover to Google Slides by uploading an audio file saved in Google Drive to each slide.
For this option, all you need is Google Slides and a computer with a microphone.
Let’s go through the steps-
Step 1: Create your audio files for each slide and upload them to Google Drive.

Tip: Organize your files with a naming convention. You’ll need to locate these files in the next step. To keep them organized , following a naming convention for your audio files, including Course, Lesson, and Slide numbers, helps.
Step 2: Insert audio to your slide, and configure play settings
Next, you can insert audio from your drive into each slide individually.

The files you uploaded should be in the Recent tab, but you can also search for the file manually.

Step 3: Configure your audio settings
Google Slides gives you the option to specify how the voiceover should act. To open the Format options menu, you can click on the speaker icon, then go to Format options under the Format menu.

Voice-over formatting options for Google Slides:
- Autoplay- You can choose if you want the audio to play automatically or manually when a student clicks the slide.
- Loop- You can define if you want the recording to stop or repeat once it gets to the end.

- Button size and colour – You can resize the button by dragging the corner and changing the colour using the “Recolor” option.

An online course or membership site can be a wildly successful way to monetize content.
Need help figuring out where to start? Get free training and start building for free !
Option 2: how to do a voice-over on PowerPoint
Microsoft Powerpoint has a feature that many average users don’t know about, which allows you to add voice-over narration to your PowerPoint. For this option, all you’ll need is Microsoft PowerPoint and a computer with a microphone.
On Windows computers:
Step 1 – in the top menu, go to slideshow >> record slideshow..
You have the option to record from the beginning of the presentation or from the current slide you’re on.

Step 2- Start recording
Once you select which recording you’d like to go ahead with, you’ll be in full-screen mode with options to record, stop, and replay. Once you click record, there will be a countdown timer from 3.

Anything you type in the notes section of the PowerPoint can be viewed by clicking on the notes button at the top.

The recording will stop automatically once you make it to the final slide. You can also pause, stop, or replay a recording at any time by pressing the pause button in the top left of your screen.

You can also record a video of yourself in the corner by selecting the video option in the bottom right corner.

Step 3 – Testing your narration
Once you’re finished, a speaker icon will appear at the bottom right corner of all the slides with recorded narration.

Just hover over the speaker icon to play, skip to time, or adjust the volume to play the narration.

On Mac Computers
Step 1 – click on slide show..

In the top menu, click Slide Show and choose the slide you want to start working on. Unlike on Windows, you will have to select the slide you want to work on manually. If it is the first slide you wish to choose, do so.
Step 2 – Click on Record Slide Show

Step 3 – Choose the input method

On the top of the screen, you can turn off the camera, if you wish to, or turn it on.
The next button helps you choose the voice input, whether your Mac’s in-built mic or an external device.
Step 4 – Add a voice-over to slides

As with the Windows version, add voice-over to the slides one by one, and add notes if you wish.
Step 5 – Complete recording

Once done, click on the large red button to start recording. Once your voice-over is complete, click the same button to stop recording. Again, add notes if you wish to. Then, move to the next slide.
Step 6 – Click on tips for more controls

Click on Tips for several functions and shortcuts you can use on your Macbook to control your voice-over recordings. The Mac version of the PowerPoint tool is much easier to use.
Step 7 – Verify your voice-over for accuracy

After your voice-over is complete, return to your presentation, and make sure that your voice-over is accurate by clicking on the white “Play” icon at the bottom of each slide.
Option 3: how to do a voice-over with screen recording
The last option involves recording your screen and audio as you discuss the presentation.
Check out our guide: How To Record Your Screen On Any Device .
We’ll show you free options and two paid options with advanced editing features:
Hit the record button on the video conferencing software
The easiest and cheapest option for screen recording without additional software is to join a Google Meet or a Zoom call by yourself, share your screen, and press the recording button.
This may be easy for a simple presentation but may prove frustrating for a longer presentation – the inability to edit means you’ve got one shot to make it through your presentation without any mistakes.
Use your computer’s built-in screen recorder
On Windows 10 , just click Windows + G at the same time to open the Game Bar, and press “Start Recording”.
If you’re on a Mac , you can make a video recording of the entire screen or just a portion of it. Shift-Command(⌘)-5 will display on-screen controls for recording the entire screen.
Two paid screen recording options
If you want the ability to edit and customize your video and access more editing options, you’ll need to invest in some software like Screenflow or Camtasia .
Here are our two favorite options , depending on whether you’re on a Mac or Windows System:
Screenflow is a software program for video editing and screencasting for Apple users and is one of the best options for screen capture. This software functions well as a video editor for novice editors, but it lacks the deep customization and functions of a more advanced editor like Adobe Premiere Pro.
Download free trial of Screenflow
Camtasia is an all-in-one screen recorder and video editor that works on both Windows and Mac. It is one of the most widely used systems for screen recording and video editing. It is popular for its user-friendly interface and simple video editing.
Try Camtasia for free
Option 4: how to do voice-over presentations with Thinkific
If you have created a presentation on an external platform like Keynote , PowerPoint or Google Slides, you can use a Presentation lesson to display it within your Thinkific course!
This function enables you to record audio while speaking to specific slides. You also have the option to upload a recording for each slide.
This is a great way to create a customized experience for your students right within Thinkific .
To create a Presentation lesson, you will need to upload a PDF file. Each page in your PDF will be converted to images that will be displayed as slides within your Presentation lesson for students to navigate through.
If you have created a presentation in an external platform like PowerPoint you can simply export it from that platform as a PDF to later upload to Thinkific!
Here are the steps to create a Presentation lesson with voice-over on Thinkific .
With that, let’s explore what it takes to ensure a good voiceover.
Follow these five tips for adding a good voiceover
- Invest in a good microphone – Most cell phones and computers come with built-in microphones. These may not provide the professional-grade audio quality necessary to create compelling online lessons. Therefore, you must invest in a professional microphone that eliminates noise and disturbances. As we mentioned earlier, the most important rule is to ensure that your audio quality is high.
- Use a teleprompter – Although you may speak out your presentation and elaborate on the impromptu bullet points, you could make mistakes. These mistakes may make you seem like a novice. A teleprompter can help you read out your sentences in front of the webcam or the mic without making any errors. The result is – top-notch quality presentations with voiceovers.
- Clear your throat – Most people do not realize the importance of a good quality voice. In fact, voice-over artists are hired simply because of their excellent voices! While you do not need to hire professional voice-over artists, you can ensure that you sound your best by gargling your throat and clearing it before you begin to record. In other words, avoid recording your voiceover if you have a sore throat or when your voice sounds hoarse. Keep a jug of water ready next to you to keep sounding fresh.
- Sound confident – Confidence doesn’t come with good quality microphones and teleprompters alone. Practice talking in front of a mirror, which will help ensure that you sound and look great. In fact, dressing professionally just before you record your voice-over may also have psychological benefits – you could feel more professional and thus sound more professional and confident.
- Edit audio if necessary – Despite all the care taken, you may make mistakes during voice-over recording. Listen to your slides repeatedly and make changes until you are completely satisfied with how you sound. Although there are audio editing tools out there, they may not be necessary for simple presentations such as the ones required for online lessons.
Whichever method you choose, turning a regular presentation into an engaging voice-over is sure to improve the quality of your presentation.
But here’s a thought: Why not monetize your presentations with an online course?
Sign up with us for free and try it out (we dare you) .
Not ready to take the leap, but still interested in improving the quality of your production? Check out one of these related guides:
- How to Create Video For Your Online Coaching Course
- How to Improve the Video Production Quality for Your Online Course
- Best Equipment & Software For Creating Online Courses
- 4 Elements of Effective Video Content for Online Courses
This guide on voiceovers was published in August 2020 and was updated in October 2022.
Colin is a Content Marketer at Thinkific, writing about everything from online entrepreneurship & course creation to digital marketing strategy.
- How To Craft Magnetic & Compelling Learning Outcomes
- Essential Questions To Ask In Your Training Evaluation Survey
- Best Equipment & Software For Creating Online Courses
- How to Create a Compelling Sales Page for Your Online Course
- What Is Universal Design For Learning? (Examples & Best Practices)
Related Articles
Building a b2b online learning experience to grow your business.
Read this blog post to learn how to successfully build, pitch, and sell your online courses to clients in the B2B space.
Teaching History Online: A Comprehensive Guide
Are you a history teacher or enthusiast? Interested in monetizing your passion? Use our guide to learn how to teach history online.
How to Turn Your Blog Content Into an Online Course
If you're a blogger, the transition into creating online courses is a natural one. Here's how to turn your blog into a course you can sell to your audience.
Try Thinkific for yourself!
Accomplish your course creation and student success goals faster with thinkific..
Download this guide and start building your online program!
It is on its way to your inbox
- Center for Innovative Teaching and Learning
Using VoiceThread to Record Narration Over Slides
This guide summarizes a solution for instructors who need a tool to allow them to record narration over a PowerPoint presentation. This approach is ideal if you were planning to present slides in your face-to-face course.
To use VoiceThread, you need access to Blackboard, and a microphone of some kind (e.g. integrated into your computer or a headset) or a telephone. If you want to capture webcam video as part of your recording, you will of course need a webcam.
Here are the steps to create a recording with VoiceThread
These instructions are slightly different for Blackboard Original courses and Blackboard Ultra courses.
Blackboard Original Courses
- Login to Blackboard and access a specific course
- Click on a content area in your course menu, such as Content
- From the Build Menu , choose Build Content , then VoiceThread
- Provide a Title and Description (as needed) and click Submit
- You should now see the VoiceThread link
- Click the link you just created
- Choose Individual VT from the configuration menu
- Click the grey Create new VoiceThread on the top left of the screen
- From your computer, drag your PowerPoint presentation to the Add Media area (or click the plus sign, then My Computer to browse for your presentation)
- Enter a Title and Description for your VoiceThread video
- Wait while the presentation processes, this could take between 1 and 5 minutes depending on the size of the presentation
- Once the presentation is processed you will see that each slide is displayed separately. Click the Comment button at the top of the window to open the presentation.
- For any slide that you want to add audio, click the comment bubble at the center of the timeline and choose the microphone icon to begin recording (or use the telephone icon to record via your telephone if you do not have a microphone)
- When you finish your audio for that slide, you can either click the next slide arrow and keep recording or click the Stop Recording link
- Once you are finished recording audio, click Stop Recording , then Save
- Click the grey X at the top right to return to the share window
- Click the blue Share with class button then the next Share with class button.
The video will begin processing, and captions will be added automatically when they are ready.
You can click the Return to Course link and close the tab to return to your course Depending on the length of the video, you can return to the course and click the link to preview the video. This is the same view students will experience.
Blackboard Ultra Courses
- Click the plus icon to add content and choose Content Market
- Click the plus icon in the lower right corner of the VoiceThread tile
You can click the Return to Course link and close the tab to return to your course
Depending on the length of the video, you can return to the course and click the link to preview the video. This is the same view students will experience.
Phone: 815-753-0595 Email: [email protected]
Voice over generator for PowerPoint

Table of Contents
Using a voice over generator for PowerPoint adds style, professionalism, and natural properties to your presentation. Here’s how.
PowerPoint (PPT) is Microsoft’s app for making and editing presentations. As part of Microsoft Office, PowerPoint is available on Mac, PC, and mobile devices. It lets users create brand-new or template-based presentations, add text, art, images, animations, or videos, and share their work with others.
Adding voice over as audio support is particularly useful when making PowerPoint presentations and can enhance content delivery. Here’s how to use a voice over generator for PowerPoint, no matter whether you’re using the online PPT maker or the desktop PPT creator app.
What makes a good PowerPoint presentation?
A good PowerPoint presentation seamlessly blends form and function to engage, inform, and persuade its audience. At its core, clarity and conciseness are paramount, ensuring that slides are not overloaded with excessive text or overly complex graphics. Instead, each slide should convey a singular idea, augmented by impactful visuals and limited bullet points. A consistent design theme with appropriate color contrasts, legible fonts, and organized layouts provides visual cohesion and ensures easy readability.
Additionally, the integration of relevant images, charts, and graphs can bolster comprehension and retention of the content. Beyond the slides themselves, the presenter’s delivery plays a pivotal role—a dynamic narrative, aligned with the visuals, can bring the content to life, sustaining audience attention and fostering understanding. Ultimately, a successful PowerPoint presentation is one that is both visually appealing and effectively communicates its intended message.
Why are voice overs a good idea for PowerPoint?
Voice overs complement PowerPoint presentations in many ways. Here are some the best reasons to add a voice over to a presentation.
Boost reliability and validity
Adding clear audio voice over to a presentation adds validity to its content. The audience can feel that validity, which in turn increases the feelings of reliability and adds faith in the content.
Add emotion
Besides increasing validity, a voice over on PowerPoint slides makes the content more emotional. The presentation adds passion that accentuates the vision and values of the presentation.
Serve as a call to action
Voice over functionality is very captivating. It passes the call to action to your audience even without apparent references. This is mainly because the presentation becomes more emphatic when natural-sounding voices are behind it.
Make content more inclusive
Text to speech software and a voice over make any presentation more inclusive and accessible. People with learning disabilities like dyslexia, ADHD, and visual impairments can listen to the content without feeling overwhelmed about reading it.
How to record a voice over using PowerPoint
Recording and adding a voiceover on PowerPoint is simple. Just follow the steps below, and you’ll be good to go.
- Open the PowerPoint presentation where you want to add a voice over.
- Hit the “Record” button from the upper-hand ribbon. You can also choose from different recording options in the “Record” tab.
- You can use the text from the presentation as a teleprompter as you record yourself. Any existing notes will be transformed into text during the recording.
- With proper permissions, turn on or off your camera or microphone.
- Press “Start recording” when ready.
- Use the “left” or “right” arrows to record voice overs for a particular slide.
- Make pauses by pressing the pause button or selecting “Stop” to finish.
- Review the recording by pressing the “Play” button. If you’re unhappy with it, you can edit it by pressing “Retake recording.”
- Export the presentation as a video file by hitting “Export” and “Export Video.”
Create a professional voice over quickly and easily with Speechify Voiceover Studio
As you can see, adding a voice over to your PowerPoint presentation can be done from within the app. However, the steps may be a bit too complex for some users. Also, you may not be comfortable with the idea of using your own voice.
But luckily, we have a solution for that.
Originally just a text to speech (TTS) app, Speechify has now expanded into fully customizable, real-time AI voiceover generation with Speechify Voiceover Studio . You can use it to create professional voice overs that sound like real human voices for Microsoft PowerPoint, Google Slides, and other—in addition to recording e-learning and tutorial videos, podcasts, audiobooks, and more. Create audio dialogs, training videos, or stunning slide-show presentation voiceovers in seconds.
The human-like voices, plenty of playback options, and affordable pricing make Speechify Voiceover well worth the consideration.
You can use your own video editor to edit the text to speech voices however you like, or you can use Speechify’s own AI video maker . And if you don’t want to use PowerPoint or Google Slides, you can create your slide-show presentation with Speechify AI Slides.
Here’s an overview of Speechify’s AI Voice Generator features:
- More than 200 high-quality AI voices
- Over 20 different languages and accents
- Complete customization over pronunciation, pauses, pitch, and more.
- 8,000+ licensed background music soundtracks
- Unlimited uploads and downloads
- Commercial usage rights
- 24/7 customer support
- Fast audio editing and processing
- Export in WAV or MP3 files
Try Speechify Voiceover Studio today
Speechify Voiceover Studio can provide high-quality natural-sounding voices for your PowerPoint presentations. The ease of use and quick generation of audio files make this app suitable for users of all ages and computer skills.
Try Speechify Voiceover Studio for free today.
How do I set up voice over in PowerPoint?
You can use the app’s in-built voice recorder feature and record yourself or use third-party computer-generated AI voices offered by Speechify.
Can you put a voice recording over a PowerPoint?
Yes, you can use your own voice recordings or computer-generated voices from third-party software like Murf or Speechify over a PowerPoint slide.
How do you get PowerPoint to read to you?
PowerPoint has a speech recognition tool you can use to read text out loud. Go to “Speech Recognition,” then “Text to Speech,” and set the reading speed and other properties.
- Previous Best Arabic Text to Speech Voices
- Next Hindi Text to Speech Voices

Cliff Weitzman
Cliff Weitzman is a dyslexia advocate and the CEO and founder of Speechify, the #1 text-to-speech app in the world, totaling over 100,000 5-star reviews and ranking first place in the App Store for the News & Magazines category. In 2017, Weitzman was named to the Forbes 30 under 30 list for his work making the internet more accessible to people with learning disabilities. Cliff Weitzman has been featured in EdSurge, Inc., PC Mag, Entrepreneur, Mashable, among other leading outlets.
Recent Blogs

Is Text to Speech HSA Eligible?

Can You Use an HSA for Speech Therapy?

Surprising HSA-Eligible Items
Ultimate guide to ElevenLabs

Voice changer for Discord

How to download YouTube audio

Speechify 3.0 is the Best Text to Speech App Yet.

Voice API: Everything You Need to Know

Best text to speech generator apps

The best AI tools other than ChatGPT
Top voice over marketplaces reviewed
Speechify Studio vs. Descript

Everything to Know About Google Cloud Text to Speech API
Source of Joe Biden deepfake revealed after election interference

How to listen to scientific papers
How to add music to CapCut
What is CapCut?
VEED vs. InVideo
Speechify Studio vs. Kapwing
Voices.com vs. Voice123

Voices.com vs. Fiverr Voice Over
Fiverr voice overs vs. Speechify Voice Over Studio
Voices.com vs. Speechify Voice Over Studio
Voice123 vs. Speechify Voice Over Studio
Voice123 vs. Fiverr voice overs
HeyGen vs. Synthesia
Hour One vs. Synthesia
HeyGen vs. Hour One
Speechify makes Google’s Favorite Chrome Extensions of 2023 list

How to Add a Voice Over to Vimeo Video: A Comprehensive Guide
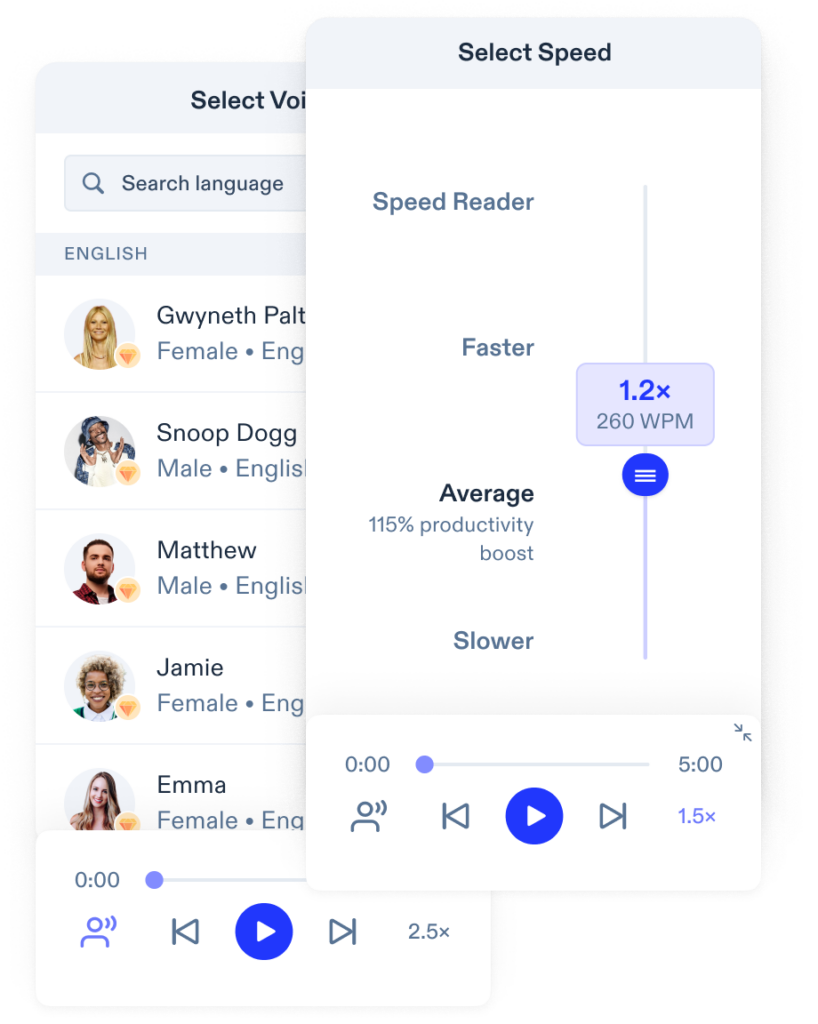
Speechify text to speech helps you save time
Popular blogs.
The Best Celebrity Voice Generators in 2024
YouTube Text to Speech: Elevating Your Video Content with Speechify
The 7 best alternatives to synthesia.io.
Everything you need to know about text to speech on TikTok

The 10 best text-to-speech apps for Android
How to convert a pdf to speech, the top girl voice changers.
How to use Siri text to speech
Obama text to speech
Robot voice generators: the futuristic frontier of audio creation, pdf read aloud: free & paid options.
Alternatives to FakeYou text to speech
All about deepfake voices, tiktok voice generator.
Text to speech GoAnimate
The best celebrity text to speech voice generators, pdf audio reader, how to get text to speech indian voices.
Only available on iPhone and iPad
To access our catalog of 100,000+ audiobooks, you need to use an iOS device.
Coming to Android soon...
Join the waitlist
Enter your email and we will notify you as soon as Speechify Audiobooks is available for you.
You’ve been added to the waitlist. We will notify you as soon as Speechify Audiobooks is available for you.
- Add animation Video
- Add transitions between slides Video
- Add, format, and record video Video
- Add and record audio Video

Add and record audio

Add and record audio, such as music, narration, or sound bites, to your PowerPoint presentation and select the playback options.
Add audio from your PC
Select Insert > Media > Audio .
Select Audio on My PC .
In the Insert Audio dialog box, select the audio file you want to add.
Select Insert .
Record audio
Select Insert > Media > Audio .
Select Record Audio .
Type in a name for your audio file, select Record , and then speak.
Important: Your device must have a microphone enabled in order to record audio.
To review your recording, select Stop and then select Play .
Select Record to re-record your clip, or select OK if you’re satisfied.
To move your clip, select and drag the audio icon to where you want it on the slide.
Note: If you’re using more than one audio file per slide, it’s advisable to put the audio icon in the same spot on a slide to find it easily.
Select Play .
Change playback options
Select the audio icon and then select the Playback tab. Then select which options you'd like to use:
To trim the audio, select Trim and then use the red and green sliders to trim the audio file accordingly.
To fade in or fade out audio, change the number in the Fade Duration boxes.
To adjust volume, select Volume and select the setting you prefer.
To choose how the audio file starts, select the dropdown arrow and select an option:
In Click Sequence – Plays the audio file automatically with a click.
Automatically – Plays automatically once you advance to the slide that the audio file is on.
When Clicked On – Plays audio only when the icon is clicked on.
To choose how the audio plays in your presentation, select an option:
Play Across Slides – Plays one audio file across all slides.
Loop until Stopped – Plays an audio file on loop until it’s stopped manually by clicking the Play/Pause button.
To have the audio play continuously across all slides in the background, select Play in Background .
Delete audio
To delete audio, select the audio icon on the slide and press Delete.
Add audio to your PowerPoint presentation
Play music for the duration of your slide show

Need more help?
Want more options.
Explore subscription benefits, browse training courses, learn how to secure your device, and more.

Microsoft 365 subscription benefits

Microsoft 365 training

Microsoft security

Accessibility center
Communities help you ask and answer questions, give feedback, and hear from experts with rich knowledge.

Ask the Microsoft Community

Microsoft Tech Community

Windows Insiders
Microsoft 365 Insiders
Was this information helpful?
Thank you for your feedback.
How To Add Audio To PowerPoint
Adding audio to your PowerPoint presentation can make all the difference if you want to impress your audience. Fortunately, it's easy to do. Here's how...
Presentations need to be visually appealing to maintain the audience's attention, but it can be a challenge to present all the information in a visually balanced way. This is where adding audio to your PowerPoint can be a game-changer .
Incorporating audio can help your audience absorb the concepts more easily and stay engaged for longer periods.
If you want to elevate your presentation game , adding audio is a highly effective way to achieve it.
In this guide, we will go through how to add audio to your PowerPoint presentation and adjust its settings to create an effective audio presentation.
How To Add Audio To PowerPoint 🔊
How to record audio for your powerpoint presentation 🗣️, powerpoint faq: adding audio 🤓.
Important disclosure: we're proud affiliates of some tools mentioned in this guide. If you click an affiliate link and subsequently make a purchase, we will earn a small commission at no additional cost to you (you pay nothing extra). For more information, read our affiliate disclosure .
- Open your PowerPoint presentation and navigate to the slide where you want to add audio.
- Click on the "Insert" tab in the top menu bar.
- Click on the "Audio" button in the "Media" section.
4. You will be presented with two options: "Audio on my PC" and "Online Audio." Choose the option that best suits your needs.
- To add audio from your computer, select "Audio on my PC" and browse for the audio file you want to add.
- To add online audio, select "Online Audio" and use the search bar to find the audio you want to add. Click on the audio to preview it and then click "Insert" to add it to your slide.
5. A small audio icon will appear once you have added the audio to your slide. You can click on this icon to play or pause the audio. 🔉
6. If you want to adjust the audio settings, such as volume or playback options, click on the audio icon and then click on the "Playback" tab in the top menu bar.
7. In the "Playback" tab, you can adjust the volume, select whether the audio should play automatically or on click, and choose whether the audio should loop or play just once.
8. Once you have made your preferred changes to your audio file, you can preview your slide by clicking on the "Slide Show" tab in the top menu bar and selecting "From Current Slide."
That's it! Your audio is now added to your PowerPoint presentation.
You don't need to be an audio expert with top-of-the-line equipment. You can simply record a voice memo using your smartphone or download free copyrighted audio to incorporate into your presentation.

👉 Please note: The process of adding sound effects or music to your PowerPoint is the same as adding audio recordings.
What types of audio can I add to my PowerPoint presentation? You can add various types of audio files, such as MP3, WAV, and AIFF files. You can also add online audio from websites such as YouTube or SoundCloud.
Can I edit the audio after I have added it to my PowerPoint presentation? Sure, edit the audio by selecting the audio icon on your slide and clicking on the "Audio Tools" tab in the top menu bar. From there, you can make adjustments to the audio settings, such as volume and playback options.
Can I add multiple audio files to a single slide? Yes, you can. Simply repeat the steps to add audio to your slide for each audio file.
How do I ensure that the audio plays during my presentation? You can select the audio icon on your slide and click on the "Playback" tab in the top menu bar. From there, you can choose whether the audio should play automatically or on click.
Can I adjust the volume of the audio during my presentation? Yes, you can adjust the volume of the audio during your presentation by right-clicking on the audio icon and selecting "Edit Sound Object." From there, you can adjust the volume slider.
Adding audio to your PowerPoint presentation is a simple and effective way to enhance the audience's understanding and retention of information while minimizing your effort.
Incorporating audio into your presentation makes it easier for your audience to comprehend information.
Also, you can convey a significant amount of information in a shorter period , avoiding information overload. It's a win-win situation for everyone!
Subscribe to our newsletter
Subscribe to be notified of new content on marketsplash..

How to Record Customized Camera Feeds With Cameo in PowerPoint
T he widespread adoption of remote work and virtual meetings has led many people and organizations to realize they don't have to be physically present in the same conference room to make presentations. In fact, you don't even need to conduct them live.
However, recording your PowerPoint slides with your face on them requires technical know-how and third-party apps like OBS. This makes recording presentations a bit difficult and discourages people from doing it.
Thankfully, Microsoft has addressed this issue in PowerPoint 365 with the Cameo feature. Here's what it is and how to use it.
What Is Cameo in PowerPoint?
Cameo is a PowerPoint feature that lets you add your webcam or any other camera feed into your presentation. This makes it easier to present virtually, as your audience can see you from within your slides.
Previously, you needed a third-party app like OBS to overlay yourself on your presentation. You can also use a green screen overlay in Capcut or other similar apps to achieve the same effect. However, this takes a lot of effort and know-how.
But with this feature, you can do it from inside PowerPoint with just a few clicks. Here's how to insert a cameo into your slides.
- Go to Insert > Cameo .
- After clicking on Cameo, PowerPoint will insert a placeholder object on your current slide and open the Camera Format tab.
- You can edit the object as you wish, much like any other shape on PowerPoint. You can also click on the options in the Designer pane on the right side of the screen to help you work faster.
- Once you're happy with its placement on your slide, click on the Preview button to see your live video.
With that, you can start presenting your PowerPoint slides via screen sharing while still keeping yourself on the screen.
How to Record Your PowerPoint Presentation With Cameo
You can also insert a cameo from Record > Cameo . Clicking on this will bring you to the same menu tab and insert a placeholder object for your video. However, even if you didn't set up Cameo beforehand, you can insert it directly while recording your presentation. Here's how:
- Go to Record > From Beginning or Record > From Current Slide .
- In the recording screen, click on the Camera icon at the top. This will insert a round object containing your video in your slides' lower-right-hand section.
- Click on the Red icon to start recording your presentation.
- Go through your presentation as usual. For more information, check out our guide on turning your presentations into videos .
- Once you've finished, click the Red icon again to stop recording.
- Click Export to go to the Export to video screen .
- Change the File Name as needed, then click Browse to select the location where you will save your recorded video.
- Once done, click Export Video .
With that, you don't have to spend much effort to add your video feed to your PowerPoint presentation recording. However, the app only places your video at one location across every slide; it might cover some of your content. That's why it's better to use the Cameo feature when you're building or editing your PowerPoint presentation.
If you're unhappy with your recording, press the Retake Video on the left of the record icon. You can pick between On Current Slide or On All Slides .
What You Need to Record Customized Camera Feeds
You need a webcam and a Microsoft 365 account to record your customized camera feed. Furthermore, you cannot use Cameo or record presentations in the PowerPoint web app. You need to download and install it on your computer to use these features.
The Cameo feature is already available on Microsoft PowerPoint 365 in Windows and Mac. However, recording your presentation with Cameo is only available on Windows. As of the time of writing, this feature isn't available for the main PowerPoint 365 for Mac version.
If you're running macOS, you must be a Microsoft 365 Insider to get this feature. However, since the Cameo recording feature is already announced in the Microsoft 365 Insider blog , we hope it will be available in the mainstream PowerPoint for Mac version in a few months.
Recording Your Presentations Is Now Much Easier
The Cameo feature has made presenting PowerPoint slides in video calls easier. And with the recording function, you no longer need a third-party app to put your video over your presentation.
You can integrate it into each slide, allowing you to control where you are on your screen. And you also save a lot of time and effort, as you can record and save your presentation as a video from within Microsoft PowerPoint.

IMAGES
VIDEO
COMMENTS
In the Options dialog box, click the Customize Ribbon tab on the left. Then, in the right-hand box that lists the available ribbon tabs, select the Recording check box. Click OK. To get ready to record, select Record on either the Recording tab or the Slide Show tab of the ribbon.
Record a Voiceover for Your Presentation. Open the PowerPoint presentation in which you would like to record a voiceover narration. Head over to the "Slide Show" tab and, in the "Set Up" group, select "Record Slide Show.". Once selected, a drop-down menu will appear. Here, you can choose to start the narration from the beginning or ...
In this you will learn how to record a voice over a PowerPoint presentation, how to edit that audio snippet in PowerPoint and how to save the presentation ...
Tutorial. Open your PowerPoint presentation or create a new one. In the taskbar, select Slide Show. Then click Record Slide Show. Choose the option Record from Beginning. You'll now get to a different view, which we'll call "Recorder View". Here's an overview: In the bottom right corner, you'll see three icons.
Go to Insert > Audio > Record Audio. Type a name, select Record, then read your script. Select Stop. Entire slideshow: Select View > Normal and choose the first slide. Select Slide Show > Record Slide Show > Record from Current Slide. To review the recording, click the sound indicator (it looks like a speaker) and then select Play to hear your ...
Open the Slide Show tab and select Record Slide Show . Select the Record button on the toolbar to start recording your narration. Use your keyboard arrow keys to move back and forth between slides. Press N or Space Bar to move to the next slide or animation in the presentation.
Record narration and timings for your presentation in Microsoft PowerPoint to give it a professional and polished feel. Record narration and timings:1. Selec...
Today's video will show you how to add and record audio narration to your slides in Microsoft PowerPoint. You'll need to make sure you have a recording devic...
How to record audio as a voice-over or narration in PowerPoint - Quick Guide. In PowerPoint, choose a slide. From Slide Show menu > click lower part Record Slide Show button. Select a slide to Record from Current Slide, or Record from Beginning from the sub-menu.
How to record a voiceover for PowerPoint on a PC. 1. Open a new or existing or presentation in PowerPoint. 2. From the top toolbar, select "Insert." 3. Toward the far right side, click "Audio ...
Look at the top of your screen to find the right option. Select "Record slide show." Now you've prepared your presentation to accept audio footage. Check the settings on your computer to ensure it enabled your microphone to capture your voice over. Press "Play" when you're ready to narrate.
Step 3: Start the recording. In the PowerPoint menu, select the Slide Show tab. From here, click on Record Slide Show. This will open the recording window with two options to choose from: Record from Current Slide: This option allows you to start recording from your selected slide. Record from Beginning: This option enables you to record the ...
Record a Voiceover. To add your voice to a PowerPoint presentation, you should first open PowerPoint on your computer. From there: Select Slide Show on the top menu. Choose Record Slideshow. You ...
In this step-by-step tutorial, learn how to add a voice over / narration to a PowerPoint slide presentation. You'll learn three different methods to adding a...
Try Camtasia for free. Option 4: how to do voice-over presentations with Thinkific. If you have created a presentation on an external platform like Keynote, PowerPoint or Google Slides, you can use a Presentation lesson to display it within your Thinkific course!. This function enables you to record audio while speaking to specific slides.
From your computer, drag your PowerPoint presentation to the Add Media area (or click the plus sign, then My Computer to browse for your presentation) Enter a Title and Description for your VoiceThread video; Wait while the presentation processes, this could take between 1 and 5 minutes depending on the size of the presentation
Open the PowerPoint presentation where you want to add a voice over. Hit the "Record" button from the upper-hand ribbon. You can also choose from different recording options in the "Record" tab. You can use the text from the presentation as a teleprompter as you record yourself. Any existing notes will be transformed into text during ...
Learn how to record a PowerPoint Presentation with audio and video simply by using the build-in PowerPoint functionalities and tools. You will learn how to...
Select Record to re-record your clip, or select OK if you're satisfied. To move your clip, select and drag the audio icon to where you want it on the slide. Note: If you're using more than one audio file per slide, it's advisable to put the audio icon in the same spot on a slide to find it easily.
Presentations need to be visually appealing to maintain the audience's attention, but it can be a challenge to present all the information in a visually balanced way. This is where adding audio to your PowerPoint can be a game-changer.. Incorporating audio can help your audience absorb the concepts more easily and stay engaged for longer periods.. If you want to elevate your presentation game ...
Go to Record > From Beginning or Record > From Current Slide.; In the recording screen, click on the Camera icon at the top. This will insert a round object containing your video in your slides ...