
Research Guides
Submit and publish your thesis.
- The Graduate Thesis: What is it?
- Thesis Defences
- Deadlines and Fees
Formatting in MS Word
- Formatting in LaTeX
- Making Thesis Accessible
- Thesis Embargo
- Review and Release
- Your Rights as an Author
- Re-using Third Party Materials
- Creative Commons Licenses for Theses
- Turning Thesis into an Article
- Turning Thesis into a Book
- Other Venues of Publication
Thesis style template for MS Word is available on the School of Graduate Studies website . You are not required to use the template but using it will make some of the formatting requirements easier to meet.
►► Thesis template for Microsoft Word (.docx)
For formatting instructions and requirements see the Formatting section of the SGS website .
MS Word formatting tips
Section breaks and page numbers.
One of the most common formatting items that causes difficulty is the page numbering, since the front section and the rest of the thesis use different characters and placement. The way to properly format these sections is to add Section Breaks in between the front matter and the Introduction or Chapter One and between each of the following chapters, including the Bibliography and Appendices sections.
Adding Section Breaks and Page Numbers in Word 2016
You will need to insert “Section Break – next page” in between all chapters and between the front matter and the first chapter as well as between the last chapter and the appendices and the references.
- Click on the place where the break should be inserted and then go to the Layout tab.
- Click on the arrow beside Breaks and choose Section Break Next Page from the list. This allows you to format sections individually of each other.
- Go to the first chapter after the front matter, click in the header and footer area and in the Header & Footer tools, ensure that “Different First Page” is selected and then ensure that the “Link to Previous” option is not selected. This way, when you format the front matter with Roman numerals in the bottom centre, it won’t carry the formatting into the next section.
- Use the Insert Page Numbers and Format Page numbers to insert the page numbers in the appropriate place with the appropriate formatting.
Using Document Styles
The template has Styles that can be used to format your entire thesis. To use a style, select the text to apply the style to, then choose the appropriate style from the Styles window.
If you don’t want to use the template (for example, if you don’t want to use the numbered headings, you can create your own styles. To do this, format the heading (or other element) the way you want, then click New Style in the style window. Insert a unique name for the style and click OK . You can then use that style for those elements going forward.
Table of Contents (TOC)
To automatically generate a TOC, apply the appropriate Styles to all headings. The template has styles created for this purpose. If you are not using the template, you can create your own heading styles to apply.
Auto-generate the TOC in Word 2016 on both Mac and Windows
- Go to the References tab, choose Table of Contents and select Custom Table of Contents . Click OK .
Using your own styles
- If you have created your own styles with custom names, go to the References tab, choose Table of Contents and select Custom Table of Contents , then click Options .
- Put numbers beside the styles you created that correspond with the level of heading they represent. Click OK , then OK again.
Manual formatting of TOC
To add right-aligned tabs with leaders:
- From the Home tab, open the Paragraph settings and click on the Tabs button.
- Enter the tab stop position, choose Right Tab and for Leader , choose the … option. Click Set (or the + sign on Mac), then click OK .
- Type the TOC entry, press tab, then insert the page number.
Miscellaneous tips
- Use page breaks instead of pressing Enter or Return
- Use paragraph first-line indent or tab consistently throughout doc (best to use Styles)
- Use consistent spacing around headers
- Use Shift + Return/Enter to keep headings that run over 2 lines in the same paragraph
- Ensure there are no Widow/Orphan headings or paragraphs
- When inserting longer quotes, use margins to indent rather than tabbing in and inserting a hard return after each line
- Always use tabs rather than spaces. Set tab stops so you aren’t using multiple tabs
Formatting issues and examples
When creating your own table of contents , be sure to format the space between the text and the numbers properly. Do not use multiple tabs or periods to separate them. This will result in a jagged right margin. You want to set a right-aligned tab with leaders in order to have the numbers properly aligned to the right margin. The auto-generate TOC feature does this automatically.

When starting content on a new page, do not use the return key until you get to the next page. If you add content to that section later on, it will move everything down the page, even on the following page. Instead, use the Insert Page Break feature.

When formatting indented quotes, do not use tabs to indent the lines , or put a return at the end of each line. The test in the paragraph won’t flow properly if you need to add more text or change the margins. Instead use the margin controls in the Ruler to indent the paragraph on each side.

- << Previous: Formatting
- Next: Formatting in LaTeX >>
- Last Updated: Sep 15, 2023 3:23 PM
- URL: https://guides.library.utoronto.ca/thesis
Library links
- Library Home
- Renew items and pay fines
- Library hours
- Engineering
- UT Mississauga Library
- UT Scarborough Library
- Information Commons
- All libraries
University of Toronto Libraries 130 St. George St.,Toronto, ON, M5S 1A5 [email protected] 416-978-8450 Map About web accessibility . Tell us about a web accessibility problem . About online privacy and data collection .
© University of Toronto . All rights reserved. Terms and conditions.
Connect with us
- more social media

- Langson Library
- Science Library
- Grunigen Medical Library
- Law Library
- Connect From Off-Campus
- Accessibility
- Gateway Study Center
Email this link
Thesis / dissertation formatting manual (2024).
- Filing Fees and Student Status
- Submission Process Overview
- Electronic Thesis Submission
- Paper Thesis Submission
- Formatting Overview
- Fonts/Typeface
- Pagination, Margins, Spacing
- Paper Thesis Formatting
- Preliminary Pages Overview
- Copyright Page
- Dedication Page
- Table of Contents
- List of Figures (etc.)
- Acknowledgements
- Text and References Overview
- Figures and Illustrations
- Using Your Own Previously Published Materials
- Using Copyrighted Materials by Another Author
- Open Access and Embargoes
- Copyright and Creative Commons
- Ordering Print (Bound) Copies
- Tutorials and Assistance
- FAQ This link opens in a new window
UCI Libraries maintains the following templates to assist in formatting your graduate manuscript. If you are formatting your manuscript in Microsoft Word, feel free to download and use the template. If you would like to see what your manuscript should look like, PDFs have been provided. If you are formatting your manuscript using LaTex, UCI maintains a template on OverLeaf.
- Annotated Template (Dissertation) 2024 PDF of a template with annotations of what to look out for
- Word: Thesis Template 2024 Editable template of the Master's thesis formatting.
- PDF Thesis Template 2024
- Word: Dissertation Template 2024 Editable template of the PhD Dissertation formatting.
- PDF: Dissertation Template 2024
- Overleaf (LaTex) Template
- << Previous: Tutorials and Assistance
- Next: FAQ >>
- Last Updated: Feb 20, 2024 2:09 PM
- URL: https://guides.lib.uci.edu/gradmanual
Off-campus? Please use the Software VPN and choose the group UCIFull to access licensed content. For more information, please Click here
Software VPN is not available for guests, so they may not have access to some content when connecting from off-campus.
- University of Michigan Library
- Research Guides
Microsoft Word for Dissertations
- Introduction, Template, & Resources
- Formatting for All Readers
- Applying a Style
- Modifying a Style
- Setting up a Heading 1 Example
- Images, Charts, Other Objects
- Footnotes, Endnotes, & Citations
- Cross-References
- Appendix Figures & Tables
- Table of Contents
- List of Figures/Tables
- Chapter and Section Numbering
- Page Numbers
- Landscape Pages
- Combining Chapter Files
- Commenting and Reviewing
- The Two-inch Top Margin
- Troubleshooting
- Finalizing Without Styles
- Preparing Your Final Document
Help with Microsoft Word
Members of the University of Michigan community can get dissertation & thesis formatting assistance from the experts at ScholarSpace:
Please visit this link to make an appointment , or send an email to [email protected].
We're here to solve any formatting problems you've run into, and can give you guidance about captioning figures, solving numbering issues, creating a List of Tables/Figures/Appendices, and more.
Contact Information

Introduction to Word for Dissertations
Formatting your dissertation (or thesis) will likely take more time than you expect. But using the special features described in this Guide will save you a great deal of work , particularly if you use our template (available in the box below). The earlier you begin to use these tools, the more time you'll save and the less stress you'll have as your submission deadline approaches. Students at the University of Michigan are also encouraged to contact the experts at the Library's ScholarSpace anytime you run into a problem or have a question.
To meet Rackham’s Dissertation Formatting Guidelines you will need to modify the standard settings that Microsoft Word uses. This guide will show you how to use the tools to make the necessary modifications. While we do follow the requirements from Rackham’s formatting guidelines to demonstrate the tools, in the end, you are responsible for verifying that your document meets the requirements that Rackham sets.
To save yourself time and effort , please consider using our Dissertation Template (link available in the box below). Many of the settings discussed in this Guide are already included in that document.
Please note that, as a University of Michigan student, you have free access to the Microsoft Office suite of tools -- including Microsoft Word. Visit this link to learn more and to download Office to your own computer.
Dissertation Template and other Resources
- ScholarSpace Template for Dissertations This Microsoft Word document comes with many of the Rackham formatting guidelines built in, and can be used for dissertations and theses. Please note that this template doesn't follow the formatting direction of any particular Style Guide. It is your responsibility to make sure you are following the Style Guide predominant in your field, and to make any relevant formatting changes to heading styles, numbering, captions, etc... How to make many of those changes is described throughout this Guide.
- Rackham Dissertation Handbook Rackham's Dissertation Guidelines and Handbook
- Dissertation Formatting Checklist Rackham's list of formatting issues to watch out for in your dissertation.
- Using Microsoft Word for Large Documents (non-dissertation specific) Handout (This document was written for an older -- much older -- version of Word, but nearly all of the information is still accurate and useful)
- Guide to Copyright for Dissertations
A word about LaTeX
LaTeX is a writing and markup language often used in science and engineering documents because it allows for great control in creating complex equations and formulas. ScholarSpace does not maintain a template for dissertations created with LaTeX, and we can only provide very limited support for it. That said, there is a community of U-M folks who actively maintain this LaTeX template to keep it in line with Rackham's guidelines .
Here are some other very useful resources:
- Video recording of a UM Library Workshop on Dissertation Formatting with LaTeX
- Documentation for LaTeX and Overleaf
- Bibiliography Management with LaTeX
- How to Write a Thesis in LaTeX
- A huge collection of LaTeX resources
Can I use Google Docs for my dissertation?
No. Google Docs can get you pretty far down the road to something that looks like what Rackham requires, however, it's going to take a lot more work to get that far, and as you approach the finish line there will be obstacles that Google Docs just won't be able to get around. The issue is that Google Docs was not designed for complicated documents like a thesis or dissertation. To get it to do many of the special things that Rackham requires, you'll have to do a lot of work that Word will just do for you . A few examples:
- Rackham requires 1" margin on all pages, but a 2" margin at the top of each new section. You'll have to manually adjust every relevant page yourself in Docs to get this, but Word will just do it automatically.
- Docs gives you three choices for how your Table of Contents will look, none of which are suitable for Rackham. While you can adjust the format, many aspects of it (such as spacing) will revert to the original every time you update it. With Word, you're in charge of what your ToC looks like.
- In Docs, you'll have to manually type in your figure numbers ("Figure 3.6") and change them every time you add or move them. But Word will manage numbering and caption placement for you, it will renumber figures or tables as you add or move them, and it will create your List of Figures/Tables automatically – correct page numbers and all.
- With Word's figure/table numbering, you can also insert cross-references so when you refer to "(see Figure 4.2)" but then you add some new figures before that, not only will Figure 4.2 renumber itself automatically, but anywhere you've referred to it will be updated, too. No more anxiety about whether you've updated everything accurately.
- Page numbers: Rackham wants the first two pages to have no page numbers, the rest of the frontmatter to have small roman numerals, and the body of the document to have arabic numerals. Docs just plain can't do that.
If you're concerned about the learning curve of using Word, please know that this Guide goes over how to do everything, AND the Word template found here has nearly everything already set up for you. We also regularly offer a workshop that serves as an introduction to the most useful features, and you can set up a meeting with a ScholarSpace expert anytime you run into something that you can't figure out.
Writing Assistance
This Guide is all about how to properly format your dissertation -- how to make it look the way Rackham wants it to look. But what if you need help with the actual composition of your content? Our friends at the Sweetland Writing Center offer such assistance, through their Writing Workshop program. From their website:
These are just a few quick but especially important tips to help you get started. See our more expansive Tips & Troubleshooting section for suggestions that are a little more complex.
- Save early , save often, and create backup versions as you go along. Consider setting up Microsoft OneDrive (you have free access with your umich login credentials). With this, you can turn on "Autosave" in Word to automatically save your document at regular intervals.

- Use our template (available above), it will save you lots of time. Nearly all of the difficult formatting stuff we discuss in this Guide is already built into the template. Consider doing all of your writing in it -- even if you're working in separate files for each chapter, you can use a copy of the template for each one of those chapters.
- Set the margins including the two-inch margin for chapters titles ( Setting Margins ) .
- Define styles for Headings 1-3, Normal, Captions, and Quotes – these are most common; you may need others ( Working with Styles ).
- If headings need to be numbered (for example, 1.1, 1.2, 2.1, etc.), define a multi-level list ( Automatic Numbering ).
- If captions need to include the chapter number, define a multi-level list ( Automatic Numbering ).
- Share your file(s) with your advisors using Track Changes ( Commenting and Reviewing ) .
- If you use EndNote to manage your citations and create your bibliography, use only one EndNote library for your entire dissertation (see our EndNote Basics guide).
- Did we mention that you really ought to try out our template (available above)?
Library Subject Guides
4. writing up your research: thesis formatting (ms word).
- Books on Thesis Writing
- Thesis Formatting (MS Word)
- Referencing
Haere mai, tauti mai—welcome! These instructions are designed to be used with recent versions of MS Word. Please note there is no template or specific formatting guidelines for a thesis at UC. Please talk to your supervisor and take a look at theses in the UC Research Repository to see how they are usually formatted.
- Where to start
- Show/Hide Formatting
- Heading Styles
- Navigation Pane
- Table of Contents
- Numbered Headings
- List of Figures/Tables
- Page/Section Breaks, Page Numbering & Orientation
Word Thesis Formatting workshops run throughout the year.
Some useful documents.
- Word Formatting Instructions PDF This PDF contains the same instructions that are available on this page.
- Sample Thesis Document with No Formatting This sample thesis file can be used to practise formatting. It is not a template for how to format a thesis. UC does not provide any guidelines on formatting a thesis.
- APA 7th Edition Formatting Example This document is formatted according to APA 7th Edition formatting guidelines. It could be used as a template or as an example to follow. It contains some additional instructions for certain APA formatting in Word.
For more APA formatting advice see the APA Style Blog's excellent Style and Grammar Guidelines .
Finding Examples
Look at examples and ask your supervisor.
The best guide on how to format your thesis is a combination of:
- Looking at previous theses in your discipline. Search the UC Research Repository for your subject or department, and browse by issue date to get the most recent.
- Asking your supervisor for recommendations on specific formatting and details.
General Recommendations
The following is an example only of preliminaries to the thesis that could be included.
- Acknowledgements
- List of Figures
- List of Tables
- Abbreviations
- Toggle show Home ->Show/Hide formatting

Using styles for headings allows you to create an automatic table of contents.
- Select major headings one at a time and choose Home ->Styles ‘Heading 1’
- Select subheadings and apply Home ->Styles ‘heading 2’ and ‘heading 3’
- Modify a style by right clicking on it and choosing Modify in the styles pane at the top of the screen.
The Navigation Pain is useful for seeing the outline of your document as well as providing links to quickly go to any section of the document.
- View->check Navigation Pane

In order to create an automatic table of contents heading styles must be used.
- References -> Table of Contents -> Custom Table of Contents (no heading in table)

- Right click table of contents to ‘update field’ and choose ‘update entire table’

- Home->Multilevel list-> choose style with a number level for each heading level

- To change the heading level 1 number to say ‘Chapter 1’ right click on heading level 1 in the styles area Heading 1->Modify .

- In the modify screen click Format->Numbering.

- Then click ‘ Define New Number Format’.

- Then add the word ‘Chapter’ and a space before the ‘1’.

To create automatic lists of figures or tables you first have to give a caption to all your figures and tables.
- Right click figure or table and select Insert Caption

- Choose Label type eg. Figure, Table etc
- Choose position above or below
- Give the table or figure a title in the top box
- Go to the headings for List of Figures and List of tables and then click References->Insert Table of Figures -> select caption label type (Figure or Table)

- On the following menu select caption label type (Figure or Table) and click OK

This can be used to have different page numbering styles of different sections of your document or to have certain pages landscape to display a large table or graph.
- Insert a section break (next page) at the end of the title page ( Layout -> Breaks -> Next Page )

- Insert a section break at chapter 1 ( Layout -> Breaks -> Next Page )
- Insert page breaks for all other ‘heading 1’ headings ( Layout -> Breaks -> Page )
Adding Page Numbers
- Insert -> Page Number and choose a position on the page

- Double click on title page header or footer (top or bottom of the page) and tick ‘ Different First Page’ in the Design ribbon that appears

- Click in second page header or footer, right click on the page number and select ‘ format page numbers ’

- Select Roman numerals eg. ‘i, ii, iii, iv’ etc
- Select start at ‘i’ (start at ‘1’)

- Scroll to chapter 1 and change number style for this section back to ordinary numbers and start at 1
Change Page Orientation
- Insert a section break before and after the pages you want to change to landscape orientation (See instructions above for inserting a section break)
- Layout -> Orientation -> Landscape
NOTE: A section break is usually only needed if page orientation or separate page numbers are required.
- << Previous: Books on Thesis Writing
- Next: Referencing >>
- Last Updated: Feb 8, 2024 12:29 PM
- URL: https://canterbury.libguides.com/writingup
Purdue Online Writing Lab Purdue OWL® College of Liberal Arts
University Thesis and Dissertation Templates

Welcome to the Purdue OWL
This page is brought to you by the OWL at Purdue University. When printing this page, you must include the entire legal notice.
Copyright ©1995-2018 by The Writing Lab & The OWL at Purdue and Purdue University. All rights reserved. This material may not be published, reproduced, broadcast, rewritten, or redistributed without permission. Use of this site constitutes acceptance of our terms and conditions of fair use.
Theses and dissertations are already intensive, long-term projects that require a lot of effort and time from their authors. Formatting for submission to the university is often the last thing that graduate students do, and may delay earning the relevant degree if done incorrectly.
Below are some strategies graduate students can use to deal with institutional formatting requirements to earn their degrees on time.
Disciplinary conventions are still paramount.
Scholars in your own discipline are the most common readers of your dissertation; your committee, too, will expect your work to match with their expectations as members of your field. The style guide your field uses most commonly is always the one you should follow, and if your field uses conventions such as including all figures and illustrations at the end of the document, you should do so. After these considerations are met, move on to university formatting. Almost always, university formatting only deals with things like margins, font, numbering of chapters and sections, and illustrations; disciplinary style conventions in content such as APA's directive to use only last names of authors in-text are not interfered with by university formatting at all.
Use your university's formatting guidelines and templates to your advantage.
If your institution has a template for formatting your thesis or dissertation that you can use, do so. Don't look at another student's document and try to replicate it yourself. These templates typically have the necessary section breaks and styles already in the document, and you can copy in your work from your existing draft using the style pane in MS Word to ensure you're using the correct formatting (similarly with software such as Overleaf when writing in LaTeX, templates do a lot of the work for you). It's also often easier for workers in the offices that deal with theses and dissertations to help you with your work if you're using their template — they are familiar with these templates and can often navigate them more proficiently.
These templates also include placeholders for all front matter you will need to include in your thesis or dissertation, and may include guidelines for how to write these. Front matter includes your table of contents, acknowledgements, abstract, abbreviation list, figure list, committee page, and (sometimes) academic history or CV; everything before your introduction is front matter. Since front matter pages such as the author's academic history and dissertation committee are usually for the graduate school and not for your department, your advisor might not remember to have you include them. Knowing about them well before your deposit date means you won't be scrambling to fill in placeholders at the last minute or getting your work returned for revision from the graduate school.
Consider institutional formatting early and often.
Many graduate students leave this aspect of submitting their projects until it's almost too late to work on it, causing delays in obtaining their degree. Simply being aware that this is a task you'll have to complete and making sure you know where templates are, who you can ask for help in your graduate office or your department, and what your institution's guidelines are can help alleviate this issue. Once you know what you'll be expected to do to convert to university formatting, you can set regular check-in times for yourself to do this work in pieces rather than all at once (for instance, when you've completed a chapter and had it approved by your chair).
Consider fair use for images and other third-party content.
Most theses and dissertations are published through ProQuest or another publisher (Harvard, for instance, uses their own open publishing service). For this reason, it may be the case that your institution requires all images or other content obtained from other sources to fall under fair use rules or, if an image is not considered under fair use, you'll have to obtain permission to print it in your dissertation. Your institution should have more guidance on their specific expectations for fair use content; knowing what these guidelines are well in advance of your deposit date means you won't have to make last-minute changes or removals to deposit your work.
How To Format A PhD Thesis In Microsoft Word (An Illustrative Guide)
The format of a PhD thesis is as important as the content of the thesis. Different institutions have different formatting guidelines so PhD students should always refer to their handbook.
However, there are some standard requirements of PhD theses which do not change with institutions thus making the theses look similar in many aspects. This article highlights the common formatting standards expected of PhD theses and provides step-by-step instructions on how to format some sections in Microsoft Word.
A PhD thesis or dissertation is divided into three distinct components – front matter, main text and back matter – each of which has its own sub-components, as discussed below:
Front matter
Declaration by the candidate and approval of thesis, table of contents, list of figures, list of tables, list of abbreviations, acknowledgements, inserting figures into main text, inserting tables into main text, back matter, numbering the thesis, related article.
The front matter refers to the preliminary pages that come before the main chapters of the theses. These include:
The title page is the first page of the thesis. It includes: the title of the PhD thesis, the name of the PhD student, the school or department and university in which the study took place, the city and country in which the university is located, and lastly the month and year in which the degree was conferred.
A sample title page is shown below:
Originality is very crucial for PhD-level theses and dissertations. In this section, the PhD candidate declares that his work has not been published elsewhere to the best of his knowledge. The declaration is followed by approval of thesis and includes the names of all those people who reviewed and approved the thesis. These could be the supervisors, the Head of Department/School and/or the Dean of the School of Graduate Studies. The wordings on this page may vary from one institution to another, it is therefore important for the candidates to refer to their handbooks.
The abstract is a short summary of the thesis, normally a paragraph in length. Abstracts can be structured or unstructured. A structured abstract is one that has headings and text below each heading, while an unstructured abstract does not have headings, it is written in paragraph form.
A sample of a structured and unstructured abstract is provided below:
The table of contents provides the outline of the thesis and shows all the headings and sub-headings of the thesis and their page numbers.
To insert a table of contents in Microsoft Word:
- Make sure all the headings and sub-headings of the front matter pages, the main text and the back matter pages have been properly specified in the Word document.
- Click the references tab, then select table of contents option.
- The table of contents has a drop-down arrow which when clicked shows the different style of TOC.
- Select the preferred style of TOC and click OK.
- The TOC will be inserted automatically.

The list of figures shows the titles of all the figures in the thesis and their page numbers.
To insert the list of figures in Microsoft Word:
- Click on the references tab, then click on “insert table of figures” option.

- The following dialogue box will open. In the caption label window, select “figure”. It will show different formats for the list of figures. Choose the style you prefer and click OK.

Like the list of figures, the list of tables shows the titles of all the tables in the thesis and their page numbers.
To insert the list of tables in Microsoft Word:

- The following dialogue box will open. In the caption label window, select “table”. It will show different formats for the list of tables. Choose the style you prefer and click OK.

The list of figures and the list of tables should be on different pages.
All acronyms and their abbreviations used throughout the thesis should be highlighted in their own separate page titled ‘list of abbreviations.”
In a PhD thesis, it is mandatory to acknowledge all those who helped you in your PhD journey. These include: your supervisors, other faculty who either reviewed your work or gave advice, people who proofread your work, institutions that helped you gain access to your data, your research respondents, fellow colleagues etc.
Some PhD candidates dedicate their thesis to people who are dear to them, for instance, parents, siblings, spouse/partner, children etc. This section is however not mandatory.
Page numbering for front matter
For front matter, Roman numerals should be used excluding the title page which should not be numbered. The page numbers should be placed at the bottom and centre-aligned.
The main text of thesis is the meat of the thesis and starts from chapter all the way to the last chapter of the thesis. The chapters of theses vary from one institution to another but generally have the following structure:
Chapter 1: Introduction
Chapter 2: Literature review
Chapter 3: Research methodology
Chapter 4: Research findings/results
Chapter 5: Discussions
Chapter 6: Conclusions and recommendations
Each chapter should be organised into headings. There are different levels of headings: level 1, level 2, level 3 etc. The use of these different levels depends on a student’s work.
Other formatting requirements for the main text include:
Font: the most recommended font styles are Times New Roman, Arial, Book Antiqua etc. Students should refer to their handbook for guidance on the font required by their institution.
Spacing: the most recommended spacing for theses is 1.5 for the main text except for things like tables.
Referencing style: the recommended referencing style (such as APA, MLA, Havard etc) should be used throughout the text.
Page numbering: for main text, Arabic numerals are used. The page numbers should be placed at the bottom and centre-aligned.
It is advisable to include figures into theses. Figures help to present some information in a more appealing way than plain text. For each figure inserted, make sure to number it and include a caption explaining what the figure is about.
To insert figures’ captions and numbers into Microsoft Word:
Click on the references tab, then click on insert caption.
A dialogue box will open. Under options, choose “figure” as the label.
Type the caption for the figure, choose the numbering format preferred and click OK. The caption and number of the figure will be inserted.

The procedure for tables is the same as for figures.
To insert tables’ captions and numbers into Microsoft Word:
A dialogue box will open. Under options, choose “table” as the label.
Type the caption for the table, choose the numbering format preferred and click OK. The caption and number of the table will be inserted.

The same procedure is used when you have equations, maps and other illustrations.
Important points to remembers:
When inserting captions and numbers for figures and tables, the cursor should be placed at the right position, that is, above the figures and tables.
If the table or figure has been lifted from somewhere else, the source should be acknowledged at the bottom of the table or figure.
The numbering of the figures and tables should be done by chapter. For instance, all figures in chapter 1 should be numbered: figure 1.1, figure 1.2, figure 1.3 etc. while all figures in chapter 2 should be numbered: figure 2.1, figure 2.2, figure 2.3 etc. Same for the tables, equations and all other illustrations.
The back matter has two main content: the references and the appendices.
The references should be done in accordance with the referencing style recommended by the institution.
The appendices section lists all other materials pertaining to the study that were not included in the front matter. Depending on the study, these may include: the research protocol, a letter of introduction for the research, the questionnaire used for the study, the list of respondents etc.
The page numbers for the references and appendices should be Arabic numerals and a continuation of the pages from main text.
The title of the appendices should be done using either Roman numerals (Appendix I, Appendix II, Appendix III etc) or the alphabet letters in caps, that is, Appendix A, Appendix B, Appendix C… etc.
Each appendix should start on its own page.
As discussed earlier, different numbering styles are used for the different sections of the thesis:
The title page should not be numbered.
The other front matter pages should be numbered using Roman numerals.
The main text and back matter pages should be numbered using Arabic numerals.
Many students struggle with doing the numbering correctly.
The best way to do this in Microsoft Word is to use the “section break” function which divides the thesis into different sections. Each section is then numbered separately from the other sections. To do this:
Go to the end of the page where you want to insert the section break. This should be: at the end of the title page, and after the last front matter page (dedication). Because the main text and back matter pages are numbered using the same style, there is no need to create a section break after the main text.
From insert menu, go to break then section break and select the one written (next page).
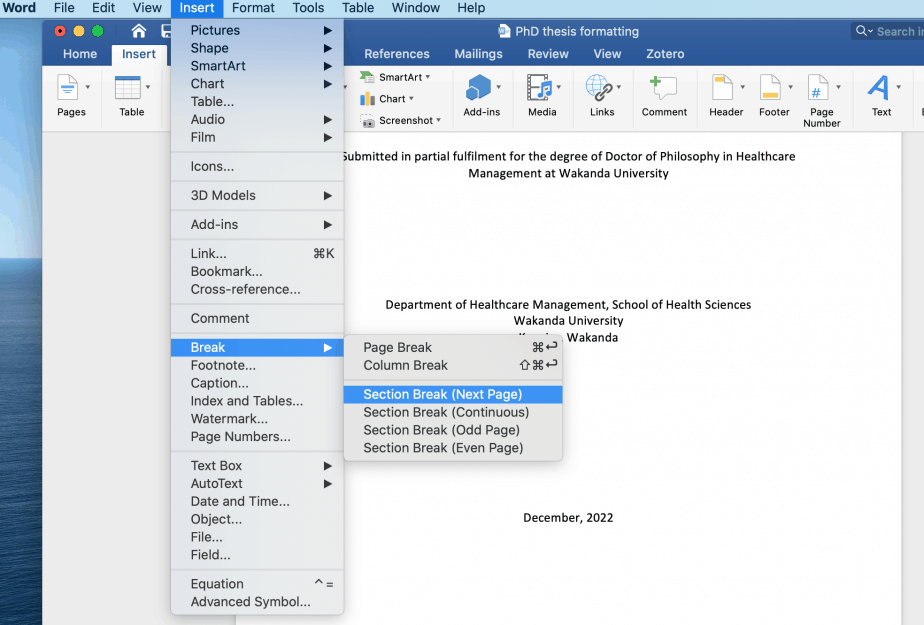
Word will create different sections for the title page, the other front matter pages and the main text and back matter pages.
Use the insert tab and page number function to insert different formats for the different sections: not to be numbered (title page), numbered using Roman numerals (for front matter pages) and numbered using Arabic numerals (main text and back matter pages).

In conclusion, formatting a PhD thesis requires careful consideration of the requirements given by an institution for the different parts of a thesis. PhD students should always consult their handbooks to ensure that their theses meet the high academic standards required of them. This article discussed some key formatting issues and provided step-by-step instructions on some formatting options.
Comprehensive Guidelines for Writing a PhD Thesis Proposal (+ free checklist for PhD Students)
Grace Njeri-Otieno
Grace Njeri-Otieno is a Kenyan, a wife, a mom, and currently a PhD student, among many other balls she juggles. She holds a Bachelors' and Masters' degrees in Economics and has more than 7 years' experience with an INGO. She was inspired to start this site so as to share the lessons learned throughout her PhD journey with other PhD students. Her vision for this site is "to become a go-to resource center for PhD students in all their spheres of learning."
Recent Content
SPSS Tutorial #11: Correlation Analysis in SPSS
In this post, I discuss what correlation is, the two most common types of correlation statistics used (Pearson and Spearman), and how to conduct correlation analysis in SPSS. What is correlation...
SPSS Tutorial #10: How to Check for Normality of Data in SPSS
The normality assumption states that the data is normally distributed. This post touches on the importance of normality of data and illustrates how to check for normality of data in SPSS. Why...
- Mardigian Library
- Subject Guides
Formatting Your Thesis or Dissertation with Microsoft Word
- Tables and Figures
- Introduction
- Copyright Page
- Dedication, Acknowledgements, & Preface
- Headings and Subheadings
- Citations and Bibliography
- Page Numbers
- Rotated (Landscape) Pages
- Table of Contents
- Lists of Tables and Figures
- List of Abbreviations
- Some Things to Watch For
- PDF with Embedded Fonts
Tables and figures
Many theses include tables and figures. Most often, they are added to the thesis as images, but sometimes you might want to add some as a linked Excel file. And, the way that captions are added to figures and tables differs between APA and IEEE style. The videos below are lengthy, so they start with a table of contents so you can jump to the section that you need.
Tables and figures - IEEE style
This video demonstrates a modified IEEE style for tables and figures that most CECS students use.
- << Previous: Page Numbers
- Next: Rotated (Landscape) Pages >>
- Last Updated: Mar 21, 2024 2:35 PM
- URL: https://guides.umd.umich.edu/Word_for_Theses
Call us at 313-593-5559
Chat with us
Text us: 313-486-5399
Email us your question
- 4901 Evergreen Road Dearborn, MI 48128, USA
- Phone: 313-593-5000
- Maps & Directions
- M+Google Mail
- Emergency Information
- UM-Dearborn Connect
- Wolverine Access
Techniques for managing theses using Microsoft Word
Theses and other long documents (e.g., books, manuals, reports) can present challenges that shorter documents wouldn't. Theses are often more structured, contain several levels of headings, and may have numbered headings. It is more difficult to maintain a standard "look and feel" throughout a long document like a thesis.
Information on using the UWaterloo Thesis template .
Theses often contain components not found in shorter documents such as a Table of Contents, List of Tables/Figures, an Index, cross references, footnotes or endnotes. (The files used in the exercises below are: Nursery_Rhymes (.docx) and fiddle.bmp . The .jpeg version below can be saved and used.)

University of Waterloo thesis requirements
uWaterloo thesis regulations for formatting requirements are outlined on the Graduate studies website .
Some details worth mentioning (as of April 2008):
- The text of the thesis (main body) must either be double spaced or space and a half.
- Captions related to figures: it is acceptable to have them single spaced on the same page (some disciplines do require the caption to appear on a separate page).
Accessibility Styles Heading styles Modifying styles (including a related exercise) Creating a new style (including a related exercise) Modifying a heading style (including a related exercise) Numbering headings (List style and legal style numbering) (including related exercises) Document templates (including accessing and using the uWaterloo Word Thesis template) Captioning and numbering of tables and figures (including related exercises) Footnotes and endnotes (including related exercise) Endnotes with square brackets ([1],[2],...) Bookmarks (including related exercise) Cross references (including related exercise) Outline view (including related exercise) Creating a Table Of Contents (including related exercise) Generating a list of tables and a list of figures (including related exercises) Page numbering/headers and footers (including related exercises) Inserting landscape pages (including related exercises) Creating your thesis from many small documents (including a related exercise) Enter document properties Hanging indents Inline references and bibliography PDF for electronic submission Electronic thesis submission
Accessibility
All web pages, including, Word and PDF files on our websites, published as of January 1, 2012, will need to be accessible as per the Accessibility for Ontarians With Disabilities Act (AODA) by January 1, 2014 (WCAG 2.0 Level A). This may include theses on UWSPACE as well.
Review the following and follow the steps to ensure your thesis is accessible.
- Ensure your file has a title ( File/Info, Properties, Title , see 'Enter Document Properties' below)
Styles: Headings
- Using the Heading 1, 2, 3, etc. styles for your headings as described below.
- For shorter documents only use the Heading 1 tag once.
- For long documents, if you use the Heading 1 tag multiple times, ensure the document title is set in File/Info, Properties, Title.
- Don't make headings too long
- Do NOT underline headings or any other text (links will be underlined automatically)
Meaningful links
- e.g. 'University of Waterloo Library Website' links to http://lib.uwaterloo.ca
- Don't use links such as 'click here'; instead use a meaningful description of what the link is
Images/objects
- Right click on the image/object
- Choose Format... (or Format Picture , Format Object , etc)
- A dialog box will appear. Click on the Alt Text tab. (In Word 2013 for images inserted by Insert>Pictures option, a side panel will appear. Select Layout & Properties>ALT TEXT .)
- Under Description or Alternative text: , type a meaningful description
- Avoid any 'floating' images/objects.
- Select the image/object
- Under the Format tab in the Arrange section, click the Wrap Text button and select In Line with Text .
- Put “” in the alt text description (null) OR
- Mark image as an artifact so that screen readers skip them.
- Use columns instead of text boxes or floating objects
- Ensure you use the lists features in Word rather than manually typing your own bullets/dashes/numbers for an ordered or unordered list
Charts/graphs
- Charts/graphs should have good colour contrast for those who are colour blind.
- Colour Contrast Analyzer for Windows
- Contrast Analyzer for Windows and Mac
- right click on the chart/graph and select Format Plot Area/Format Data Series .
- In the side panel that appears, select Chart Area from the dropdown box.
- Select Layout & Properties>ALT TEXT .
- Under Description type a meaningful description of the graph
- Or use the longdesc attribute
- Provide the data information used to generate the graph in a table (beside/above/under it)
- Place your cursor inside the header row.
- In the Table Tools tab select Layout , in the Data section, click on Repeat Header Rows
- Do not use nested tables (tables within tables)
- Do not use tables for layout. If you must, make sure they are linearized.
- Avoid blank columns and rows if possible (delete rows/columns not needed)
- Make sure the order is correct when tabbing through a table
- Right click on the table
- Choose Table Properties
- Select the Alt Text section
- Under Description , type a meaningful description
Text boxes/floating objects
- Avoid text boxes and floating objects
- Use columns instead
Video/audio
- Any videos/audio should include closed captioning and/or descriptive text
Avoid blank lines, extra spaces, empty table cells
- Use page breaks, tabs, etc. instead
Checking for Accessibility in Word
Once your thesis is complete, or periodically as you write it, it is recommended that you check it for accessibility. Word 2010 has an accessibility checker that checks a variety of things to ensure your document is reasonably accessible.
The rules that Word follows for the Accessibly Checker are found on Microsoft's Accessibility Checker page .
Using Word's Accessibility Checker
- From the File tab choose Info.
- In the Prepare for Sharing (Word 2010) or Inspect Document (Word 2013) section, choose Check for Issues>Check Accessibility .
- A new pane will open to the right of your document that lists the issues it has found.
- Take you to the spot in your document where they occur so you can fix them
- View information on how to fix them under Additional Information at the bottom of the pane
The best way to ensure consistent formatting in a Word document is by consistent use of Word styles. Every paragraph in Word has a “Style” associated with it. A style is a collection of formatting that details the font, font size, font highlighting (bold, italics, etc.), paragraph alignment, paragraph indents, paragraph spacing, and so on. If a style is edited, and any of its attributes changed, the formatting of any paragraph to which that style was assigned will immediately change to reflect the modifications.
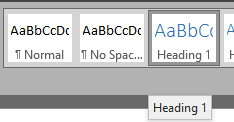
The style assigned to the current paragraph is indicated in the Home tab and in the Styles section.

If no style is highlighted in this area, you may need to scroll up or down using the arrows to find the assigned style.
A document can contain many different styles, but most documents will have paragraphs of “Normal” style, which are standard paragraphs, and one to three levels of headings (Heading 1, Heading 2 and Heading 3).
It is important to use styles in all documents to carry out formatting of paragraphs of different types. This is especially true in longer documents where it is more difficult to apply standard formatting manually, and where the formatting requirements may change a number of times throughout the document production time. A unique style should be created for every paragraph type : normal paragraphs, indented paragraphs, etc.
You can create your own styles, or adapt one of the many styles that are pre-defined in Word. You can view the recommended style list from Word by simply scrolling through them using the arrows, but to see a complete list of styles:
- Click on the button in the bottom right of the Styles section in the Home tab.
- In the Styles window that appears, click on Options... in the bottom right.
- Now in the Styles window you will see many built-in styles you may use. You may modify them as you will see later in this document.
As you will see, there are a very large number of styles available. For practical purposes, you may want to show only Recommended styles.
You will note that clicking on the button in the bottom right of the Styles section in the Home tab, caused a floating Styles window to be displayed. If you want to close this window, simply click its Close button. When the Styles window is visible, you can click on any of the styles and that style will be applied to the selected paragraphs in the document.
Heading styles
Amongst Word’s predefined styles are nine levels of heading styles: Heading 1 through Heading 9. Although you could make up your own styles to apply to headings in your document, there are several reasons why you should use Word’s built-in heading styles.
- It becomes trivial to generate a Table of Contents of items tagged with heading styles.
- Word’s outline view offers a powerful tool for structuring long documents, and it is driven by Word’s heading styles.
- You can insert cross-references to headings created with Word’s heading styles.
To practice editing styles, we will use the file called Nursery Rhymes.docx.
Modifying styles
If you do not explicitly assign a style to a paragraph, Word assigns the “Normal” style. Most other styles are based on this Normal style, so modifying the Normal style can have the effect of modifying other styles in the document.
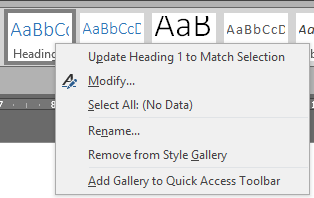
To modify a style, right click on the style in the ribbon or in the Styles window and choose Modify.
For example, to change the Normal style to Arial, 11 point, with three points of white space following each paragraph, do the following.
- Click on the File tab in the top left and choose Options .Click Advanced on the left and then scroll down on the right to the Display section. Beside Show measurements in units of: , choose Inches from the drop down menu and click OK.
- Now open the file on your N:\ drive called Nursery Rhymes.docx
- The Modify Style dialog box will appear.
- Under Formatting ,from the font drop down list, select Arial , and from the size drop down select 11 .

- Select the Indents and Spacing tab.

- Click OK twice.
Creating a new style
You may need to create a new style that does not currently exist in Word. For example, you may want a paragraph that is indented half an inch from both the left and right margins, and has three points of white space after and three points before.
- Click on the button at the bottom right of the Styles section of the Home tab to open the floating Styles window.
- Click on the New Style button at the bottom of the Styles window. The Create New Style from Formatting dialog box will open.
- In the Name: field, enter Indp .

- Click Format and select Paragraph .
- Under the Indentations section, in the Left: and Right: fields enter 0.5 .
- Under the Spacing section, in the Before: and After: fields enter 3 .

- Cli c k Format and select Shortcut key .
- Press [Ctrl]+[Shift]+[I] (all at once - this will be your shortcut key combination).
- Click Assign and the Close .
- Click OK .
- Now go to the end of the Jack and Jill rhyme, press [Enter] to start a new paragraph, and type the second verse of Jack and Jill:
Up Jack got and off did trot, As fast as he could caper, He went to bed to mend his head, With vinegar and brown paper
- clicking anywhere in the paragraph, and selecting Indp from the Style section of the Home tab or
- pressing [Ctrl]+[Shift]+[I] .
Modifying a heading style
As mentioned above, Word has nine levels of built-in heading styles, Heading 1 to Heading 9. You will probably use three or four levels in your thesis, and likely you will want to change the format and appearance of them.
Steps to modify the Heading 1 and Heading 2 styles are given below. Other heading styles can be modified in the same way .
- Suppose we want Heading 1 styles to be in Times New Roman font (it is acceptable to have the body of a document in one font, usually a serif font, and the document headings in a different font, usually sans serif), 16 point , bold , and centered . To do this, right click on the Heading 1 style in the Styles section of the Home tab and choose Modify . The Modify Style dialog box will appear.

- Now click the Format button, and choose Paragraph .
- Widow/Orphan control: Prevents Word from printing the last line of a paragraph by itself at the top of a page (widow) or the first line of a paragraph by itself at the bottom of a page (orphan)
- Keep with next: Prevents a page break between the selected paragraph and the following paragraph.
Generally speaking, all paragraphs should have Widow/Orphan control set. Also, all headings should have Keep with next set; otherwise a heading might appear all by itself at the bottom of a page, and that is not a desirable situation. Notice some other settings you can make on this dialog box. Keep lines together should be used if you have a paragraph that you want to prevent from being broken across two pages. The other option, Page break before, could be used perhaps for a Heading 1, if you always wanted Heading 1 to begin on a new page (this can be confusing sometimes, though, if you aren't aware of this setting and are trying to remove the page break).
- (Note in this window, that a Heading 1 style will be followed automatically by a Normal style. That’s all right, unless we knew we had a document structure where a Heading 1 was always followed immediately by a Heading 2. In that case, we would choose Heading 2 as the default style to follow a Heading 1. We don’t think that is the case here, so we will leave it at Normal.)
- Let's create a shortcut key for each heading style to make them easier to apply while typing. We'll use 1 for a Heading 1, 2 for a Heading 2, etc. Click the Format button, and choose Shortcut Key . Hold down the keys 1 all at once. Click Assign , Close and then OK.
- Click OK again.
- Now we want to modify a Heading 2 style. Our Heading 2 s should be Times New Roman font , 14 point bold , and left justified. Follow the above instructions (1. to 9.) to make these changes to the Heading 2 style (use 2 as the shortcut keys for a Heading 2). When you are done, click OK to return to the main modify style box, and then click OK to finish.
Some documents use the style “body text” for standard document paragraphs. If that is what you want, you should modify all other styles used in the document to make “Body Text” be the paragraph type to follow all other paragraphs and also the style other styles are based on.
Numbering headings
Theses frequently have a requirement that all headings in the document be numbered. There are two types of numbering.
The first is list style numbering, where major headings are numbered with one style, perhaps I, II, III… second level headings in another style, perhaps A, B, C…etc. third level headings in yet another style, perhaps 1, 2, 3… and so on. Every time a new higher level heading occurs, the numbering of lower level headings starts at the beginning.
The other type of numbering is legal style numbering, where first level headings are numbered 1, 2, 3… (or perhaps I, II, III…); second level headings are numbered 1.1, 1.2, 1.3…(or 2.1, 2.2, 3.1, 3.2… as appropriate); third level headings are numbered 1.1.1, 1.1.2.… and so on.
List style numbering
- To number headings with a List style , first go to the top of your document by pressing (together) on your keyboard. (Similarly, pressing CTRL-End will move the insertion point immediately to the end of the document. Want to get back to the last place you were working? Try SHIFT-F5 .)
- In the dialog box that appears, click the More >> button at the bottom left.
- Choose the numbering style you want by selecting it from the Number style for this level: list, perhaps I, II, III, ... etc .
- Modify the punctuation beside the number if you like, If you want the number followed by some other punctuation (or nothing) instead of a right parenthesis, click to the right of the punctuation beside the number/letter in the Enter formatting for number: box, and hit Backspace to remove the punctuation. If you want some other punctuation, type it now. If you don’t want the number followed by any punctuation, don’t type anything. (Ensure not to type over the letter/number but to only add/change the punctuation.)
- Set Number alignment to Left , set Aligned at to 0 and set Text indent at to 0 . If you want to set these settings for all your levels, click the Set for All Levels ... button and (optionally) set all the values to 0 and click OK.
- Under Link level to style : choose Heading 1 .
- Set Follow number with: to Space .

- Select a, b, c, ... from the Number style for this level: list.
- Type the desired punctuation to follow the number style under Enter formatting for number: (ensure not to type over the letter/number but to only add/change the punctuation).
- Under Link level to style: choose Heading 2 style.
- Set Number alignment to Left , set Aligned at to 0 and set Text indent at to 0 .
- Set Follow number with: to Space .
- Repeat the above procedure for levels 3, 4 and as many heading levels as you wish to have numbered in your document. In all cases, make sure that the restart numbering after higher list level is checked.
Note 1: If you are defining this numbering format to a document that already has headings with heading styles applied, make sure that the mouse is clicked at the very beginning of the document. This will cause the numbering styles to be applied from that point forward. The numbering will also apply to any subsequent headings that you enter.
Note 2: You could have selected a pre-formatted numbering style from the Multilevel drop down list; however, the procedure outlined above makes it clearer to you that you can attach any numbering scheme to heading level styles.
Legal style numbering
- Go to the top of your document by pressing (together) on your keyboard.

- This may be all you need to do. If you want to change the alignment options or make the first level a roman numeral number (I, II, III, etc.), the steps below describe how to do this.
- Make sure Level 1 is selected by clicking 1 under Click level to modify: , and choose I, II etc . from the Number style for this level: list., perhaps I, II, III, ...
- If you want the number followed by some other punctuation (or nothing), click to the right of the punctuation beside the number/letter in the Enter formatting for number: box, and hit Backspace to remove the punctuation. If you want some other punctuation, type it now. If you don’t want the number followed by any punctuation, don’t type anything. (Ensure not to type over the letter/number but to only add/change the punctuation.)
- Repeat this for level 3 and any other levels you are using
- Make sure Level 1 is selected by clicking 1 under Click level to modify:
- Click the Set for All Levels ... button and set the values as you like and click OK.
- Set Follow number with: to Space or Tab (define the tab location beside Text indent at: )
- Set Number alignment to Left , Centred , or Right
Left aligning multi-line headings
- If you anticipate any of your headings will wrap to a second line, you may want to set up your numbering such that the first line and any subsequent lines will line up vertically. To do this we will set a specified position for the text that follows the number and follow the number with a Tab .
- First go to the top of your document by pressing (together) on your keyboard.
- Set Number alignment to Left , set Aligned at to 0 (or whatever position you want your number to be left aligned at) and set Text indent at to 0.5 (or a larger indent if your number is indented as well) .
- Set Follow number with: to Tab
- Repeat step 5 for each level you are using. Keep in mind that the Text indent must be larger than the Aligned at value by enough space to allow for your largest anticipated number (e.g. if you are using legal style numbering and anticipate a level 4 number like 23.12.11.1, you will need to make sure the Text indent is at approximately 0.8" or so larger than the Aligned at setting.
- Click OK once you have set these settings for all levels you are using.
Document templates
Every document created in Word has a template associated with it. A template is a collection of formatting, styles, macros and possibly text. When you start Word 2010, it opens a blank document based on the “Normal” or “standard” template. When you go to create a new document by clicking the File taband choosing New , or open Word 2013, Word displays a variety of available templates from which you can choose, including the standard Blank document template which uses the Normal template.
A template is simply a Word document, with a file extension of .dotx (regular template) or .dotm (a template that may contain macros) instead of .docx .
Saving and creating templates
Templates you create should be stored in the trusted templates folder:
- C:\Users\userid\Documents\Custom Office Templates (Windows 8)
- C:\Users\userid\Documents\Custom Office Templates (Windows 7)
- C:\Users\userid\AppData\Roaming\Microsoft\Templates (Windows Vista/7/8)
- C:\Documents and Settings\userid\Application Data\Microsoft\Templates (Windows XP)
Where 'userid' is the name of the computer account you are logged into.
Saving here tells Word that it is safe to open even if the template should contain macros or other code. Because macros can contain malicious code, Word is on the lookout against opening documents with macros. If your computer security settings are at the recommended level, Word will open any template file, but it will disable any macros it contains. For templates that are in the (Trusted) Templates folder, however, Word doesn't disable the macros. It assumes the files are safe, so be sure the files you store there are from a trusted source.
You may wish to create all the styles you think you will need, and set up some standard formatting, (margins, etc.) and save these settings as a template:
- Choose File/ Save As
- For Word 2010, select Microsoft> Templates (or Trusted Templates if you are using Windows XP) on the left side of the Save As window. (In Word 2013 the save location is automatically changed to the templates folder when step 3 is completed)
- Beside Save as type: select Word Macro-Enabled Template or Word Template . Choose Word Macro-Enabled Template if your template has macros, as the UWaterloo Thesis template does .
- Enter the File Name:
- Click Save .
- For Word 2010, click on My Templates and select your template. Click OK .
- For Word 2013, click on PERSONAL and select your template.
Using the UWaterloo Thesis template
The UWaterloo Thesis template (dotm) may be useful as-is for your thesis, or it may be a useful starting point for you to modify.
Exercise: Downloading and using the UWaterloo Word Thesis template
- Download the UWaterloo Thesis template (dotm) .
- If prompted to confirm you want to open this file, click on the OK button.
- When you first open the UWaterloo Thesis template, a yellow bar (Security Warning) will appear at the top, click Enable Content .
- Choose File/Save As
- For Word 2010, select Microsoft> Templates (or Trusted Templates if you are using Windows XP) on the left side of the Save As window.
- Beside Save as type: select Word Macro-Enabled Template.
- Click Save
- Choose File/New
- For Word 2010, click on My Templates and select uwthesis_word . Click OK .
- For Word 2013, click on PERSONAL and select uwthesis_word .
Captioning and numbering of tables and figures
In a longer more structured document, you will frequently want to number and add captions to your tables and figures. You could do this manually, but a better idea is to let Word add these captions and automatically assign the numbers. You need this automated approach for a number of reasons.
- If you want to easily make a cross-reference to the table or figure, Word must maintain the caption.
- If you want to automatically create a List of Tables or List of Figures for your Table of Contents, Word must maintain the captions.
- If you insert or delete tables or figures, Word will automatically renumber if it maintains the captions.
A caption consists of the word Table or Figure, whichever is appropriate, followed by a number. You may then choose to add punctuation, such as a period or a colon, and then the text you wish to have for the caption.
Captioning tables
You may want to add captions to tables already entered into your document or, alternatively, you may want to have captions automatically added to any new tables you create.
Adding captions to existing tables
If you have tables without captions in your document and wish to add captions, you can do so quite easily. For each table:
- Click somewhere in the table
- Click on the References tab
- Click the Insert Caption button
- In the Caption box, it will read Table 1 (if it reads Figure 1, choose Table from the Label: drop down list) and allow you to add further information. If you wish to have punctuation appear after the number, type it, and then type the text of the caption. Notice that the Position box lets you select Above or Below for the caption, but table captions are generally positioned above the table.
Repeat the above procedure for every table in your document. Word will automatically provide the correct table number.
Automatically captioning tables
Word can automatically add the caption to a table when the table is created. To do this:
- Click on the AutoCaption button. You will be presented with a list of objects that can be captioned automatically. One of those is Microsoft Word Table . Click the checkbox beside this item. Confirm the Options below are what you want and click OK . Now every time you create a table, the caption Table followed by the appropriate number will be added automatically. You can simply click in the caption line, type any punctuation you wish, and then type the caption text.
Combining manual and automatic captioning
You can manually caption any existing tables, and then ask Word to automatically caption any additional tables you add. Word will handle the numbering properly.
Captioning figures
To caption an existing figure, select the figure and:
- Make sure that Figure is selected in the Label box. The Caption box will read Figure 1 and permit you to type additional information. Type any punctuation that you wish to have after the number, and then type the text of the caption. Repeat this process with each figure in your document. Note that the caption appears by default at the bottom of the figure.
Automatic captioning is probably not a viable option for figures. Automatic captioning only works with figures inserted via an application that supports Object Linking and Embedding (OLE), that is, objects that can be inserted into a document via the Insert>Object command. Generally, most people insert figures from a variety of sources, so manually captioning is often necessary.
Step-by-step captioning and numbering of tables and figures
Now we will ask Word to automatically add captions to any additional tables that we create:
- Our document already contains 1 table, and we will be adding more. We would like to add a caption to the existing table, and automatically add captions to any additional tables we create.
- First, click anywhere inside the existing table.
- In the resulting dialog box, make sure that Table is selected in the Label: box, and Above Selected Item in the Position box.

- Click on the References tab.
- Click the Insert Caption button.
- Click on the AutoCaption button.

- Now go to the Jack and Jill rhyme, and click at the end of the text of the Jack and Jill rhyme, and press Enter to move to a new line.

Enter the following information into the table.
Note: The caption “Table 2” is created automatically, and you can click after the 2 and type a colon, and then type the caption “Result of Climbing Hill”.
Now we will add a caption to the Lamb figure that appears in “Mary had a Little Lamb”:
- Click on the image of the lamb to select it, click on the References tab, and click the Insert Caption button.
- In the label box, select Figure . Note that that causes the Position to be set to Below selected item .

Now we will add an additional figure near the top of the document. On your N : drive is an image file called fiddle.bmp .
- Set the mouse pointer after the title of “Hey Diddle Diddle”, press enter>. Go to the Insert tab and click on the Picture (Word 2010) or Pictures (Word 2013) button. Select fiddle.bmp from the N drive .
- Now click on the fiddle image to select it . Click on the References tab and then the Insert Caption button. Make sure that Figure is selected from the drop down list beside Label: . To the caption field add a colon , followed by “Cat’s Fiddle” and click OK . Note that the picture is captioned as Figure 1 because it appears first in the document, and the picture of the Lamb, which was Figure 1 has been renumbered to Figure 2.
Aligning the table and figure caption
The caption for both figures and tables defaults to left alignment. You may wish to have your captions centered, particularly if your tables and figures are centered on the page. Captions are inserted with the Caption style attached. To change the alignment:
- Click on the button in the bottom right of the Styles section in the Home tab. In the Styles window that appears, click on the down arrow beside the Caption style and choose Modify

- Scroll to find the Caption style in the style gallery and right click on it and choose Modify.

Since the same style is applied to Figure and Table captions, you cannot have different alignments for these two types of captions, unless you create a new style for one of the captions. This will work, but you must remember to apply that style manually to the captions, and if you are creating a List of Tables or List of Figures, you must remember to tell Word to use items of that style to build the list.
Concatenating chapter number to figure or table number
You may wish to have the chapter number appended to the table or figure number in the caption, such as Table 1.3, or Figure 3.8:
- Choose Table in the Label box

- Choose Heading 1 beside Chapter starts with style and . (period) beside Use separator:
- Click OK (note that the type of numbering you choose for your Heading 1s will be used)
- Repeat the above, but choose Figure in the Label box.
- Click Close .
Captioning tables and figures in appendices
You likely want to caption your tables and figures in your Appendices using the Appendix letter and the number of the table/figure (e.g. A-1). I have found two ways to do this:
- You can create a new label when captioning your tables and figures: When you are in Appendix A you would create a new label of Table A- and then the numbering will add the 1, 2, etc. The only issue with this is that it 'forces' a space after the '-' that you would have to remove manually or with a macro (or you could add a space between the 'A' and the '-' in the label so the spacing is even but that may not be consistent with the rest of your thesis). If you choose to do it this way, when you generate your list of Tables and Figures you would need to generate the list of table and figures in the appendices separately by choosing these other labels at the time of creating your lists of tables and figures.
- You could use a heading style (for example Heading 9) for your appendix headings. You could base it on the Appendix style and then format it as you like it. You would then need to click on your first appendix title and go back into Format/Bullets and Numbering to link the level to style 'Heading 9' (rather than style 'Appendix'). You would also need to change all the Appendix titles to the Heading 9 style as well. At this point, you could use the built-in labels for Tables and Figures and click on Numbering and indicate to Include chapter number and Chapter starts with style, Heading 9 .
Footnotes and endnotes
Footnotes and endnotes are handled in a similar fashion, except that footnotes appear at the bottom of the current page, and endnotes appear at the end of the document.
- We wish to insert a footnote after the word fiddle in the rhyme Hey Diddle Diddle . Click your mouse immediately after the word fiddle and click on the References tab and then the Insert Footnote button. If you are in Print Layout view, you will be shifted to the bottom of the page and be able to enter your footnote text right away. If you are in Draft view, a new pane will appear at the bottom to allow you to type your footnote. In either case, to return to the same spot in your document, simply double click on the footnote number. (In Draft view you could also click on the close button on the right side.
- Type the footnote text:
The instrument in question was really a violin. The rumour that it was a very expensive Stradivarius was simply that, mere rumour.

Here you could make changes to the number format, restart the numbering, convert footnotes to endnotes, etc. We won't make any changes now so just click the Cancel button.
- Double clicking on the footnote number
- Now, switch views. If you were in Draft switch to Print Layout, and vice versa. Do this by selecting the appropriate Document View from the View tab.
- We want to put another footnote, in Jack and Jill , after the word crown. Click after the word crown , and click on the References tab and then the Insert Footnote button. The footnote number will be presented, and you can type your footnote. Type this footnote:
A crown is another name for the head. They could have said that Jack broke his head, but that would not rhyme, so they used the word crown instead.
- Now return to the main document by double clicking the footnote number.
- Move the mouse over one of the footnote indicators in the document (don’t click) and see the note that appears showing the text of the footnote.
- In the References tab, right click on the Insert Footnote button and then choose Add to Quick Access Toolbar.
- Now create a footnote by clicking on the button on the Quick Access Toolbar.
Note: If your Word file was imported from a previous version of word and you have issues with footnotes appearing on the wrong page, you can try the following:
- Open the file.
- From the File tab, choose Options .
- Click Advanced on the left and scroll down to the bottom section, Compatibility options for
- From the drop down list beside Lay out this document as if created in: choose Microsoft Word 2010 or Microsoft Word 2013 , depending on the version you're using.
How to change the footnote separator
The footnote separator is the thin line that appears between the bottom of your page and any footnote text that may be on that page.
- In the View tab, click Draft to switch to Draft view.
- In the References tab, click Show Notes (in the Footnotes section of the tab).
- Directly above the pane that appears at the bottom is a drop down menu. From this drop down menu, you can choose Footnote Separator .
- You can then change the footnote separator in the pane and click on the X in the top right of the pane to close the pane.
Endnotes with square brackets ([1],[2],...)
- In the References tab, click Insert Endnote
- Click on the button at the bottom right of the Styles section of the Home tab to open the floating Styles window. Click on the Options link. Under Select styles to show choose All styles and click OK. Find the Endnote Reference style in the list and click the drop down arrow beside it and choose Modify. OR
- Select an endnote reference number from the endnotes section at the end of your document, right click and choose Style. Endnote Reference will be selected. Click the Modify button.
- In the Modify Style window that opens, click on the Format button (bottom left) and choose Font ; uncheck superscript and then click OK and OK again. (Click Close if necessary.) All of your Endnote Reference numbers should now NOT be superscript.
- In the References tab, clicking on the button at the bottom right of the Footnotes section
- Beside Number format, choosing the style you like
- Clicking on the Apply button
- Click at the top of your document (or press Ctrl-Home on your keyboard to quickly go to the top of your document).
- In the Home tab, click Replace on the far right (in the Editing section).
- Click on the More button. (If you don’t see a More button but do see a Less button, then you can leave things as they are.)
- With your insertion point in the text box beside Find What: , choose the Format button and choose Style then choose Endnote Reference from the list and click OK .
- Click in the text box beside Replace With: and type [^&] . Now click on the Replace All button. A message will pop up to tell you how many replacements were made. Click OK . All of your Endnote Reference numbers should now have square brackets around them.
- Click the Close button to close the Find and Replace window.
A Bookmark marks a place in a document that you may wish to jump to, refer to, etc.
We will insert a bookmark at the location of the song “Inky Dinky Spider”.
- Select the title “Inky Dinky Spider” . From the Insert tab, click on Bookmark . In the resulting dialog box, assign the bookmark a name of “spider” and click Add . Initially, you will not see any indication that a bookmark exists, but the next step will describe how you can view a bookmark 'codes' so you will know where your bookmarks are.
Cross references
A cross-reference is a referral from one location in a document to a component elsewhere in the document. For example, “see Table 2: Snowfall in 2003”. Cross references can be made to tables, figures, footnotes, headings, page numbers, bookmarks, etc.
We will create a cross-reference to the “Jack and Jill” table.

- In the Reference type : drop down list, select Table . Note that a list of all tables appears.

and we can add the text “climbing things can prove dangerous”. Note that the grey area that you see when you click on the inserted cross-reference text is there to indicate that this is a cross-reference. It will not print.
- Now we will delete the first table in our document, and we will see what happens to our reference. Drag through to select the caption and the complete Table 1 , and press the delete key.
- If we print it or do a print preview, the references will be updated before printing occurs.
- Home tab: Select/Select All (in the Editing section) or press Ctrl-A on your keyboard
- Press F9 . Note that the table numbering and cross-references are updated.
- In the Reference type: drop down list, choose Bookmark.
- From the list of bookmarks presented, select spider (in this case this is the only item in the list).
- From the Insert reference to: drop down list, choose Page number (as opposed to the actual text that was bookmarked).

- Click on the Close button to close the cross-reference window.
Outline view
Outline View is very useful for viewing the structure of your document, or for restructuring it. The following exercise takes you through some of the features/uses of Outline View.
- Click on the View tab and then click Outline in the Document Views section.
- A new Outlining tab will appear with various options/settings to choose from.
- “Rhymes About Animals” is currently a Heading 2. Promote it to a Heading 1 by clicking in the heading , and then clicking the Promote button (alternatively, click SHIFT TAB). Note that when you promote this heading, you do not promote any headings at a lower level. “Baa Baa…”, “Hey Diddle…” and “Mary Had…” all remain as Heading 3.
- Click “Rhymes About Animals” again and demote it back to a Heading 2 by clicking the Demote button (or by pressing the TAB key).
- Click on the Plus sign beside “Rhymes About Stars” (the mouse printer will become a double headed arrow when you are over that plus sign). Clicking on this plus sign selects the current line and the entire structure under that line as well.
- Now click the Promote button. Note that all heading levels are promoted, but the text remains as text.
- To verify that the text remained as text, click on the Show Level: drop down list and choose All Levels to display the text as well as the headings.
- Select this structure again ( click on the Plus sign beside “Rhymes About Stars” ), and demote it to its original level by clicking on the Demote button.
- Perhaps the heading “Twinkle Twinkle …” should have been body text, and not a heading. Click on the heading "Twinkle Twinkle ..." and demote it to body text by clicking the Demote to Body Text button. Now promote it back to a heading by clicking the Promote button(it may become a Heading 2 so you may need to click on the demote button to make it a Heading 3 again).
- Try choosing All Levels from the Show Level drop down menu to display the entire document.
- Click on the check box beside Show First Line Only (with show all levels), to see that it displays only the first line of each paragraph but all heading levels.
- Choose Level 1 from the Show Level drop down menu to view only level 1 headings.
- C lick somewhere in the first level one heading , and then click on the Expand button on the ribbon above to expand that heading to show all Heading 2s.
- Click in one of the Heading 2s and expand it by clicking the Expand button .
- Now reverse the process by clicking in the appropriate heading level and clicking the Collapse button . Return your outline to showing only level 1 headings.
- Now click on the big plus sign beside the “Nursery Rhymes” heading , and click the Expand button . Note that you see all Heading 2s. Click again on the Expand button , and all Heading 3s appear. Reverse the process by repeatedly clicking the Collapse button twice.
- Select Level 2 from the Show Level drop down menu to view Heading 1s and Heading 2s.
- Click on the Plus sign beside the heading “Rhymes About Stars” to select the entire structure.
- Move it up in the document by clicking the Move Up button until you have the heading appearing above the “Rhymes About Animals” heading.
- View the entire document by selecting All Levels from the Show Level drop down menu to convince yourself that not only the heading but everything that appears under that heading was moved.
- Now put the entire structure back into its original location by selecting Show Level 2 from the Show Level drop down menu and clicking the Move Down button .
- Let's go back to Print Layout view. Click on the View tab and then click the Print Layout button on the left side of the ribbon.
Creating a table of contents
Word can automatically generate a Table of Contents (TOC) from your styles, primarily the Heading styles you have used. Although it is easiest to create the TOC from built in Heading styles, you can also ask Word to include other styles as well by clicking on the Options button in the Table of Contents window while generating the Table of Contents. To create the Table of Contents, you
- Set the insertion point at the beginning of the document, where the TOC should appear
- Choose an item from the Table of Contents drop down button on the far left of the ribbon. If you like one of the sample Table of Contents formats in the list, you can choose one of those; if you want to customize your Table of Contents you can choose Insert Table of Contents and select the format, and the number of heading levels you wish to have appear in the TOC, and optionally click on the Options button if you want to add or remove styles to include in the Table of Contents, and click OK.
- Word will insert the Table of Contents.
- At some later point, you can insert the TOC again, and Word will ask if you want to replace the old TOC.
Generating a list of tables and a list of figures
A List of Tables and a List of Figures can be automatically generated as well. You would click on the References tab and click on Insert Table of Figures from the Captions section of the ribbon. From the Caption label: drop down menu, you would choose either Table or Figure , whichever is appropriate. If you wish to generate a list for both, do one first and then the other.
Exercise: Adding a title page and creating a Table of Contents
- Switch to Draft view by selecting the View tab then the Draft button.
- Go to and click your mouse at the top of your document or press on your keyboard to go to the top of your document.
- At the top of your document, press Enter> to open up a blank line. Make sure that the blank line is in the normal style by clicking in that line , and clicking on the Normal style button in the Styles section of the Home tab.
- Type some information that will constitute the Title Page of your thesis.
- Click at the end of the text on the title page , and insert a Section break: click on the (Page) Layout tab and, in the Page Setup section, click Break and then choose Next Page (in the Section Breaks section) .
- Click within the text of your title page and click on the button in the Page Setup section of the (Page) Layout tab. In the Layout tabof the window that opens, under Page, set Vertical alignment to be Center and click OK.
- Now, on the page after the title page, press the Enter key to open a new line (if necessary). In that line, type Table of Contents .
- Let's create a new style for the titles on the preliminary pages, called " Prelim Headings ". This new style should be based on the Normal style, Centered, Arial font, 14 point, and bold.
- Select "Table of Contents" and assign the new style, Prelim Headings to it.
- Click after the title, Table of Contents and press Enter to go to a new line. Make sure the new line is the Normal Style (by clicking on the Normal style button in the Styles section of the Home tab if necessary).
- Click on the Options button.
- Scroll down until you see the Prelim Headings style in the list.
- Put at " 1 " beside the Prelim Headings style and click on the OK button.

- The Table of Contents is inserted into your document. When you click on it, it appears greyed, but the grey shading will not print.
- After making changes in your document, to update the Table of Contents, right click on it and choose Update Field; you will then be prompted to Update page numbers only or to Update entire table; choose one and then click OK .
Exercise: Creating a list of figures and a list of tables
- Now we will create a List of Figures.
- Put a page break after the Table of Contents by pressing on your keyboard.
- At the top of the new page, type List of Figures .
- Assign the new style, Prelim Headings to the title List of Figures.
- Press Enter to go to a new line.
- Click on the References tab and click on Insert Table of Figures from the Captions section of the ribbon.

- Everything else is fine, so click OK . A List of Figures is inserted.
- Repeat the above procedure to create a List of Tables. The title of the page should be List of Tables . Assign the new style, Prelim Headings to the title List of Tables. In the settings window, choose Table from the drop down list beside Caption label .
- To update a List of Figures or a List of Tables, right click on the list and choose Update Field; you will then be prompted to Update page numbers only or to Update entire table; choose one and then click OK .
Page numbering/headers and footers
The pages of the front material of the thesis (all components up to and including the Table of Contents) should be numbered in lower case Roman numerals, but no page number should appear on the first page. The body pages of the thesis must be numbered in Arabic numerals, starting at 1. In order for parts of the document to have different formatting, it must be divided into sections. Earlier, when we were inserting the Table of Contents and Title Page, we inserted a section break. We will need to insert another section break between the preliminary pages and the body pages. We will then have the front material in one section, and the body in another section and be ready to number our pages. We will place our page numbers in the bottom centre.
Assigning page numbers
- Click on the View tab and click on the Draft button in the ribbon to change to Draft view.
- Click at the top of the first page of the body of your thesis (before any text).
- Click on the ( Page) Layout tab and, click Break/ Next Page (in the Section Breaks section of the drop down list) .
- Scroll to the beginning of the document, and place the cursor at the top of the second (2nd) page after the section break.

- You should now have lower case roman numeral numbering starting from ii on the second page of your preliminary pages.
- Click on the page number on your title page
- Now you should NOT have a page number on your title page, but you should still have page numbers on all the pages following the title page.
- Your pages will now have numbers on the bottom centre, but they are all Roman numerals. That is not what we want for the main body of your thesis. We need to reset the page numbering and format beginning on the first page of the body of your thesis.
- Click on the page number on the first page of the body of your thesis.
- Click on the Insert tab , and choose Page Number/Format Page Numbers from the Header & Footer section .

Inserting landscape pages
Sometimes you may have a table or figure that is too wide to fit on a normal portrait page (8.5 by 11) so you want to place it rotated on the page. That is, you want to create a landscape page, (11 by 8.5). That is fairly simple to do if you understand the concept of Word sections.
In order to change any formatting in Word, such as the page orientation, you need to insert a new section.
Exercise: Adding a landscape page in the middle of a document
- Go to the spot in your document where you want to insert the landscape page.
- Press Enter after the section break to open up a blank line.
- Then click on the (Page) Layout tab and, choose Break/Next Page (in the Section Breaks section of the drop down list)to end the previous section.
- Click in the empty line between the two section breaks, click on the (Page) Layout tab, and choose Orientation/La ndscape (in the Page Setup section of the ribbon). This will cause the new empty page to be landscape but all other pages will remain portrait.
- Choose View/Print Layout to see that this new blank page is landscape, but the rest of the document is portrait.
Perhaps you have already created the table, and now wish to modify it so that it appears in landscape mode.
Exercise: Modifying a table so that it appears in landscape mode
- If you have a table caption, you will want to drag through the text of the caption and the table to select all the information you will want on the landscape page.
- Click in it and then click the symbol that you will see near the top left corner of the table when you hover your mouse in this area OR
- Click in the table and then click on the Layout tab that you will see at the top under Table Tools . Then choose Select/Select Table from the Table section of the ribbon.
- With the table selected, click on the ( Page) Layout tab. Now click on the button in the Page Setup section of the ribbon.

- This will cause Word to add the section breaks before and after the table and to put the table on a landscape page.
- Click at the top of the page in question.
- Click on the Insert tab.
- Choose Page Number/Format Page Numbers from the Header & Footer section of the ribbon.
- Click the button beside Continue from previous section (see below) and click OK .
Note that when you add page numbers or headers/footers to this document, they will appear in a landscape not portrait orientation. This is acceptable in an electronic thesis. If you had a requirement for a printed copy to have a portrait page number on a landscape page, Microsoft has instructions or in Word 2010/2013, you can do the following:
- Click in your landscape page that already has section breaks around it.
- Click on the Insert tab, choose Page Number and then Page Margins, and choose the option called Vertical, Right.
- You should now be in a Header/Footing editing view.
- Click on the page number on the right side of the page and drag the square boxes so that the box the page number is in spans the width (or height in this case) of your page. You may have to resize this box to see your page number to edit it, but you can always adjust it later. As long as the box is centred on the page, all will look as it should.
- Click on the page number text and press Crtl-E to centre the text vertically (this could also be done with the middle alignment button in the Home tab).
- You may edit the text within the box to remove the word, 'Page' as well.
- Select the number itself, click on the Home tab and change the style to Footer to match the other page numbers.
- If the page number itself is incorrect, choose Page Number/Format Page Numbers from the Header & Footer Tools/Design section of the ribbon (or in the Insert tab), and click the button beside Continue from previous section , or specify a page number, and click OK .
- While in the footer, click Link to Previous in the Header & Footer Tools/Design section of the ribbon to unselect it.
- If there is still a page number in another location, select it and delete it by pressing the delete key on your keyboard.
Creating your thesis from many small documents
Since computers are faster and have more memory than they did in the past, and since Word 2010/2013 file sizes are smaller (due to format) than earlier versions of Word, it may be best and easiest to have your thesis all in one file.
While you are creating your thesis, however, you may create it as a number of smaller files, perhaps storing each chapter in a separate file. In order to build a table of contents, create cross references and get pages numbered sequentially, you will want to combine them into a single file at the end.
The easiest way to do this is to simply amalgamate all files by selecting the Insert tab then Object/Text from File . This method will combine all your smaller files into one large file. This one large file should be fine for the reasons stated above, if you have sufficient memory on your computer, and if your thesis is not too large and doesn't contain a lot of large images.
If you absolutely cannot have such a large file due to an older computer or lack of computer memory, another option exists. The other option is to use the Insert as Link feature.
Notes about the 'Insert as Link' feature :
- All cross-references will need to be added at the end; updating them (using Ctrl-A, F9) will likely break them and they will need to be re-inserted.
- If you use the software, EndNote, for managing your bibliography, you may need to do all of your updating in the individual files and avoid using F9 in your main file.
- Start with an empty document. F rom the Insert tab, in the Text section of the ribbon, choose Object/Text from File .

- You will want to see the actual text, so if you do see some code like the above, click on the File taband choose Options . Click Advanced on the left and then scroll down on the right to the Show Document Content section. Beside Show field codes instead of their values , make sure there is NOT a checkmark. If there is, click on the checkbox to remove the checkmark and click the OK button.
- Alternatively, you can toggle between viewing the complete text or field code of a specific field by right clicking on it, and from the context menu that appears, select Toggle Field Codes .
- Repeat this Insert as Link process for all your files. When you have created a single document, you can add cross references, page numbers, table of contents, etc.
- When you are done, save this new document.
- If you need to update your table of contents, lists of figures or list of tables, avoid using F9 and update them individually by right clicking on them and choosing Update Field; you will then be prompted to Update page numbers only or to Update entire table ;choose one and then click OK .
- Select the entire main document (Home tab, Editing section of ribbon , Select/Select All, OR simply press CTRL-A on your keyboard ).
- Then simply press the F9 key to update your main file. (Remember that you may need to re-insert all your cross references if you do this.)
- Select the entire main document (Home tab, Editing section of ribbon , Select/Select All, OR simply press CTRL-A on your keyboard )
- Press CTRL-SHIFT-F7 on your keyboard . Any modified files will be saved. You can then save the main file.
Enter document properties
To ensure your PDF and Word file is accessible , it is imperative that the Title of your thesis be entered in the document properties:
- Choose File/Info .
- Look at the Properties information on the right.
- Click on the Title text box and type in the correct title.
- You can also enter other document properties such as your name for the Author (by clicking Add an author ;you can remove an author by right clicking on their name and choosing Remove Person ),etc
Hanging indents
If you are creating your bibliography manually, you may want to create a hanging indent. To do so:
- Click on the line where you want your first item.
- In the ( Page) Layout tab, click on the corner arrow in the Paragraph section.
- In the Paragraph window that opens, make sure you are in the Indents and Spacing tab.
- Under Indentation , beside Left , set the size you want for the tab that will be used for the 2nd and subsequent lines of your entry.
- Under Special , choose Hanging.
- Now type the information you want for your bibliography item. When the text wraps to the second and subsequent lines, it will automatically be indented until you press enter on your keyboard.
Inline references and bibliography
Creating in line references and generating a bibliography is possibly the most complex task involved in preparing a thesis. This isn't because this is hard to do, but because there are probably as many different formats required for references as there are people preparing a thesis at any given point in time.
One solution to this problem is to purchase a Personal Bibliographic Management program. Packages such as these, all perform essentially the same functions, interface with Word, and let you manage a bibliography, etc.; however, these packages can be costly to purchase.
The recommended solution is to use RefWorks, a web based bibliographic management package licensed by the UW Library, that is available to all UWaterloo faculty, staff and students at no charge. It is linked from the UWaterloo Library web site in the right panel. The UWaterloo Library offers courses on how to use RefWorks and they also maintain course notes for RefWorks .
PDF for electronic submission
Theses are now submitted electronically in PDF format to the Graduate Office. They should be named, based on your name, Lastname_Firstname.pdf . Word 2010 and Word 2013 have a built in PDF creator, and Word 2007 allows you to download a free PDF creator add-in that works very well with Word 2007 for creating PDF files.
For Word 2007, check to see if the PDF creator add-in is installed:
- If, under Save As, you see PDF or XPS , then the add-in is installed and you can click on PDF or XPS, then browse to where you want your PDF file saved, type in the name you want it to be called, and click Publish .
- If, under Save As, you see Find add-ins for other file formats, then the add-in is not installed. See the next section for instructions on how to install it
Word 2007: How to install the add-in if it is not installed:
- Sign onto the PC with an administrative account.
- Open Word and click on the Office buttonat top left, then select Save As/Find add-ins for other file formats .
- A Word Help window will appear. Browse down and click on the hypertext for Microsoft Save as PDF or XPS Add-in for 2007 Microsoft Office programs.
- Internet Explorer (or your default web browser) should load a page.
- Click on the Validation button in the middle of the page to continue.
- A horizontal message bar will appear near the top of your window (below the Internet Explorer toolbar). Click where it says "click here" and select Install Active X Control from the menu.
- Click Run to any windows asking you to install Active X, and then the SavetoPDF... exe file.
- At the license page, click in the bottom left to " accept " then the continue button.
- A window should appear when the installation is complete.
- Close Word and re-open it.
Converting Word files to PDF
If you are using Word 2010/2013 built in PDF creator
- Click on the File taband choose Save As
- Browse to the location where you want it saved.
- Choose PDF (*.pdf) beside Save as type:
- Click Options . Make sure that the Document structure tags for accessibility and Document Properties is checked and Create bookmarks using Headings is checkedand click OK.
- Type in the name you want it to be called (based on the Lastname_Firstname.pdf format), and click Save .
- NOTE: Avoid security settings as they may interfere with assistive software
How to save a Word 2007 file as PDF using the add-in:
- Click on the Office button and choose Save As/ PDF or XPS .
- Browse to where you want it saved, type in the name you want it to be called (based on the Lastname_Firstname.pdf format), and click Publish .
Testing PDFs for Accessibility
PDF files can be checked after creation, to ensure that the tags are in a logical sequence and that all items are properly tagged.
Adobe Acrobat Pro Accessibility Checker
- Open Adobe Acrobat Pro (these notes are based on Adobe Acrobat XI (version 11)
- Open the newly created PDF file
- View/Tools/Accessibility , click " Full Check " on the right.
- Under Checking Options, check all the checkboxes and click Start Checking.
- click the + sign beside (e.g.) Document (## issue) and read the information displayed for each issue to learn how to fix it
- If there are issues, it is often easiest to fix them in Word and then re-create the PDF file
PDF Accessibility-Checker (PAC) (*free*)
- Free download
- Recommended by World Wide Web Consortium (W3C)
- 14/23 WCAG 2.0 checks
- Gives text of what a blind person would hear
- Easy to install and use
- Windows and Mac versions available
- Download and install PAC from its website (you do not need to be an administrator to do this)
- To run PAC, double click on pac.exe from where it is installed
- Click Browse and browse to the PDF file you would like to check; select the file and click Open
- Click Start Check
- Click Report
- You can ignore any issues related to ‘Correct Syntax of Tags / Rolls’
- Some issues may require some investigating as PAC doesn’t provide as much detail as Word on issues
- Issues related to ‘Consistent Heading Structure’ or ‘Logical Reading Order’ are often related to an issue such as a Heading 1 followed by a Heading 3 (instead of Heading 1 followed by Heading 2 followed by Heading 3)
Electronic Thesis submission procedures
Procedures for submitting your thesis electronically .
Using Word to Write your Thesis: Creating an Outline

When I started the third year of my Ph.D., and the thought of creating a thesis outline was looming, I was advised to attend a course to learn how to use Microsoft Word properly before I started writing .
I laughed! Of course, I knew how to use Word! Why on earth would I spend 3 hours at a course on something I already know how to do?
My friend was insistent that I should attend. Since she had never steered me wrong in the lab before, I figured it couldn’t hurt to see if there was a trick or two I could pick up along the way.
Initially, I was quietly despairing that the course was a waste of an afternoon, especially after hearing questions such as “How do you insert a table?”, but I persevered and, by the second half of the session, realized that I knew nothing about the advanced functions of Word that make writing a thesis that much easier.
Finding out how little I actually knew had me feeling down at first, with that “worst Ph.D. student ever” feeling sinking in. But after talking to other students, I soon found out that I wasn’t alone! Surprisingly, few people I spoke to (including several students who had just submitted theses) had any idea of how much of the work of thesis writing Word would do automatically (or auto-magically) for you.
In the hopes that I can make at least one student’s write-up less stressful, I’ve created several posts that will show you how to use Microsoft Word ‘s advanced functions to write your thesis. Today’s topic starts from the beginning.
Creating a Thesis Outline
The first trick that I found fantastically helpful in laying out thesis chapters is the Outlining function . Creating a thesis outline allows you to set out the headings for your chapters, sections, and subsections and provides an easy means of moving them about without having to copy and paste things all over your document. To use the outline function, click the “ View ” tab at the top of the Word menu and select “ Outline ”.

This will give you the outlining toolbar.

From here, you can start your thesis outline by jotting down your main headings for each chapter and building a plan for each section.

At this stage, you will have a very rough idea of the points you want to include. Now, you can designate the level or importance of each heading. The level will decide the size and type of font used for the heading and will be useful later on when you generate the table of contents.
Give it Some Style
Before you start assigning levels to the headings, decide how you want each level to look: e.g., the Chapter heading needs to be size 20, bold and underlined, level 2 section headings need to be size 18, bold, etc.
Then set up the style for each level:
- Close outline view
- Return to the home tab
- Go to the Styles gallery
- Right-click “ Heading 1 “
- Select “ Modify” and set up your preferred font styles

I found it useful to set this to “ New documents based on this template ” so that in each thesis chapter that I wrote, the headings were identical. You can also use the format option to make even more changes, like adjusting the line spacing and indents, or setting text to “keep with next” so paragraphs don’t break over a page or figures and legends don’t become separated.
Once you have this set up for each of the headings (I went as far as Heading 5 and didn’t need to go any further), you can set up the levels for your chapter headings within your thesis outline.
- Return to outline view
- Using the tool marked “ level ” use the single arrows on either side of it to promote or demote each heading a level, the double arrows move the headings to either end, i.e. Heading 1 or body text.

If you decide you need to move sections around, rather than copying and pasting, simply click the grey circle next to the heading and drag it to its new position.
Give Them Numbers
Next, you can add numbering to your headings. Still in outline view :
- Highlight all the headings in your thesis outline
- Click the Home tab and select “ multilevel list ” (located beside list numbering and bullet points)
- Select the type of numbering you want. I opted for the 1, 1.1, 1.1.1 format, but don’t be afraid to play around with other options if that’s not what you’re looking for.

With your thesis outline laid out for each chapter, it just becomes a matter of filling in the gaps. This will break your thesis into much more manageable chunks.
Pick a small section to write each week, and your thesis will practically write itself!
Stay tuned for my next post on generating a table of contents, inserting captions, and cross-referencing sections.
Originally published October 15, 2014. Reviewed and updated on November 22, 2020.
**Note: All screenshots taken from Word for Windows, 2019.

Thank you so much that’s just what I was hoping to find to finally finish my master’s thesis!

Wow. Thanks for this. Much helpful!!

I am just starting my Master’s Capstone paper and this is exactly what I was hoping to find! THANK YOU!

Thank you so much for this! I have completed almost all of my undergrad without knowing about outline and am so grateful to find your post for my dissertation!

Very informative
Leave a Comment Cancel Reply
You must be logged in to post a comment.
This site uses Akismet to reduce spam. Learn how your comment data is processed .
Forgot your password?
Lost your password? Please enter your email address. You will receive mail with link to set new password.
Back to login
Information Technology
Writing Your Thesis in Word
Follow these instructions and tips for successfully writing your thesis in the Word thesis template . Don't have the thesis template? Download it from our website .
CAUTION: DO NOT USE THE WORD THESIS TEMPLATE IN ANY DOCUMENT OTHER THAN WORD. (OPENOFFICE, NEOOFFICE, PAGES, GOOGLE DOCS, ETC). Make sure that you are using Word on the computer and NOT Word on a browser! Your formatting will break if you do so!!
Some of the instructions will vary depending on the version of Word you use. These instructions are for the current version, Word 2019. We've also documented exact steps for Word 2016 on Mac and Word 2016/2013 on Windows.
- Applying Styles
- Modifying Styles
Section Breaks
- Table of Contents, List of Figures, List of Tables
Deleting Optional Sections
- Formatting Thesis to be Double-Sided (with mirror margins)
- Copying and Pasting into Word from Another Document
- Formatting Thesis to be Single-Sided
Rotating Pages
Inserting a really long sideways excel table into word.
- Accidentally delete the Table of Contents, List of Tables, or List of Figures?
Writing Thesis with Multiple Languages
"Styles" are used in Word to easily apply a set of formatting attributes--such as font, font size, indentation, and spacing--consistently throughout a document. When you apply a style to a paragraph, it is formatted with the attributes defined in the style. The Word thesis template has many pre-defined styles for things like chapter titles, sub titles, main body text, quotes, figures, etc. See the table below to learn what styles to use and where.
Pre-defined styles in the Word thesis template
Note: Word has many default styles that can't be deleted. To avoid confusion from thesis-specific styles and Word's default ones, look for a comma after the name of thesis styles (e.g., Heading1,h1).
How to apply styles
See specific instructions for your version of Word:
- Word 2016 & newer (Mac)
- Word 2013 & newer (Windows)
How to modify styles
If you don't like the way a style is defined, you can easily modify it!
- Go to the Format menu and choose Styles .
- Select the style you want to modify from the lefthand side.
- Click the Modify button.
- Change the parameters you want. More options are available from the Format drop-down menu.
- Click OK when you're done.
Tip: Want to change the font type in the entire thesis? Modify the " Normal " style.
How to copy styles from the template to another document
If your document suddenly loses styles from the template, you can readd them without worry!
- Go to the Styles ribbon and select the bottom-right pop-out button for the Styles Pane to appear.
- Select the Manage Styles icon (may appear as an "A" with a checkmark button).
- Click the Import / Export button located on the bottom-left.
- Click Open File (on the right-side) and select the thesis template. Select missing styles.
- Click Copy to copy the styles over to your current document.
The thesis template is designed for double-sided printing, so you need to insert an Odd Section Break at the end of each chapter. This will ensure the next chapter falls on the right side (or odd page) of the document. Odd section breaks should also occur at the end of each section in the front matter.
How to insert an Odd section break (on Mac)
- Turn on hidden components so you can see when a section break is inserted (On the Home menu, click the ¶ button.)
- Place your cursor at the end of the chapter.
- Go to the Layout menu > Breaks > Odd Page

Note: Have you converted the thesis template to single-sided? If so, you need to use Next page breaks instead of Odd.
See specific instructions for your version of Word: 2016 & newer (Mac); 2013 & newer (Win)
How to delete section breaks
Multiple consecutive section breaks will create extra blank pages in your thesis. Delete them this way:
- Use the show/hide button (¶) to reveal hidden components.
- Place your cursor just to the left of the section break.
- Hold down the Shift key and the right arrow key to select it.
- Press the Delete key.
Note: If that doesn't work, go to the View menu > Outline. Click on the section break to highlight it, and delete it.
Tips and Quick Fixes:
- Use only one section break at a time. Multiple consecutive breaks create erroneous blank pages. (Learn how to delete sections breaks above )
- In some cases it may be necessary to force something to the next page (eg, an image). Use a page break for this (Insert menu > Break > Page Break)
- Click the Show/Hide (¶) button to see what section breaks you already have.
- Format menu > Document > Layout tab
- Section start: Odd page
- Check “Different odd and even” and “Different first page”
- Apply to WHOLE document
- See instructions for your version of Word: Word 2016 & newer (Mac); 2013 & newer (Win)
Table of Contents, List of Figures, and List of Tables
The Table of Contents, List of Figures, and List of Tables will automatically populate based on the styles you apply to certain text like chapter titles, figure titles, and table titles. Periodically, you will need to update the Table of Contents and other tables so it will populate this information.
How to Update the Table of Contents, List of Figures, and List of Tables
- Right-click (or control+click) on the gray shaded part of the Table of Contents (or List of Figures/Tables).
- Choose Update Field .

- Do NOT edit the Table of Contents manually!
- Check that you applied the right style to the chapter title, figure title, or table title in the body of your thesis.
- Have a long chapter title but need it to appear as a single entry in the TOC? Press shift+return to force text to next line in the chapter title without creating a new paragraph.
How to Add Another Table of Contents
If you want to add a new table of contents, follow these steps, which use a table of schemes as an example.
- Select "New Style" in the styles pane
- Basing the new style on "Figure Title" or "Figure Caption"
- Rename the new style to something else (for instance, "Scheme Title" and "Scheme Caption")
- Apply these new styles to your scheme titles and captions
- 2016 and newer (Mac)
- 2013 and newer (Windows)
- Select " No " if you are prompted "Do you want to replace the table of contents?". This prevents your first Table of Contents from being replaced with your table of schemes.
There are specific pagination rules you must follow, all of which are outlined in the Senior Handbook. Some important ones to keep in mind:
- Page 1 is the first page of the first chapter of your thesis (usually the Introduction).
- The page number is hidden--not printed--on the first page of each chapter (including Introduction), even though those pages DO count toward the pagination.
- Blank pages should not have a printed page number (but do count toward the pagination).
How to hide a page number on the first page of a chapter
- Make sure the right kind of section break is inserted at the end of the previous chapter (e.g, Odd section for double-sided thesis)
- Format menu > Document > Layout > Check ‘Different First Page’
- Delete any page number that appears on the first page.
How to fix pagination on your own
- Page Layout View > double-click on the page number. Or from 'Insert', choose 'Page Numbers'.
- If you are in your first chapter, normally your Introduction, click on 'Format..' and under 'Page Numbering' make sure that 'Start at:' is chosen, and manually enter 1. Then, click 'OK' and ensure that 'Show number on first page' is unchecked.
- When you are not in your first chapter, normally after your Introduction, make sure the 'Show number on first page' is unchecked. Then, click on 'Format..' and under 'Page Numbering' make sure that 'Continue from previous section' is chosen.
- When pagination completely breaks, come to the Help Desk!
Inserting images is more than a simple copy and paste. Follow these guidelines:
- Keep the image saved to your computer (don't copy and paste from a web page).
- If you need to modify the image more than just a simple resize, do it in an application like Photoshop (not Word).
- Follow the exact instructions below for inserting the image into the Word thesis template.
How to insert an image
- Put the paragraph in the Figure style before inserting the figure
- In Word: Insert menu > Picture > From File
- Put the title of the figure in the "Figure Title" style (which will appear in the TOC)
- If you have a caption, use the "Figure Caption" style.
How to leave space for a large figure
Sometimes you may need to insert a figure that takes up an entire page. To do this without causing any pagination errors, follow these instructions:
- Insert the cursor where you want to add the figure page.
- In the menu bar, go to Insert > Break > Page break.
- Repeat step 2.
- You should now have a blank page. When you print your thesis, remove this page and add the figure page you want.
There are a number of ways to insert tables into your thesis.
- Consider creating the table within Word. Another option is to build it in Excel.
- From Excel, you may need to it as an image or PDF and then insert it into Word.
- Have a really long table that needs to be oriented in landscape mode? Don't rotate the page! See our guidelines below .
- Though there is not particular style to use for the table itself, use the "Table Title,tt" and "Table Caption,tc" styles.
In order to insert a footnote in your thesis, follow these instructions:
- Insert the cursor where you want to add your footnote reference
- Either, click on the "References" tab, and select "Insert Footnote"
- Or, click on "Insert" in the top menu bar (not the insert tab) and select "Footnote...", select footnote, and click insert again.
- You should now have a reference number where you placed your cursor and a footnote at the end of the page.
Footnote text should be in the "Footnote Text" style. The number within the footnote, as well as the in-paragraph reference number, should be in the "Footnote Reference" style. Footnotes should automatically be in the appropriate styles, but if you encounter any problems with your footnotes, checking the style is a good first step.
If your footnote numbering gets out of order, click on "insert" in the top menu bar, select "Footnote...", select "Convert...", and then "Convert all footnotes to endnotes" and select OK. Don't hit "Insert", instead hit "Convert..." again, and this time select "Convert all endnotes to footnotes" and select OK. Once that is done, select "close".
Some of the sections are optional, such Acknowledgments and Preface. The trick is to delete the text and the corresponding section break or you'll end up with multiple blank pages.
- Delete the text you don't need.
- Delete the section break at the end of the chapter ( see instructions above ).
Double sided printing (with mirror margins)
Thesis needs to be formatted with mirror margins, here's how to do it (and see screenshots included).
- Go to the Format menu (on top bar) > Document > Margins tab.
- In the multiple pages drop-down box, select "Mirror Margins".
- Make sure the margins above are 1" except "Inside" should be 1.5".
- At the bottom, "Apply To": Whole Document.
- "Section start": Odd Page
- Check the boxes for "Different odd and even" and "Different first page" options.
- Again at the bottom, "Apply To": Whole Document.
- Click OK to save the settings when done.

Copying and Pasting from Another Document
When writing a thesis in another sort of document (e.g. Google Docs, LibreOffice, etc), you'll have to eventually transfer this into the Reed-provided templates. However, the formatting on your documents might interfere with the Word template
Here is how to copy and paste from Google Docs:
Additional Considerations
Formatting the thesis to be single-sided (note: this is not the same as printing single-sided).
- Uncheck Mirror Margins (Format menu > Document. Margins tab > uncheck 'Mirror magins'. Apply to: WHOLE document)
- Format menu > Document. Layout tab > Section start: Even Page. Uncheck ‘Different Odd and Even’. Apply to: WHOLE document
- Set page number header alignment: In the first section, like Intro, Insert > Page Number > set alignment
Though rotating a page in Word may seem like the right thing to do, DON'T DO IT. Instead, leave these pages in a separate document; then insert them by hand after printing. It's OK to display no page numbers on these pages, but they still must be counted in the pagination. Insert a one blank page (using Insert > Break > Page Break) for each manually inserted page.
Here are four different methods for inserting a properly formatted, good quality version of a long excel table!
Adobe Illustrator :
- Print the Excel table to PDF (File > Print > Save As PDF) Note: Make sure your table uses a standard font, like Times
- Open the PDF in Adobe Illustrator (installed on the IRC computers)
- Select all and copy (Select > All and Edit > Copy)
- Create a new document in Illustrator (File > New)
- Paste in the copied document and rotate (Edit > Paste and Object > Transform > Rotate)
- File > Save as EPS
- Insert the EPS into Word
Inkscape ( free download here! ):

- Open Inkscape, then open the PDF. (File > Open... > Desktop > Thesis_Table.pdf) Select which page you would like to flip sideways and click Ok . Note: You can only do this one page at a time :(

- Open Word and drag the SVG from our desktop onto the page. From there you can crop it, modify size and orientation. When you are satisfied, copy and paste it into your thesis.
Google Drawings:
- Copy and paste the table into Google Drawings (from Word is best); resize in Google Drawings as needed
- Export as an SVG (File >> Download >> Scalable Vector Graphics (.svg))
- Insert as an image into Word, and now you can rotate the table!
If the quality of the image doesn't need to be extremely detailed, you can try this fourth method with Word :
- Put the table in a separate word doc, using page setup to make it landscape Layout >> Orientation >> Landscape

- Open in Preview (Mac)
- Rotate pages
- Export each page as a 150 dpi PNG
- Insert into the thesis Word document as pictures
Whoopsie! Accidentally delete the Table of Contents, List of Tables, or List of Figures?
Here's how to add them back:
Table of Contents
- Insert > Index and Tables
- Select the Table of Contents tab
- Click Options
- Make sure 'Heading 1, h1' has a TOC level of '1'
- Repeat for Heading 2-3, numbering their TOC level respectively.
List of Tables
- Select the Table of Figures tab
- Under the Caption label box, select Table
- Check 'Style' and pick Table Title from the drop-down box
List of Figures
- Under the Caption label box, select Figure
- Check 'Style' and pick 'Figure Title' from the drop-down box
- Before printing, update the Table of Contents, List of Figures, and List of Tables
- Print to PDF (on Mac File menu > Print > Save as PDF)
- Preview : View > Two Pages.
- Adobe Reader : View > Page Display. Check "Two-up Continuous" and "Show Cover Page During Two-Up"
How to print a page range
- Save as PDF first, then print the range of pages.
For seniors writing their theses using multiple languages, the line spacing may be inconsistent, especially if the body is copied and pasted from another document into the template. This can be fixed by selecting the paragraph(s) and clicking "body, b" in the Styles Pane, or by changing the font of the non-Latin characters to the ones listed below. For some languages that use non-Latin characters (e.g. Greek, Russian), simply switching the language on your computer's keyboard input (not Word) between English and the other language will generally preserve the correct line spacing.
Fonts that shouldn't mess up line spacing:
- Chinese: PMingLiu, MingLiu, KaiTi, Kai (simplified only), BiauKai (traditional only)
- Korean: Batang, Batangche
Have a language expert improve your writing
Run a free plagiarism check in 10 minutes, generate accurate citations for free.
- Knowledge Base
- How to Write a Thesis Statement | 4 Steps & Examples
How to Write a Thesis Statement | 4 Steps & Examples
Published on January 11, 2019 by Shona McCombes . Revised on August 15, 2023 by Eoghan Ryan.
A thesis statement is a sentence that sums up the central point of your paper or essay . It usually comes near the end of your introduction .
Your thesis will look a bit different depending on the type of essay you’re writing. But the thesis statement should always clearly state the main idea you want to get across. Everything else in your essay should relate back to this idea.
You can write your thesis statement by following four simple steps:
- Start with a question
- Write your initial answer
- Develop your answer
- Refine your thesis statement
Instantly correct all language mistakes in your text
Upload your document to correct all your mistakes in minutes

Table of contents
What is a thesis statement, placement of the thesis statement, step 1: start with a question, step 2: write your initial answer, step 3: develop your answer, step 4: refine your thesis statement, types of thesis statements, other interesting articles, frequently asked questions about thesis statements.
A thesis statement summarizes the central points of your essay. It is a signpost telling the reader what the essay will argue and why.
The best thesis statements are:
- Concise: A good thesis statement is short and sweet—don’t use more words than necessary. State your point clearly and directly in one or two sentences.
- Contentious: Your thesis shouldn’t be a simple statement of fact that everyone already knows. A good thesis statement is a claim that requires further evidence or analysis to back it up.
- Coherent: Everything mentioned in your thesis statement must be supported and explained in the rest of your paper.
Receive feedback on language, structure, and formatting
Professional editors proofread and edit your paper by focusing on:
- Academic style
- Vague sentences
- Style consistency
See an example

The thesis statement generally appears at the end of your essay introduction or research paper introduction .
The spread of the internet has had a world-changing effect, not least on the world of education. The use of the internet in academic contexts and among young people more generally is hotly debated. For many who did not grow up with this technology, its effects seem alarming and potentially harmful. This concern, while understandable, is misguided. The negatives of internet use are outweighed by its many benefits for education: the internet facilitates easier access to information, exposure to different perspectives, and a flexible learning environment for both students and teachers.
You should come up with an initial thesis, sometimes called a working thesis , early in the writing process . As soon as you’ve decided on your essay topic , you need to work out what you want to say about it—a clear thesis will give your essay direction and structure.
You might already have a question in your assignment, but if not, try to come up with your own. What would you like to find out or decide about your topic?
For example, you might ask:
After some initial research, you can formulate a tentative answer to this question. At this stage it can be simple, and it should guide the research process and writing process .
Here's why students love Scribbr's proofreading services
Discover proofreading & editing
Now you need to consider why this is your answer and how you will convince your reader to agree with you. As you read more about your topic and begin writing, your answer should get more detailed.
In your essay about the internet and education, the thesis states your position and sketches out the key arguments you’ll use to support it.
The negatives of internet use are outweighed by its many benefits for education because it facilitates easier access to information.
In your essay about braille, the thesis statement summarizes the key historical development that you’ll explain.
The invention of braille in the 19th century transformed the lives of blind people, allowing them to participate more actively in public life.
A strong thesis statement should tell the reader:
- Why you hold this position
- What they’ll learn from your essay
- The key points of your argument or narrative
The final thesis statement doesn’t just state your position, but summarizes your overall argument or the entire topic you’re going to explain. To strengthen a weak thesis statement, it can help to consider the broader context of your topic.
These examples are more specific and show that you’ll explore your topic in depth.
Your thesis statement should match the goals of your essay, which vary depending on the type of essay you’re writing:
- In an argumentative essay , your thesis statement should take a strong position. Your aim in the essay is to convince your reader of this thesis based on evidence and logical reasoning.
- In an expository essay , you’ll aim to explain the facts of a topic or process. Your thesis statement doesn’t have to include a strong opinion in this case, but it should clearly state the central point you want to make, and mention the key elements you’ll explain.
If you want to know more about AI tools , college essays , or fallacies make sure to check out some of our other articles with explanations and examples or go directly to our tools!
- Ad hominem fallacy
- Post hoc fallacy
- Appeal to authority fallacy
- False cause fallacy
- Sunk cost fallacy
College essays
- Choosing Essay Topic
- Write a College Essay
- Write a Diversity Essay
- College Essay Format & Structure
- Comparing and Contrasting in an Essay
(AI) Tools
- Grammar Checker
- Paraphrasing Tool
- Text Summarizer
- AI Detector
- Plagiarism Checker
- Citation Generator
A thesis statement is a sentence that sums up the central point of your paper or essay . Everything else you write should relate to this key idea.
The thesis statement is essential in any academic essay or research paper for two main reasons:
- It gives your writing direction and focus.
- It gives the reader a concise summary of your main point.
Without a clear thesis statement, an essay can end up rambling and unfocused, leaving your reader unsure of exactly what you want to say.
Follow these four steps to come up with a thesis statement :
- Ask a question about your topic .
- Write your initial answer.
- Develop your answer by including reasons.
- Refine your answer, adding more detail and nuance.
The thesis statement should be placed at the end of your essay introduction .
Cite this Scribbr article
If you want to cite this source, you can copy and paste the citation or click the “Cite this Scribbr article” button to automatically add the citation to our free Citation Generator.
McCombes, S. (2023, August 15). How to Write a Thesis Statement | 4 Steps & Examples. Scribbr. Retrieved April 16, 2024, from https://www.scribbr.com/academic-essay/thesis-statement/
Is this article helpful?

Shona McCombes
Other students also liked, how to write an essay introduction | 4 steps & examples, how to write topic sentences | 4 steps, examples & purpose, academic paragraph structure | step-by-step guide & examples, what is your plagiarism score.
- Formatting Your Dissertation
- Introduction
Harvard Griffin GSAS strives to provide students with timely, accurate, and clear information. If you need help understanding a specific policy, please contact the office that administers that policy.
- Application for Degree
- Credit for Completed Graduate Work
- Ad Hoc Degree Programs
- Acknowledging the Work of Others
- Advanced Planning
- Dissertation Submission Checklist
- Publishing Options
- Submitting Your Dissertation
- English Language Proficiency
- PhD Program Requirements
- Secondary Fields
- Year of Graduate Study (G-Year)
- Master's Degrees
- Grade and Examination Requirements
- Conduct and Safety
- Financial Aid
- Non-Resident Students
- Registration
On this page:
Language of the Dissertation
Page and text requirements, body of text, tables, figures, and captions, dissertation acceptance certificate, copyright statement.
- Table of Contents
Front and Back Matter
Supplemental material, dissertations comprising previously published works, top ten formatting errors, further questions.
- Related Contacts and Forms
When preparing the dissertation for submission, students must follow strict formatting requirements. Any deviation from these requirements may lead to rejection of the dissertation and delay in the conferral of the degree.
The language of the dissertation is ordinarily English, although some departments whose subject matter involves foreign languages may accept a dissertation written in a language other than English.
Most dissertations are 100 to 300 pages in length. All dissertations should be divided into appropriate sections, and long dissertations may need chapters, main divisions, and subdivisions.
- 8½ x 11 inches, unless a musical score is included
- At least 1 inch for all margins
- Body of text: double spacing
- Block quotations, footnotes, and bibliographies: single spacing within each entry but double spacing between each entry
- Table of contents, list of tables, list of figures or illustrations, and lengthy tables: single spacing may be used
Fonts and Point Size
Use 10-12 point size. Fonts must be embedded in the PDF file to ensure all characters display correctly.
Recommended Fonts
If you are unsure whether your chosen font will display correctly, use one of the following fonts:
If fonts are not embedded, non-English characters may not appear as intended. Fonts embedded improperly will be published to DASH as-is. It is the student’s responsibility to make sure that fonts are embedded properly prior to submission.
Instructions for Embedding Fonts
To embed your fonts in recent versions of Word, follow these instructions from Microsoft:
- Click the File tab and then click Options .
- In the left column, select the Save tab.
- Clear the Do not embed common system fonts check box.
For reference, below are some instructions from ProQuest UMI for embedding fonts in older file formats:
To embed your fonts in Microsoft Word 2010:
- In the File pull-down menu click on Options .
- Choose Save on the left sidebar.
- Check the box next to Embed fonts in the file.
- Click the OK button.
- Save the document.
Note that when saving as a PDF, make sure to go to “more options” and save as “PDF/A compliant”
To embed your fonts in Microsoft Word 2007:
- Click the circular Office button in the upper left corner of Microsoft Word.
- A new window will display. In the bottom right corner select Word Options .
- Choose Save from the left sidebar.
Using Microsoft Word on a Mac:
Microsoft Word 2008 on a Mac OS X computer will automatically embed your fonts while converting your document to a PDF file.
If you are converting to PDF using Acrobat Professional (instructions courtesy of the Graduate Thesis Office at Iowa State University):
- Open your document in Microsoft Word.
- Click on the Adobe PDF tab at the top. Select "Change Conversion Settings."
- Click on Advanced Settings.
- Click on the Fonts folder on the left side of the new window. In the lower box on the right, delete any fonts that appear in the "Never Embed" box. Then click "OK."
- If prompted to save these new settings, save them as "Embed all fonts."
- Now the Change Conversion Settings window should show "embed all fonts" in the Conversion Settings drop-down list and it should be selected. Click "OK" again.
- Click on the Adobe PDF link at the top again. This time select Convert to Adobe PDF. Depending on the size of your document and the speed of your computer, this process can take 1-15 minutes.
- After your document is converted, select the "File" tab at the top of the page. Then select "Document Properties."
- Click on the "Fonts" tab. Carefully check all of your fonts. They should all show "(Embedded Subset)" after the font name.
- If you see "(Embedded Subset)" after all fonts, you have succeeded.
The font used in the body of the text must also be used in headers, page numbers, and footnotes. Exceptions are made only for tables and figures created with different software and inserted into the document.
Tables and figures must be placed as close as possible to their first mention in the text. They may be placed on a page with no text above or below, or they may be placed directly into the text. If a table or a figure is alone on a page (with no narrative), it should be centered within the margins on the page. Tables may take up more than one page as long as they obey all rules about margins. Tables and figures referred to in the text may not be placed at the end of the chapter or at the end of the dissertation.
- Given the standards of the discipline, dissertations in the Department of History of Art and Architecture and the Department of Architecture, Landscape Architecture, and Urban Planning often place illustrations at the end of the dissertation.
Figure and table numbering must be continuous throughout the dissertation or by chapter (e.g., 1.1, 1.2, 2.1, 2.2, etc.). Two figures or tables cannot be designated with the same number. If you have repeating images that you need to cite more than once, label them with their number and A, B, etc.
Headings should be placed at the top of tables. While no specific rules for the format of table headings and figure captions are required, a consistent format must be used throughout the dissertation (contact your department for style manuals appropriate to the field).
Captions should appear at the bottom of any figures. If the figure takes up the entire page, the caption should be placed alone on the preceding page, centered vertically and horizontally within the margins.
Each page receives a separate page number. When a figure or table title is on a preceding page, the second and subsequent pages of the figure or table should say, for example, “Figure 5 (Continued).” In such an instance, the list of figures or tables will list the page number containing the title. The word “figure” should be written in full (not abbreviated), and the “F” should be capitalized (e.g., Figure 5). In instances where the caption continues on a second page, the “(Continued)” notation should appear on the second and any subsequent page. The figure/table and the caption are viewed as one entity and the numbering should show correlation between all pages. Each page must include a header.
Landscape orientation figures and tables must be positioned correctly and bound at the top so that the top of the figure or table will be at the left margin. Figure and table headings/captions are placed with the same orientation as the figure or table when on the same page. When on a separate page, headings/captions are always placed in portrait orientation, regardless of the orientation of the figure or table. Page numbers are always placed as if the figure were vertical on the page.
If a graphic artist does the figures, Harvard Griffin GSAS will accept lettering done by the artist only within the figure. Figures done with software are acceptable if the figures are clear and legible. Legends and titles done by the same process as the figures will be accepted if they too are clear, legible, and run at least 10 or 12 characters per inch. Otherwise, legends and captions should be printed with the same font used in the text.
Original illustrations, photographs, and fine arts prints may be scanned and included, centered between the margins on a page with no text above or below.
Use of Third-Party Content
In addition to the student's own writing, dissertations often contain third-party content or in-copyright content owned by parties other than you, the student who authored the dissertation. The Office for Scholarly Communication recommends consulting the information below about fair use, which allows individuals to use in-copyright content, on a limited basis and for specific purposes, without seeking permission from copyright holders.
Because your dissertation will be made available for online distribution through DASH , Harvard's open-access repository, it is important that any third-party content in it may be made available in this way.
Fair Use and Copyright
What is fair use?
Fair use is a provision in copyright law that allows the use of a certain amount of copyrighted material without seeking permission. Fair use is format- and media-agnostic. This means fair use may apply to images (including photographs, illustrations, and paintings), quoting at length from literature, videos, and music regardless of the format.
How do I determine whether my use of an image or other third-party content in my dissertation is fair use?
There are four factors you will need to consider when making a fair use claim.
1) For what purpose is your work going to be used?
- Nonprofit, educational, scholarly, or research use favors fair use. Commercial, non-educational uses, often do not favor fair use.
- A transformative use (repurposing or recontextualizing the in-copyright material) favors fair use. Examining, analyzing, and explicating the material in a meaningful way, so as to enhance a reader's understanding, strengthens your fair use argument. In other words, can you make the point in the thesis without using, for instance, an in-copyright image? Is that image necessary to your dissertation? If not, perhaps, for copyright reasons, you should not include the image.
2) What is the nature of the work to be used?
- Published, fact-based content favors fair use and includes scholarly analysis in published academic venues.
- Creative works, including artistic images, are afforded more protection under copyright, and depending on your use in light of the other factors, may be less likely to favor fair use; however, this does not preclude considerations of fair use for creative content altogether.
3) How much of the work is going to be used?
- Small, or less significant, amounts favor fair use. A good rule of thumb is to use only as much of the in-copyright content as necessary to serve your purpose. Can you use a thumbnail rather than a full-resolution image? Can you use a black-and-white photo instead of color? Can you quote select passages instead of including several pages of the content? These simple changes bolster your fair use of the material.
4) What potential effect on the market for that work may your use have?
- If there is a market for licensing this exact use or type of educational material, then this weighs against fair use. If however, there would likely be no effect on the potential commercial market, or if it is not possible to obtain permission to use the work, then this favors fair use.
For further assistance with fair use, consult the Office for Scholarly Communication's guide, Fair Use: Made for the Harvard Community and the Office of the General Counsel's Copyright and Fair Use: A Guide for the Harvard Community .
What are my options if I don’t have a strong fair use claim?
Consider the following options if you find you cannot reasonably make a fair use claim for the content you wish to incorporate:
- Seek permission from the copyright holder.
- Use openly licensed content as an alternative to the original third-party content you intended to use. Openly-licensed content grants permission up-front for reuse of in-copyright content, provided your use meets the terms of the open license.
- Use content in the public domain, as this content is not in-copyright and is therefore free of all copyright restrictions. Whereas third-party content is owned by parties other than you, no one owns content in the public domain; everyone, therefore, has the right to use it.
For use of images in your dissertation, please consult this guide to Finding Public Domain & Creative Commons Media , which is a great resource for finding images without copyright restrictions.
Who can help me with questions about copyright and fair use?
Contact your Copyright First Responder . Please note, Copyright First Responders assist with questions concerning copyright and fair use, but do not assist with the process of obtaining permission from copyright holders.
Pages should be assigned a number except for the Dissertation Acceptance Certificate . Preliminary pages (abstract, table of contents, list of tables, graphs, illustrations, and preface) should use small Roman numerals (i, ii, iii, iv, v, etc.). All pages must contain text or images.
Count the title page as page i and the copyright page as page ii, but do not print page numbers on either page .
For the body of text, use Arabic numbers (1, 2, 3, 4, 5, etc.) starting with page 1 on the first page of text. Page numbers must be centered throughout the manuscript at the top or bottom. Every numbered page must be consecutively ordered, including tables, graphs, illustrations, and bibliography/index (if included); letter suffixes (such as 10a, 10b, etc.) are not allowed. It is customary not to have a page number on the page containing a chapter heading.
- Check pagination carefully. Account for all pages.
A copy of the Dissertation Acceptance Certificate (DAC) should appear as the first page. This page should not be counted or numbered. The DAC will appear in the online version of the published dissertation. The author name and date on the DAC and title page should be the same.
The dissertation begins with the title page; the title should be as concise as possible and should provide an accurate description of the dissertation. The author name and date on the DAC and title page should be the same.
- Do not print a page number on the title page. It is understood to be page i for counting purposes only.
A copyright notice should appear on a separate page immediately following the title page and include the copyright symbol ©, the year of first publication of the work, and the name of the author:
© [ year ] [ Author’s Name ] All rights reserved.
Alternatively, students may choose to license their work openly under a Creative Commons license. The author remains the copyright holder while at the same time granting up-front permission to others to read, share, and (depending on the license) adapt the work, so long as proper attribution is given. (By default, under copyright law, the author reserves all rights; under a Creative Commons license, the author reserves some rights.)
- Do not print a page number on the copyright page. It is understood to be page ii for counting purposes only.
An abstract, numbered as page iii , should immediately follow the copyright page and should state the problem, describe the methods and procedures used, and give the main results or conclusions of the research. The abstract will appear in the online and bound versions of the dissertation and will be published by ProQuest. There is no maximum word count for the abstract.
- double-spaced
- left-justified
- indented on the first line of each paragraph
- The author’s name, right justified
- The words “Dissertation Advisor:” followed by the advisor’s name, left-justified (a maximum of two advisors is allowed)
- Title of the dissertation, centered, several lines below author and advisor
Dissertations divided into sections must contain a table of contents that lists, at minimum, the major headings in the following order:
- Front Matter
- Body of Text
- Back Matter
Front matter includes (if applicable):
- acknowledgements of help or encouragement from individuals or institutions
- a dedication
- a list of illustrations or tables
- a glossary of terms
- one or more epigraphs.
Back matter includes (if applicable):
- bibliography
- supplemental materials, including figures and tables
- an index (in rare instances).
Supplemental figures and tables must be placed at the end of the dissertation in an appendix, not within or at the end of a chapter. If additional digital information (including audio, video, image, or datasets) will accompany the main body of the dissertation, it should be uploaded as a supplemental file through ProQuest ETD . Supplemental material will be available in DASH and ProQuest and preserved digitally in the Harvard University Archives.
As a matter of copyright, dissertations comprising the student's previously published works must be authorized for distribution from DASH. The guidelines in this section pertain to any previously published material that requires permission from publishers or other rightsholders before it may be distributed from DASH. Please note:
- Authors whose publishing agreements grant the publisher exclusive rights to display, distribute, and create derivative works will need to seek the publisher's permission for nonexclusive use of the underlying works before the dissertation may be distributed from DASH.
- Authors whose publishing agreements indicate the authors have retained the relevant nonexclusive rights to the original materials for display, distribution, and the creation of derivative works may distribute the dissertation as a whole from DASH without need for further permissions.
It is recommended that authors consult their publishing agreements directly to determine whether and to what extent they may have transferred exclusive rights under copyright. The Office for Scholarly Communication (OSC) is available to help the author determine whether she has retained the necessary rights or requires permission. Please note, however, the Office of Scholarly Communication is not able to assist with the permissions process itself.
- Missing Dissertation Acceptance Certificate. The first page of the PDF dissertation file should be a scanned copy of the Dissertation Acceptance Certificate (DAC). This page should not be counted or numbered as a part of the dissertation pagination.
- Conflicts Between the DAC and the Title Page. The DAC and the dissertation title page must match exactly, meaning that the author name and the title on the title page must match that on the DAC. If you use your full middle name or just an initial on one document, it must be the same on the other document.
- Abstract Formatting Errors. The advisor name should be left-justified, and the author's name should be right-justified. Up to two advisor names are allowed. The Abstract should be double spaced and include the page title “Abstract,” as well as the page number “iii.” There is no maximum word count for the abstract.
- The front matter should be numbered using Roman numerals (iii, iv, v, …). The title page and the copyright page should be counted but not numbered. The first printed page number should appear on the Abstract page (iii).
- The body of the dissertation should be numbered using Arabic numbers (1, 2, 3, …). The first page of the body of the text should begin with page 1. Pagination may not continue from the front matter.
- All page numbers should be centered either at the top or the bottom of the page.
- Figures and tables Figures and tables must be placed within the text, as close to their first mention as possible. Figures and tables that span more than one page must be labeled on each page. Any second and subsequent page of the figure/table must include the “(Continued)” notation. This applies to figure captions as well as images. Each page of a figure/table must be accounted for and appropriately labeled. All figures/tables must have a unique number. They may not repeat within the dissertation.
- Any figures/tables placed in a horizontal orientation must be placed with the top of the figure/ table on the left-hand side. The top of the figure/table should be aligned with the spine of the dissertation when it is bound.
- Page numbers must be placed in the same location on all pages of the dissertation, centered, at the bottom or top of the page. Page numbers may not appear under the table/ figure.
- Supplemental Figures and Tables. Supplemental figures and tables must be placed at the back of the dissertation in an appendix. They should not be placed at the back of the chapter.
- Permission Letters Copyright. permission letters must be uploaded as a supplemental file, titled ‘do_not_publish_permission_letters,” within the dissertation submission tool.
- DAC Attachment. The signed Dissertation Acceptance Certificate must additionally be uploaded as a document in the "Administrative Documents" section when submitting in Proquest ETD . Dissertation submission is not complete until all documents have been received and accepted.
- Overall Formatting. The entire document should be checked after all revisions, and before submitting online, to spot any inconsistencies or PDF conversion glitches.
- You can view dissertations successfully published from your department in DASH . This is a great place to check for specific formatting and area-specific conventions.
- Contact the Office of Student Affairs with further questions.
CONTACT INFO
Katie riggs, explore events.

Customize or create new styles
You can use styles to quickly apply a set of formatting choices consistently throughout your document. If you want formatting choices that are not available from the built-in styles and themes available in Word, you can modify an existing style and customize it to suit your needs. You can change the formatting (such as font size, color, and text indentation) in styles applied to titles, headings, paragraphs, lists, and so on. You can also select formatted text in your document to create a new style in the Styles gallery .
The styles covered in this article are located in the Styles gallery, a visual menu located on the Home tab. To apply a style, simply select the text you want to format, and then click the style you want in the Styles gallery. To learn more, see Apply a style to text in Word .

Modify an existing style
You can modify an existing style in the Styles gallery in two ways:
Modify a style by updating it to match formatting in your document
Modify a style manually in the modify style dialog box.
If you have text in your document that already has a style applied, you can change the formatting of that text and apply it to the style in the Styles gallery.
Select text in your document that has the style applied, such as Heading 1.
When you select text that has a style applied, that style is highlighted in the Styles gallery.
Format the selected text with the new attributes that you want.
For example, you might want to change the point size for the Heading 1 style from 16 points to 14 points.
On the Home tab, in the Styles group, right-click the style that you want to change, and then click Update [Style Name] to Match Selection .
Note: All text with the style that you changed will automatically change to match the new style that you defined.
You can modify a style directly in the Styles gallery, without using the text in your document.
On the Home tab, right-click any style in the Styles gallery and click Modify .

In the Formatting section, make any formatting changes you want, such as font style, size, or color, alignment, line spacing, or indentation.

Choose whether the style change applies to the current document or to all future documents.

Create a new style based on document formatting
You can select formatted text in your document to create a new style that you add to the Styles gallery.
Right-click the text on which you want to base a new style.
In the mini toolbar that appears, click Styles , and then click Create a Style .

In the Create New Style from Formatting dialog box, give your style a name and click OK .
Your new style will now appear in the Styles gallery.
Note: If you want your new style to appear in all new Word documents, right-click it in the Styles gallery, click Modify , and then select New documents based on this template at the bottom of the dialog box.
Apply a style to text in Word

Need more help?
Want more options.
Explore subscription benefits, browse training courses, learn how to secure your device, and more.

Microsoft 365 subscription benefits

Microsoft 365 training

Microsoft security

Accessibility center
Communities help you ask and answer questions, give feedback, and hear from experts with rich knowledge.

Ask the Microsoft Community

Microsoft Tech Community

Windows Insiders
Microsoft 365 Insiders
Was this information helpful?
Thank you for your feedback.
IMAGES
VIDEO
COMMENTS
Thesis style template for MS Word is available on the School of Graduate Studies website. You are not required to use the template but using it will make some of the formatting requirements easier to meet. Thesis template for Microsoft Word (.docx) For formatting instructions and requirements see the Formatting section of the SGS website.
If you are formatting your manuscript in Microsoft Word, feel free to download and use the template. If you would like to see what your manuscript should look like, PDFs have been provided. ... Word: Thesis Template 2024. Editable template of the Master's thesis formatting. PDF Thesis Template 2024. Word: Dissertation Template 2024 ...
Use Styles to control the formatting of your dissertation. The bulk of this Guide revolves around the use of styles. Styles allow you to: Set the margins including the two-inch margin for chapters titles (Setting Margins). Define styles for Headings 1-3, Normal, Captions, and Quotes - these are most common; you may need others (Working with ...
Expand the Styles options by clicking on the drop-down arrow on the bottom right of the tool bar. Select Create a Style from the list. In the Create New Style from Formatting window, add a name for the style. Click on Modify. In the Create New Style from Formatting window adjust the settings as required.
For more APA formatting advice see the APA Style Blog's excellent Style and Grammar Guidelines. Finding Examples. Look at examples and ask your supervisor. The best guide on how to format your thesis is a combination of: Looking at previous theses in your discipline.
University Thesis and Dissertation Templates. Theses and dissertations are already intensive, long-term projects that require a lot of effort and time from their authors. Formatting for submission to the university is often the last thing that graduate students do, and may delay earning the relevant degree if done incorrectly.
UM-Dearborn Microsoft Word thesis template. Most students use Microsoft Word to write their thesis or dissertation. For previous assignments, you likely did not use some of Word's advanced features such as styles, section breaks, rotated pages, automatically generated table of contents, automatically generated list of abbreviations, etc.
How to insert a table of contents in MS Word; Table of contents styles; List of figures. The list of figures shows the titles of all the figures in the thesis and their page numbers. To insert the list of figures in Microsoft Word: Click on the references tab, then click on "insert table of figures" option. The following dialogue box will open.
Word actually provides up to nine levels of heading styles to help you to create a hierarchical structure. It is your decision how many heading levels your document requires, but most theses do not exceed four heading levels. The first two heading styles are visible in the Styles Gallery on the Home tab. Heading 1
This guide includes video tutorials designed to help you get most of the formatting of your thesis correct the first time. Using these videos to format your thesis will save a lot of time when it comes to having your format checked. ... And, the way that captions are added to figures and tables differs between APA and IEEE style. The videos ...
Revised on February 20, 2019. The layout requirements for a dissertation are often determined by your supervisor or department. However, there are certain guidelines that are common to almost every program, such as including page numbers and a table of contents. If you are writing a paper in the MLA citation style, you can use our MLA format guide.
Using Word Styles A Style is a defined set of formatting instructions that can be applied in one click. Word has many built-in styles ready to use and is an efficient and consistent method to format text. Start with a blank Word document and define all the Styles you need for formatting your dissertation by either
At 'Style for following paragraph', select Normal [2]. Select the same formatting that you applied previously to your Heading 1 style [3]. Click on the Format button [4] to access the Paragraph box, where you can amend paragraph 'Spacing' and 'Line spacing' as required [5].
The best way to ensure consistent formatting in a Word document is by consistent use of Word styles. Every paragraph in Word has a "Style" associated with it. A style is a collection of formatting that details the font, font size, font highlighting (bold, italics, etc.), paragraph alignment, paragraph indents, paragraph spacing, and so on.
Learn how to format your thesis in Microsoft Word. This video covers making sections, inserting tables, figures, and more.
Highlight all the headings in your thesis outline. Click the Home tab and select " multilevel list " (located beside list numbering and bullet points) Select the type of numbering you want. I opted for the 1, 1.1, 1.1.1 format, but don't be afraid to play around with other options if that's not what you're looking for.
When you apply a style to a paragraph, it is formatted with the attributes defined in the style. The Word thesis template has many pre-defined styles for things like chapter titles, sub titles, main body text, quotes, figures, etc. See the table below to learn what styles to use and where. Pre-defined styles in the Word thesis template
The UDThesis Styles are Word files designed to provide standard formatting for dissertations, education leadership portfolio, and theses according to the University of Delaware, Graduate College's Thesis and Dissertation Manual. UDThesis Styles also provide standard formatting for Honors Senior Thesis with Distinction
Setting the page layout to enable double-sided printing of thesis documents. Word provides several preset margins you can choose from, but for thesis layout it is necessary to make your own custom margins. 1. On the ribbon bar, select : Layout. 2. Click on : Margins: to access the drop-down options. 3. Click on : Custom Margins…
For inquiries pertaining to consultative services on data plotting, analysis, and interpretation, please feel free to reach out to me at [email protected]...
Step 1: Start with a question. You should come up with an initial thesis, sometimes called a working thesis, early in the writing process. As soon as you've decided on your essay topic, you need to work out what you want to say about it—a clear thesis will give your essay direction and structure.
Depending on the size of your document and the speed of your computer, this process can take 1-15 minutes. After your document is converted, select the "File" tab at the top of the page. Then select "Document Properties." Click on the "Fonts" tab. Carefully check all of your fonts.
In the mini toolbar that appears, click Styles, and then click Create a Style. In the Create New Style from Formatting dialog box, give your style a name and click OK. Your new style will now appear in the Styles gallery. Note: If you want your new style to appear in all new Word documents, right-click it in the Styles gallery, click Modify ...