PowerPoint 101: The Ultimate Guide for Beginners

Are you struggling with PowerPoint? You need a quick design in PowerPoint but don't know where to start? Don't worry, you have nothing to be ashamed of.
In this article, we're going to refresh the most important PowerPoint basics so you can take advantage of this Microsoft software and create high-impact presentations at any time!
Millions of users worldwide use Microsoft 365 services , making PowerPoint the presentation design software with the highest market share. And with good reason! PowerPoint's features stand out for its usability and originality . We can tell you that PowerPoint is pretty intuitive software, and it's a great option to choose when working with presentations on a daily basis. So, are you ready for a quick PowerPoint 101 class?
Let ' s see what you ' re going to learn today with this PowerPoint Guide :

What is PowerPoint?
What are the best uses of powerpoint, powerpoint basics: what are the components of powerpoint workspace, mastering powerpoint: what are the main features of powerpoint, what are powerpoint templates and where to find them, time to practice how to make a presentation in powerpoint.

Microsoft PowerPoint is a presentation design software that is part of Microsoft 365 . This software allows you to design presentations by combining text, images, graphics, video, and animation on slides in a simple and intuitive way.
Over time, PowerPoint has evolved and improved its accessibility to users. For this reason, it has been adapted to the main operating systems and modalities:
- PowerPoint Online
Additionally, you can use Word and Excel in this online version. That way, you'll be able to make real-time changes in the cloud without fearing losing your files. Sounds great, right?
PowerPoint has a versatile range of uses. Here's a list of the different tasks you can complete with this presentation design software:
- Business presentations or Pitch decks.
- Marketing, Sales and HR plans.
- Project briefs and timelines.
- Inductions to new employees.
- Seminars and educational classes.
- Professional portfolio of photos or designs.
- Presentations of a research summary.
- Presentations for special occasions.
These are just a few examples of the multiple possibilities this Microsoft software offers. Your imagination is the only limit!
Stay tuned as we continue with this PowerPoint 101 Guide...

In order to deeply understand this presentation design software, you need to recognize its main components. Now it's time to learn about the PowerPoint basics!
A quick note before going any further: when opening PowerPoint, some of the commands in the ribbons will look grayish and won't be highlighted when you hover the mouse over them.
This happens since some commands need to be selected in order to function. For example, if you want to change the color of a text, you first need to select it.
That being said, let's start with this Guide for PowerPoint beginners:
PowerPoint Main Window
The first aspect to learn is PowerPoint Main Window. To facilitate the explanation, we've organized its main elements with numbers from 1 to 10:

Based on that, the main components of PowerPoint window are the following:
1. Quick Access Toolbar: allows you to customize commands to have them at hand. You only have to select it and go to "More commands."
2. Title Bar: shows you the name of your file and other "Suggested options" like Slide Master View . These options will vary depending on the use you give to the commands.
3. File Tab: you will see the Home Menu (PowerPoint backstage) by selecting it. There, you can create a new presentation, save it, print it, export it, and many other options.
4. The Ribbon: it's where PowerPoint tabs and tools are. These tools can also be called "commands" or “features.”
5. More Button or Down Arrow: these arrows allow you to view more tools or layout options in PowerPoint.
6. Slides Pane: shows your slides in thumbnail size. By right-clicking, you can access additional options for customizing each slide. Perfect for PowerPoint beginners!
7. Slide: PowerPoint's blank canvas and the frame to be seen when presenting the file.
8. Placeholders: they are dotted boxes that will store your content.
9. Status Bar: allows you to view the slide number, grammatical errors, speaker notes, and the comments on your file.
10. Zoom: allows you to enlarge or minimize your PowerPoint workspace. The range goes from 10 to 400%.
PowerPoint Tabs
The PowerPoint tabs are the control desk of your presentation . Since PowerPoint's features are too many, they're organized in tabs.
You can come and go between tabs as you need. Once you click on a tab, it will open its ribbon, and there, you'll be able to see all the tools related to that particular category.
This PowerPoint tutorial for beginners will give you an overview of all PowerPoint tabs . Pay attention to the following list:
- Transitions Tab
- Animations Tab
- Slide Show Tab
- Recording Tab
1. Home Tab
The Home tab is the most common tab of PowerPoint. This is the tab you'll probably use the most if you're designing a presentation deck from scratch.

It allows you to add new slides and change the text characteristics : font, size, boldness, underlining, alignment, etc. If you've ever used Microsoft Word, these features will be familiar to you.
Also, you will find commands to edit the characteristics of the geometric shapes you insert. This includes: fill color, line color, sharpe effects, among others.
2. Insert Tab
The Insert tab is exactly what its name says it is. In this ribbon, you'll find all the options concerning adding a new element to your PowerPoint presentation .

You can insert a picture, some geometric shapes, icons, WordArt graphics, among others. We can tell you that this tab is really helpful for PowerPoint beginners!
For example, if you have a lot of data in PowerPoint , you could add a chart or diagram to show your information in a more visual way. Also, you can embed videos or music into PowerPoint really easily.
- PowerPoint tip for beginners: To be able to write text on your slides, you need a text box. So, if you're designing your presentation from scratch, remember to go first to the Insert tab and add a text box to start writing.
3. Design Tab
If you are one of those people who enjoy choosing the design of a PowerPoint presentation, this tab will be your favorite.

The Design tab offers a wide range of premade designs , allowing you to get more polished slides. Even better, if you explore its ribbon, you can adjust the color palette and change the overall style of your PowerPoint deck.
The PowerPoint interface, as this basic PowerPoint Tutorial, is really intuitive. We believe that you won't have any problem with this tab!
4. Transitions Tab
Using transitions in PowerPoint is a dynamic way to move from one slide to the next during a presentation. This feature is PowerPoint's stamp, so don ' t miss it!

Some PowerPoint transitions are really classic, like wiping the old slide to present the new one. Others are somewhat over the top, like the “Vortex” or the “Airplane” effect.
If you click on each kind of transition, you'll see a preview on how it would look when presenting. Really cool, right?
5. Animations Tab
In case you want to add special effects for certain elements in your slides , the Animations tab in PowerPoint will interest you.

Like the Transitions tab, you will find various animation effects in this ribbon. It's a matter of trying and choosing the best one according to your needs!
6. Slide Show Tab
As its name says, the Slide Show tab is about presenting your slides . We really like that it gives you several options to show up your presentation!

Considering that you're a PowerPoint beginner, you're not likely to use the Slide Show tab very much.
But if you're curious about this command, you must read our article: How to Make a PowerPoint Slideshow that Runs Automatically?
7. Review Tab
The Review tab is not often used by PowerPoint beginners either.
However, if your job is related to writing or if you work at an international company, this tool can be extremely useful!

With this tab, you can check the slide's spelling, translate the text in real-time, and add comments to your slides . This last function can be helpful to give feedback to a colleague.
8. View Tab
This View tab allows you to change the view of your PowerPoint slides and make handouts from them, among other things.

As you can see, the majority of its commands are really specific. So you won't have any issues while designing, test and see!
In this section, our favorite command for PowerPoint beginners is Slide Master . Explore more about this tool in our guide!
9. Recording Tab
In the last versions of this design presentation software, PowerPoint added the Recording tab. As its name says, it allows you to record all your presentation slides .

This ribbon has advanced commands, so the most common action for a PowerPoint beginner is to take a screenshot or record the screen sequentially .
10. Help Tab
Finally, there is the Help tab. If you have any problem or question concerning how to use PowerPoint, you may go here to look for a solution.
In the latest versions, Windows has added a “Show Training” option. You can click this command to practice the PowerPoint basics since it will download training templates.

As a beginner in PowerPoint, you must recognize the objective of each PowerPoint tab to be able to master the software . But, in order to conduct an outstanding presentation deck, you also need to dominate its most important features. Let's see some of them in the next section!
If you feel ready to delve deeper into PowerPoint's tools, this section is for you.
As you may know , 24Slides specializes in creating outstanding presentations for any Design Project . So, we asked one of our experts about her favorite PowerPoint features, and we want to share them all with you!
Carmen Navarrete , Graphic Designer at 24Slides, highlighted the following features that will make your presentations stand out from the crowd:
PowerPoint Feature #1: Crop to Shape
This first PowerPoint feature is simple but effective!
Let's see how to use it:
- First, choose an image you want to cut and insert it into your workspace.
- Once inserted, select it with the mouse.
- Go to the "Picture Format" tab.
- Press the arrow of the "Crop" button (right side of the screen).
- Select "Crop to Shape."
- Choose your favorite shape and customize your PowerPoint presentation!

PowerPoint Feature #2: Merge Shapes
If you don't like any figure enough, you can create one from scratch!
This is possible thanks to the "Merge Shapes" option. Follow these steps to unleash your creativity:
- First choose an image you want to cut.
- Check the list of PowerPoint shapes (Insert tab > Shapes).
- Choose two or three figures you want to merge (they can be the same figure).
- Select the figures you are going to merge (see the image).
- Once selected, go to the "Shape Format" tab.
- Press the "Merge Shapes" option and the type of merge you want (test and choose!).

- A new figure will appear, and you must fill it with the image from the first step.
- Stay on the Shape Format tab and go to "Shape Fill" (button in the middle of the ribbon).
- Select "Picture Fill" and browse for your image.
- Select the image to fill your new figure, and that's it!

- PowerPoint tip for beginners: When your merged figure is ready, paste the image to the background of your slide to achieve a better result. This way, you can use your image as a canvas and see if both elements fit well.
PowerPoint Feature #3: Insert Icons
This PowerPoint feature is quite easy to follow for PowerPoint beginners!
Just follow these steps:
- Go to the Insert tab.
- Select the "Icons" option.
- A Microsoft 365 library will open, where you can search for the required icon.
- Now, you must insert it into your presentation and adapt it to your design.
- If you have an active Microsoft 365 subscription, you'll have access to a larger number of icons in PowerPoint.
- PowerPoint tip for beginners: If you want to learn more about icons in PowerPoint, read our article on How to Use Icons to Make Amazing PowerPoint Presentations .
PowerPoint Feature #4: Insert SmartArt
PowerPoint's SmartArt is one of the most popular and accessible tools to dominate while learning about PowerPoint basics.
To use it in your slide deck, you must:
- Select SmartArt.
- See all SmartArt categories and choose your favorite based on your needs.
- Add the text you have prepared and adapt it to your presentation.

We want to give you some ideas to master this SmartArt tool in PowerPoint: you can make timelines , flowcharts , and even a Venn diagram in just a few seconds. Try and see!
PowerPoint Feature #5: Remove Background
If you don't know how to use Photoshop and want to remove the background from an image, in this PowerPoint 101 Guide, we show you how:
- First choose the image you want to remove the background from.
- Insert the image in the PowerPoint workspace.
- Select the image and go to the "Picture Format" tab.
- Select "Remove Background" (first option on the left).
- You can keep and remove parts of the image with the first two tools of the ribbon (see image).
- Keep in mind that all the sections highlighted in purple will be deleted.

- We recommend zooming in to keep or remove parts of the image with more detail.
- Once you're done, press the "Keep Changes" button.
- Finally, adapt the new image to your PowerPoint presentation.

- PowerPoint tip for beginners: Choose a high-contrast photo or image for best results. In other words, the outline of the person or object you want to cut out must have clear edges and cannot blend with the image's background color.
PowerPoint Feature #6: Add Speaker Notes
The latest PowerPoint feature is a command you can use to prepare your speech before presenting to an audience.
Learning how to add speaker notes in PowerPoint is simple:
- Select the slide that needs some notes.
- Usually, there is a footer below the slide, but if not, you will have to activate it.
- Go to the View tab and select "Notes."
- The Speaker Notes section will appear, and you can add whatever you want!

- PowerPoint tip for beginners: In case you want to practice your entire presentation and have a lot of notes, go to the View tab and select "Notes Page" (fourth command). You'll be able to see all your Speaker Notes faster!
PowerPoint Feature #7: PowerPoint Translator
If you've ever wondered how to translate your PowerPoint Slides, we'll explain the step by step here:
- Go to the Review tab.
- Select the text you want to translate.
- Press the “Translate” button.
- A panel will open on the right side of the screen.
- Choose the language you need and you'll see the translation in real-time.
- If you press Insert, the text will change to the new translation!
PowerPoint Feature #8: Screen Recording
The process of recording your screen in PowerPoint is straightforward and intuitive. Let's see:
- Go to the “Record” or “Recording” tab.
- Press the "Record Slide Show" button or the “From Beginning” button (depending on your PPT version).
- A new window will open.
- Select the red record button and start recording!
- When you're done, select “Export.”
- By default, the video will be 1080p. If you want to lower the video quality, go to "Customize export."
- Name the video, save it to a folder and that's it!
As you may have noticed, this software has endless PowerPoint design options for beginners. We encourage you to try and test each functionality!
However, we're clear that PowerPoint has different features, so it can be hard to know where to start. That's why understanding PowerPoint basics is crucial if you truly want to master this software!
Our PowerPoint 101 Guide continues; stay tuned to discover more great stuff about this Microsoft software. Keep reading!
A PowerPoint template is a pre-made design that you can use for your own means, and that will save you a lot of time!
Templates in PowerPoint are a great resource for designing since all the structure is already done, and you only have to update the content . We can tell you they're the perfect resource for PowerPoint beginners!
They can be incredibly specific. For example, there are templates for a SWOT analysis or a complete Marketing report. Otherwise, templates can also be very general, with several slides with a similar design.
If you struggle with the artistic part of designing presentations, downloading PowerPoint templates will be a life changer!

How to download PowerPoint templates for free?
If you didn't know, 24Slides has an extensive repository of PowerPoint templates. But how to obtain them? It's really simple:
- First, create an account on our Free Templates Website with the button “Register” (that way, you can download everything without problems!).
- Think about the graphics you need and the ideal structure for your presentation deck (you can also change the color palette later!).
- Download it in PowerPoint format (if you prefer it in Google Slides format, you'll also find this type in our repository).
- Edit and change everything you need for your PowerPoint presentation!
24Slides Designers specialize in business and corporate PowerPoints, but you'll also find other types of templates on our website: Data templates, Timelines, Roadmaps, Matrixes, Diagrams, and more.
Keep in mind that a well-designed PowerPoint deck helps you communicate stronger messages to your audience . Don't waste this opportunity to make your presentation shine!

If you want to learn more about how to master PowerPoint, do not miss the last section. We'll show you some PowerPoint basics from the software itself!
A PowerPoint 101 Guide wouldn't be that useful with no examples. So, if you enjoy the step-by-step guides, this section is for you.
Below, we'll show you how to make a simple PowerPoint presentation. But first, here are some tips to be more efficient in the process:
- Be clear about what type of presentation you're going to create (is it corporate, playful, or more creative?).
- Make a draft with the most important information you need to add and, thus, generate a good structure in your presentation .
- Get inspired by examples on the internet , but adapt them to your needs and audience.
- If you will create a business presentation, keep in mind your brand identity .
- Make sure your PowerPoint works , you may need to update to the latest version or pay for the subscription.
Step 1: Make a draft to structure your presentation
As we said before, writing a draft or script of your content will be vital to start on the right foot as a PowerPoint beginner.
This advice is so important that we choose it as the first step to learning how to make a PowerPoint presentation. Remember: Planning is key!

Regarding the process of planning, we share some good practices:
- If your presentation will be very long , write down all subtitles and content in a Word document. This will help you organize your ideas and give a correct sequence to your narrative. In addition to avoiding redundancies in the message you want to communicate.
- If your presentation will use many visual resources , we recommend choosing high-quality images. This will help you have a starting graphic base. Some good free image repositories are Freepick , Unsplash , and Adobe Stock .
- If your presentation is based on data , have all your results summarized or your most relevant conclusions at hand. The idea of making a PowerPoint presentation is to show your information in the simplest way possible for your audience.
Step 2: Create a new document in PowerPoint
Once you check that all the functions are working fine with the software, please open it and go to the File tab. If you've ever used Word or Excel, you'll probably find this Home Menu familiar.
In short, this is the main page of PowerPoint, where you can create a new presentation or open an older one. Let's see:

In order to follow this part of our PowerPoint Tutorial correctly, take into consideration the following points:
- On the lower side of the screen, you'll find your recently opened PowerPoint files. This option is great for saving some time.
- If you don't find the presentation you're looking for, click on the “Open” option at the left bar and find older files.
- Don't forget to save your presentation with a relatable name so you won't lose sight of it!
Step 3: Choose the perfect design for your presentation
With your information ready in a draft, it's time to choose the design of your PowerPoint slide deck. You must imagine that the available design options are endless!
For practical reasons, you have three options regarding the design:
- Start a design from scratch (very difficult for a PowerPoint beginner).
- Choose an established PowerPoint design or layout.
- Download a PowerPoint template and modify some details.
Don't worry if you don't know how to continue! In this PowerPoint 101 class, we're going to explain step by step the second option:
How do you set a default design in PowerPoint?
- First, go to the Design tab.
- Open the list of options by clicking on the third arrow.
- Choose the design you like the most for your PowerPoint presentation.

If you want to explore more PowerPoint designs, there is a way to research online. For that, you only need to:
- Go to the File tab (first tab, next to the Home tab).
- Select "More themes" (see image).

- Use the search engine and write the keyword you want (it can be related to your business or it can be a color).
- Check the list of PowerPoint themes and choose your favorite.
- Wait a few minutes while it loads and keep designing in PowerPoint!

How do you change the layout of one slide in PowerPoint?
In this PowerPoint 101 Guide, you will also learn how to configure the layout of each slide.
Keep in mind that to have a high-impact presentation, you must adapt your slides' design to the type of content you'll add. And using layouts is perfect for this purpose.
To change the layout type in PowerPoint, follow these steps:
- Right-click on the slide you want to change.
- Select the "Layout" option.
- You will find more than ten layout models.
- Choose the one that best suits your content.
- Repeat these steps for each slide (if you wish or require).

How do you customize your slides in PowerPoint?
The design process in this PowerPoint 101 Guide doesn't stop there.
You also can customize your presentation's color palette , font style, background format , and graphics effects .
Just go to:
- Design tab > Variants.
- Select Colors, Fonts, Effects or Background Styles (as you need).
- If you're inspired and want to create your own background in PowerPoint, select Background Styles > Format Background.
- Finally, custom your slides as you want!

Step 4: Add all your information to your presentation
Now, it's time to add all your information to your slides. If your script is long, take your time to copy each part of it.
In this PowerPoint Tutorial, we're going to show how our design is going so far. We design at your side!

Step 5: Add transitions or animations to your presentation
The stamp of PowerPoint is its transitions and animations! Naturally, our PowerPoint 101 has considered these essential commands.
If you want to add them to your presentation and make your speech more fluid, follow these steps:
- Go to the tabs section of PowerPoint.
- Select "Transitions" or "Animations" and try your favorite effects.
- Remember that if you select Transitions, these will modify the entire slide, while Animations can be added to each element individually.
When choosing one Animation, you can eliminate it if you aren't 100% convinced. You only need to:
- Select the Animation number that appears on the corner.
- Press the "Delete" or "Backspace" button on your keyboard.
- Choose another Animation in PowerPoint if you want!

This “PowerPoint for dummies” is full of tips and tricks! So here is one more: Don't overuse transitions or animations in PowerPoint ; they can make your presentation slower and unprofessional . Use this tool in a subtle way!
Step 6: Refine the final details
As always, every final product must be reviewed. Especially if you're learning the PowerPoint fundamentals with us.
We recommend reviewing each slide of your PowerPoint presentation one final time. In this process, you will be able to:
- Add icons if your presentation requires it.
- Change any image or illustration if they don't convince you.
- Change transitions or animations.
- Customize your presentation's color palette .
- Proofread your slides' text or add more information.
- Add speaker notes to your presentation.

Step 7: Slideshow your presentation
When your presentation is finished, it's essential to know how to make a PowerPoint slideshow. This way, you can see your slides from the exact same perspective your audience will see them.
To slideshow your presentation in PowerPoint, follow these simple steps for PowerPoint beginners:
- Position yourself on your first slide.
- Go to the bottom right of the software.
- Select the "Slide Show" button (see image).
- Have a look of your presentation by clicking on each slide or pressing the right arrow on your keyboard.
- To go out from the Slide Show mode, you have to press the ESC key.

Now you can present your slides like an expert!
When you master this presentation design software, you'll be able to create amazing things in PowerPoint : infographics, diagrams, charts, pitch decks, business cards, calendars, you name it!
This was our PowerPoint Guide for beginners. We hope that our compilation today will be useful for conducting more professional presentations in the future and, why not, achieve all your goals!
Don't forget to share this PowerPoint 101 Guide with your co-workers or whoever you want!

Want to boost your beginner PowerPoint skills? Check out this content:
- How to Work with Multiple Images in PowerPoint
- How to Add a Timer to Your Powerpoint Presentations
- PowerPoint Charts, Graphs, & Tables Made Easy | Tips & Tricks
- How To Use PowerPoint Design Ideas - All Questions Answered!
- 36 Fun Icebreakers for Your Next Presentation
- The Cost of PowerPoint Presentations: Discover the hidden expenses you might overlook!
Create professional presentations online
Other people also read

Tutorial: Save your PowerPoint as a Video
How To Convert Google Slides To PowerPoint and Vice Versa

How To Add Animations To PowerPoint
Critical PowerPoint Shortcuts – Claim Your FREE Training Module and Get Your Time Back!
How to Make a PowerPoint Presentation (Step-by-Step)
- PowerPoint Tutorials
- Presentation Design
- January 22, 2024
In this beginner’s guide, you will learn step-by-step how to make a PowerPoint presentation from scratch.
While PowerPoint is designed to be intuitive and accessible, it can be overwhelming if you’ve never gotten any training on it before. As you progress through this guide, you’ll will learn how to move from blank slides to PowerPoint slides that look like these.

Table of Contents
Additionally, as you create your presentation, you’ll also learn tricks for working more efficiently in PowerPoint, including how to:
- Change the slide order
- Reset your layout
- Change the slide dimensions
- Use PowerPoint Designer
- Format text
- Format objects
- Play a presentation (slide show)
With this knowledge under your belt, you’ll be ready to start creating PowerPoint presentations. Moreover, you’ll have taken your skills from beginner to proficient in no time at all. I will also include links to more advanced PowerPoint topics.
Ready to start learning how to make a PowerPoint presentation?
Take your PPT skills to the next level
Start with a blank presentation.
Note: Before you open PowerPoint and start creating your presentation, make sure you’ve collected your thoughts. If you’re going to make your slides compelling, you need to spend some time brainstorming.
For help with this, see our article with tips for nailing your business presentation here .
The first thing you’ll need to do is to open PowerPoint. When you do, you are shown the Start Menu , with the Home tab open.
This is where you can choose either a blank theme (1) or a pre-built theme (2). You can also choose to open an existing presentation (3).
For now, go ahead and click on the Blank Presentation (1) thumbnail.

Doing so launches a brand new and blank presentation for you to work with. Before you start adding content to your presentation, let’s first familiarize ourselves with the PowerPoint interface.
The PowerPoint interface

Here is how the program is laid out:
- The Application Header
- The Ribbon (including the Ribbon tabs)
- The Quick Access Toolbar (either above or below the Ribbon)
- The Slides Pane (slide thumbnails)
The Slide Area
The notes pane.
- The Status Bar (including the View Buttons)
Each one of these areas has options for viewing certain parts of the PowerPoint environment and formatting your presentation.
Below are the important things to know about certain elements of the PowerPoint interface.
The PowerPoint Ribbon

The Ribbon is contextual. That means that it will adapt to what you’re doing in the program.
For example, the Font, Paragraph and Drawing options are greyed out until you select something that has text in it, as in the example below (A).

Furthermore, if you start manipulating certain objects, the Ribbon will display additional tabs, as seen above (B), with more commands and features to help you work with those objects. The following objects have their own additional tabs in the Ribbon which are hidden until you select them:
- Online Pictures
- Screenshots
- Screen Recording
The Slides Pane

This is where you can preview and rearrange all the slides in your presentation.
Right-clicking on a slide in the pane gives you additional options on the slide level that you won’t find on the Ribbon, such as Duplicate Slide , Delete Slide , and Hide Slide .

In addition, you can add sections to your presentation by right-clicking anywhere in this Pane and selecting Add Section . Sections are extremely helpful in large presentations, as they allow you to organize your slides into chunks that you can then rearrange, print or display differently from other slides.

The Slide Area (A) is where you will build out your slides. Anything within the bounds of this area will be visible when you present or print your presentation.
Anything outside of this area (B) will be hidden from view. This means that you can place things here, such as instructions for each slide, without worrying about them being shown to your audience.

The Notes Pane is the space beneath the Slide Area where you can type in the speaker notes for each slide. It’s designed as a fast way to add and edit your slides’ talking points.
To expand your knowledge and learn more about adding, printing, and exporting your PowerPoint speaker notes, read our guide here .
Your speaker notes are visible when you print your slides using the Notes Pages option and when you use the Presenter View . To expand your knowledge and learn the ins and outs of using the Presenter View , read our guide here .

You can resize the Notes Pane by clicking on its edge and dragging it up or down (A). You can also minimize or reopen it by clicking on the Notes button in the Status Bar (B).
Note: Not all text formatting displays in the Notes Pane, even though it will show up when printing your speaker notes. To learn more about printing PowerPoint with notes, read our guide here .
Now that you have a basic grasp of the PowerPoint interface at your disposal, it’s time to make your presentation.
Adding Content to Your PowerPoint Presentation
Notice that in the Slide Area , there are two rectangles with dotted outlines. These are called Placeholders and they’re set on the template in the Slide Master View .
To expand your knowledge and learn how to create a PowerPoint template of your own (which is no small task), read our guide here .

As the prompt text suggests, you can click into each placeholder and start typing text. These types of placeholder prompts are customizable too. That means that if you are using a company template, it might say something different, but the functionality is the same.

Note: For the purposes of this example, I will create a presentation based on the content in the Starbucks 2018 Global Social Impact Report, which is available to the public on their website.
If you type in more text than there is room for, PowerPoint will automatically reduce its font size. You can stop this behavior by clicking on the Autofit Options icon to the left of the placeholder and selecting Stop Fitting Text to this Placeholder .
Next, you can make formatting adjustments to your text by selecting the commands in the Font area and the Paragraph area of the Home tab of the Ribbon.

The Reset Command: If you make any changes to your title and decide you want to go back to how it was originally, you can use the Reset button up in the Home tab .

Insert More Slides into Your Presentation
Now that you have your title slide filled in, it’s time to add more slides. To do that, simply go up to the Home tab and click on New Slide . This inserts a new slide in your presentation right after the one you were on.

You can alternatively hit Ctrl+M on your keyboard to insert a new blank slide in PowerPoint. To learn more about this shortcut, see my guide on using Ctrl+M in PowerPoint .
Instead of clicking the New Slide command, you can also open the New Slide dropdown to see all the slide layouts in your PowerPoint template. Depending on who created your template, your layouts in this dropdown can be radically different.

If you insert a layout and later want to change it to a different layout, you can use the Layout dropdown instead of the New Slide dropdown.
After inserting a few different slide layouts, your presentation might look like the following picture. Don’t worry that it looks blank, next we will start adding content to your presentation.

If you want to follow along exactly with me, your five slides should be as follows:
- Title Slide
- Title and Content
- Section Header
- Two Content
- Picture with Caption
Adding Content to Your Slides
Now let’s go into each slide and start adding our content. You’ll notice some new types of placeholders.

On slide 2 we have a Content Placeholder , which allows you to add any kind of content. That includes:
- A SmartArt graphic,
- A 3D object,
- A picture from the web,
- Or an icon.
To insert text, simply type it in or hit Ctrl+C to Copy and Ctrl+V to Paste from elsewhere. To insert any of the other objects, click on the appropriate icon and follow the steps to insert it.
For my example, I’ll simply type in some text as you can see in the picture below.

Slides 3 and 4 only have text placeholders, so I’ll go ahead and add in my text into each one.

On slide 5 we have a Picture Placeholder . That means that the only elements that can go into it are:
- A picture from the web

To insert a picture into the picture placeholder, simply:
- Click on the Picture icon
- Find a picture on your computer and select it
- Click on Insert
Alternatively, if you already have a picture open somewhere else, you can select the placeholder and paste in (shortcut: Ctrl+V ) the picture. You can also drag the picture in from a file explorer window.

If you do not like the background of the picture you inserted onto your slide, you can remove the background here in PowerPoint. To see how to do this, read my guide here .
Placeholders aren’t the only way to add content to your slides. At any point, you can use the Insert tab to add elements to your slides.
You can use either the Title Only or the Blank slide layout to create slides for content that’s different. For example, a three-layout content slide, or a single picture divider slide, as shown below.

In the first example above, I’ve inserted 6 text boxes, 3 icons, and 3 circles to create this layout. In the second example, I’ve inserted a full-sized picture and then 2 shapes and 2 text boxes.
The Reset Command: Because these slides are built with shapes and text boxes (and not placeholders), hitting the Reset button up in the Home tab won’t do anything.
That is a good thing if you don’t want your layouts to adjust. However, it does mean that it falls on you to make sure everything is aligned and positioned correctly.
For more on how to add and manipulate the different objects in PowerPoint, check out our step-by-step articles here:
- Using graphics in PowerPoint
- Inserting icons onto slides
- Adding pictures to your PowerPoint
- How to embed a video in PowerPoint
- How to add music to your presentation
Using Designer to generate more layouts ideas
If you have Office 365, your version of PowerPoint comes with a new feature called Designer (or Design Ideas). This is a feature that generates slide layout ideas for you. The coolest thing about this feature is that it uses the content you already have.
To use Designer , simply navigate to the Design tab in your Ribbon, and click on Design Ideas .

NOTE: If the PowerPoint Designer is not working for you (it is grey out), see my troubleshooting guide for Designer .
Change the Overall Design (optional)
When you make a PowerPoint presentation, you’ll want to think about the overall design. Now that you have some content in your presentation, you can use the Design tab to change the look and feel of your slides.
For additional help thinking through the design of your presentation, read my guide here .
A. Picking your PowerPoint slide size
If you have PowerPoint 2013 or later, when you create a blank document in PowerPoint, you automatically start with a widescreen layout with a 16:9 ratio. These dimensions are suitable for most presentations as they match the screens of most computers and projectors.
However, you do have the option to change the dimensions.
For example, your presentation might not be presented, but instead converted into a PDF or printed and distributed. In that case, you can easily switch to the standard dimensions with a 4:3 ratio by selecting from the dropdown (A).
You can also choose a custom slide size or change the slide orientation from landscape to portrait in the Custom Slide Size dialog box (B).

To learn all about the different PowerPoint slide sizes, and some of the issues you will face when changing the slide size of a non-blank presentation, read my guide here .
B. Selecting a PowerPoint theme
The next thing you can do is change the theme of your presentation to a pre-built one. For a detailed explanation of what a PowerPoint theme is, and how to best use it, read my article here .
In the beginning of this tutorial, we started with a blank presentation, which uses the default Office theme as you can see in the picture below.

That gives you the most flexibility because it has a blank background and quite simple layouts that work for most presentations. However, it also means that it’s your responsibility to enhance the design.
If you’re comfortable with this, you can stay with the default theme or create your own custom theme ( read my guide here ). But if you would rather not have to think about design, then you can choose a pre-designed theme.
Microsoft provides 46 other pre-built themes, which include slide layouts, color variants and palettes, and fonts. Each one varies quite significantly, so make sure you look through them carefully.
To select a different theme, go to the Design tab in the Ribbon, and click on the dropdown arrow in the Themes section .

For this tutorial, let’s select the Frame theme and then choose the third Variant in the theme. Doing so changes the layout, colors, and fonts of your presentation.

Note: The theme dropdown area is also where you can import or save custom themes. To see my favorite places to find professional PowerPoint templates and themes (and recommendations for why I like them), read my guide here .
C. How to change a slide background in PowerPoint
The next thing to decide is how you want your background to look for the entire presentation. In the Variants area, you can see four background options.

For this example, we want our presentation to have a dark background, so let’s select Style 3. When you do so, you’ll notice that:
- The background color automatically changes across all slides
- The color of the text on most of the slides automatically changes to white so that it’s visible on the dark background
- The colors of the objects on slides #6 and #7 also adjust, in a way we may not want (we’ll likely have to make some manual adjustments to these slides)

Note: If you want to change the slide background for just that one slide, don’t left-click the style. Instead, right-click it and select Apply to Selected Slides .
After you change the background for your entire presentation, you can easily adjust the background for an individual slide.

Inside the Format Background pane, you can see you have the following options:
- Gradient fill
- Picture or texture fill
- Pattern fill
- Hide background
You can explore these options to find the PowerPoint background that best fits your presentation.
D. How to change your color palette in PowerPoint
Another thing you may want to adjust in your presentation, is the color scheme. In the picture below you can see the Theme Colors we are currently using for this presentation.

Each PowerPoint theme comes with its own color palette. By default, the Office theme includes the Office color palette. This affects the colors you are presented with when you format any element within your presentation (text, shapes, SmartArt, etc.).

The good news is that the colors here are easy to change. To switch color palettes, simply:
- Go to the Design tab in the Ribbon
- In the Variants area, click on the dropdown arrow and select Colors
- Select the color palette (or theme colors) you want
You can choose among the pre-built color palettes from Office, or you can customize them to create your own.
As you build your presentation, make sure you use the colors from your theme to format objects. That way, changing the color palette adjusts all the colors in your presentation automatically.
E. How to change your fonts in PowerPoint
Just as we changed the color palette, you can do the same for the fonts.

Each PowerPoint theme comes with its own font combination. By default, the Office theme includes the Office font pairing. This affects the fonts that are automatically assigned to all text in your presentation.

The good news is that the font pairings are easy to change. To switch your Theme Fonts, simply:
- Go to the Design tab in the Ribbon
- Click on the dropdown arrow in the Variants area
- Select Fonts
- Select the font pairing you want
You can choose among the pre-built fonts from Office, or you can customize them to create your own.
If you are working with PowerPoint presentations on both Mac and PC computers, make sure you choose a safe PowerPoint font. To see a list of the safest PowerPoint fonts, read our guide here .
If you receive a PowerPoint presentation and the wrong fonts were used, you can use the Replace Fonts dialog box to change the fonts across your entire presentation. For details, read our guide here .
Adding Animations & Transitions (optional)
The final step to make a PowerPoint presentation compelling, is to consider using animations and transitions. These are by no means necessary to a good presentation, but they may be helpful in your situation.
A. Adding PowerPoint animations
PowerPoint has an incredibly robust animations engine designed to power your creativity. That being said, it’s also easy to get started with basic animations.
Animations are movements that you can apply to individual objects on your slide.

To add a PowerPoint animation to an element of your slide, simply:
- Select the element
- Go to the Animations tab in the Ribbon
- Click on the dropdown arrow to view your options
- Select the animation you want
You can add animations to multiple objects at one time by selecting them all first and then applying the animation.
B. How to preview a PowerPoint animation

There are three ways to preview a PowerPoint animation:
- Click on the Preview button in the Animations tab
- Click on the little star next to the slide
- Play the slide in Slide Show Mode
To learn other ways to run your slide show, see our guide on presenting a PowerPoint slide show with shortcuts .
To adjust the settings of your animations, explore the options in the Effect Options , Advanced Animation and the Timing areas of the Animation tab .

Note: To see how to make objects appear and disappear in your slides by clicking a button, read our guide here .
C. How to manage your animations in PowerPoint

The best way to manage lots of animations on your slide is with the Animation Pane . To open it, simply:
- Navigate to the Animations tab
- Select the Animation Pane
Inside the Animation Pane, you’ll see all of the different animations that have been applied to objects on your slide, with their numbers marked as pictured above.
Note: To see examples of PowerPoint animations that can use in PowerPoint, see our list of PowerPoint animation tutorials here .
D. How to add transitions to your PowerPoint presentation
PowerPoint has an incredibly robust transition engine so that you can dictate how your slides change from one to the other. It is also extremely easy to add transitions to your slides.
In PowerPoint, transitions are the movements (or effects) you see as you move between two slides.

To add a transition to a PowerPoint slide, simply:
- Select the slide
- Go to the Transitions tab in the Ribbon
- In the Transitions to This Slide area, click on the dropdown arrow to view your options
- Select the transition you want
To adjust the settings of the transition, explore the options in the Timing area of the Transitions tab.
You can also add the same transition to multiple slides. To do that, select them in the Slides Pane and apply the transition.
E. How to preview a transition in PowerPoint

There are three ways to preview your PowerPoint transitions (just like your animations):
- Click on the Preview button in the Transitions tab
- Click on the little star beneath the slide number in the thumbnail view
Note: In 2016, PowerPoint added a cool new transition, called Morph. It operates a bit differently from other transitions. For a detailed tutorial on how to use the cool Morph transition, see our step-by-step article here .
Save Your PowerPoint Presentation
After you’ve built your presentation and made all the adjustments to your slides, you’ll want to save your presentation. YOu can do this several different ways.

To save a PowerPoint presentation using your Ribbon, simply:
- Navigate to the File tab
- Select Save As on the left
- Choose where you want to save your presentation
- Name your presentation and/or adjust your file type settings
- Click Save
You can alternatively use the Ctrl+S keyboard shortcut to save your presentation. I recommend using this shortcut frequently as you build your presentation to make sure you don’t lose any of your work.

This is the standard way to save a presentation. However, there may be a situation where you want to save your presentation as a different file type.
To learn how to save your presentation as a PDF, see our guide on converting PowerPoint to a PDF .
How to save your PowerPoint presentation as a template
Once you’ve created a presentation that you like, you may want to turn it into a template. The easiest – but not technically correct – way, is to simply create a copy of your current presentation and then change the content.
But be careful! A PowerPoint template is a special type of document and it has its own parameters and behaviors.
If you’re interested in learning about how to create your own PowerPoint template from scratch, see our guide on how to create a PowerPoint template .
Printing Your PowerPoint Presentation
After finishing your PowerPoint presentation, you may want to print it out on paper. Printing your slides is relatively easy.

To open the Print dialog box, you can either:
- Hit Ctrl+P on your keyboard
- Or go to the Ribbon and click on File and then Print

Inside the Print dialog box, you can choose from the various printing settings:
- Printer: Select a printer to use (or print to PDF or OneNote)
- Slides: Choose which slides you want to print
- Layout: Determine how many slides you want per page (this is where you can print the notes, outline, and handouts)
- Collated or uncollated (learn what collated printing means here )
- Color: Choose to print in color, grayscale or black & white
There are many more options for printing your PowerPoint presentations. Here are links to more in-depth articles:
- How to print multiple slides per page
- How to print your speaker notes in PowerPoint
- How to save PowerPoint as a picture presentation
So that’s how to create a PowerPoint presentation if you are brand new to it. We’ve also included a ton of links to helpful resources to boost your PowerPoint skills further.
When you are creating your presentation, it is critical to first focus on the content (what you are trying to say) before getting lost inserting and playing with elements. The clearer you are on what you want to present, the easier it will be to build it out in PowerPoint.
If you enjoyed this article, you can learn more about our PowerPoint training courses and other presentation resources by visiting us here .
🔒 Unlock the PowerPoint Shortcuts Trusted by Industry Leaders KKR, American Express, HSBC, and More!
Join over 114,880 professionals from diverse fields including consulting, investment banking, advertising, marketing, sales, and business development who have supercharged their PowerPoint game with our proven methods.
✅ Customize compelling presentations effortlessly.
✅ Master time-saving techniques for faster deck creation.
✅ Boost your career prospects with top-notch PowerPoint skills.
Get FREE access to the Critical PowerPoint Shortcuts module of our premium training course by entering your name and email below.
DISCLAIMER: PC Users Only!
We respect your privacy and will keep your info safe and confidential.
About The Author

Popular Tutorials
- How to Strikethrough Text (l̶i̶k̶e̶ ̶t̶h̶i̶s̶) in Word, Excel & PowerPoint
- How to Make Animated Fireworks in PowerPoint (Step-by-Step)
- Strikethrough Shortcut (l̶i̶k̶e̶ ̶t̶h̶i̶s̶) for Word, Excel & PowerPoint
- How to Create a Flash Card Memory Game in PowerPoint (Like Jeopardy)
- Keyboard Shortcuts Not Working: Solved
PowerPoint Tutorial Categories
- Strategies & Opinions
- Shortcuts & Hacks
- Pictures, Icons, Videos, Etc.
- New Features
- Miscellaneous
- Charts & Data Viz
We help busy professionals save hours and gain peace of mind, with corporate workshops, self-paced courses and tutorials for PowerPoint and Word.
Work With Us
- Corporate Training
- Presentation & Template Design
- Courses & Downloads
- PowerPoint Articles
- Word Articles
- Productivity Resources
Find a Tutorial
- Free Training
- For Businesses
We help busy office workers save hours and gain peace of mind, with tips, training and tutorials for Microsoft PowerPoint and Word.
Master Critical PowerPoint Shortcuts – Secure Your FREE Training Module and Save Valuable Time!
⌛ Master time-saving expert techniques.
🔥 Create powerful presentations.
🚀 Propel your career to new heights.
We value your privacy – we keep your info safe.
Discover PowerPoint Hacks Loved by Industry Giants - KKR, AmEx, HSBC!
Over 114,880 professionals in finance, marketing and sales have revolutionized their PPT skills with our proven methods.
Gain FREE access to a full module of our premium PowerPoint training program – Get started today!
We hate spam too and promise to keep your information safe.
You are currently viewing a placeholder content from Facebook . To access the actual content, click the button below. Please note that doing so will share data with third-party providers.

Basic tasks for creating a PowerPoint presentation
PowerPoint presentations work like slide shows. To convey a message or a story, you break it down into slides. Think of each slide as a blank canvas for the pictures and words that help you tell your story.
Choose a theme
When you open PowerPoint, you’ll see some built-in themes and templates . A theme is a slide design that contains matching colors, fonts, and special effects like shadows, reflections, and more.
On the File tab of the Ribbon, select New , and then choose a theme.
PowerPoint shows you a preview of the theme, with four color variations to choose from on the right side.
Click Create , or pick a color variation and then click Create .

Read more: Use or create themes in PowerPoint
Insert a new slide
On the Home tab, click the bottom half of New Slide , and pick a slide layout.

Read more: Add, rearrange, and delete slides .
Save your presentation
On the File tab, choose Save .
Pick or browse to a folder.
In the File name box, type a name for your presentation, and then choose Save .
Note: If you frequently save files to a certain folder, you can ‘pin’ the path so that it is always available (as shown below).

Tip: Save your work as you go. Press Ctrl+S often or save the file to OneDrive and let AutoSave take care of it for you.
Read more: Save your presentation file
Select a text placeholder, and begin typing.

Format your text
Select the text.
Under Drawing Tools , choose Format .

Do one of the following:
To change the color of your text, choose Text Fill , and then choose a color.
To change the outline color of your text, choose Text Outline , and then choose a color.
To apply a shadow, reflection, glow, bevel, 3-D rotation, a transform, choose Text Effects , and then choose the effect you want.
Change the fonts
Change the color of text on a slide
Add bullets or numbers to text
Format text as superscript or subscript
Add pictures
On the Insert tab, select Pictures , then do one of the following:
To insert a picture that is saved on your local drive or an internal server, choose This Device , browse for the picture, and then choose Insert .
(For Microsoft 365 subscribers) To insert a picture from our library, choose Stock Images , browse for a picture, select it and choose Insert .
To insert a picture from the web, choose Online Pictures , and use the search box to find a picture. Choose a picture, and then click Insert .

You can add shapes to illustrate your slide.
On the Insert tab, select Shapes , and then select a shape from the menu that appears.
In the slide area, click and drag to draw the shape.
Select the Format or Shape Format tab on the ribbon. Open the Shape Styles gallery to quickly add a color and style (including shading) to the selected shape.

Add speaker notes
Slides are best when you don’t cram in too much information. You can put helpful facts and notes in the speaker notes, and refer to them as you present.

Click inside the Notes pane below the slide, and begin typing your notes.

Add speaker notes to your slides
Print slides with or without speaker notes
Give your presentation
On the Slide Show tab, do one of the following:
To start the presentation at the first slide, in the Start Slide Show group, click From Beginning .

If you’re not at the first slide and want to start from where you are, click From Current Slide .
If you need to present to people who are not where you are, click Present Online to set up a presentation on the web, and then choose one of the following options:
Broadcast your PowerPoint presentation online to a remote audience
View your speaker notes as you deliver your slide show.
Get out of Slide Show view
To get out of Slide Show view at any time, on the keyboard, press Esc .
You can quickly apply a theme when you're starting a new presentation:
On the File tab, click New .
Select a theme.

Read more: Apply a design theme to your presentation
In the slide thumbnail pane on the left, select the slide that you want your new slide to follow.
On the Home tab, select the lower half of New Slide .
From the menu, select the layout that you want for your new slide.
Your new slide is inserted, and you can click inside a placeholder to begin adding content.
Learn more about slide layouts
Read more: Add, rearrange, and delete slides
PowerPoint for the web automatically saves your work to your OneDrive, in the cloud.
To change the name of the automatically saved file:
In the title bar, click the file name.
In the File Name box, enter the name you want to apply to the file.
If you want to change the cloud storage location, at the right end of the Location box, click the arrow symbol, then navigate to the folder you want, then select Move here .
On the Home tab, use the Font options:

Select from other formatting options such as Bold , Italic , Underline , Strikethrough , Subscript , and Superscript .
On the Insert tab, select Pictures .
From the menu, select where you want to insert the picture from:

Browse to the image you want, select it, then select Insert .
After the image is inserted on the slide, you can select it and drag to reposition it, and you can select and drag a corner handle to resize the image.
On the slide canvas, click and drag to draw the shape.
Select the Shape tab on the ribbon. Open the Shape Styles gallery to quickly add a color and style (including shading) to the selected shape.

A horizontal Notes pane appears at the bottom of the window, below the slide.
Click in the pane, then enter text.

On the Slide Show tab, select Play From Beginning .

To navigate through the slides, simply click the mouse or press the spacebar.
Tip: You can also use the forward and back arrow keys on your keyboard to navigate through the slide show.
Read more: Present your slide show
Stop a slide show
To get out of Slide Show view at any time, on the keyboard, press Esc.
The full-screen slide show will close, and you will be returned to the editing view of the file.
Tips for creating an effective presentation
Consider the following tips to keep your audience interested.
Minimize the number of slides
To maintain a clear message and to keep your audience attentive and interested, keep the number of slides in your presentation to a minimum.
Choose an audience-friendly font size
The audience must be able to read your slides from a distance. Generally speaking, a font size smaller than 30 might be too difficult for the audience to see.
Keep your slide text simple
You want your audience to listen to you present your information, instead of reading the screen. Use bullets or short sentences, and try to keep each item to one line.
Some projectors crop slides at the edges, so that long sentences might be cropped.
Use visuals to help express your message
Pictures, charts, graphs, and SmartArt graphics provide visual cues for your audience to remember. Add meaningful art to complement the text and messaging on your slides.
As with text, however, avoid including too many visual aids on your slide.
Make labels for charts and graphs understandable
Use only enough text to make label elements in a chart or graph comprehensible.
Apply subtle, consistent slide backgrounds
Choose an appealing, consistent template or theme that is not too eye-catching. You don't want the background or design to detract from your message.
However, you also want to provide a contrast between the background color and text color. The built-in themes in PowerPoint set the contrast between a light background with dark colored text or dark background with light colored text.
For more information about how to use themes, see Apply a theme to add color and style to your presentation .
Check the spelling and grammar
To earn and maintain the respect of your audience, always check the spelling and grammar in your presentation .
Top of Page

Need more help?
Want more options.
Explore subscription benefits, browse training courses, learn how to secure your device, and more.

Microsoft 365 subscription benefits

Microsoft 365 training

Microsoft security

Accessibility center
Communities help you ask and answer questions, give feedback, and hear from experts with rich knowledge.

Ask the Microsoft Community

Microsoft Tech Community

Windows Insiders
Microsoft 365 Insiders
Was this information helpful?
Thank you for your feedback.
Improve your practice.
Enhance your soft skills with a range of award-winning courses.
How to Structure your Presentation, with Examples
August 3, 2018 - Dom Barnard
For many people the thought of delivering a presentation is a daunting task and brings about a great deal of nerves . However, if you take some time to understand how effective presentations are structured and then apply this structure to your own presentation, you’ll appear much more confident and relaxed.
Here is our complete guide for structuring your presentation, with examples at the end of the article to demonstrate these points.
Why is structuring a presentation so important?
If you’ve ever sat through a great presentation, you’ll have left feeling either inspired or informed on a given topic. This isn’t because the speaker was the most knowledgeable or motivating person in the world. Instead, it’s because they know how to structure presentations – they have crafted their message in a logical and simple way that has allowed the audience can keep up with them and take away key messages.
Research has supported this, with studies showing that audiences retain structured information 40% more accurately than unstructured information.
In fact, not only is structuring a presentation important for the benefit of the audience’s understanding, it’s also important for you as the speaker. A good structure helps you remain calm, stay on topic, and avoid any awkward silences.
What will affect your presentation structure?
Generally speaking, there is a natural flow that any decent presentation will follow which we will go into shortly. However, you should be aware that all presentation structures will be different in their own unique way and this will be due to a number of factors, including:
- Whether you need to deliver any demonstrations
- How knowledgeable the audience already is on the given subject
- How much interaction you want from the audience
- Any time constraints there are for your talk
- What setting you are in
- Your ability to use any kinds of visual assistance
Before choosing the presentation’s structure answer these questions first:
- What is your presentation’s aim?
- Who are the audience?
- What are the main points your audience should remember afterwards?
When reading the points below, think critically about what things may cause your presentation structure to be slightly different. You can add in certain elements and add more focus to certain moments if that works better for your speech.

What is the typical presentation structure?
This is the usual flow of a presentation, which covers all the vital sections and is a good starting point for yours. It allows your audience to easily follow along and sets out a solid structure you can add your content to.
1. Greet the audience and introduce yourself
Before you start delivering your talk, introduce yourself to the audience and clarify who you are and your relevant expertise. This does not need to be long or incredibly detailed, but will help build an immediate relationship between you and the audience. It gives you the chance to briefly clarify your expertise and why you are worth listening to. This will help establish your ethos so the audience will trust you more and think you’re credible.
Read our tips on How to Start a Presentation Effectively
2. Introduction
In the introduction you need to explain the subject and purpose of your presentation whilst gaining the audience’s interest and confidence. It’s sometimes helpful to think of your introduction as funnel-shaped to help filter down your topic:
- Introduce your general topic
- Explain your topic area
- State the issues/challenges in this area you will be exploring
- State your presentation’s purpose – this is the basis of your presentation so ensure that you provide a statement explaining how the topic will be treated, for example, “I will argue that…” or maybe you will “compare”, “analyse”, “evaluate”, “describe” etc.
- Provide a statement of what you’re hoping the outcome of the presentation will be, for example, “I’m hoping this will be provide you with…”
- Show a preview of the organisation of your presentation
In this section also explain:
- The length of the talk.
- Signal whether you want audience interaction – some presenters prefer the audience to ask questions throughout whereas others allocate a specific section for this.
- If it applies, inform the audience whether to take notes or whether you will be providing handouts.
The way you structure your introduction can depend on the amount of time you have been given to present: a sales pitch may consist of a quick presentation so you may begin with your conclusion and then provide the evidence. Conversely, a speaker presenting their idea for change in the world would be better suited to start with the evidence and then conclude what this means for the audience.
Keep in mind that the main aim of the introduction is to grab the audience’s attention and connect with them.
3. The main body of your talk
The main body of your talk needs to meet the promises you made in the introduction. Depending on the nature of your presentation, clearly segment the different topics you will be discussing, and then work your way through them one at a time – it’s important for everything to be organised logically for the audience to fully understand. There are many different ways to organise your main points, such as, by priority, theme, chronologically etc.
- Main points should be addressed one by one with supporting evidence and examples.
- Before moving on to the next point you should provide a mini-summary.
- Links should be clearly stated between ideas and you must make it clear when you’re moving onto the next point.
- Allow time for people to take relevant notes and stick to the topics you have prepared beforehand rather than straying too far off topic.
When planning your presentation write a list of main points you want to make and ask yourself “What I am telling the audience? What should they understand from this?” refining your answers this way will help you produce clear messages.
4. Conclusion
In presentations the conclusion is frequently underdeveloped and lacks purpose which is a shame as it’s the best place to reinforce your messages. Typically, your presentation has a specific goal – that could be to convert a number of the audience members into customers, lead to a certain number of enquiries to make people knowledgeable on specific key points, or to motivate them towards a shared goal.
Regardless of what that goal is, be sure to summarise your main points and their implications. This clarifies the overall purpose of your talk and reinforces your reason for being there.
Follow these steps:
- Signal that it’s nearly the end of your presentation, for example, “As we wrap up/as we wind down the talk…”
- Restate the topic and purpose of your presentation – “In this speech I wanted to compare…”
- Summarise the main points, including their implications and conclusions
- Indicate what is next/a call to action/a thought-provoking takeaway
- Move on to the last section
5. Thank the audience and invite questions
Conclude your talk by thanking the audience for their time and invite them to ask any questions they may have. As mentioned earlier, personal circumstances will affect the structure of your presentation.
Many presenters prefer to make the Q&A session the key part of their talk and try to speed through the main body of the presentation. This is totally fine, but it is still best to focus on delivering some sort of initial presentation to set the tone and topics for discussion in the Q&A.

Other common presentation structures
The above was a description of a basic presentation, here are some more specific presentation layouts:
Demonstration
Use the demonstration structure when you have something useful to show. This is usually used when you want to show how a product works. Steve Jobs frequently used this technique in his presentations.
- Explain why the product is valuable.
- Describe why the product is necessary.
- Explain what problems it can solve for the audience.
- Demonstrate the product to support what you’ve been saying.
- Make suggestions of other things it can do to make the audience curious.
Problem-solution
This structure is particularly useful in persuading the audience.
- Briefly frame the issue.
- Go into the issue in detail showing why it ‘s such a problem. Use logos and pathos for this – the logical and emotional appeals.
- Provide the solution and explain why this would also help the audience.
- Call to action – something you want the audience to do which is straightforward and pertinent to the solution.
Storytelling
As well as incorporating stories in your presentation , you can organise your whole presentation as a story. There are lots of different type of story structures you can use – a popular choice is the monomyth – the hero’s journey. In a monomyth, a hero goes on a difficult journey or takes on a challenge – they move from the familiar into the unknown. After facing obstacles and ultimately succeeding the hero returns home, transformed and with newfound wisdom.
Storytelling for Business Success webinar , where well-know storyteller Javier Bernad shares strategies for crafting compelling narratives.
Another popular choice for using a story to structure your presentation is in media ras (in the middle of thing). In this type of story you launch right into the action by providing a snippet/teaser of what’s happening and then you start explaining the events that led to that event. This is engaging because you’re starting your story at the most exciting part which will make the audience curious – they’ll want to know how you got there.
- Great storytelling: Examples from Alibaba Founder, Jack Ma
Remaining method
The remaining method structure is good for situations where you’re presenting your perspective on a controversial topic which has split people’s opinions.
- Go into the issue in detail showing why it’s such a problem – use logos and pathos.
- Rebut your opponents’ solutions – explain why their solutions could be useful because the audience will see this as fair and will therefore think you’re trustworthy, and then explain why you think these solutions are not valid.
- After you’ve presented all the alternatives provide your solution, the remaining solution. This is very persuasive because it looks like the winning idea, especially with the audience believing that you’re fair and trustworthy.
Transitions
When delivering presentations it’s important for your words and ideas to flow so your audience can understand how everything links together and why it’s all relevant. This can be done using speech transitions which are words and phrases that allow you to smoothly move from one point to another so that your speech flows and your presentation is unified.
Transitions can be one word, a phrase or a full sentence – there are many different forms, here are some examples:
Moving from the introduction to the first point
Signify to the audience that you will now begin discussing the first main point:
- Now that you’re aware of the overview, let’s begin with…
- First, let’s begin with…
- I will first cover…
- My first point covers…
- To get started, let’s look at…
Shifting between similar points
Move from one point to a similar one:
- In the same way…
- Likewise…
- Equally…
- This is similar to…
- Similarly…
Internal summaries
Internal summarising consists of summarising before moving on to the next point. You must inform the audience:
- What part of the presentation you covered – “In the first part of this speech we’ve covered…”
- What the key points were – “Precisely how…”
- How this links in with the overall presentation – “So that’s the context…”
- What you’re moving on to – “Now I’d like to move on to the second part of presentation which looks at…”
Physical movement
You can move your body and your standing location when you transition to another point. The audience find it easier to follow your presentation and movement will increase their interest.
A common technique for incorporating movement into your presentation is to:
- Start your introduction by standing in the centre of the stage.
- For your first point you stand on the left side of the stage.
- You discuss your second point from the centre again.
- You stand on the right side of the stage for your third point.
- The conclusion occurs in the centre.
Key slides for your presentation
Slides are a useful tool for most presentations: they can greatly assist in the delivery of your message and help the audience follow along with what you are saying. Key slides include:
- An intro slide outlining your ideas
- A summary slide with core points to remember
- High quality image slides to supplement what you are saying
There are some presenters who choose not to use slides at all, though this is more of a rarity. Slides can be a powerful tool if used properly, but the problem is that many fail to do just that. Here are some golden rules to follow when using slides in a presentation:
- Don’t over fill them – your slides are there to assist your speech, rather than be the focal point. They should have as little information as possible, to avoid distracting people from your talk.
- A picture says a thousand words – instead of filling a slide with text, instead, focus on one or two images or diagrams to help support and explain the point you are discussing at that time.
- Make them readable – depending on the size of your audience, some may not be able to see small text or images, so make everything large enough to fill the space.
- Don’t rush through slides – give the audience enough time to digest each slide.
Guy Kawasaki, an entrepreneur and author, suggests that slideshows should follow a 10-20-30 rule :
- There should be a maximum of 10 slides – people rarely remember more than one concept afterwards so there’s no point overwhelming them with unnecessary information.
- The presentation should last no longer than 20 minutes as this will leave time for questions and discussion.
- The font size should be a minimum of 30pt because the audience reads faster than you talk so less information on the slides means that there is less chance of the audience being distracted.
Here are some additional resources for slide design:
- 7 design tips for effective, beautiful PowerPoint presentations
- 11 design tips for beautiful presentations
- 10 tips on how to make slides that communicate your idea
Group Presentations
Group presentations are structured in the same way as presentations with one speaker but usually require more rehearsal and practices. Clean transitioning between speakers is very important in producing a presentation that flows well. One way of doing this consists of:
- Briefly recap on what you covered in your section: “So that was a brief introduction on what health anxiety is and how it can affect somebody”
- Introduce the next speaker in the team and explain what they will discuss: “Now Elnaz will talk about the prevalence of health anxiety.”
- Then end by looking at the next speaker, gesturing towards them and saying their name: “Elnaz”.
- The next speaker should acknowledge this with a quick: “Thank you Joe.”
From this example you can see how the different sections of the presentations link which makes it easier for the audience to follow and remain engaged.
Example of great presentation structure and delivery
Having examples of great presentations will help inspire your own structures, here are a few such examples, each unique and inspiring in their own way.
How Google Works – by Eric Schmidt
This presentation by ex-Google CEO Eric Schmidt demonstrates some of the most important lessons he and his team have learnt with regards to working with some of the most talented individuals they hired. The simplistic yet cohesive style of all of the slides is something to be appreciated. They are relatively straightforward, yet add power and clarity to the narrative of the presentation.
Start with why – by Simon Sinek
Since being released in 2009, this presentation has been viewed almost four million times all around the world. The message itself is very powerful, however, it’s not an idea that hasn’t been heard before. What makes this presentation so powerful is the simple message he is getting across, and the straightforward and understandable manner in which he delivers it. Also note that he doesn’t use any slides, just a whiteboard where he creates a simple diagram of his opinion.
The Wisdom of a Third Grade Dropout – by Rick Rigsby
Here’s an example of a presentation given by a relatively unknown individual looking to inspire the next generation of graduates. Rick’s presentation is unique in many ways compared to the two above. Notably, he uses no visual prompts and includes a great deal of humour.
However, what is similar is the structure he uses. He first introduces his message that the wisest man he knew was a third-grade dropout. He then proceeds to deliver his main body of argument, and in the end, concludes with his message. This powerful speech keeps the viewer engaged throughout, through a mixture of heart-warming sentiment, powerful life advice and engaging humour.
As you can see from the examples above, and as it has been expressed throughout, a great presentation structure means analysing the core message of your presentation. Decide on a key message you want to impart the audience with, and then craft an engaging way of delivering it.
By preparing a solid structure, and practising your talk beforehand, you can walk into the presentation with confidence and deliver a meaningful message to an interested audience.
It’s important for a presentation to be well-structured so it can have the most impact on your audience. An unstructured presentation can be difficult to follow and even frustrating to listen to. The heart of your speech are your main points supported by evidence and your transitions should assist the movement between points and clarify how everything is linked.
Research suggests that the audience remember the first and last things you say so your introduction and conclusion are vital for reinforcing your points. Essentially, ensure you spend the time structuring your presentation and addressing all of the sections.

- Get started with computers
- Learn Microsoft Office
- Apply for a job
- Improve my work skills
- Design nice-looking docs
- Getting Started
- Smartphones & Tablets
- Typing Tutorial
- Online Learning
- Basic Internet Skills
- Online Safety
- Social Media
- Zoom Basics
- Google Docs
- Google Sheets
- Career Planning
- Resume Writing
- Cover Letters
- Job Search and Networking
- Business Communication
- Entrepreneurship 101
- Careers without College
- Job Hunt for Today
- 3D Printing
- Freelancing 101
- Personal Finance
- Sharing Economy
- Decision-Making
- Graphic Design
- Photography
- Image Editing
- Learning WordPress
- Language Learning
- Critical Thinking
- For Educators
- Translations
- Staff Picks
- English expand_more expand_less
PowerPoint - Slide Basics
Powerpoint -, slide basics, powerpoint slide basics.

PowerPoint: Slide Basics
Lesson 5: slide basics.
/en/powerpoint/saving-presentations/content/
Introduction
Every PowerPoint presentation is composed of a series of slides . To begin creating a slide show, you'll need to know the basics of working with slides. You'll need to feel comfortable with tasks like inserting a new slide, changing the layout of a slide, arranging existing slides, changing the slide view , and adding notes to a slide.
Optional: Download our practice presentation .
Watch the video below to learn more about slide basics in PowerPoint.
Understanding slides and slide layouts
When you insert a new slide , it will usually have placeholders to show you where content will be placed. Slides have different layouts for placeholders, depending on the type of information you want to include. Whenever you create a new slide, you'll need to choose a slide layout that fits your content.

Placeholders can contain different types of content, including text, images, and videos. Many placeholders have thumbnail icons you can click to add specific types of content. In the example below, the slide has placeholders for the title and content .

To insert a new slide:
Whenever you start a new presentation, it will contain one slide with the Title Slide layout. You can insert as many slides as you need from a variety of layouts.

To change the layout of an existing slide, click the Layout command, then choose the desired layout.

To quickly add a slide that uses the same layout as the selected slide, click the top half of the New Slide command.

Organizing slides
PowerPoint presentations can contain as many slides as you need. The Slide Navigation pane on the left side of the screen makes it easy to organize your slides. From there, you can duplicate , rearrange , and delete slides in your presentation.

Working with slides

- Delete slides : If you want to remove a slide from your presentation, you can delete it. Simply select the slide you want to delete, then press the Delete or Backspace key on your keyboard.
To copy and paste slides:
If you want to create several slides with the same layout, you may find it easier to copy and paste a slide you've already created instead of starting with an empty slide.

Customizing slide layouts
Sometimes you may find that a slide layout doesn't exactly fit your needs. For example, a layout might have too many—or too few—placeholders. You might also want to change how the placeholders are arranged on the slide. Fortunately, PowerPoint makes it easy to adjust slide layouts as needed.
Adjusting placeholders

- To delete a placeholder : Select the placeholder you want to delete, then press the Delete or Backspace key on your keyboard.
To add a text box:
Text can be inserted into both placeholders and text boxes . Inserting text boxes allows you to add to the slide layout. Unlike placeholders, text boxes always stay in the same place, even if you change the theme.

Using blank slides
If you want even more control over your content, you may prefer to use a blank slide , which contains no placeholders. Blank slides can be customized by adding your own text boxes, pictures, charts, and more.

While blank slides offer more flexibility, keep in mind that you won't be able to take advantage of the predesigned layouts included in each theme.
To play the presentation:
Once you've arranged your slides, you may want to play your presentation. This is how you will present your slide show to an audience.

- The presentation will appear in full-screen mode.
- You can advance to the next slide by clicking your mouse or pressing the spacebar on your keyboard. You can also use the arrow keys on your keyboard to move forward or backward through the presentation.
- Press the Esc key to exit presentation mode.
You can also press the F5 key at the top of your keyboard to start a presentation.
Customizing slides
To change the slide size:.
By default, all slides in PowerPoint 2013 use a 16 - by-9 —or widescreen —aspect ratio. You might know that widescreen TVs also use the 16-by-9 aspect ratio. Widescreen slides will work best with widescreen monitors and projectors. However, if you need your presentation to fit a 4-by-3 screen, it's easy to change the slide size to fit.

To format the slide background:
By default, all slides in your presentation use a white background . It's easy to change the background style for some or all of your slides. Backgrounds can have a solid , gradient , pattern , or picture fill.

- The background style of the selected slide will update.

To apply a theme:
A theme is a predefined combination of colors, fonts, and effects that can quickly change the look and feel of your entire slide show. Different themes also use different slide layouts , which can change the arrangement of your existing placeholders. We'll talk more about themes later in our Applying Themes lesson.

Try applying a few themes to your presentation. Some themes will work better than others, depending on your content.
- Open our practice presentation .
- Change the theme of the presentation.
- Delete slide 7. This slide should be blank.
- Add a new slide with the Title and Content layout to the end of the presentation.
- In the Title placeholder, type Adoption Event Dates .
- Select the Content placeholder and delete it.
- Insert a text box and type July 17, 2017 inside it.
- Change the slide size to Standard (4:3) . A dialog box will appear asking if you want to maximize or ensure fit. Choose Ensure Fit .

/en/powerpoint/text-basics/content/
Home Blog Education Presentation Skills 101: A Guide to Presentation Success
Presentation Skills 101: A Guide to Presentation Success
Getting the perfect presentation design is just a step toward a successful presentation. For the experienced user, building presentation skills is the answer to elevating the power of your message and showing expertise on any subject. Still, one can ask: is it the same set of skills, or are they dependable on the type of presentation?
In this article, we will introduce the different types of presentations accompanied by the skillset required to master them. The purpose, as always, is to retain the audience’s interest for a long-lasting and convincing message.

Table of Contents
The Importance of Presentation Skills
Persuasive presentations, instructional presentations, informative presentations, inspirational presentations, basic presentation skills, what are the main difficulties when giving a presentation, recommendations to improve your presentation skills, closing statement.
Effective communication is the answer to reaching business and academic goals. The scenarios in which we can be required to deliver a presentation are as diverse as one can imagine. Still, some core concepts apply to all presentations.
We define presentation skills as a compendium of soft skills that directly affect your presentation performance and contribute to creating a great presentation. These are not qualities acquired by birth but skills you ought to train and master to delve into professional environments.
You may ask: is it really that evident when a presenter is not prepared? Here are some common signs people can experience during presentations:
- Evasive body language: Not making eye contact with the audience, arms closed tightly to the body, hands in pockets all the time.
- Lack of interest in the presenter’s voice: dull tone, not putting an effort to articulate the topics.
- Doubting when asked to answer a question
- Irksome mood
The list can go on about common presenter mistakes , and most certainly, it will affect the performance of any presented data if the lack of interest by the presenter is blatantly obvious. Another element to consider is anxiety, and according to research by the National Institute of Mental Health, 73% of the population in the USA is affected by glossophobia , which is the fear of public speaking, judgment, or negative evaluation by other people.
Therefore, presentation skills training is essential for any business professional who wants to achieve effective communication . It will remove the anxiety from presentation performance and help users effectively deliver their message and connect with the audience.
Archetypes of presentations
Persuasive presentations aim to convince the audience – often in short periods – to acquire a product or service, adhere to a cause, or invest in a company. For business entrepreneurs or politicians, persuasive presentations are their tool for the trade.
Unless you aim to be perceived as an imposter, a proper persuasive presentation has the elements of facts, empathy, and logic, balanced under a well-crafted narrative. The central pillar of these presentations is to identify the single factor that gathered your audience: it could be a market need, a social cause, or a revolutionary concept for today’s society. It has to be something with enough power to gather critiques – both good and bad.
That single factor has to be backed up by facts. Research that builds your hypothesis on how to solve that problem. A deep understanding of the target audience’s needs , concerns, and social position regarding the solution your means can offer. When those elements are in place, building a pitch becomes an easy task.
Graphics can help you introduce information in a compelling format, lowering the need for lengthy presentations. Good presentation skills for persuasive presentations go by the hand of filtering relevant data and creating the visual cues that resonate with what your audience demands.
One powerful example of a persuasive presentation is the technique known as the elevator pitch . You must introduce your idea or product convincingly to the audience in a timeframe between 30 seconds and less than 2 minutes. You have to expose:
- What do you do
- What’s the problem to solve
- Why is your solution different from others
- Why should the audience care about your expertise

For that very purpose, using engaging graphics with contrasting colors elevates the potential power of your message. It speaks professionalism, care for details, and out-of-the-box thinking. Knowing how to end a presentation is also critical, as your CTAs should be placed with care.
Therefore, let’s resume the requirements of persuasive presentations in terms of good presentation skills:
- Identifying problems and needs
- Elaborating “the hook” (the element that grabs the audience’s attention)
- Knowing how to “tie” your audience (introducing a piece of information related to the hook that causes an emotional impact)
- Broad knowledge of body language and hand gestures to quickly convey your message
- Being prepared to argue a defense of your point of view
- Handling rejection
- Having a proactive attitude to convert opportunities into new projects
- Using humor, surprise, or personal anecdotes as elements to sympathize with the audience
- Having confidence
- Be able to summarize facts and information in visually appealing ways

You can learn more about persuasive presentation techniques by clicking here .
In the case of instructional presentations, we ought to differentiate two distinctive types:
- Lecture Presentations : Presentations being held at universities or any other educative institution. Those presentations cover, topic by topic, and the contents of a syllabus and are created by the team of teachers in charge of the course.
- Training Presentations : These presentations take place during in-company training sessions and usually comprise a good amount of content that is resumed into easy-to-take solutions. They are aimed to coach employees over certain topics relevant to their work performance. The 70-20-10 Model is frequently used to address these training situations.
Lecture presentations appeal to the gradual introduction of complex concepts, following a structure set in the course’s syllabus. These presentations often have a similar aesthetic as a group of professors or researchers created to share their knowledge about a topic. Personal experience does tell that course presentations often rely on factual data, adequately documented, and on the theoretical side.
An example of a presentation that lies under this concept is a Syllabus Presentation, used by the teaching team to introduce the subject to new students, evaluation methods, concepts to be learned, and expectations to pass the course.

On the other hand, training presentations are slide decks designed to meet an organization’s specific needs in the formal education of their personnel. Commonly known as “continuous education,” plenty of companies invest resources in coaching their employees to achieve higher performance results. These presentations have the trademark of being concise since their idea is to introduce the concepts that shall be applied in practice sessions.
Ideally, the training presentations are introduced with little text and easy-to-recognize visual cues. Since the idea is to summarize as much as possible, these are visually appealing for the audience. They must be dynamic enough to allow the presenter to convey the message.

Those key takeaways remind employees when they revisit their learning resources and allow them to ruminate on questions that fellow workers raise.
To sum up this point, building presentation skills for instructional presentations requires:
- Ability to put complex concepts into simpler words
- Patience and a constant learning mindset
- Voice training to deliver lengthy speeches without being too dense
- Ability to summarize points and note the key takeaways
- Empathizing with the audience to understand their challenges in the learning process

The informative presentations take place in business situations, such as when to present project reports from different departments to the management. Another potential usage of these presentations is in SCRUM or other Agile methodologies, when a sprint is completed, to discuss the advance of the project with the Product Owner.
As they are presentations heavily dependent on data insights, it’s common to see the usage of infographics and charts to express usually dense data in simpler terms and easy to remember.

Informative presentations don’t just fall into the business category. Ph.D. Dissertation and Thesis presentations are topics that belong to the informative presentations category as they condense countless research hours into manageable reports for the academic jury.

Since these informational presentations can be perceived as lengthy and data-filled, it is important to learn the following professional presentation skills:
- Attention to detail
- Be able to explain complex information in simpler terms
- Creative thinking
- Powerful diction
- Working on pauses and transitions
- Pacing the presentation, so not too much information is divulged per slide

The leading inspirational platform, TEDx, comes to mind when talking about inspirational presentations. This presentation format has the peculiarity of maximizing the engagement with the audience to divulge a message, and due to that, it has specific requirements any presenter must meet.
This presentation format usually involves a speaker on a stage, either sitting or better standing, in which the presenter engages with the audience with a storytelling format about a life experience, a job done that provided a remarkable improvement for society, etc.

Empathizing with the audience is the key ingredient for these inspirational presentations. Still, creativity is what shapes the outcome of your performance as people are constantly looking for different experiences – not the same recipe rephrased with personal touches. The human factor is what matters here, way above data and research. What has your experience to offer to others? How can it motivate another human being to pursue a similar path or discover their true calling?
To achieve success in terms of communication skills presentation, these inspirational presentations have the following requirements:
- Focus on the audience (engage, consider their interests, and make them a part of your story)
- Putting ego aside
- Creative communication skills
- Storytelling skills
- Body language knowledge to apply the correct gestures to accompany your story
- Voice training
- Using powerful words

After discussing the different kinds of presentations we can come across at any stage of our lives, a group of presentation skills is standard in any type of presentation. See below what makes a good presentation and which skills you must count on to succeed as a presenter.
Punctuality
Punctuality is a crucial aspect of giving an effective presentation. Nothing says more about respect for your audience and the organization you represent than delivering the presentation on time . Arriving last minute puts pressure on the tech team behind audiovisuals, as they don’t have enough preparation to test microphones, stage lights, and projector settings, which can lead to a less powerful presentation Even when discussing presentations hosted in small rooms for a reduced audience, testing the equipment becomes essential for an effective presentation.
A solution for this is to arrive at least 30 minutes early. Ideally, one hour is a sweet spot since the AV crew has time to check the gear and requirements for your presentation. Another benefit of this, for example, in inspirational presentations, is measuring the previous presenter’s impact on the audience. This gives insights about how to resonate with the public, and their interest, and how to accommodate your presentation for maximum impact.
Body Language
Our bodies can make emotions transparent for others, even when we are unaware of such a fact. Proper training for body language skills reduces performance anxiety, giving the audience a sense of expertise about the presented topic.
Give your presentation and the audience the respect they deserve by watching over these potential mistakes:
- Turning your back to the audience for extended periods : It’s okay to do so when introducing an important piece of information or explaining a graph, but it is considered rude to give your back to the audience constantly.
- Fidgeting : We are all nervous in the presence of strangers, even more, if we are the center of attention for that moment. Instead of playing with your hair or making weird hand gestures, take a deep breath to center yourself before the presentation and remember that everything you could do to prepare is already done. Trust your instincts and give your best.
- Intense eye contact : Have you watched a video where the presenter stared at the camera the entire time? That’s the feeling you transmit to spectators through intense eye contact. It’s a practice often used by politicians to persuade.
- Swearing : This is a no-brainer. Even when you see influencers swearing on camera or in podcasts or live presentations, it is considered an informal and lousy practice for business and academic situations. If you have a habit to break when it comes to this point, find the humor in these situations and replace your swear words with funny alternatives (if the presentation allows for it).
Voice Tone plays a crucial role in delivering effective presentations and knowing how to give a good presentation. Your voice is a powerful tool for exposing your ideas and feelings . Your voice can articulate the message you are telling, briefing the audience if you feel excited about what you are sharing or, in contrast, if you feel the presentation is a burden you ought to complete.
Remember, passion is a primary ingredient in convincing people. Therefore, transmitting such passion with a vibrant voice may help gather potential business partners’ interest.
But what if you feel sick prior to the presentation? If, by chance, your throat is sore minutes before setting foot on the stage, try this: when introducing yourself, mention that you are feeling a bit under the weather. This resonates with the audience to pay more attention to your efforts. In case you don’t feel comfortable about that, ask the organizers for a cup of tea, as it will settle your throat and relax your nerves.
Tech Skills
Believe it or not, people still feel challenged by technology these days. Maybe that’s the reason why presentation giants like Tony Robbins opt not to use PowerPoint presentations . The reality is that there are plenty of elements involved in a presentation that can go wrong from the tech side:
- A PDF not opening
- Saving your presentation in a too-recent PowerPoint version
- A computer not booting up
- Mac laptops and their never-ending compatibility nightmare
- Not knowing how to change between slides
- Not knowing how to use a laser pointer
- Internet not working
- Audio not working
We can come up with a pretty long list of potential tech pitfalls, and yet more than half of them fall in presenters not being knowledgeable about technology.
If computers aren’t your thing, let the organization know about this beforehand. There is always a crew member available to help presenters switch between slides or configure the presentation for streaming. This takes the pressure off your shoulders, allowing you to concentrate on the content to present. Remember, even Bill Gates can get a BSOD during a presentation .
Presentations, while valuable for conveying information and ideas, can be daunting for many individuals. Here are some common difficulties people encounter when giving presentations:
Public Speaking Anxiety
Glossophobia, the fear of public speaking, affects a significant portion of the population. This anxiety can lead to nervousness, trembling, and forgetfulness during a presentation.
Lack of Confidence
Many presenters struggle with self-doubt, fearing that they may not be knowledgeable or skilled enough to engage their audience effectively.
Content Organization
Organizing information in a coherent and engaging manner can be challenging. Presenters often grapple with how to structure their content to make it easily digestible for the audience. Artificial Intelligence can help us significantly reduce the content arrangement time when you work with tools like our AI Presentation Maker (made for presenters by experts in presentation design).
Audience Engagement
Keeping the audience’s attention and interest throughout the presentation can be difficult. Distractions, disengaged attendees, or lack of interaction can pose challenges.
Technical Issues
Technology glitches, such as malfunctioning equipment, incompatible file formats, or poor internet connectivity, can disrupt presentations and increase stress.
Time Management
Striking the right balance between providing enough information and staying within time limits is a common challenge. Going over or under the allotted time can affect the effectiveness of the presentation.
Handling Questions and Challenges
Responding to unexpected questions, criticism, or challenges from the audience can be difficult, especially when presenters are unprepared or lack confidence in their subject matter.
Visual Aids and Technology
Creating and effectively using visual aids like slides or multimedia can be a struggle for some presenters. Technical competence is essential in this aspect.
Language and Articulation
Poor language skills or unclear articulation can hinder effective communication. Presenters may worry about stumbling over words or failing to convey their message clearly.
Maintaining appropriate and confident body language can be challenging. Avoiding nervous habits, maintaining eye contact, and using gestures effectively requires practice.
Overcoming Impersonal Delivery
In virtual presentations, maintaining a personal connection with the audience can be difficult. The absence of face-to-face interaction can make it challenging to engage and read the audience.
Cultural and Diversity Awareness
Presenting to diverse audiences requires sensitivity to cultural differences and varying levels of familiarity with the topic.
In this section, we gathered some tips on how to improve presentation skills that can certainly make an impact if applied to your presentation skills. We believe these skills can be cultivated to transform into habits for your work routine.
Tip #1: Build a narrative
One memorable way to guarantee presentation success is by writing a story of all the points you desire to cover. This statement is based on the logic behind storytelling and its power to connect with people .
Don’t waste time memorizing slides or reading your presentation to the audience. It feels unnatural, and any question that diverts from the topic in discussion certainly puts you in jeopardy or, worse, exposes you as a fraud in the eyes of the audience. And before you ask, it is really evident when a presenter has a memorized speech.
Build and rehearse the presentation as if telling a story to a group of interested people. Lower the language barrier by avoiding complex terms that maybe even you aren’t fully aware of their meaning. Consider the ramifications of that story, what it could lead to, and which are the opportunities to explore. Then, visualize yourself giving the presentation in a natural way.
Applying this technique makes the presentation feel like second nature to you. It broadens the spectrum in which you can show expertise over a topic or even build the basis for new interesting points of view about the project.
Tip #2: Don’t talk for more than 3 minutes per slide
It is a common practice of presenters to bombard the audience with facts and information whilst retaining the same slide on the screen. Why can this happen? It could be because the presenter condensed the talk into very few slides and preferred to talk. The reality is that your spectators won’t retain the information you are giving unless you give visual cues to help that process.
Opt to prepare more slides and pace your speech to match the topics shown on each slide. Don’t spend more than 3 minutes per slide unless you have to introduce a complex piece of data. Use visual cues to direct the spectators about what you talk about, and summarize the principal concepts discussed at the end of each section.
Tip #3: Practice meditation daily
Anxiety is the number one enemy of professional presenters. It slowly builds without you being aware of your doubts and can hinder your performance in multiple ways: making you feel paralyzed, fidgeting, making you forget language skills or concepts, affecting your health, etc.
Meditation is an ancient practice taken from Buddhist teachings that train your mind to be here in the present. We often see the concepts of meditation and mindfulness as synonyms, whereas you should be aware that meditation is a practice that sets the blocks to reach a state of mindfulness. For presenters, being in the here and now is essential to retain focus, but meditation techniques also teach us to control our breathing and be in touch with our body signals when stress builds up.
The customary practice of meditation has an impact on imagination and creativity but also helps to build patience – a skill much needed for connecting with your audience in instructional presentations.
Having the proper set of presentation skills can be quite subjective. It goes beyond presentation tips and deepens into how flexible we can be in our ability to communicate ideas.
Different presentations and different audiences shape the outcome of our efforts. Therefore, having a basic understanding of how to connect, raise awareness, and empathize with people can be key ingredients for your career as a presenter. A word of advice: success doesn’t happen overnight. It takes dedication and patience to build communication skills . Don’t condition your work to believe you will be ready “someday”; it’s best to practice and experience failure as part of the learning process.

Like this article? Please share
Business Presentations, Presentation Approaches, Presentation Skills Filed under Education
Related Articles

Filed under Presentation Ideas • June 6th, 2024
10+ Outstanding PowerPoint Presentation Examples and Templates
Looking for inspiration before approaching your next slide design? If so, take a look at our selection of PowerPoint presentation examples.

Filed under PowerPoint Tutorials • May 28th, 2024
How to Compress PowerPoint Presentations
You don’t need to end up with gigantic PowerPoint files you cannot email or distribute with ease. Instead, learn how to compress PowerPoint presentations by applying any of these 6 different methods.

Filed under Google Slides Tutorials • May 28th, 2024
How to Add a GIF to Google Slides
With this guide we teach you how to make presentations more interesting by adding GIF images to Google Slides.
Leave a Reply

Cloud Storage

Custom Business Email

Video and voice conferencing

Shared Calendars

Word Processing

Spreadsheets
Presentation Builder

Survey builder

Google Workspace
An integrated suit of secure, cloud-native collaboration and productivity apps powered by Google AI.
Tell impactful stories, with Google Slides
Create, present, and collaborate on online presentations in real-time and from any device.
- For my personal use
- For work or my business

Jeffery Clark
T h i s c h a r t h e l p s b r i d g i n g t h e s t o r y !

E s t i m a t e d b u d g e t

Make beautiful presentations, together
Stay in sync in your slides, with easy sharing and real-time editing. Use comments and assign action items to build your ideas together.

Present slideshows with confidence
With easy-to-use presenter view, speaker notes, and live captions, Slides makes presenting your ideas a breeze. You can even present to Google Meet video calls directly from Slides.

Seamlessly connect to your other Google apps
Slides is thoughtfully connected to other Google apps you love, saving you time. Embed charts from Google Sheets or reply to comments directly from Gmail. You can even search the web and Google Drive for relevant content and images directly from Slides.

Extend collaboration and intelligence to PowerPoint files
Easily edit Microsoft PowerPoint presentations online without converting them, and layer on Slides’ enhanced collaborative and assistive features like comments, action items, and Smart Compose.

Work on fresh content
With Slides, everyone’s working on the latest version of a presentation. And with edits automatically saved in version history, it’s easy to track or undo changes.

Make slides faster, with built-in intelligence
Assistive features like Smart Compose and autocorrect help you build slides faster with fewer errors.

Stay productive, even offline
You can access, create, and edit Slides even without an internet connection, helping you stay productive from anywhere.
Security, compliance, and privacy

Secure by default
We use industry-leading security measures to keep your data safe, including advanced malware protections. Slides is also cloud-native, eliminating the need for local files and minimizing risk to your devices.
Encryption in transit and at rest
All files uploaded to Google Drive or created in Slides are encrypted in transit and at rest.
Compliance to support regulatory requirements
Our products, including Slides, regularly undergo independent verification of their security, privacy, and compliance controls .
Private by design
Slides adheres to the same robust privacy commitments and data protections as the rest of Google Cloud’s enterprise services .

You control your data.
We never use your slides content for ad purposes., we never sell your personal information to third parties., find the plan that’s right for you, google slides is a part of google workspace.
Every plan includes

|
|
| $12 USD info Or $14.40 per user / month, when billed monthly
|
|---|---|---|
| content creation | done | done |
| Secure cloud storage | 15 GB per user | 2 TB per user |
| remove | done | |
| Secure email | done | done |
| remove | done | |
| Video and voice conferencing | 100 participants | 150 participants |
| remove | done | |
| Centralized administration | remove | done |
| remove | done | |
| Self-service online and community forums | 24/7 online support and community forums |
Collaborate from anywhere, on any device
Access, create, and edit your presentations wherever you are — from any mobile device, tablet, or computer — even when offline.

Get a head start with templates
Choose from a variety of presentations, reports, and other professionally-designed templates to kick things off quickly..

Photo Album

Book Report

Visit the Slides Template Gallery for more.
Ready to get started?
The Ultimate Beginner’s Guide to Microsoft PowerPoint: From Newbie to Master
You will need to give a presentation one day. This beginner’s guide to Microsoft PowerPoint should give you a great start to a wonderful slideshow.
Microsoft PowerPoint has been a staple for creating presentations for many years. But like anything, not everyone is an expert right off the bat. You have to start somewhere, right? So, let this beginner's guide to PowerPoint be that first step.
For those beginner's who are using PowerPoint for the first time, haven't used it in a while, or just want a simple reference for the basics, this your guide to the desktop version. And, many of these same features apply if you use it online. So, if you are still deciding between PowerPoint Online and PowerPoint 2016 , this guide can come in handy either way.
What Is Microsoft PowerPoint?
Microsoft PowerPoint is basically a presentation creation tool. You can make slideshows with text, images, shapes, animations, audio, and much more. Then, pop your presentation onto the big screen to display it to others or save it as a visual document for yourself.
From Microsoft :
"PowerPoint is a slideshow presentation program that's part of the Microsoft office suite of tools. PowerPoint makes it easy to create, collaborate, and present your ideas in dynamic, visually compelling ways."
For business, educational, and personal situations, PowerPoint offers the flexibility to make the simplest presentations stand out with its host of features.
General Uses for PowerPoint
- Business presentations for products and services
- Educational slideshows for classrooms and lectures
- Personal visuals such as mind maps and family photo slideshows
- Sales and marketing materials
- Event presentations like weddings, anniversaries, or family reunions
- Project, budget, and financial presentations
- Certificates, calendars, reports, diagrams, and charts for any industry
You can create almost any type of visual in PowerPoint. But first, you should become familiar with the general terms of the application.
Basic Terms Used in PowerPoint
You will see many words and terms used frequently throughout this guide. So, taking a moment to review them will help you follow the processes and explanations much easier.
Slideshow and Presentation : When talking about PowerPoint, you may see these two terms become interchangeable. They each represent the overall document you create in the application.
Slides : Each slideshow in PowerPoint contains slides, just like with a physical slideshow. You can think of slides as pages that you can add to your presentation and then move through them one-by-one.
Animations : Animations are visual effects that can give your slide a unique appearance. They allow you to add movement and pizzazz to the elements on your slide.
Transitions : Transitions are also visual tools, but you will see as one slide moves to the next. By using a transition, you can make your presentation stand out to your audience or use it to create a dramatic effect.
The Ribbon and Tabs in PowerPoint
Just like with other Microsoft Office applications, the PowerPoint ribbon contains the buttons that you will use inside tabs. You can customize the ribbon to remove or add both tabs and buttons. But, you will likely see the tabs below by default.

Here is a brief description of what each one is for and which tab group you can see.
- File : Create a new presentation, open an existing one, save, print, and share slideshows.
- Home : Control the clipboard, slides, font, paragraph, drawing, and editing.
- Insert : Insert slides, tables, images, illustrations, links, comments, text, and media.
- Design : Select a theme, pick a variant, customize slides, and get design ideas.
- Transitions : Choose a transition, preview it, adjust the effects, and add timing.
- Animations : Pick an animation, preview it, adjust the effects, use advanced features, and add timing.
- Slide Show : Start a slideshow, set one up, pick a monitor, and use presentation view.
- Review : Use tools for proofreading, accessibility, language, comments, and comparisons.
- View : Change the presentation view, adjust the master views, zoom in or out, select colors, and work with windows and macros.
You should also see the Help tab and Tell me what you want to do box. If you need assistance or want more information on a feature, just open Help or enter the keyword into the Tell me box and view your results.
The PowerPoint Quick Access Toolbar
Like the tabs and ribbon with other Microsoft Office products, you also have the Quick Access Toolbar. You might already be familiar with this handy tool, but if not, this is the toolbar at the very top left of the PowerPoint window. As the name implies, this feature allows you to perform quick actions.

The Save button lets you easily save the file you are working on with the current file name.
If you make a mistake and want to undo it, just click the Undo button. If you click it once, it will undo the last action you took. If you keep clicking it, it will undo each previous action by moving backward. Alternatively, you can click the arrow next to the Undo button and highlight all actions you want to undo.
If you undo an action with the button, the Redo button will then be clickable. This lets you redo what you have just undone. Like the Undo button, you can redo your last action with one click or use the arrow next to the Redo button to redo multiple actions.
The Presentation button lets you start your slideshow as it will be viewed by others. It should take up your entire screen for a nice view of the presentation at any time during your creating or editing processes.
You can select the arrow on the right of the Quick Access Toolbar to add or remove buttons from it easily. You can also see more commands available or move the toolbar below the ribbon.
How to Work With PowerPoint Slides
Slides are the foundations of your slideshows. So knowing the ins and outs of how to work with them effectively can have a big impact on your creation. Here are the basics you should know to work with your PowerPoint slides.
Add a PowerPoint Slide
On the Home tab, you should see a section on the ribbon for Slides . You can quickly add a slide by clicking the New Slide button. This will add a slide just like the one you have currently selected.
Alternatively, you can click the arrow on the New Slide button. This allows you to choose which type of slide you want to add such as a blank slide, a title with content, or a picture with caption.

Change the Layout of a Slide
The Layout button on your ribbon lets you change the type of the currently selected slide. So you can easily change a title slide to one with a title and content or a picture with caption slide to a content with a caption. Or you can get a slide ready for you to insert a PDF directly .
Slide Icons
Some slide types are easy to understand right from the start. For instance, if you choose a title slide, you will see the text areas instructing you to click to add your title and subtitle. But other slide layouts, like those that let you add media, contain icons for you to insert your content.
If you use this type of slide, just click the corresponding icon to insert your item.
- Insert Table : Create a table by choosing the number of columns and rows.
- Insert Chart : Create a chart with a variety of options like line, pie, bar, and area.
- Insert SmartArt graphic : Create a visual like a matrix, pyramid, or process diagram.
- Pictures : Insert an image from your computer.
- Online Pictures : Insert an image from the gallery or search the web for one.
- Insert video : Insert a video from a file, YouTube, or embed code.

You can also get more details on embedding YouTube videos or adding music to your PowerPoint presentations .
Delete a Slide
If you want to delete a slide, the simplest way is to select it and click Delete on your keyboard. You can also right-click on the slide and choose Delete Slide from the context menu.
Using PowerPoint Sections
You might want to organize your slideshow into different sections. Click the Section button, select Add Section , and then give it a name. You can then add slides separately within each section. The Section button arrow lets you also remove, rename, collapse, and expand sections.

Other Common Slide Actions
- Easily rearrange slides with a drag-and-drop action.
- Duplicate slides or create them from an outline using the New Slide button arrow or right-clicking and using the context menu.
- Return a slide to its default layout by clicking the Reset button or right-clicking and using the context menu.
Work With Presentation Notes
PowerPoint offers a terrific speaker note feature that can come in handy. You can add a note to a slide for your own reference or for speaking to your audience during a presentation. The note section appears directly below each slide within PowerPoint.
If you cannot see it, just click the Notes button in the task bar at the bottom of your PowerPoint window. Or, open the View tab and click the Notes button on your ribbon. Then, simply click inside the note section to add yours.

Using Notes in Your Presentations
When you present your slideshow to an audience, only you can see your notes. This makes it a great tool to hold your descriptions, explanations, or instructions as you present your slideshow. Here is the view that you will see containing your notes as you display your presentation.

Printing Your Presentation Notes
If you print your presentation so that your audience has a reference, you can include your notes if you like. To see how it will look, click the View tab and then Notes Page in the Presentation Views section of the ribbon.
If you would like to change how your notes look when you print them, click the Notes Master button in the Master Views section of the ribbon. This allows you to select the design, layout, and page setup options. Also, note the Handout Master button directly to the left which lets you customize the entire handout appearance as well.

Add Animation to PowerPoint
If you are considering adding animations to your slides, it's super easy to do. Animations can be effective for slideshows you create for education like classroom presentations or college lectures. They can also give your presentation a fun effect for personal slideshows like a family reunion or wedding display.
Animation Options
These are the basic features available on the Animations tab.
- Animation : Choose from a variety of options by clicking the arrow in the Animation You can apply an animation to an element when it enters or exits the slide, use it for emphasis, or give it a motion path.
- Effect Options : Different animations have extra options for you to pick from. For instance, the Wheel animation lets you pick the number of spokes while the Spin options lets you select the direction and amount of spins.
- Advanced Animation : Here you can add an animation, open the Animation Pane for more working room, set up a trigger, or use the Animation Painter. But for simple slideshow animations, the basic features should suit you fine.
- Timing : Decide how you want your animations to appear on the slide. They can start when you click during the presentation or right after or with the previous animation. You can also pick a duration time, delay time, and reorder your animations.
- Preview : Once you add an animation you can see a quick view of how it will look without exiting the editing mode or opening the presentation view.

Create Your First PowerPoint Animation
First, select the slide and then the element on the slide that you want to animate. Then, just pick the type from the Animation box. It's that easy! You can then use the tools described above to add effects, advanced items, or timing if you like.
Notice that when you add an animation to an element, a number appears next to it. Each animation you add will be numbered sequentially so that you can easily identify it, work with it, or reorder it. Remember to think of each animated element on its own. This means you can have multiple animations with their own effects all on the same slide.

If you use the Animation Pane on the right, the numbers make it simple to see one animation at a time. There, you can add the same types of effects that you see on the ribbon. Just click the arrow corresponding to the animation and a dropdown menu will appear.
And if you are inserting Excel charts into your presentation , you can animate those too.
Apply PowerPoint Transition Effects
Inserting transitions between your slides can be another effective way to keep your audience's attention, similar to animations. You can apply a unique visual, with or without sound, as you move through the slides of your presentation.
Transition Options
These are the basic features available on the Transitions tab.
- Transition to This Slide : Pick from the transition options by clicking the arrow in the box. You can apply a transition that is subtle, exciting, or dynamic. Keep in mind that this is the effect for transitioning to the current slide .
- Effect Options : Different transitions have extra options that you can apply. For example, the Wipe, Wind, and Orbit transitions let you pick the direction.
- Timing : Here you can add a sound to go with your transition, pick a duration time, and apply these items to all slides. In addition, you can decide to advance to the next slide upon your mouse click or automatically after a certain period of time.
- Preview : Once you add a transition you can see a quick view of how it will look without exiting the editing mode or opening the presentation view.

Create a Slide Transition
This works basically much the same way as the animation only with one step less. Simply select the slide and pick the transition. You can then optionally apply any of the above-described effects that you would like. Pretty easy, right?
While transitions, like animations, may not have their place in every type of slideshow, they can be eye-catching for casual gatherings or fun events. Even for business presentations, a simple Fade effect can eliminate a clunky transition between slides.
Use Different Presentation Views
Not everyone works the same way when it comes being creative. Luckily PowerPoint offers different built-in views to accommodate this. Just select the View tab and take a look at the ways in which you can work with your slideshow.
The Presentation Views section holds five unique ways to create or edit your slideshow. One of those is the Notes Page which you read about above. And, here are the other four with brief explanations.
- Normal : As you can probably guess, this is the basic, normal view. You should see your slides on the left as numbered thumbnails and the current slide in the largest section to the right. This view works well if you prefer to jump between slides visually.
- Outline View : For those who prefer to write or create using outlines, this view is ideal. You can write directly within the outline pane on the left or paste an existing outline from Microsoft Word directly in. Here again, the current slide is in the largest section to the right.
- Slide Sorter : This is a terrific way to see all of your slides at a glance. Taking up the entire center window, you can see each slide and can reorder them easily with a drag-and-drop action.
- Reading View : If you want to see your entire presentation without switching to full-screen mode, then just click this button. You can view your slideshow with animations and transitions easily.

Along with the Slide Sorter view, the Normal and Outline Views allow you to quickly reorder your slides. Just select one and then drag it to its new location.
Collaborate on PowerPoint Presentations
Like other Microsoft Office applications, you have features to easily collaborate with others on your PowerPoint presentations. So if your sales team, fellow educators, or classmates will work on the slideshow together, you have a few options.
Share your slideshow as a PowerPoint presentation saved to OneDrive or as a PDF. Just click the Share button from the menu on the upper right corner. Then, invite others in the sidebar that opens, send the slideshow as an attachment, or obtain a link to share.
Let others make notes on the presentation with the Comments button which is right next to the Share button on the menu. (Assuming your collaborators open the presentation in PowerPoint.) You can view their comments, pop in a reply, move, and delete comments.

View the version history once you start collaborating. If your collaborators are able to make edits to the presentation, you can see the previous versions. A button will appear in the menu in between the Share and Comments buttons. You can then open previous versions of the slideshow if needed.
Slideshow Options
Once your presentation is complete, it's time to review and set up your slideshow. Head over to the Slide Show tab and check out the following options.

Start Slide Show
- From Beginning : Watch your slideshow from the first slide as your audience will see it.
- From Current Slide : Watch your slideshow start from the slide you select.
- Present Online : Use the Office Presentation Service to view your slideshow in a browser.
- Custom Slide Show : Create a custom presentation with the slides in a particular order.
- Set Up Slide Show : Choose the show type, show options, which slides to display, how to advance the slides, and any multiple monitor options you need.
- Hide Slide : This hides any slide that you select from the presentation.
- Rehearse Timings : You can practice presenting your slideshow and see the amount of time you spend on each slide and the slideshow in total. You also have an option to save your timings which is helpful for improving the presentation time if needed.
- Record Slide Show : Easily record your slideshow from the beginning or a specific slide. This is ideal for distributing to others who could not attend the presentation.
- Enable or Disable narrations, timings, and media controls with the convenient checkboxes.
Select a connected monitor from the dropdown box for where your presentation should display. You can also enable or disable Presenter View.
Presenter View provides you with a different view of your slideshow. This allows you to see your presentation with speaker notes on one screen while your slideshow displays on another. In addition, you can control your presentation in this view.
- Change the display settings or duplicate the slideshow.
- Access tools like a laser pointer, pen, or highlighter to use throughout your presentation.
- Zoom in on a slide.
- Black or unblack the slideshow.
- Advance to another slide.
- End the slideshow.

Start the PowerPoint Slideshow
Once you have the above options set for your slideshow, have rehearsed it, and are ready to start, the rest is easy.
Open PowerPoint on your computer, select which monitor to use, and then present it. You can start the slideshow with either the From Beginning button on the Slide Show tab or with the Start from Beginning button on the Quick Access Toolbar . This is the same process you would have followed when you reviewed your presentation.
If you decide to use the Presenter View during your slideshow, then you already know the tools you have at your fingertips to control the show. But if you choose not to or are only working with one monitor, you can still maneuver your presentation.
Simply right-click on the slideshow once it begins to open the context menu. You can then see all of the slides, zoom in, adjust the screen or printer options, and end the show.

Design With Powerpoint Templates
One final part of this beginner's guide is the templates you can use to boost your productivity in PowerPoint. Using a template, you can get a head start on your presentation. PowerPoint offers a variety of built-in templates and you can find those from online third-parties.
Use Featured PowerPoint Templates
To view options within PowerPoint, click File > New . You will then see a number of featured templates you can use along with categories you can pick from and a search box if you want something in particular.

The built-in templates range from basic business cards and diagrams to lengthy and detailed presentations for most any industry.
If you see a template you would like to check out, click on it and then review its description and download size in the popup window. If you want to use it, click the Create button.
Use Third-Party PowerPoint Templates
While templates for Microsoft Word or Microsoft Excel seem to be more plentiful, you can still check out these great suggestions for third-party options that include Microsoft PowerPoint templates.
- 5 PowerPoint Templates for Efficient Meetings
- The Best PowerPoint Templates for Educational Presentations
- Need a Gantt Chart Template for Excel or PowerPoint? Here Are 10 Unique Options
- The Best Free Microsoft Office Calendar Templates for Staying Organized
- The Best Flowchart Templates for Microsoft Office
Let the PowerPoint Presentation Begin
If you have never used it before, then this beginner's guide to Microsoft PowerPoint should give you a great start to a wonderful slideshow. Whether you are preparing your first professional presentation or just want to get creative with family photos, these basics should have you covered.

- PRESENTATION SKILLS
Search SkillsYouNeed:
Presentation Skills:
- A - Z List of Presentation Skills
- Top Tips for Effective Presentations
- General Presentation Skills
- What is a Presentation?
- Preparing for a Presentation
- Organising the Material
- Writing Your Presentation
- Deciding the Presentation Method
- Managing your Presentation Notes
- Working with Visual Aids
- Presenting Data
- Managing the Event
- Coping with Presentation Nerves
- Dealing with Questions
- How to Build Presentations Like a Consultant
- Self-Presentation in Presentations
- Specific Presentation Events
- Remote Meetings and Presentations
- Giving a Speech
- Presentations in Interviews
- Presenting to Large Groups and Conferences
- Giving Lectures and Seminars
- Managing a Press Conference
- Attending Public Consultation Meetings
- Managing a Public Consultation Meeting
- Crisis Communications
- Elsewhere on Skills You Need:
- Communication Skills
- Facilitation Skills
- Teams, Groups and Meetings
- Effective Speaking
- Question Types
Subscribe to our FREE newsletter and start improving your life in just 5 minutes a day.
You'll get our 5 free 'One Minute Life Skills' and our weekly newsletter.
We'll never share your email address and you can unsubscribe at any time.
Presentation Skills
Presenting information clearly and effectively is a key skill in getting your message across. Today, presentation skills are required in almost every field, and most of us are required to give presentations on occasions. While some people take this in their stride, others find it much more challenging.
It is, however, possible to improve your presentation skills with a bit of work. This section of SkillsYouNeed is designed to help.
Many people feel terrified when asked to talk in public, especially to bigger groups. However, these fears can be reduced by good preparation, which will also lay the groundwork for making an effective presentation.
There are Different Types of Presentations, but They’re All Presentations
There are any number of occasions when you may be asked to speak in public or to a group of people. They include:
- Presenting or making a speech at a conference or event.
- Objecting to a planning proposal at a council meeting.
- Making a speech at a wedding.
- Proposing a vote of thanks to someone at a club or society.
- On behalf of a team, saying goodbye and presenting a gift to a colleague who is leaving.
- Seeking investment or a loan to help you set up a new business.
These can all be considered presentations.
They do not, however, all require the same approach. You would not, for example, use PowerPoint to thank a colleague who was leaving. It would be unusual (though it has been done) to use it in a speech at a wedding. However, a conference audience would be somewhat surprised NOT to see slides projected onto a screen.
It follows, therefore, that there is no single set of rules that apply to all presentations. There are, however, some things that every presentation opportunity has in common. These include:
You will present better if you have prepared effectively . This does NOT necessarily mean that you have written out your speech verbatim and rehearsed it until you know it off by heart—although that might work for some people. It does, however, mean that you have to be confident that you are saying the right thing, in the right way, to the right people.
You need to be clear about your audience and your message . Every presentation will be better if you have clearly considered the message that you want or need to convey, and how best to convey it to your audience. These two pieces of information drive your style, structure, content, and use of visual aids.
You must never overrun your allocated time . In other words, don’t outstay your welcome. Almost every speech or presentation is better if it is shorter. Nobody minds going for coffee early or finishing before they expected to do so. Everybody minds being held up.
Generally speaking, your audience starts on your side. As a rule, your audience is there (more or less) voluntarily. They have chosen to listen to you, and they want to enjoy your presentation. The occasion is yours to lose.
An Important Point
There is one very important point to remember: if what you’re doing or saying is not working, do something else.
One of the worst feelings as a presenter is that you have lost your audience. You know that’s happened, but you continue to stumble through your remaining PowerPoint slides for the next 15 minutes, as your audience checks their phones and wishes it was coffee time. You think you have no choice, but that’s not actually true.
When you present, you are in charge of the room . The audience has effectively handed you control and is sitting back waiting for you to do something. You may have prepared a specific talk, but if you see that isn’t working, you can always change it. You are, after all, the expert.
You can, for example:
- Skip through some slides to a section that they may find more interesting;
- Ask your audience whether there is particular information that they were expecting that you are not providing;
- Suggest that everyone looks a bit sleepy, and maybe it would be better to start questions early, or have a discussion; or
- Ask the audience at the start of the presentation what they are expecting and what they want you to cover. That way, you can tailor the presentation to fit their expectations.
Just as when you are facilitating, you want to help your audience get the most out of your presentation. The best way to do that is to accept feedback—which may include smiles, nods of interest, or people getting their phones out.
Quick Guide to Effective Presentations
If you need to improve your presentation skills quickly, then a really good place to start is with our Top Tips for Effective Presentations .
This will give you some ‘quick wins’ that will help you improve your presentations. If you’re already an experienced presenter, this page should be a useful refresher, or even take your skills from good to great.
Our tips include general ideas about connecting with your audience, information about the importance of voice and body language, and detailed tips about preparing slide-shows.
The most important tip of all, however, is to remember that it's all about your audience.
Keep that in mind, and your presentation skills will almost instantly improve.
If you have more time to develop your presentation skills…
…then the Presentation Skills section of SkillsYouNeed is designed to help.
Our Presentation Skills section is split into two parts.
- The first gives you a step-by-step guide to putting together and delivering a professional and effective presentation .
- The second provides more detailed information about presenting and communicating in particular circumstances .
You can either use our step-by-step guide to walk you through the presentation preparation and delivery process, or you can focus on particular areas that are an issue for you.
Preparing for Your Presentation
The guide starts by explaining What is a Presentation?
We define a presentation as a means of communication that can be adapted to various speaking situations, such as talking to a group, addressing a meeting or briefing a team. Effective presentations usually require careful thought and preparation—although this preparation need not take very long.
Preparation is the most important part of making a successful presentation. Our page on Preparing For A Presentation explains what information you need before you can really start to plan your presentation and decide what you are going to say. The most important aspects include the objective of the presentation, the subject, and the audience.
Irrespective of whether the occasion is formal or informal, you should always aim to give a clear, well-structured delivery. To do so, you need to organise your presentation material . You can either do this in your head, or use a technique like mind-mapping to help you identify links and good flow.
By the time you come to write your presentation , you should know exactly what you want to say and the order in which you want to say it. You may want to use one of the standard presentation structures, such as ‘What, Why, How?’. You will also find it helpful to consider how to tell your story most effectively, and to use stories in your presentation to illustrate points. There is more about this in our page on writing your presentation .
You also need to decide on your presentation method . Presentations range from the formal to the informal. Your choice of presentation method will depend on many factors, including the audience, the venue, the facilities, and your own preferences.
Visual aids can add another dimension to your presentation, helping to hold your audience’s attention, and also act as a reminder of what you wanted to say. However, they need handling with care. Only use visual aids if they are necessary to maintain interest and assist comprehension . If visual aids are not used well, they can ruin a presentation.
See Working with Visual Aids to avoid falling into the trap of the dreaded ‘ Death by PowerPoint’ .
A particular case of visual aids is the use of data in a presentation.
There are times when using data in a presentation can really help you to tell the story better. It is, however, important not to blind your audience with statistics. You also need to remember that many people find numbers difficult to understand. Our page on Presenting Data gives some hints and tips about using data effectively in a presentation situation.
On the Day of the Presentation
There are a number of aspects to delivering your presentation on the day.
The practicalities of how you manage your presentation can make a significant difference to its success, and to your nerves! For example, turning up early means that you have will have a chance to see the room, and ensure that you can operate all the necessary equipment. There is more about how to cope, including managing sound systems, audio-visual equipment and lecterns in our page on Managing the Presentation Event .
Many people also feel very nervous before and during a presentation. This is entirely normal, and can even be helpful if you can channel it in the right way. There are some tried and tested strategies and techniques to manage your nerves so that you can concentrate on delivering an effective and engaging presentation.
See Coping with Presentation Nerves for some ideas that will help.
How you present yourself can also affect how your audience responds to your presentation.
You need to fit with your audience's expectations if they are not going to spend quite a large chunk of your presentation dealing with the differences between expectations and reality.
For more about aspects of self-presentation, see our page on Self-Presentation in Presentations .
You also need to consider how to manage your presentation notes .
Few people are able to give a presentation without notes. You will need to know your own abilities and decide how best to make the presentation. You might manage your talk by using full text, notes on cue cards, keywords on cue cards, or mind maps. There is more about this in our page on Managing your Presentation Notes .
After the presentation, you may be faced with a question-and-answer session. For many people, this is the worst part of the event.
Decide in advance how and when you wish to handle questions. Some speakers prefer questions to be raised as they arise during the presentation whilst others prefer to deal with questions at the end. At the start of your presentation, you should make clear your preferences to the audience. See our page on Dealing with Questions for more ideas about how to make the question session pleasant and productive, rather than something to dread.
Presenting Under Particular Circumstances
You may find that you need to give a presentation under certain circumstances, where your previous experience is less helpful.
Circumstances that may be new to you include:
- Giving a Speech , for example, at a wedding.
One particular special case is attending public consultation meetings.
Our pages on Attending Public Consultation Meetings , and Managing Public Consultation Meetings provide information to help whether you are a concerned member of the public, or responsible for organising a public meeting.
You may also find yourself required to organise or manage a press conference.
Although this may not strictly be what you would describe as a ‘presentation’, it is nonetheless an event at which you are required to present your organisation in a particular light.
Our page on Managing a Press Conference gives some ideas about how best to do that.
Finally, should you be unlucky enough to be involved in a serious crisis or disaster that affects your organisation, our page on Crisis Communications gives some ideas about how to manage press and public relations on these occasions.
Start with: What is a Presentation? Top Tips for Effective Presentations
See also: Personal Appearance Interpersonal Communication Skills
Unsupported browser
This site was designed for modern browsers and tested with Internet Explorer version 10 and later.
It may not look or work correctly on your browser.
- Presentations
Presentations 101: The Absolute Basics of Making a Presentation
Presentations don’t require PowerPoint, Keynote, or any specific app. They don’t require a projector, a laser pointer, or a long stick. And they definitely don’t require bullet points, animations, and soundtracks.
All they require is the info you want to share, simplified to show one bit of info per screen. That’s it.
There’s no reason that making a presentation should be a daunting process. Here’s everything you’ll need to make a perfectly good presentation, in any app you have on your computer.
The Presentation Basics
Making a presentation can feel intimidating, since the best look so polished they’d require an art degree to make, and the worst cram so much information into a slide deck that they seem like they’d take forever to put together. And yet, neither should be that intimidating. The PowerPoints of today are simply digital refreshes of the original overhead transparency presentations that date back to World War II and the couple-decades-newer photographic slide projectors. Both of those were, again, a refresh of another idea—a large poster you could point to with a stick while speaking.

Of all things, the first version of PowerPoint wasn’t even designed for making digital presentations to be shown on a projector from your laptop. It was instead designed as a simple way to make transparencies you’d print out and then show on an overhead projector, or perhaps print on paper and show as a flip chart. That first version only had a few tools, including text and basic shapes, but it was enough for Microsoft to acquire the company that made it for $14 million.
PowerPoint and Keynote of today have far more features than that early presentations app that started it all, but the basics of a presentation haven’t changed. All you really need to for a presentation is a full-screen clear view of the text and images you want to share. Backgrounds aren’t really necessary, and more often than not are simply distracting and make the text harder to read. Animations and transitions can be nice, but they’re not necessary either, as long as you can easily shift from one slide to the next.
So all you really need to make a presentation could be the built-in Paint app on a PC. You’d add text and images, save each “slide” as an individual picture on your computer, then open them full-screen with the Photo Viewer app. Voila, you’ve got a full presentation. You could do the same thing with practically any graphics app, and—with somewhat worse results—could do something similar by putting large text and pictures on individual pages in any basic word processor—including the built-in apps like TextEdit and Wordpad—and a quick PDF export that’s then opened full-screen in your PDF reader. For the most basic of presentations, there’s literally no need for a specialized presentations app.

That’s why presentation features are cropping up in all types of apps you’d never expect to include presentation features. Evernote recently added a basic presentation mode that turns your notes and included images and more into a basic, clean presentation. Draft , the online writing tool, just added a similar tool to turn a plain text document into a presentation, and Deckset is a Mac app that’s coming soon for the same purpose.
You really, really don’t need that much for a presentation.
The Stuff you Do Need
Now, all that’s needed is to make your presentation, in any app you’d like. If you have PowerPoint or Keynote, go ahead and use them—or use their free online counterparts, or Google Docs Presentations. Or, perhaps, just use any graphics app as mentioned above. Either way, the only things you need to focus on are the essentials: a decently basic background, your images and other graphics you’ll include to press your points, and—most importantly—your text. Nothing else matters.
Start with a simple slide design, and work up. A plain color, offset by a contrasting font color, is plenty. Then, if you want to include graphics, make sure they’re very clear from a distance, and then figure out where they’re going to go in your slide lineup.
Now, focus on your text, the most important part of your presentation. Guy Kawasaki famously said that PowerPoints should adhere to the 10/20/30 rule : 10 slides, shown for 20 minutes, using at least a 30 point font. The first two rules are great for not losing your audience’s attention, but the latter is crucial if you want people to be able to quickly grasp what your slides say. Use the largest font possible—far larger than 30 points works great, too—and simplify your concepts to the most basic so they can be communicated in the fewest words possible. And there’s no necessity to stick with the typical larger title and smaller bullet points on your slides. Instead, you can make each slide showcase only one idea, presented in a larger font, to keep everything from being so cluttered.

Finally, you’ll need a simple way to present. Every slide app—the web apps included—let you take your presentation full-screen in a tap, typically on a small Present button on the bottom of the screen. If you choose to make a non-traditional presentation with individual images as slides, then just open the set of “pictures” in your photo viewer app. All you’ll need then is to tap your arrow keys to proceed through your presentation, no matter which app you’re using. You could use animations and transitions, but those aren’t necessary. What is necessary is the info you’re trying to share, and these steps are all you’ll need to do that.
There’s one more thing: the device you’re using to share your presentation. The obvious choice is a laptop connected to a projector. That’s far from the only way, though. You could play back your presentation on almost any device these days, and can make it in similarly simple tools even on a tablet or phone. The important thing—large text and images in a simple, full-screen view—works universally.
And That’s All.
It might sound crazy, but that’s really all that’s needed for a presentation. The PowerPoint and Keynote alternates, and even their own web apps, aren’t nearly as fancy and don’t include all the snazzy animations, charting and diagramming tools, and more that you’d perhaps expect. But then, all of that isn’t needed for a presentation.
What is needed is your ideas, simply presented, and your speaking skills that will bring your message across to your audience. For that, be sure to check our newest Tuts+ business tutorials on presentations that’ll help you make the best of your presentation, regardless of what app you’re using:
- Jump-Start Guide to Essential Business Presentation Skills
- Deliver Engaging Presentations Like Steve Jobs
Graphic Credit: Presentation icon designed by Alexander Bickov from the Noun Project . Idea icon designed by Joe Harrison from the Noun Project .
Oral Presentations
Presentation basics, key elements of good presentations.
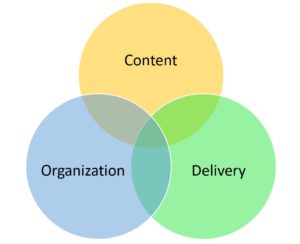
There are three key elements of good presentations: Content, Organization, Delivery. Your audience needs interesting and appropriate content in order to pay attention, especially at the start of a presentation. Logical organization helps retain your audience’s attention – they need to be able to follow your train of thought and predict where you are going with your ideas. Delivery also is important, as your own engagement with the information helps your audience engage.
Content deals with the substance of your presentation. Your ideas and information should be original and significant. Use accepted and relevant sources in your research, and reference those sources as needed. Offer a clear analysis that’s comprehensive and concise at the same time – strive for the right amount of information for your audience’s needs and the allotted presentation time. Make sure that your content is relevant to your audience, so that they understand immediately why they should pay attention to your presentation.
Garr Reynolds, in his book Presentation Zen: Simple Ideas on Presentation Design and Delivery , identifies characteristics of presentation content that create what he calls SUCCES(s): [1]
- Simplicity – reduce information to key points and essential meanings
- Unexpectedness – pose questions, offer interesting statistics, “make the audience aware that they have a gap in their knowledge and then fill that gap”
- Concreteness – use specific language, provide real-life examples
- Credibility – use sources, facts, statistics to back up your content; deliver information confidently; know your information well
- Emotions – engage your audience to feel something about your content
- Stories – use examples and illustrations to create a “story element” to the presentation
Finally, to make your content effective, repeat key information throughout your presentation. A memory research pioneer, German psychologist Hermann Ebbinghaus, found that we forget approximately 50 percent of new information within 18 minutes, with retention falling to 35 percent after a week. However, Ebbinghaus also discovered that repetition of the new information at key intervals can change this trajectory, a discovery known as the spacing effect. The lesson for presenters: work repetition into your presentation content.
Organization
Good organization requires a clear beginning, middle, and end. Link your ideas logically throughout the presentation to lead to an ending that resolves the problem or summarizes the situation you presented at the start. If you’re presenting based on a formal report or proposal, you may want to follow the order of the longer written document, but you don’t have to; as long as you include main ideas, it’s up to you to determine your presentation’s organization based on your audience and purpose. Strive for clear transitions between individual points, slides, and topics.

Delivery involves a range of factors from body language and word choice to vocal variety. A good presenter has a passion for the subject and an ability to convey and perhaps elicit that emotion in the audience. Audience engagement through eye contact, facial expression, gestures, and/or vocal tone contributes to an effective presentation. Delivery also deals with the confidence and professionalism with which you deliver the presentation. Hesitations, “ums,” and other types of vocal fumbling will distract your audience, while a clear, confident presentation helps to engage them.
Content, organization, and delivery work together and are equally important aspects of presentations.
The following two videos provide basic tips for creating effective presentations in terms of content, organization, and delivery. As you view them, consider their similarity of information and dissimilarity in presentation style. What can you infer about the presenter and intended audience of each presentation? Which video resonates more fully with you personally, and why? In terms of conveying information to a general audience, which video do you think is most effective, and why?
Planning Presentations
As you can see based on the video examples, presentations always require a situational analysis in the planning stage. Identify your audience, purpose, context, and all of the communication variables that you need to consider in order to make choices that will result in an effective presentation for your purpose and audience. For example, your purpose – the one, main idea that you want to convey through your presentation – can influence your content, organization, delivery, and overall approach. Identifying your audience can help you with what may be the most critical aspect of your presentation, making your information relevant to your audience. Analyzing communication variables for your presentation also will help you determine if you need supplemental materials or handouts, how to arrange a room for an in-person presentation, how best to structure a virtual presentation, and more.
Even if you are creating a presentation based on a formal report or proposal for which you have already done a situational analysis, do another situational analysis for your presentation, as your audience, organization, language, and overall approach may differ based on the different communication mode.
Planning Online Presentations
In addition to doing a situational analysis, online presentations may require some additional planning time in terms of how you present information. A real-time, in-person audience may pay attention to your presentation simply because you are present, and you may be able to adapt your presentation to audience reaction. However, it’s more difficult to capture the attention of a virtual audience, either real-time or asynchronous, so online presentations need to be thought through very deliberately in terms of their content, organization, look, and approach.
The following video, while written for online instructors, nonetheless offers important points to consider for any type of virtual, online presentation.
Understanding Presentation Audiences
Audiences are egocentric, meaning that they operate under the principle of WIIFM: what’s in it for them. Don’t expect your audience to meet you where you are; meet them where they are and then take them where you want to go together. According to Lucas, audiences “pay closest attention to messages that affect their own values, beliefs, and well being. Listeners approach speeches with one question uppermost in mind: ‘Why is this important to me?’ … What do these psychological principles mean to you as a speaker? First, they mean that your listeners will hear and judge what you say on the basis of what they already know and believe. Second, they mean you must relate your message to your listeners–show how it pertains to them, explain why they should care about it as much as you do.” [2]
Also, audiences have relatively short attention spans, and often decide whether or not to give you their attention within the first minute or so of a presentation. Various research studies indicate a five – twenty minute attention span for any type of presentation (note that results of studies vary). An article titled “ Neuroscience Proves You Should Follow TED’s 18-Minute Rule to Win Your Pitch ” discusses the concept of “cognitve backlog,” or the idea that the more information you provide, the more information your audience will tune out and not remember. [3]

These audience characteristics lay the groundwork for presentation strategies identified in the videos, strategies such as starting with and continuing a story, engaging attention with an interesting statistic, and more. The point to remember is that you need to make conscious, reasoned decisions about ways to engage your audience. Keeping audience attention span and egocentrism in mind, strive for the following presentation basics:
- Conciseness
- Connection with audience
Expectations for Presentations
The 10/20/30 rule, generally attributed to venture capitalist Guy Kawasaki, is a good guideline to help you achieve a “just right” balance in your presentations. Geared for entrepreneurs pitching their business, his advice is a discipline that would improve the quality—and, effectiveness—of most presentations. In brief, 10/20/30 translates to a maximum of 10 slides, a maximum of 20 minutes and a minimum of 30 point font. [4]

While this rule is a good starting point, it does not overrule your audience analysis or understanding of your purpose. Sometimes, you may need more slides or have a more involved purpose—like training people in new software or presenting the results of a research study—that takes more than 30 minutes to address. In that case, go with what your audience needs and what will make your presentation most effective. The concept behind the 10/20/30 rule—to make new learning easy for your audience to take in, process and remember—should still be your guide even if you don’t follow the rule exactly.
One last way to gauge presentations is to consider most audiences’ expectations for good presentations:
- main ideas are compelling and relevant
- information is organized with a clear beginning, middle, and end; audience can follow where the ideas are leading
- delivery shows the presenter’s enthusiasm and engagement
- visuals apply good design practices
- presentation length is appropriate for audience, purpose, and context
The following video summarizes characteristics that create effective presentations.
[1] Reynolds, Garr. (2012) Presentation Zen: Simple Ideas on Presentation Design and Delivery. 2nd ed. New Riders, Pearson Education. Information from pages 78- 81. http://ptgmedia.pearsoncmg.com/images/9780321811981/samplepages/0321811984.pdf
[2] Lucas, Stephen E. (2020) The Art of Public Speaking (13th edition).
[3] Gallo, Carmine. “Neuroscience Proves You Should Follow TED’s 18-Minute Rule to Win Your Pitch.” Inc. , https://www.inc.com/theupsstore/small-biz-ings.html
[4] Kawasaki, Guy. The 10/20/30 Rule of PowerPoint . December 2005. ↵
- Presentation Basics, original material and material adapted from Business Communication Skills for Managers, see attributions below. Authored by : Susan Oaks. Project : Communications for Professionals. License : CC BY-NC: Attribution-NonCommercial
- Making a Presentation for a Meeting. Authored by : Nina Burokas. Provided by : Lumen Learning. Located at : https://courses.lumenlearning.com/wmopen-businesscommunicationmgrs/chapter/making-a-presentation-for-a-meeting/ . Project : Business Communication Skills for Managers. License : CC BY: Attribution
- image of professional making a presentation. Authored by : rawpixel. Provided by : Pixabay. Located at : https://pixabay.com/photos/agreement-brainstorming-business-3408113/ . License : CC0: No Rights Reserved
- video Create an Effective Business Presentation. Authored by : Nick Morgan. Provided by : Harvard Business Review. Located at : https://www.youtube.com/watch?v=HTRt0zkD73M . License : Other . License Terms : YouTube video
- video How to Give a Great Presentation - 7 Presentation Skills and Tips to Leave an Impression. Provided by : Practical Psychology. Located at : https://www.youtube.com/watch?v=MnIPpUiTcRc . License : Other . License Terms : YouTube video
- video Teaching Tip: Designing Online Lectures and Recorded Presentations. Authored by : Greg Steinke and Jill Zimmerman. Provided by : CCAPS Teaching Tips, University of Minnesota. Located at : https://www.youtube.com/watch?v=GCAaRZJFJAU . License : Other . License Terms : YouTube video
- image of businesswoman presenting to an audience. Authored by : rawpixel. Provided by : Pixabay. Located at : https://pixabay.com/photos/analyzing-audience-board-3565815/ . License : CC0: No Rights Reserved
- Visual Aids. Authored by : Nina Burokas. Provided by : Lumen Learning. Located at : https://courses.lumenlearning.com/wmopen-businesscommunicationmgrs/chapter/visual-aids/ . Project : Business Communication Skills for Managers. License : CC BY: Attribution
- video Five Simple Rules for Creating World Changing Presentations. Authored by : Nancy Duarte. Provided by : Duarte Inc.. Located at : https://www.youtube.com/watch?v=hT9GGmundag . License : Other . License Terms : YouTube video

Privacy Policy
- SUGGESTED TOPICS
- The Magazine
- Newsletters
- Managing Yourself
- Managing Teams
- Work-life Balance
- The Big Idea
- Data & Visuals
- Reading Lists
- Case Selections
- HBR Learning
- Topic Feeds
- Account Settings
- Email Preferences
What It Takes to Give a Great Presentation
- Carmine Gallo

Five tips to set yourself apart.
Never underestimate the power of great communication. It can help you land the job of your dreams, attract investors to back your idea, or elevate your stature within your organization. But while there are plenty of good speakers in the world, you can set yourself apart out by being the person who can deliver something great over and over. Here are a few tips for business professionals who want to move from being good speakers to great ones: be concise (the fewer words, the better); never use bullet points (photos and images paired together are more memorable); don’t underestimate the power of your voice (raise and lower it for emphasis); give your audience something extra (unexpected moments will grab their attention); rehearse (the best speakers are the best because they practice — a lot).
I was sitting across the table from a Silicon Valley CEO who had pioneered a technology that touches many of our lives — the flash memory that stores data on smartphones, digital cameras, and computers. He was a frequent guest on CNBC and had been delivering business presentations for at least 20 years before we met. And yet, the CEO wanted to sharpen his public speaking skills.
- Carmine Gallo is a Harvard University instructor, keynote speaker, and author of 10 books translated into 40 languages. Gallo is the author of The Bezos Blueprint: Communication Secrets of the World’s Greatest Salesman (St. Martin’s Press).
Partner Center
We use essential cookies to make Venngage work. By clicking “Accept All Cookies”, you agree to the storing of cookies on your device to enhance site navigation, analyze site usage, and assist in our marketing efforts.
Manage Cookies
Cookies and similar technologies collect certain information about how you’re using our website. Some of them are essential, and without them you wouldn’t be able to use Venngage. But others are optional, and you get to choose whether we use them or not.
Strictly Necessary Cookies
These cookies are always on, as they’re essential for making Venngage work, and making it safe. Without these cookies, services you’ve asked for can’t be provided.
Show cookie providers
- Google Login
Functionality Cookies
These cookies help us provide enhanced functionality and personalisation, and remember your settings. They may be set by us or by third party providers.
Performance Cookies
These cookies help us analyze how many people are using Venngage, where they come from and how they're using it. If you opt out of these cookies, we can’t get feedback to make Venngage better for you and all our users.
- Google Analytics
Targeting Cookies
These cookies are set by our advertising partners to track your activity and show you relevant Venngage ads on other sites as you browse the internet.
- Google Tag Manager
- Infographics
- Daily Infographics
- Popular Templates
- Accessibility
- Graphic Design
- Graphs and Charts
- Data Visualization
- Human Resources
- Beginner Guides
Blog Beginner Guides 8 Types of Presentations You Should Know [+Examples & Tips]
8 Types of Presentations You Should Know [+Examples & Tips]
Written by: Krystle Wong Aug 11, 2023

From persuasive pitches that influence opinions to instructional demonstrations that teach skills, the different types of presentations serve a unique purpose, tailored to specific objectives and audiences.
Presentations that are tailored to its objectives and audiences are more engaging and memorable. They capture attention, maintain interest and leave a lasting impression.
Don’t worry if you’re no designer — Whether you need data-driven visuals, persuasive graphics or engaging design elements, Venngage can empower you to craft presentations that stand out and effectively convey your message.
Venngage’s intuitive drag-and-drop interface, extensive presentation template library and customizable design options make it a valuable tool for creating slides that align with your specific goals and target audience.
Click to jump ahead:
8 Different types of presentations every presenter must know
How do i choose the right type of presentation for my topic or audience, types of presentation faq, 5 steps to create a presentation with venngage .

When it comes to presentations, versatility is the name of the game. Having a variety of presentation styles up your sleeve can make a world of difference in keeping your audience engaged. Here are 8 essential presentation types that every presenter should be well-acquainted with:
1. Informative presentation
Ever sat through a presentation that left you feeling enlightened? That’s the power of an informative presentation.
This presentation style is all about sharing knowledge and shedding light on a particular topic. Whether you’re diving into the depths of quantum physics or explaining the intricacies of the latest social media trends, informative presentations aim to increase the audience’s understanding.
When delivering an informative presentation, simplify complex topics with clear visuals and relatable examples. Organize your content logically, starting with the basics and gradually delving deeper and always remember to keep jargon to a minimum and encourage questions for clarity.
Academic presentations and research presentations are great examples of informative presentations. An effective academic presentation involves having clear structure, credible evidence, engaging delivery and supporting visuals. Provide context to emphasize the topic’s significance, practice to perfect timing, and be ready to address anticipated questions.

2. Persuasive presentation
If you’ve ever been swayed by a passionate speaker armed with compelling arguments, you’ve experienced a persuasive presentation .
This type of presentation is like a verbal tug-of-war, aiming to convince the audience to see things from a specific perspective. Expect to encounter solid evidence, logical reasoning and a dash of emotional appeal.
With persuasive presentations, it’s important to know your audience inside out and tailor your message to their interests and concerns. Craft a compelling narrative with a strong opening, a solid argument and a memorable closing. Additionally, use visuals strategically to enhance your points.
Examples of persuasive presentations include presentations for environmental conservations, policy change, social issues and more. Here are some engaging presentation templates you can use to get started with:

3. Demonstration or how-to presentation
A Demonstration or How-To Presentation is a type of presentation where the speaker showcases a process, technique, or procedure step by step, providing the audience with clear instructions on how to replicate the demonstrated action.
A demonstrative presentation is particularly useful when teaching practical skills or showing how something is done in a hands-on manner.
These presentations are commonly used in various settings, including educational workshops, training sessions, cooking classes, DIY tutorials, technology demonstrations and more. Designing creative slides for your how-to presentations can heighten engagement and foster better information retention.
Speakers can also consider breaking down the process into manageable steps, using visual aids, props and sometimes even live demonstrations to illustrate each step. The key is to provide clear and concise instructions, engage the audience with interactive elements and address any questions that may arise during the presentation.

4. Training or instructional presentation
Training presentations are geared towards imparting practical skills, procedures or concepts — think of this as the more focused cousin of the demonstration presentation.
Whether you’re teaching a group of new employees the ins and outs of a software or enlightening budding chefs on the art of soufflé-making, training presentations are all about turning novices into experts.
To maximize the impact of your training or instructional presentation, break down complex concepts into digestible segments. Consider using real-life examples to illustrate each point and create a connection.
You can also create an interactive presentation by incorporating elements like quizzes or group activities to reinforce understanding.

5. Sales presentation
Sales presentations are one of the many types of business presentations and the bread and butter of businesses looking to woo potential clients or customers. With a sprinkle of charm and a dash of persuasion, these presentations showcase products, services or ideas with one end goal in mind: sealing the deal.
A successful sales presentation often has key characteristics such as a clear value proposition, strong storytelling, confidence and a compelling call to action. Hence, when presenting to your clients or stakeholders, focus on benefits rather than just features.
Anticipate and address potential objections before they arise and use storytelling to showcase how your offering solves a specific problem for your audience. Utilizing visual aids is also a great way to make your points stand out and stay memorable.
A sales presentation can be used to promote service offerings, product launches or even consultancy proposals that outline the expertise and industry experience of a business. Here are some template examples you can use for your next sales presentation:

6. Pitch presentation
Pitch presentations are your ticket to garnering the interest and support of potential investors, partners or stakeholders. Think of your pitch deck as your chance to paint a vivid picture of your business idea or proposal and secure the resources you need to bring it to life.
Business presentations aside, individuals can also create a portfolio presentation to showcase their skills, experience and achievements to potential clients, employers or investors.
Craft a concise and compelling narrative. Clearly define the problem your idea solves and how it stands out in the market. Anticipate questions and practice your answers. Project confidence and passion for your idea.

7. Motivational or inspirational presentation
Feeling the need for a morale boost? That’s where motivational presentations step in. These talks are designed to uplift and inspire, often featuring personal anecdotes, heartwarming stories and a generous serving of encouragement.
Form a connection with your audience by sharing personal stories that resonate with your message. Use a storytelling style with relatable anecdotes and powerful metaphors to create an emotional connection. Keep the energy high and wrap up your inspirational presentations with a clear call to action.
Inspirational talks and leadership presentations aside, a motivational or inspirational presentation can also be a simple presentation aimed at boosting confidence, a motivational speech focused on embracing change and more.

8. Status or progress report presentation
Projects and businesses are like living organisms, constantly evolving and changing. Status or progress report presentations keep everyone in the loop by providing updates on achievements, challenges and future plans. It’s like a GPS for your team, ensuring everyone stays on track.
Be transparent about achievements, challenges and future plans. Utilize infographics, charts and diagrams to present your data visually and simplify information. By visually representing data, it becomes easier to identify trends, make predictions and strategize based on evidence.

Now that you’ve learned about the different types of presentation methods and how to use them, you’re on the right track to creating a good presentation that can boost your confidence and enhance your presentation skills .
Selecting the most suitable presentation style is akin to choosing the right outfit for an occasion – it greatly influences how your message is perceived. Here’s a more detailed guide to help you make that crucial decision:
1. Define your objectives
Begin by clarifying your presentation’s goals. Are you aiming to educate, persuade, motivate, train or perhaps sell a concept? Your objectives will guide you to the most suitable presentation type.
For instance, if you’re aiming to inform, an informative presentation would be a natural fit. On the other hand, a persuasive presentation suits the goal of swaying opinions.
2. Know your audience
Regardless if you’re giving an in-person or a virtual presentation — delve into the characteristics of your audience. Consider factors like their expertise level, familiarity with the topic, interests and expectations.
If your audience consists of professionals in your field, a more technical presentation might be suitable. However, if your audience is diverse and includes newcomers, an approachable and engaging style might work better.

3. Analyze your content
Reflect on the content you intend to present. Is it data-heavy, rich in personal stories or focused on practical skills? Different presentation styles serve different content types.
For data-driven content, an informative or instructional presentation might work best. For emotional stories, a motivational presentation could be a compelling choice.
4. Consider time constraints
Evaluate the time you have at your disposal. If your presentation needs to be concise due to time limitations, opt for a presentation style that allows you to convey your key points effectively within the available timeframe. A pitch presentation, for example, often requires delivering impactful information within a short span.
5. Leverage visuals
Visual aids are powerful tools in presentations. Consider whether your content would benefit from visual representation. If your PowerPoint presentations involve step-by-step instructions or demonstrations, a how-to presentation with clear visuals would be advantageous. Conversely, if your content is more conceptual, a motivational presentation could rely more on spoken words.

6. Align with the setting
Take the presentation environment into account. Are you presenting in a formal business setting, a casual workshop or a conference? Your setting can influence the level of formality and interactivity in your presentation. For instance, a demonstration presentation might be ideal for a hands-on workshop, while a persuasive presentation is great for conferences.
7. Gauge audience interaction
Determine the level of audience engagement you want. Interactive presentations work well for training sessions, workshops and small group settings, while informative or persuasive presentations might be more one-sided.
8. Flexibility
Stay open to adjusting your presentation style on the fly. Sometimes, unexpected factors might require a change of presentation style. Be prepared to adjust on the spot if audience engagement or reactions indicate that a different approach would be more effective.
Remember that there is no one-size-fits-all approach, and the best type of presentation may vary depending on the specific situation and your unique communication goals. By carefully considering these factors, you can choose the most effective presentation type to successfully engage and communicate with your audience.
To save time, use a presentation software or check out these presentation design and presentation background guides to create a presentation that stands out.

What are some effective ways to begin and end a presentation?
Capture your audience’s attention from the start of your presentation by using a surprising statistic, a compelling story or a thought-provoking question related to your topic.
To conclude your presentation , summarize your main points, reinforce your key message and leave a lasting impression with a powerful call to action or a memorable quote that resonates with your presentation’s theme.
How can I make my presentation more engaging and interactive?
To create an engaging and interactive presentation for your audience, incorporate visual elements such as images, graphs and videos to illustrate your points visually. Share relatable anecdotes or real-life examples to create a connection with your audience.
You can also integrate interactive elements like live polls, open-ended questions or small group discussions to encourage participation and keep your audience actively engaged throughout your presentation.
Which types of presentations require special markings
Some presentation types require special markings such as how sales presentations require persuasive techniques like emphasizing benefits, addressing objections and using compelling visuals to showcase products or services.
Demonstrations and how-to presentations on the other hand require clear markings for each step, ensuring the audience can follow along seamlessly.
That aside, pitch presentations require highlighting unique selling points, market potential and the competitive edge of your idea, making it stand out to potential investors or partners.
Need some inspiration on how to make a presentation that will captivate an audience? Here are 120+ presentation ideas to help you get started.
Creating a stunning and impactful presentation with Venngage is a breeze. Whether you’re crafting a business pitch, a training presentation or any other type of presentation, follow these five steps to create a professional presentation that stands out:
- Sign up and log in to Venngage to access the editor.
- Choose a presentation template that matches your topic or style.
- Customize content, colors, fonts, and background to personalize your presentation.
- Add images, icons, and charts to enhancevisual style and clarity.
- Save, export, and share your presentation as PDF or PNG files, or use Venngage’s Presentation Mode for online showcasing.
In the realm of presentations, understanding the different types of presentation formats is like having a versatile set of tools that empower you to craft compelling narratives for every occasion.
Remember, the key to a successful presentation lies not only in the content you deliver but also in the way you connect with your audience. Whether you’re informing, persuading or entertaining, tailoring your approach to the specific type of presentation you’re delivering can make all the difference.
Presentations are a powerful tool, and with practice and dedication (and a little help from Venngage), you’ll find yourself becoming a presentation pro in no time. Now, let’s get started and customize your next presentation!
Discover popular designs

Infographic maker

Brochure maker

White paper online

Newsletter creator

Flyer maker

Timeline maker

Letterhead maker

Mind map maker

Ebook maker

- school Campus Bookshelves
- menu_book Bookshelves
- perm_media Learning Objects
- login Login
- how_to_reg Request Instructor Account
- hub Instructor Commons
Margin Size
- Download Page (PDF)
- Download Full Book (PDF)
- Periodic Table
- Physics Constants
- Scientific Calculator
- Reference & Cite
- Tools expand_more
- Readability
selected template will load here
This action is not available.
9.2: Introduction to Creating Presentations
- Last updated
- Save as PDF
- Page ID 46562
\( \newcommand{\vecs}[1]{\overset { \scriptstyle \rightharpoonup} {\mathbf{#1}} } \)
\( \newcommand{\vecd}[1]{\overset{-\!-\!\rightharpoonup}{\vphantom{a}\smash {#1}}} \)
\( \newcommand{\id}{\mathrm{id}}\) \( \newcommand{\Span}{\mathrm{span}}\)
( \newcommand{\kernel}{\mathrm{null}\,}\) \( \newcommand{\range}{\mathrm{range}\,}\)
\( \newcommand{\RealPart}{\mathrm{Re}}\) \( \newcommand{\ImaginaryPart}{\mathrm{Im}}\)
\( \newcommand{\Argument}{\mathrm{Arg}}\) \( \newcommand{\norm}[1]{\| #1 \|}\)
\( \newcommand{\inner}[2]{\langle #1, #2 \rangle}\)
\( \newcommand{\Span}{\mathrm{span}}\)
\( \newcommand{\id}{\mathrm{id}}\)
\( \newcommand{\kernel}{\mathrm{null}\,}\)
\( \newcommand{\range}{\mathrm{range}\,}\)
\( \newcommand{\RealPart}{\mathrm{Re}}\)
\( \newcommand{\ImaginaryPart}{\mathrm{Im}}\)
\( \newcommand{\Argument}{\mathrm{Arg}}\)
\( \newcommand{\norm}[1]{\| #1 \|}\)
\( \newcommand{\Span}{\mathrm{span}}\) \( \newcommand{\AA}{\unicode[.8,0]{x212B}}\)
\( \newcommand{\vectorA}[1]{\vec{#1}} % arrow\)
\( \newcommand{\vectorAt}[1]{\vec{\text{#1}}} % arrow\)
\( \newcommand{\vectorB}[1]{\overset { \scriptstyle \rightharpoonup} {\mathbf{#1}} } \)
\( \newcommand{\vectorC}[1]{\textbf{#1}} \)
\( \newcommand{\vectorD}[1]{\overrightarrow{#1}} \)
\( \newcommand{\vectorDt}[1]{\overrightarrow{\text{#1}}} \)
\( \newcommand{\vectE}[1]{\overset{-\!-\!\rightharpoonup}{\vphantom{a}\smash{\mathbf {#1}}}} \)
What you’ll learn to do: create and save a new presentation.
Creating a new presentation is important because you may not always be given a presentation to edit. Sometimes you may need to start from a blank slate. Creating a new presentation is much like creating a new document or new spreadsheet.
Contributors and Attributions
- Introduction to Creating Presentations. Authored by : Lumen Learning. License : CC BY: Attribution
Presentations that move audiences
Refine, enhance, and tailor your content quicker than ever before.
Prezi is good for business
Keep teams engaged and customers asking for more

Prezi is smart for education
Make lessons more exciting and easier to remember

Millions of people — from students to CEOs — use Prezi to grab attention, stand out, and capture imaginations

The most engaging presentations happen on Prezi

Create with confidence
Professionally designed templates.
Choose from hundreds of modern, beautifully made templates.
Millions of reusable presentations
Focus on your own creativity and build off, remix, and reuse presentations from our extensive content library.
Real creative freedom
Open canvas.
Create, organize, and move freely on an open canvas. Create seamless presentations without the restrictions of linear slides.
Ready-made asset libraries
Choose from millions of images, stickers, GIFs, and icons from Unsplash and Giphy.

A presentation that works for you
Present in-person.
Have the confidence to deliver a memorable presentation with presenter notes and downloadable presentations.
Present over video conference
Keep your audience engaged by putting yourself in the center of your presentation.
Your own ideas, ready to present faster
Prezi AI is your new creative partner. Save time, amplify your ideas, and elevate your presentations.
The specialists on visual storytelling since 2009
From TED talks to classrooms. In every country across the world. Prezi has been a trusted presentation partner for over 15 years.
*independent Harvard study of Prezi vs. PowerPoint
See why our customers love us
Prezi is consistently awarded and ranks as the G2 leader across industries based on hundreds of glowing customer reviews.
Prezi powers the best presenters to do their best presentations
- Top Courses
- Online Degrees
- Find your New Career
- Join for Free

- Graphic Design
This course is part of Effective Communication: Writing, Design, and Presentation Specialization
Taught in English
Some content may not be translated

Instructor: David Underwood
Financial aid available
144,448 already enrolled

(3,154 reviews)
Recommended experience
Beginner level
Students should be somewhat fluent in the use of basic composition-friendly software. PowerPoint, Keynote, and InDesign are all ideal.
What you'll learn
Apply inspired design ideas to your own work.
Skills you'll gain
- Presentation
Details to know

Add to your LinkedIn profile
See how employees at top companies are mastering in-demand skills

Build your subject-matter expertise
- Learn new concepts from industry experts
- Gain a foundational understanding of a subject or tool
- Develop job-relevant skills with hands-on projects
- Earn a shareable career certificate

Earn a career certificate
Add this credential to your LinkedIn profile, resume, or CV
Share it on social media and in your performance review

There are 4 modules in this course
Welcome to Graphic Design, the second course in the Effective Communications Specialization. Over 70 different companies have provided this specialization to their employees as a resource for internal professional development. Why? Because employers know that effective visual communication is the key to attracting an audience, building a relationship, and closing the sale.
This practical course gives you the tools to create professional looking PowerPoints, reports, resumes, and presentations. Using a set of best practices refined through years of experience, you’ll: • make your work look fresh and inspired. • apply simple design “tricks” to begin any project with confidence and professionalism. • receive and respond to criticism and revise your project from good to great. "This course is fantastic. It teaches a great amount of starter graphic design information but it is broken down into easily understood videos and quizzes. The quality was top notch and the interaction was as good as you would get in a brick and mortar school. I did not feel like I was missing anything by taking it online." - a recent Graphic Design student All of the course assignments can be completed with basic presentation software such as Microsoft PowerPoint, Google Slides, or Apple Keynote. You’ll also have opportunities to explore and apply more sophisticated tools, such as Adobe Photoshop, Illustrator, and InDesign. This course can be taken for academic credit as part of CU Boulder’s Master of Science in Data Science (MS-DS) degree offered on the Coursera platform. The MS-DS is an interdisciplinary degree that brings together faculty from CU Boulder’s departments of Applied Mathematics, Computer Science, Information Science, and others. With performance-based admissions and no application process, the MS-DS is ideal for individuals with a broad range of undergraduate education and/or professional experience in computer science, information science, mathematics, and statistics. Learn more about the MS-DS program at https://www.coursera.org/degrees/master-of-science-data-science-boulder.
Getting Started
This week introduces you to the importance of recognizing good design as the starting place for creating professional, attractive work of your own. We will look to the ubiquitous world of graphic design to establish a vocabulary of successful design and to find inspiration for our own projects. We will also discuss course prerequisites and review a basic digital design glossary that will help you navigate your chosen application.
What's included
12 videos 6 readings 1 quiz 1 peer review
12 videos • Total 32 minutes
- (Optional) Introduction to the Specialization (For New Learners) • 3 minutes • Preview module
- (Optional) What's So Great About The Capstone? (For New Learners) • 3 minutes
- From Writing to Design; the Handoff • 2 minutes
- The Importance of Designing Well • 1 minute
- Course Overview • 2 minutes
- Course Prerequisites • 2 minutes
- Glossary of Design Terms • 5 minutes
- Professionalism in Design • 2 minutes
- Designing with a Critical Eye • 1 minute
- Developing a Design Vocabulary • 1 minute
- The Importance of Inspiration • 1 minute
- Unexpected Places Yield Unexpected Results • 4 minutes
6 readings • Total 65 minutes
- Earn Academic Credit for your Work! • 10 minutes
- Course Support • 10 minutes
- About the For-Credit Version of this course • 10 minutes
- A Few Important Points About This Course • 10 minutes
- A Glossary of Design Terms • 15 minutes
- Developing a Design Vocabulary • 10 minutes
1 quiz • Total 20 minutes
- Glossary • 20 minutes
1 peer review • Total 120 minutes
- Making a Unique and Inspired 'PowerPoint' Slide • 120 minutes
The Blank Canvas
This week will look at the blank canvas – the untouched rectangle that will become our design project. We’ll discuss the importance of working with a grid, understanding negative space, and using appropriate margins. This week will also explore the palette of elements which, when chosen and used wisely, ensure that the finished design project is successful. We’ll cover type, color, images, and graphic elements such as borders, bars, and backgrounds.
15 videos 5 readings 2 quizzes 3 discussion prompts
15 videos • Total 64 minutes
- The Necessity of Structure • 2 minutes • Preview module
- Introducing the Grid • 4 minutes
- The Grid and Audience Perception • 4 minutes
- The Power of Negative Space • 2 minutes
- Introducing the Palette • 1 minute
- Type Is the Message • 6 minutes
- Type Anatomy • 5 minutes
- Type Families • 7 minutes
- Type Formatting • 9 minutes
- Creating with Type • 3 minutes
- Color and Its Meaning • 3 minutes
- Color and the Natural World • 3 minutes
- Image Treatment • 2 minutes
- Creative Cropping • 4 minutes
- Graphic Elements • 2 minutes
5 readings • Total 210 minutes
- Practicing Building Grids • 90 minutes
- Practicing Negative Space • 90 minutes
- Why Designers Use Templates • 10 minutes
- Practicing Templates • 10 minutes
- Practicing Cropping • 10 minutes
2 quizzes • Total 50 minutes
- Typeface • 20 minutes
- Seeing Design 'Tricks' in Action • 30 minutes
3 discussion prompts • Total 160 minutes
- Choosing a Typeface • 60 minutes
- Choosing Color • 40 minutes
- Photographic Layout • 60 minutes
Tricks of the Trade
It's time to start designing! In this week, we'll discuss the process of composition. We'll use the palette items covered in week 2, and deploy common visual design “tricks” such as contrast, repetition, sublimation, tension, and more. To help see both the effect and the universality of these design approaches, we'll look at design examples from art history, film, and current media. We’ll also cover the strategy of composition. We'll see that providing an obvious target, maintaining a natural visual flow, and prioritizing information are all critical to clear visual communication.
12 videos 4 readings 1 peer review 6 discussion prompts
12 videos • Total 33 minutes
- Design "Tricks" • 0 minutes • Preview module
- Designing with a Closed Set of Elements: The Clarity Guitars Ad • 0 minutes
- Contrast • 4 minutes
- White Space • 3 minutes
- Repetition in writing, design, and presentation • 1 minute
- Rhythm or Repetition • 2 minutes
- Sublimation • 2 minutes
- Interlocking Elements • 2 minutes
- Introduction to Tension • 5 minutes
- Tension and Movement • 4 minutes
- Targets and Portals • 3 minutes
- Establishing Priorities • 2 minutes
4 readings • Total 160 minutes
- Using the Closed Set • 10 minutes
- Practicing Contrast 2 • 60 minutes
- Practicing Tension • 45 minutes
- Practicing Logos • 45 minutes
- Design Critique • 120 minutes
6 discussion prompts • Total 300 minutes
- Practicing Contrast • 60 minutes
- Practicing White Space • 45 minutes
- Practicing Repetition • 0 minutes
- Practicing Sublimation • 45 minutes
- Identifying Targets • 30 minutes
- Designing a Cover • 120 minutes
Revision and Distance
As we've said before, designers don't work in a vacuum. Our work will be judged by others, and, as good designers, we will learn to take that judgement constructively and in stride. In this week we’ll talk about what it means to be confident, yet open to criticism. We’ll explore the importance of revision as an ongoing component of design, as well as the need to enlist feedback and maintain distance in assessing our own work.
4 videos 2 quizzes 1 peer review 1 discussion prompt
4 videos • Total 13 minutes
- Your Work Is Not Precious; Your Ability Is • 5 minutes • Preview module
- You Are Your Own Worst Critic • 3 minutes
- Looking Back at Best Practices • 4 minutes
- Moving Forward: Public Speaking • 1 minute
2 quizzes • Total 90 minutes
- Rubric Training Quiz 1 • 45 minutes
- Rubric Training Quiz 2 • 45 minutes
1 peer review • Total 240 minutes
- Poster Design • 240 minutes
1 discussion prompt • Total 90 minutes
- Designing with Criticism • 90 minutes
Instructor ratings
We asked all learners to give feedback on our instructors based on the quality of their teaching style.

CU-Boulder is a dynamic community of scholars and learners on one of the most spectacular college campuses in the country. As one of 34 U.S. public institutions in the prestigious Association of American Universities (AAU), we have a proud tradition of academic excellence, with five Nobel laureates and more than 50 members of prestigious academic academies.
Recommended if you're interested in Business Essentials
University of Colorado Boulder
Effective Communication Capstone Project
Successful Presentation
California Institute of the Arts
Fundamentals of Graphic Design
Effective Communication: Writing, Design, and Presentation
Specialization
Why people choose Coursera for their career

Learner reviews
Showing 3 of 3154
3,154 reviews
Reviewed on Oct 23, 2016
Great course! very well organised. Easy to understand some important theories of graphic design. Many exercises in the course can let you practice the skills needed in graphic design.
Reviewed on Feb 26, 2023
I am truly grateful and appreciative of the faculty members at the University of Colorado Boulder, as well as Coursera, for giving me the opportunity to study and hone my skills.
Thank you so much!
Reviewed on Sep 3, 2020
Amazing course content, amazing instructor, really helped to think, what is Graphic Designing. It' a really detail and practical course. I really Thanked the Inspector and Coursera.
New to Business Essentials? Start here.

Open new doors with Coursera Plus
Unlimited access to 7,000+ world-class courses, hands-on projects, and job-ready certificate programs - all included in your subscription
Advance your career with an online degree
Earn a degree from world-class universities - 100% online
Join over 3,400 global companies that choose Coursera for Business
Upskill your employees to excel in the digital economy
Frequently asked questions
What kind of software will i need to complete this course.
Learners need some familiarity and access to presentation software like Microsoft PowerPoint, Google Slides, and Apple Keynote. Although it is not required, design students may also use programs like Adobe Photoshop, Illustrator, or InDesign.
When will I have access to the lectures and assignments?
Access to lectures and assignments depends on your type of enrollment. If you take a course in audit mode, you will be able to see most course materials for free. To access graded assignments and to earn a Certificate, you will need to purchase the Certificate experience, during or after your audit. If you don't see the audit option:
The course may not offer an audit option. You can try a Free Trial instead, or apply for Financial Aid.
The course may offer 'Full Course, No Certificate' instead. This option lets you see all course materials, submit required assessments, and get a final grade. This also means that you will not be able to purchase a Certificate experience.
What will I get if I subscribe to this Specialization?
When you enroll in the course, you get access to all of the courses in the Specialization, and you earn a certificate when you complete the work. Your electronic Certificate will be added to your Accomplishments page - from there, you can print your Certificate or add it to your LinkedIn profile. If you only want to read and view the course content, you can audit the course for free.
What is the refund policy?
If you subscribed, you get a 7-day free trial during which you can cancel at no penalty. After that, we don’t give refunds, but you can cancel your subscription at any time. See our full refund policy Opens in a new tab .
Is financial aid available?
Yes. In select learning programs, you can apply for financial aid or a scholarship if you can’t afford the enrollment fee. If fin aid or scholarship is available for your learning program selection, you’ll find a link to apply on the description page.
More questions
Create designs that inspire
Trending searches, productivity, social media, generate stunning ai-powered visuals.

A girl rides a skateboard while walking her dog. The girl is wearing a purple sweatshirt, baggy jeans and boots. She has expressive, round brown eyes and a look of determination. The background is an out of focus park and the girl is in a 3d illustrated animation style.

A watercolor hummingbird, centered, in red and yellow with a soft cream, watercolor background.

A banana with sunglasses surfing a blue wave.

Front-facing view of a mountain with floral decorative elements, papercraft quilling style, in pastel pink, blue and purple colors.

An abstract background of melting liquid with a metallic sheen, dark purple and gold colors with reflective studio light.

Illustration of a man playing a decorated steel pan drum.

A macro, detailed portrait of the face of a Dalmatian dog staring straight ahead with bright blue eyes on a solid pastel blue, out of focus background. The portrait is realistic with studio lighting.

A yellow sun with orange rays rises over white and purple clouds in a pop art style. There should be a halftone effect and screen printing aesthetic. The orange rays radiate outward and fill the background.

A group of assorted donuts in a pink bakery box.

A portrait of a man in a digital collage style. The man is wearing thick red glasses with circular patterns in blue and orange on the inside of the frames. The man is in a red polka dot shirt with a background of thick, brightly colored lines in pink, blue, and red. Collaged into the background is a ferris wheel and a circus tent.

A profile view of a caterpillar crawling on a moss-covered rock with the lush, green forest in the background, macro view, detail, close-up.

Cartoon style woman with a blue hat, fishing on a river near a forest.

A colorful street scene in the style of Mexican mural art. The street has adobe-colored shops on both sides with striped awnings. There is a fountain in the center and trees and mountains in the distance.

A single pink ranunculus in the style of a vintage botanical drawing.

A unicorn stands on a wooden pier looking out over clouds below, with a starry night sky above.
Create and edit in an instant with Microsoft Designer

Image generator
Generate any image you can imagine with just a text description.

Background remover
Remove the background from your image in one click.

Sticker creator
Describe the sticker you want, and our AI will generate it for you.
Browse thousands of customizable templates
Fresh picks.

Celebrate an occasion

Food and drink

How it works

1. Start with the perfect template

2. Customize it with help from AI
See the templates for:

3. Share your creation with the world
Purdue Online Writing Lab Purdue OWL® College of Liberal Arts
Welcome to the Purdue Online Writing Lab

Welcome to the Purdue OWL
This page is brought to you by the OWL at Purdue University. When printing this page, you must include the entire legal notice.
Copyright ©1995-2018 by The Writing Lab & The OWL at Purdue and Purdue University. All rights reserved. This material may not be published, reproduced, broadcast, rewritten, or redistributed without permission. Use of this site constitutes acceptance of our terms and conditions of fair use.
The Online Writing Lab (the Purdue OWL) at Purdue University houses writing resources and instructional material, and we provide these as a free service at Purdue. Students, members of the community, and users worldwide will find information to assist with many writing projects. Teachers and trainers may use this material for in-class and out-of-class instruction.
The On-Campus and Online versions of Purdue OWL assist clients in their development as writers—no matter what their skill level—with on-campus consultations, online participation, and community engagement. The Purdue OWL serves the Purdue West Lafayette and Indianapolis campuses and coordinates with local literacy initiatives. The Purdue OWL offers global support through online reference materials and services.
Social Media
Facebook twitter.
- Health & Household
- Household Supplies
- Tissues, Toilet Paper & Sprays
- Toilet Paper
No featured offers available
- Quality Price,
- Reliable delivery option, and
- Seller who offers good customer service
Sorry, there was a problem.

Image Unavailable

- To view this video download Flash Player
Amazon Basics 2-Ply Toilet Paper 6 Rolls = 24 Regular Rolls, Unscented, 350 Sheets, (1 Pack of 6)
Sustainability features.
This product has sustainability features recognized by trusted certifications.
Made with materials from well-managed forests, recycled materials, and/or other controlled wood sources.
The Forest Stewardship Council (FSC) supports responsible forestry, which is a vital solution to combat climate change. Choosing FSC-certified products – whether furniture, building materials, paper, rubber, or textiles – helps protect forests, wildlife, clean water and supports the Indigenous Peoples, forest workers and communities who depend on them. Choosing FSC-certified products can also help to mitigate climate change by supporting responsible management of the world’s forests. For a better future, choose FSC.
Learn more about this certification
350 sheet (Pack of 6)
350 sheet (pack of 12)
350 sheet (pack of 18)
350 sheet (pack of 24)
350 sheet (Pack of 30)
| Brand | Amazon Basics |
| Special Feature | Septic Safe |
| Unit Count | 2100 Count |
| Material | Paper |
| Sheet Count | 2100 |
| Ply Rating | 2-Ply |
| Recommended Uses For Product | Home |
| Material Feature | Sustainable |
| Color | White |
| Scent | Unscented |
About this item
- Amazon Basics toilet paper includes 6 Rolls with 350 2-ply sheets per roll
- Each pack contains 6 rolls of Amazon Basics bath tissue for a total of 2,100 sheets
- Each roll has 4.3 times more sheets than a regular roll (based on regular rolls with 80 sheets)
- Septic safe in well maintained sewer and septic systems
- If you like Angel Soft, you'll love Amazon Basics toilet paper
From the brand

Visit the Store

Home Office

Product Description
Upgrade your bathroom experience with Amazon Basics 2-Ply Toilet Paper, the practical choice for households seeking affordability without compromising on performance. Amazon Basics 2-Ply Toilet Paper, now in a convenient pack of 6 rolls of toilet paper for your everyday needs. Each roll boasts 350 2-ply sheets, ensuring ample coverage and durability for a satisfying clean.
Product details
- Product Dimensions : 4.6 x 13.9 x 7.6 inches; 1.8 Pounds
- Date First Available : November 23, 2023
- Manufacturer : Amazon.com Services LLC.
- ASIN : B0CGWF2BRF
- #1 in Toilet Paper
Videos for this product

Click to play video

Honest reviews of basics toilet paper

Amazon Basics Toilet Paper - Watch for all the details!
Brandi Jensen

An Honest Review of our Amazon Toilet Paper!!!!

Amazon Basics bath tissue
Chelsea Seibold

Toliet paper that is soft and doesn’t clog the toliet.

Important information
Legal disclaimer.
Statements regarding dietary supplements have not been evaluated by the FDA and are not intended to diagnose, treat, cure, or prevent any disease or health condition.
Brands in this category on Amazon

Looking for specific info?
Customer reviews.
Customer Reviews, including Product Star Ratings help customers to learn more about the product and decide whether it is the right product for them.
To calculate the overall star rating and percentage breakdown by star, we don’t use a simple average. Instead, our system considers things like how recent a review is and if the reviewer bought the item on Amazon. It also analyzed reviews to verify trustworthiness.
Customers say
Customers like the performance, value, cleanliness and comfort of the toilet paper. They mention that it does the job well, is great value for the money and that it leaves their butt feeling clean. That said, some complain about the size and thickness. Opinions are mixed on absorbency, texture, and quality.
AI-generated from the text of customer reviews
Customers like the value of the toilet paper. They say it's a good product for the price, does the job decently, and isn't ridiculously expensive. Customers also appreciate the hefty rolls and plentiful supply.
"...they last a long time, and with 30 rolls in the pack, it's a great value for the price ...." Read more
"...This is incredibly convenient and cost-effective , as each roll has over four times the sheets of a regular roll.Pros:..." Read more
"...Not highest quality but good and priced right ." Read more
"...With a reverent tear, we opened the package. The rolls, hefty and plentiful, felt like a promise whispered, "No more single-ply nightmares for you...." Read more
Customers like the performance of the toilet paper. They say it does the job well, works fine for their family, and is a great product for their use. Some mention that it works on cat poop too and is good for the bathroom.
"...Is it the strongest or thickest? No, it is not. However, it does the job !" Read more
"...2 ply but feels safe and secure and does the job . Does not have lint which I highly appreciate as a female." Read more
"...It holds up and does its job . 10 out of 10 would recommend!" Read more
"...It gets the job done and there's no need to use too much of it. My only complaint is that somehow it seems to be more narrow than I'm used to." Read more
Customers like the cleanliness of the toilet paper. They say it offers an efficient cleaning experience, making cleaning comfortable. They also mention that the product is dry and clean upon opening, ensuring a hygienic experience.
"...I have found it to be durable and flushes easily down the toilet , so no worries about clogs...." Read more
" Good butt wiping paper " Read more
"It takes twice as much to wipe , so not a bargain. I won’t buy it again" Read more
"My family likes the cleanliness of this toilet paper and the absorbency is almost like a paper towel when I use it to wipe up spills...." Read more
Customers are mixed about the quality of the toilet paper. Some mention it's really good quality, soft, and durable. They say it holds up and does its job. However, some customers say that it'll break down pretty rapidly upon contact with liquid.
"...The rolls are generously sized, so they last a long time , and with 30 rolls in the pack, it's a great value for the price...." Read more
"...This tp is strong, doesn't clog the toilets and is soft enough. Not highest quality but good and priced right." Read more
"...Quantity: With 350 sheets per roll, it lasts significantly longer than regular rolls ...." Read more
"...It was soft enough to be gentle, yet strong enough to handle the task . No more wasteful double-wrapping, no more mid-wipe disintegration...." Read more
Customers have mixed opinions about the texture of the toilet paper. Some find it decently soft and doesn't feel like sandpaper. However, others say it's not the softest they've ever felt and is completely without texture.
"...This 2-ply toilet paper exceeded my expectations in every way. It's soft , absorbent, and strong enough to get the job done without falling apart...." Read more
"...Each sheet is about 1/4 inch shorter. The 2-ply is almost completely without texture of any kind, which makes the 2-ply sheets slide apart during use..." Read more
"...This tp is strong, doesn't clog the toilets and is soft enough . Not highest quality but good and priced right." Read more
"...The verdict? The Amazon Basics lived up to its name. It was soft enough to be gentle , yet strong enough to handle the task...." Read more
Customers have mixed opinions about the absorbency of the toilet paper. Some mention that it has great absorbency, soaking up all solids and liquids, while others say that it doesn't seem greatly absorbent.
"...It's soft, absorbent , and strong enough to get the job done without falling apart...." Read more
"... Not too many complaints on absorbency , but it does crumble a little bit when it's wet so it will leave behind a little bit of crumbs after you wipe..." Read more
"...be good for septic systems (those that have to use Scott) Its not the most absorbent but it works." Read more
"...They absorbed , but not flimsy enough to have it go right through to your hands.Not bad. Will buy again" Read more
Customers are dissatisfied with the thickness of the toilet paper. They mention that it's super thin and harsh, not as thick or soft as Amazon's Presto product, and lacking the thickness and durability that they've come to expect.
" Too thin and used for tissue paper" Read more
" Too thick and it doesn’t last as long as Scott’s tissue" Read more
"This toilet paper is soft, but it is a little on the thin side . Pretty good value overall." Read more
"...It’s the perfect blend of thick enough and softness without any flyaway fluff things that are usually on soft toilet paper...." Read more
Customers are disappointed with the size of the toilet paper. They say the rolls are smaller than expected, and the squares are thinner. Some customers also mention that the toilet rolls don't fit in their roll holders. Overall, some customers are disappointed that the product runs out quickly.
"...Cons:Fit: The larger rolls might be bulky for some holders...." Read more
"...What this all adds up to is...Thinner, smaller toilet paper that falls apart while using it...." Read more
"...The rolls are generously sized , so they last a long time, and with 30 rolls in the pack, it's a great value for the price...." Read more
"...Not to mention each square is smaller in length and width ...." Read more
Reviews with images

- Sort reviews by Top reviews Most recent Top reviews
Top reviews from the United States
There was a problem filtering reviews right now. please try again later..

Disclaimer : While we work to ensure that product information is correct, on occasion manufacturers may alter their ingredient lists. Actual product packaging and materials may contain more and/or different information than that shown on our Web site. We recommend that you do not solely rely on the information presented and that you always read labels, warnings, and directions before using or consuming a product. For additional information about a product, please contact the manufacturer. Content on this site is for reference purposes and is not intended to substitute for advice given by a physician, pharmacist, or other licensed health-care professional. You should not use this information as self-diagnosis or for treating a health problem or disease. Contact your health-care provider immediately if you suspect that you have a medical problem. Information and statements regarding dietary supplements have not been evaluated by the Food and Drug Administration and are not intended to diagnose, treat, cure, or prevent any disease or health condition. Amazon.com assumes no liability for inaccuracies or misstatements about products.
- About Amazon
- Investor Relations
- Amazon Devices
- Amazon Science
- Sell products on Amazon
- Sell on Amazon Business
- Sell apps on Amazon
- Become an Affiliate
- Advertise Your Products
- Self-Publish with Us
- Host an Amazon Hub
- › See More Make Money with Us
- Amazon Business Card
- Shop with Points
- Reload Your Balance
- Amazon Currency Converter
- Amazon and COVID-19
- Your Account
- Your Orders
- Shipping Rates & Policies
- Returns & Replacements
- Manage Your Content and Devices
- Amazon Assistant
- Conditions of Use
- Privacy Notice
- Consumer Health Data Privacy Disclosure
- Your Ads Privacy Choices
IMAGES
VIDEO
COMMENTS
2. Title Bar: shows you the name of your file and other "Suggested options" like Slide Master View. These options will vary depending on the use you give to the commands. 3. File Tab: you will see the Home Menu (PowerPoint backstage) by selecting it. There, you can create a new presentation, save it, print it, export it, and many other options. 4.
Create a presentation. Open PowerPoint. In the left pane, select New. Select an option: To create a presentation from scratch, select Blank Presentation. To use a prepared design, select one of the templates. To see tips for using PowerPoint, select Take a Tour, and then select Create, . Add a slide.
To do that, simply go up to the Home tab and click on New Slide. This inserts a new slide in your presentation right after the one you were on. You can alternatively hit Ctrl+M on your keyboard to insert a new blank slide in PowerPoint. To learn more about this shortcut, see my guide on using Ctrl+M in PowerPoint.
Under Drawing Tools, choose Format. Do one of the following: To change the color of your text, choose Text Fill, and then choose a color. To change the outline color of your text, choose Text Outline, and then choose a color. To apply a shadow, reflection, glow, bevel, 3-D rotation, a transform, choose Text Effects, and then choose the effect ...
One of the basics of PowerPoint presentations is to have a consistent color palette throughout. With these PowerPoint basics covered, let's change the slide background color on slide two. To start, click on the slide background. Next, click on the Design tab. In the toolbar, click on the Format Background button.
Get started with PowerPoint for Beginners. Follow this 20-Minute step by step PowerPoint tutorial to start creating presentations smoothly.Contents of this v...
This clarifies the overall purpose of your talk and reinforces your reason for being there. Follow these steps: Signal that it's nearly the end of your presentation, for example, "As we wrap up/as we wind down the talk…". Restate the topic and purpose of your presentation - "In this speech I wanted to compare…". 5.
Learn everything you need to know to get started using Microsoft PowerPoint! You'll learn all the basics plus more, including: how to choose a design theme...
From the Home tab, click the bottom half of the New Slide command. Choose the desired slide layout from the menu that appears. The new slide will appear. Click any placeholder and begin typing to add text. You can also click an icon to add other types of content, like a picture or chart.
Tip #1: Build a narrative. One memorable way to guarantee presentation success is by writing a story of all the points you desire to cover. This statement is based on the logic behind storytelling and its power to connect with people. Don't waste time memorizing slides or reading your presentation to the audience.
Present slideshows with confidence. With easy-to-use presenter view, speaker notes, and live captions, Slides makes presenting your ideas a breeze. You can even present to Google Meet video calls ...
In this video, you'll learn the slide basics in PowerPoint 2019, PowerPoint 2016, and Office 365. Visit https://edu.gcfglobal.org/en/powerpoint/slide-basics/...
Insert Chart: Create a chart with a variety of options like line, pie, bar, and area. Insert SmartArt graphic: Create a visual like a matrix, pyramid, or process diagram. Pictures: Insert an image from your computer. Online Pictures: Insert an image from the gallery or search the web for one.
Apply the 10-20-30 rule. Apply the 10-20-30 presentation rule and keep it short, sweet and impactful! Stick to ten slides, deliver your presentation within 20 minutes and use a 30-point font to ensure clarity and focus. Less is more, and your audience will thank you for it! 9. Implement the 5-5-5 rule. Simplicity is key.
Presenting or making a speech at a conference or event. Objecting to a planning proposal at a council meeting. Making a speech at a wedding. Proposing a vote of thanks to someone at a club or society. On behalf of a team, saying goodbye and presenting a gift to a colleague who is leaving.
Guy Kawasaki famously said that PowerPoints should adhere to the 10/20/30 rule: 10 slides, shown for 20 minutes, using at least a 30 point font. The first two rules are great for not losing your audience's attention, but the latter is crucial if you want people to be able to quickly grasp what your slides say.
Content, organization, and delivery work together and are equally important aspects of presentations. The following two videos provide basic tips for creating effective presentations in terms of content, organization, and delivery. As you view them, consider their similarity of information and dissimilarity in presentation style.
Here are a few tips for business professionals who want to move from being good speakers to great ones: be concise (the fewer words, the better); never use bullet points (photos and images paired ...
CREATE THIS PRESENTATION. 2. Persuasive presentation. If you've ever been swayed by a passionate speaker armed with compelling arguments, you've experienced a persuasive presentation . This type of presentation is like a verbal tug-of-war, aiming to convince the audience to see things from a specific perspective.
Presentation skills are the abilities and qualities necessary for creating and delivering a compelling presentation that effectively communicates information and ideas. They encompass what you say, how you structure it, and the materials you include to support what you say, such as slides, videos, or images. You'll make presentations at various ...
SlidesCarnival templates have all the elements you need to effectively communicate your message and impress your audience. Download your presentation as a PowerPoint template or use it online as a Google Slides theme. 100% free, no registration or download limits. Create professional and polished presentations effortlessly with these basic ...
What you'll learn to do: create and save a new presentation. Creating a new presentation is important because you may not always be given a presentation to edit. Sometimes you may need to start from a blank slate. Creating a new presentation is much like creating a new document or new spreadsheet.
Prezi has been a trusted presentation partner for over 15 years. 180+ countries. 140,000,000+ 140M+ people who ️ Prezi. 25%. more effective than slides* 40%. more memorable* *independent Harvard study of Prezi vs. PowerPoint See why our customers love us. Prezi is consistently awarded and ranks as the G2 leader across industries based on ...
The Importance of Designing Well • 1 minute. Course Overview • 2 minutes. Course Prerequisites • 2 minutes. Glossary of Design Terms • 5 minutes. Professionalism in Design • 2 minutes. Designing with a Critical Eye • 1 minute. Developing a Design Vocabulary • 1 minute. The Importance of Inspiration • 1 minute.
Use our free tools and customizable templates to craft presentations, videos, graphics, social media designs, and much more—no design expertise required. Create. ... 2. Customize it with help from AI Change design, text, and video elements to match your style or brand, or use powerful AI features in our intuitive editing apps to help create ...
Mission. The Purdue On-Campus Writing Lab and Purdue Online Writing Lab assist clients in their development as writers—no matter what their skill level—with on-campus consultations, online participation, and community engagement. The Purdue Writing Lab serves the Purdue, West Lafayette, campus and coordinates with local literacy initiatives.
Building Your PPT with Gamma. Let's build our PPT with one of the famous features of Gamma "Generate", we'll generate the PPT using the prompt. This is what the interface looks like: Step 1: Provide the Prompt; here's an example: Prompt - "Latest Rules and Regulations in FIFA in easy to understand manner with relevant examples and ...
Firstly, open your PowerPoint application and create a new presentation. Then, you should find "Visual Basic Editor" in the "Tools" menu, under "Macro" submenu. Launching Visual Basic Editor. You should see a "VBAProject" window in the Visual Basic Editor. Right-click on that to insert a new Module.
Buy Amazon Basics 2-Ply Toilet Paper 6 Rolls = 24 Regular Rolls, Unscented, 350 Sheets, (1 Pack of 6) on Amazon.com FREE SHIPPING on qualified orders
Legacy versions (CS6 and earlier) Right-click (Windows) or Control-click (macOS) the Tool Preset Picker in the Tool options bar and choose Reset Tool to reset the active tool, or choose Reset All Tools to reset all tools to their factory default settings. Reset Tool option in Photoshop CS6 and earlier.