- Deep Rock Galactic Achievements
- Exploring My Options achievement

Deep Rock Galactic
Sign in or sign up to start making your own lists.
- Create a list
- 54 want to boost

Exploring My Options achievement in Deep Rock Galactic
You unlocked a new primary and secondary weapon for the same character.
How to unlock the Exploring My Options achievement

Have you got any tips or tricks to unlock this achievement? Add a guide to share them with the community.
Achievements
- View history

- 1 Visible Achievements
- 2 Secret Achievements
Visible Achievements [ ]
Secret achievements [ ].
- The Rock Solid achievement's meaning of in a row means the last five Hazard 5 missions you've played, they don't necessarily have to be the last five missions you've played in general.
- To get the Party Time! achievement, everyone must salute (Rock and Stone) at the same time while dancing. If anyone drinks then the achievement won't pop.
- The Time Well Spent and Foreign Objects In The Launch Bay achievements cannot be achieved at the same time, as the Drop Pod is not technically inside of the launch bay. However, if the drop pod with barrels inside of it is used to enter a mission and undergoes orbital insertion, Foreign Objects In The Launch Bay can be achieved.
- 1 Promotion
- 2 Equipment
- 3 Machine Events
Approved Greenbeard
Performance matters, management approves, feelin’ perky, exploring my options, state of the art, advanced robotics, what are these things, stepping it up, consistent performance, thick-skinned, employee of the month, going lethal, bring your a-game, like a well-oiled machine, karl would be proud, mutated scavenger, now we have a bet-c, see you later, detonator, hi ho, silver – away, i like it down here, hit ’em where it hurts, barrel rider, space rig barrel locations, foreign objects in the launch bay, self control, total makeover, expert miner, legendary miner, it’s my party, good shepherd, bosco, you’re the best, movin’ on up, corporate climber, full team ahead, silver-tier employee, gold-tier employee, legendary team, managements favourite employee.
- Related Guides
PlayStation 4, PlayStation 5
Deep Rock Galactic Trophy Guide
Categories:
General Info
How long does it take to beat Deep Rock Galactic and unlock all trophies?
Over 500 Hours, depending on your skill, patience, and team..
How difficult is it to beat Deep Rock Galactic and unlock all trophies?
Medium (5/10).
Does Deep Rock Galactic have online trophies?
Does deep rock galactic have difficulty-specific trophies, does deep rock galactic have missable trophies, does deep rock galactic have glitched trophies, what is the minimum number of playthroughs required to unlock all trophies in deep rock galactic.
Each mission could be considered a playthrough. You will need to complete at least 500 missions.
Does Deep Rock Galactic have a Platinum Trophy?
Trophy Guide
Deep Rock Galactic Trophy Guide and Road Map for PlayStation 4 & PlayStation 5
Welcome to our Deep Rock Galactic Trophy Guide. Deep Rock Galactic is a unique resource-management game in which you complete mining missions on an alien planet to gather resources and upgrade your Dwarf.
The game’s honestly a lot of fun, with a great sense of humour, a fun style, and some real addictive gameplay. The issue, as you’ll see, is an absurdly long Trophy Journey with some really challenging moments.
Phase One – Complete Tutorial and First Assignment
This first phase of our Deep Rock Galactic Trophy Guide is simply dedicated to the game’s introductory content. Keep the tough, upcoming challenges out of your mind whilst you enjoy discovering what DRG has to offer.
Introduction Trophies

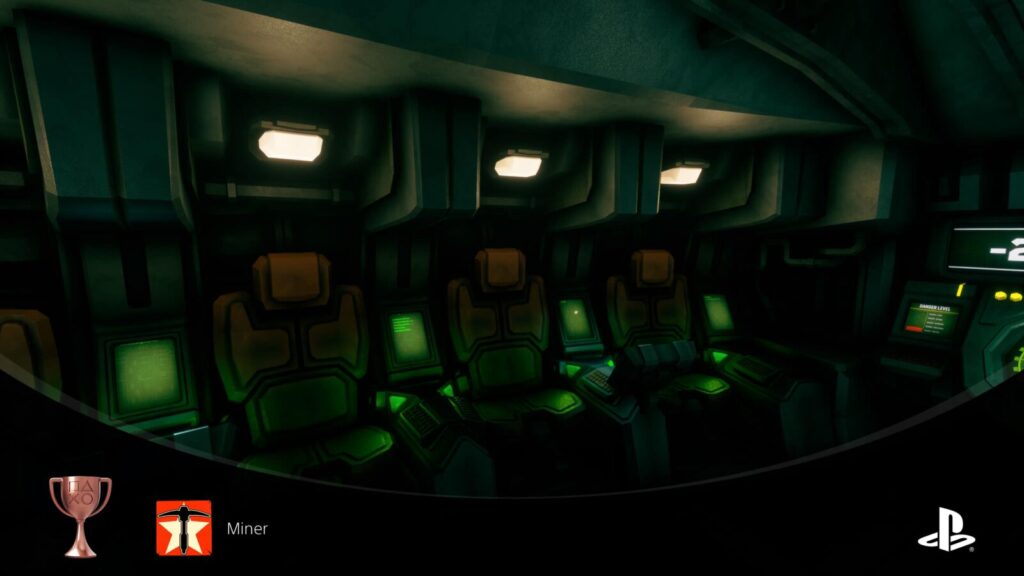
Complete your first mission.
Complete the tutorial mission at the start of the game and the Miner trophy will unavoidably unlock.
Complete your first assignment.
After unlocking Miner , you’ll have only one assignment available, it will consist of 10 missions and will act as an extension of the game’s tutorial, introducing you gradually to the game’s features and game modes.
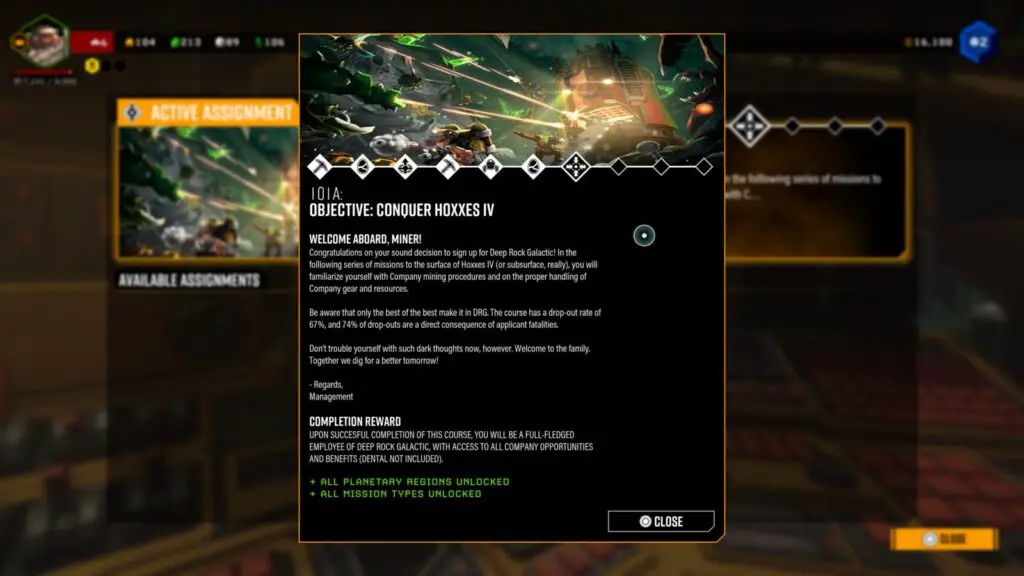
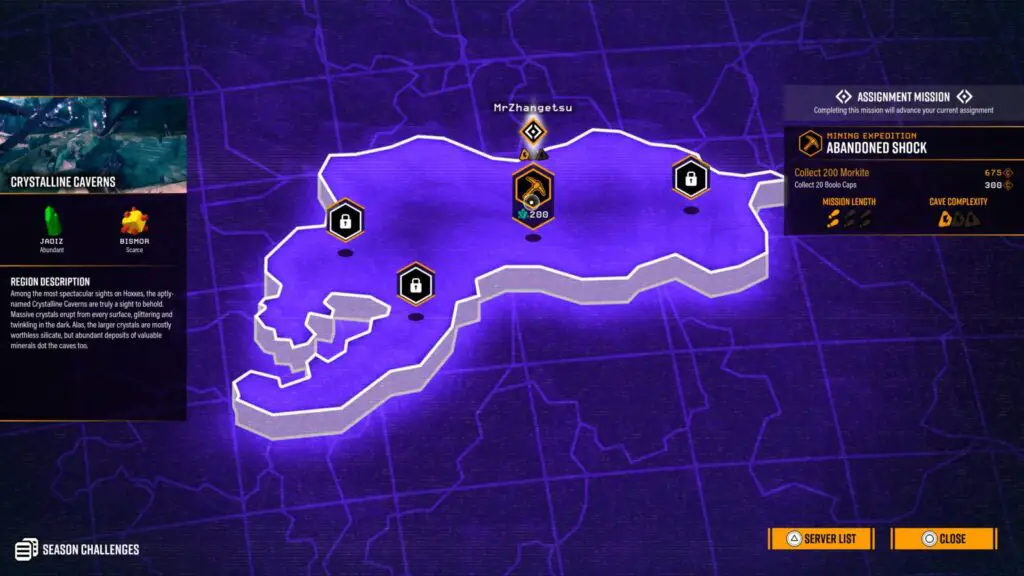
Assignment missions will be marked with a white diamond on the Mission Select map.
You won’t have access to many of the game’s features until you complete this assignment so it’s pretty unmissable.
Phase Two – Miscellaneous & Progress Trophies
Deep Rock Galactic has an egregiously long end-game grind, which we will save for phase three of this Trophy Guide. For now, try to focus solely on the more immediately-achievable trophies.
Below, I’ve split these trophies up into a few main categories; Progression Trophies , Rare Resource Trophies , Difficulty-Specific Trophies , Miscellaneous Mission Trophies , and Miscellaneous Space Rig trophies .
While you work your way through them, you’ll make steady progress which will help you when you finally get to the end-game grind.
In preparation for that, though, try to keep these things in mind as you play:
- You will eventually need to complete 50 Missions within which you are the party leader, so try to play plenty of matches with your friends, and host the missions for them via the map.
- You will eventually need to complete 100 Solo Missions, so don’t be afraid to play alone when your friends are unavailable.
- You will eventually need to promote all four Dwarves 7 times, so make sure you switch things up regularly and try out different classes.
Progression Trophies

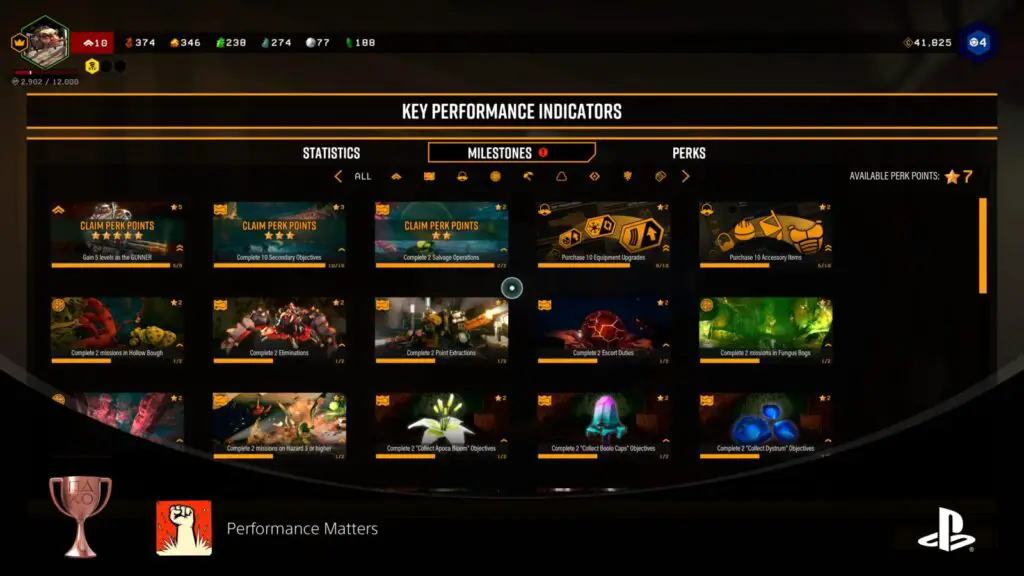
Complete 10 Milestones.
These are miniature objectives and completing them will provide you with perk points that you can use to upgrade your Dwarf.
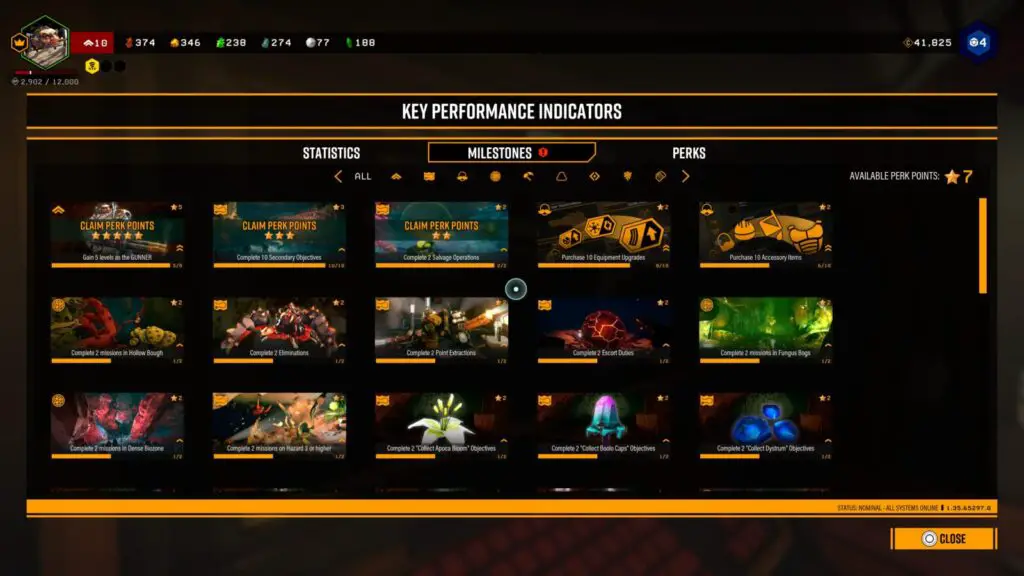
To unlock Performance Matters, simply complete 10 of these. It is highly likely this will happen naturally.
The trophy will unlock when you access the KPI Monitor after having completed 10 milestones.
Complete 25 Milestones.
As with Performance Matters , you must complete Milestones for the Management Approves trophy. Complete a total of 25 Milestones to unlock it.
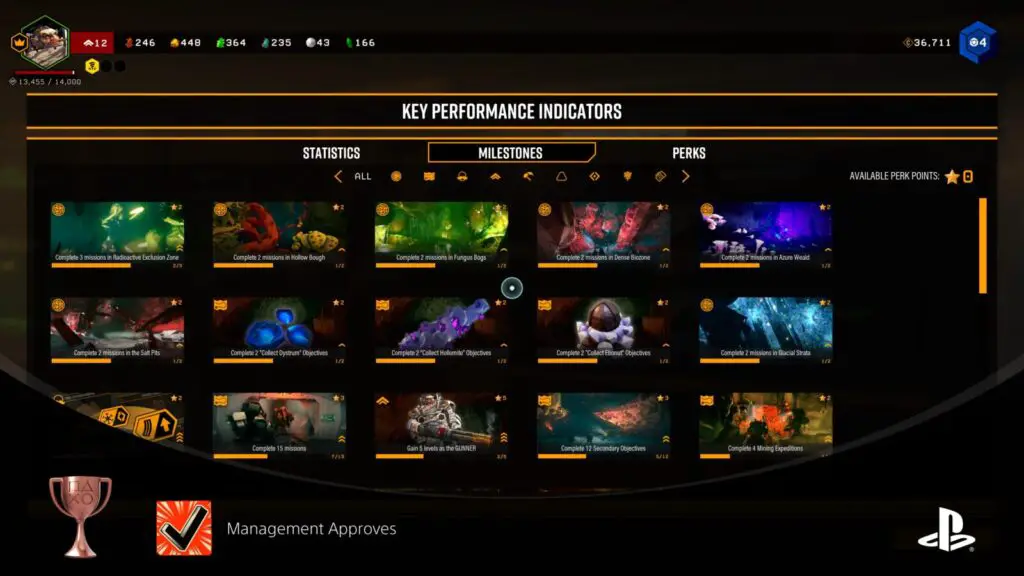
It is very likely this will happen naturally.

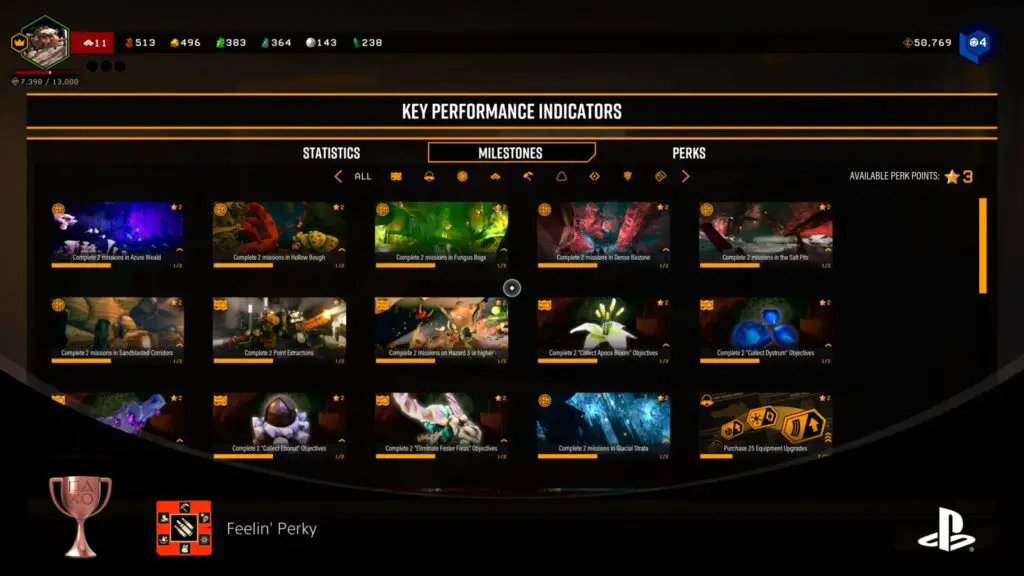
Unlock 10 Perk Nodes.
Here, there are several perks that you can purchase using Perk Points. You will unlock Perk Points by completing Milestones, viewable in the “Milestones” tab of this same monitor.
To unlock the “Feelin’ Perky” trophy, you simply need to purchase your first 10 Perks. It can be any 10 perks, but if you want this trophy ASAP, then you could just buy all the cheapest ones (tier 1 perks marked with an “I”).
Note the arrows between each perk cluster. These arrows will fill in with each perk you buy, you will need to purchase enough perks to fill all of the arrows to be able to unlock the next perk cluster.
You will unlock the fourth Perk Cluster by getting enough perks for this trophy.
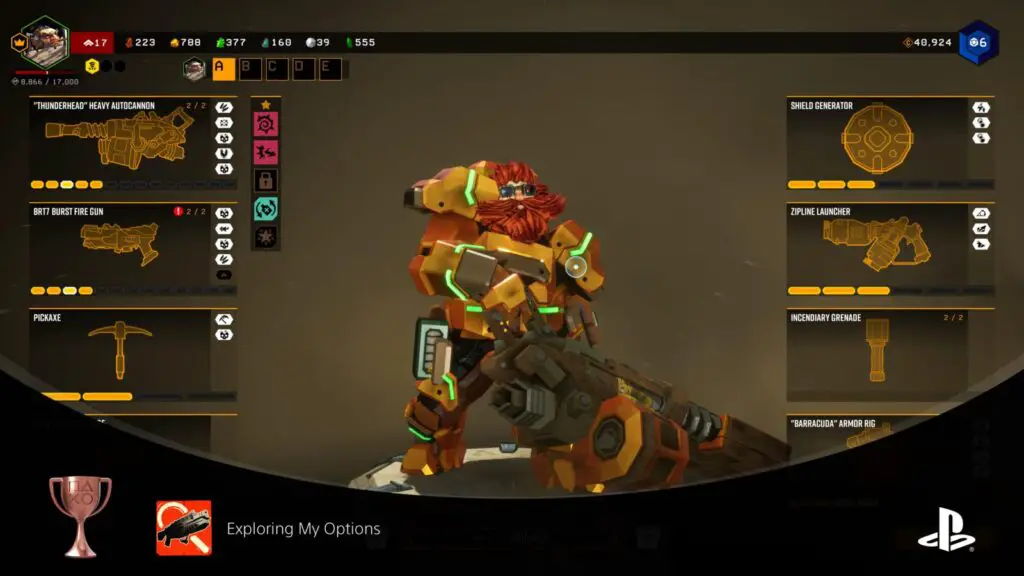
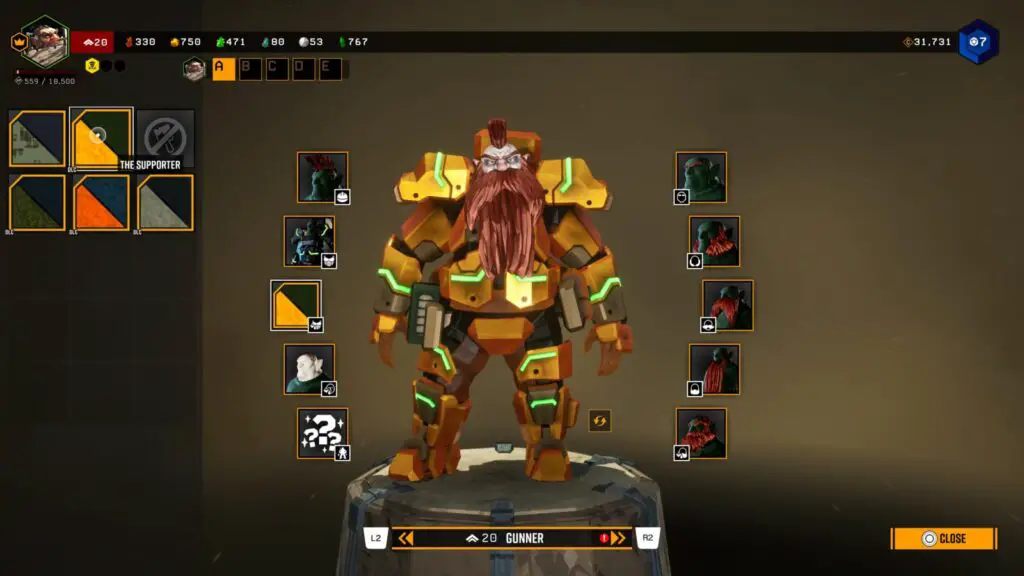
You unlocked a new primary and secondary weapon for the same character.
You can unlock alternative weapons by completing assignments. New weapon assignments will unlock once your Dwarf reaches certain level thresholds; Level 10 for an alternative Primary, Level 15 for an alternative Secondary, and Level 20 for another alternative Primary weapon.
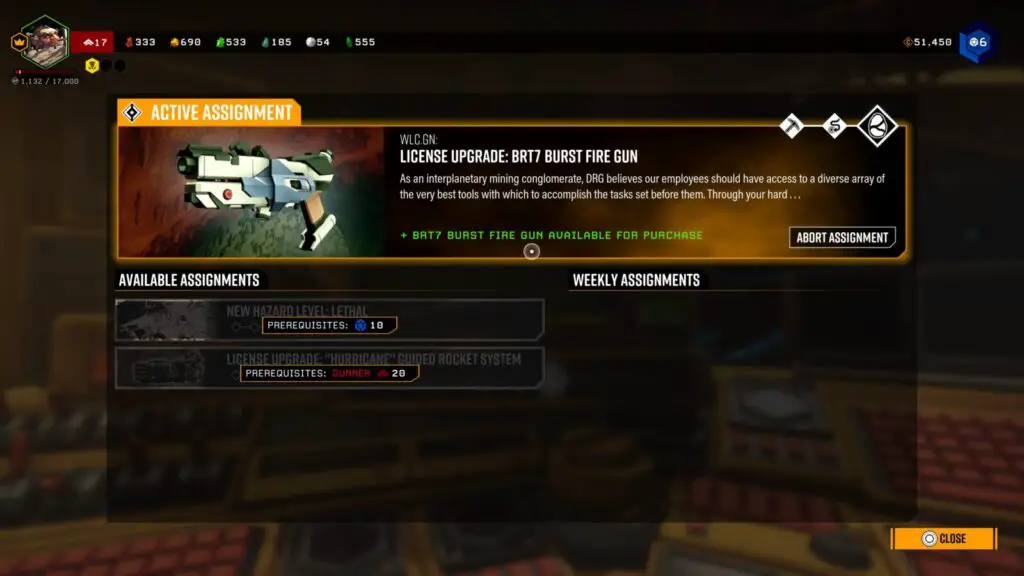
The highest level you need to achieve for the Exploring My Options trophy is Level 15, as you just need one alternative Primary, and one alternative Secondary.
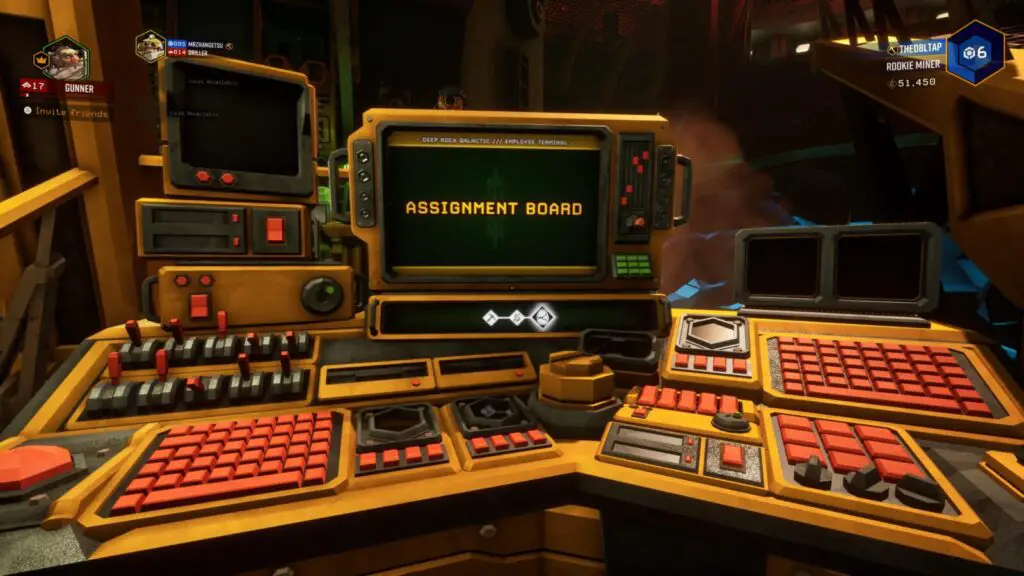
Once you unlock each assignment, activate it via the Assignment Board console next to the map in the Space Rig.
Then, complete the missions that are highlighted on the map to complete the Assignment.
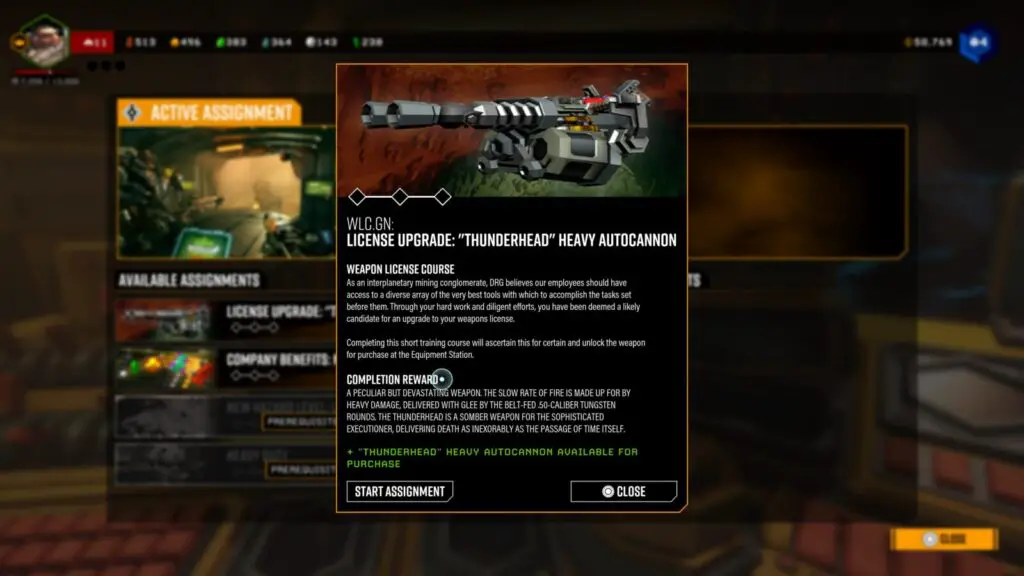
Once both weapons have been unlocked via Assignments, go to the Equipment console and purchase them both.
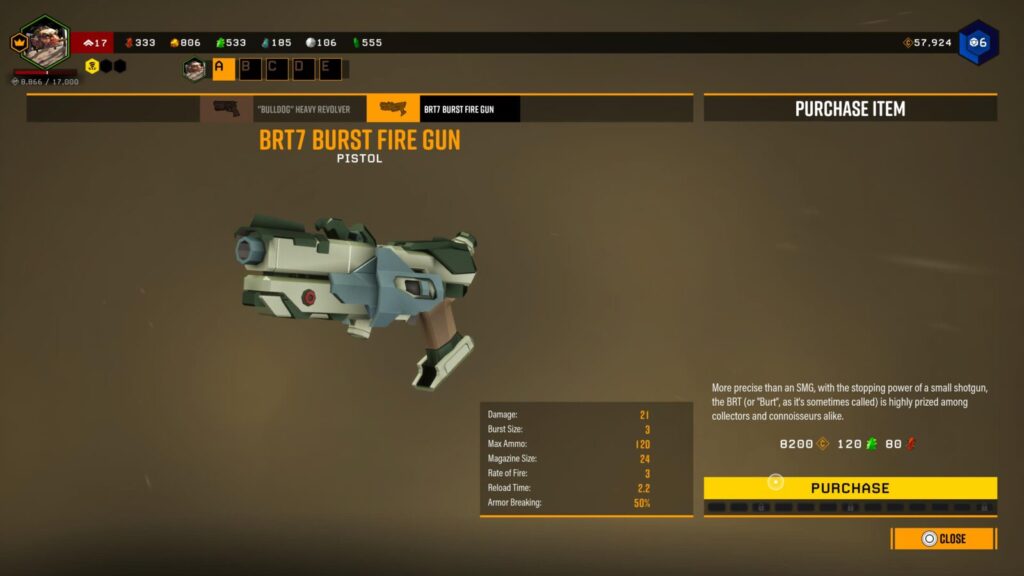
The trophy will unlock when you have purchased both a new Primary and new Secondary weapon.
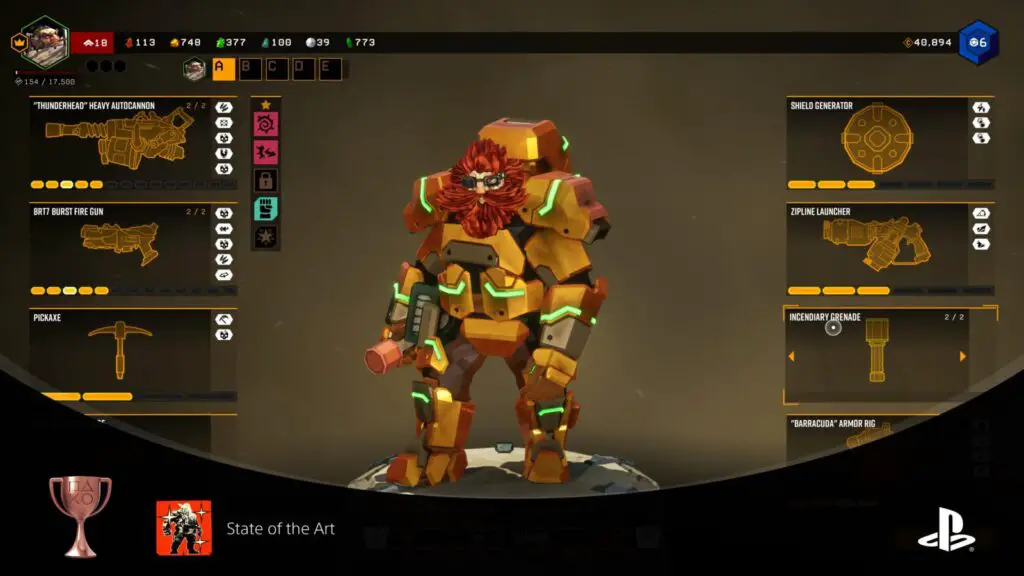
You purchased a Mod in every tier for one of each upgradable item in the Equipment Terminal for the same character.
In the Space Rig, there is an Upgrade Console just to the left of the Drop Pod, where you can make modifications to your armor by spending resources to apply upgrades to various mod slots on your gear and equipment.
You will need to gradually level up your Dwarf to unlock more mod slots over time.
Before you can unlock this State of the Art trophy, you will need to reach level 18 with your Dwarf, thus unlocking the final Mod Slot for your secondary weapon.
Then, you will need to make sure you’ve purchased at least one mod for every available slot across all of your equipment. That means 5 Primary Weapon Mods, 5 Secondary Weapon Mods, 2 Pickaxe Mods, 3 Support Tool Mods, 3 Traversal Tool Mods, and 4 Armor Rig mods.
Once you have done so, the trophy will unlock.
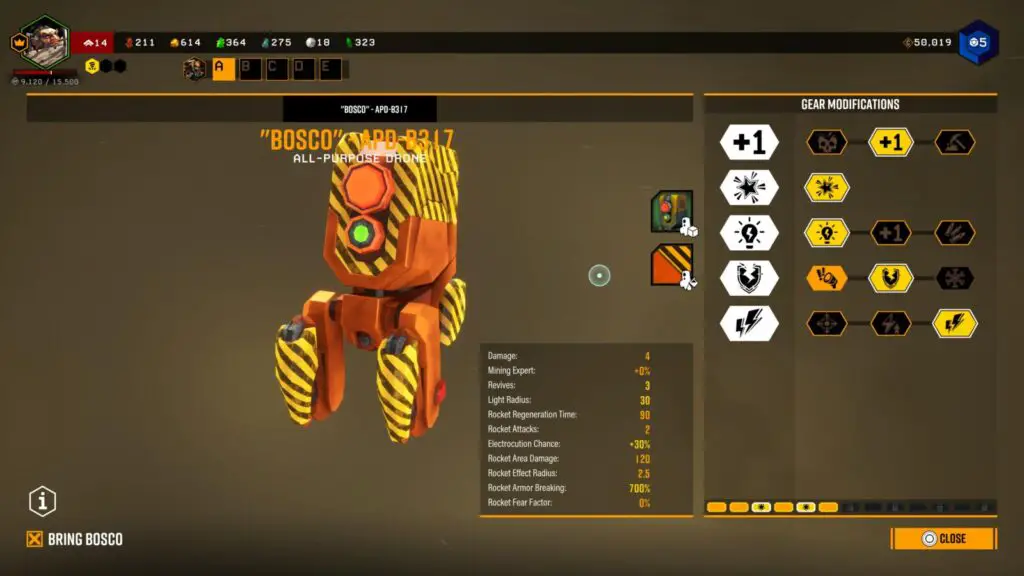
You purchased a Mod in every tier for Bosco.
The Advanced Robotics trophy requires you to purchase an upgrade for every available Mod Slot on Bosco, the Drone that supports you during Solo gameplay.
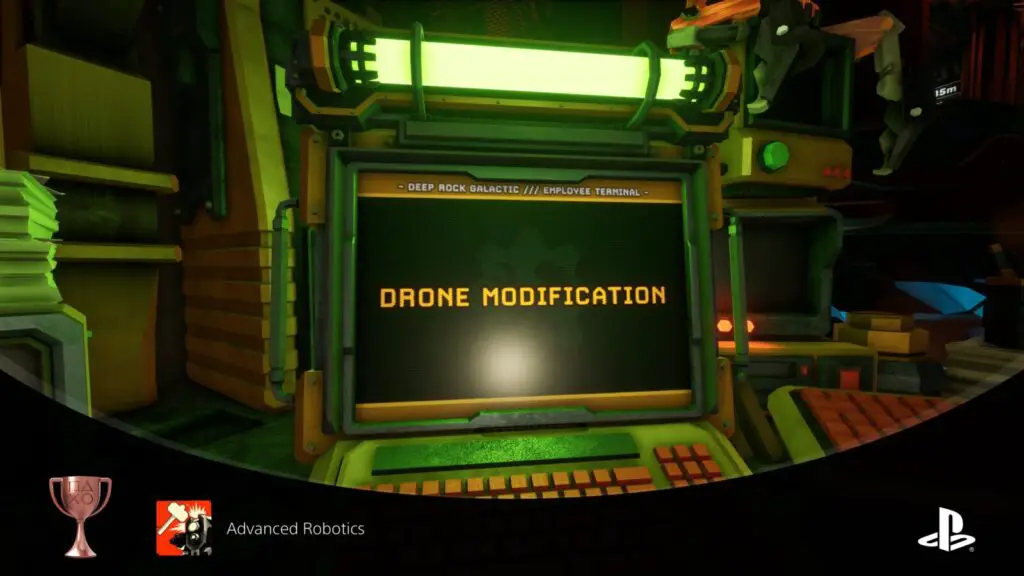
The Upgrade Console for Bosco can be found next to the drop pod.
Before you can unlock this trophy, you will need to reach Player Level 5, thus unlocking all available Mod Slots for the Drone, one per level.
Rare Resource Trophies

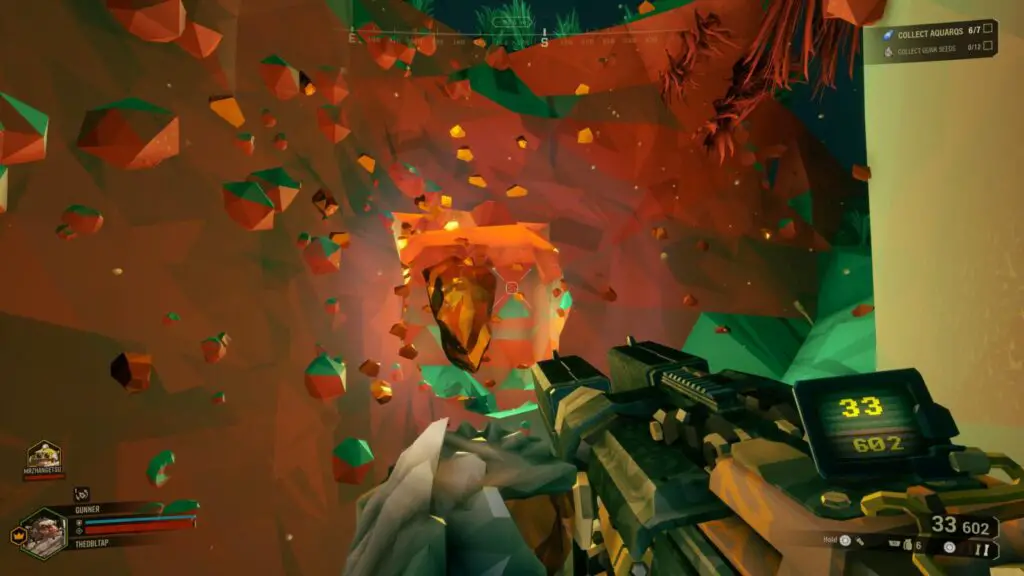
Collect 20 Compressed Gold Chunks.
During missions, keep your eye out for small gold nugget clusters on the walls. These will indicate the location of a Compressed Gold Chunk.
Look at the center of the cluster and try to see where the yellow glow is emanating from and then dig to it. At the center, you should find a big Compressed Gold Chunk.
Do this 20 times in total to unlock the Prospector trophy. It doesn’t need to be done in a single mission as the trophy is cumulative.
Of all the resources in this trophy category, Compressed Gold Chunks are the most common. Its spawn rate gives it a chance of appearing approximately once in every 3 missions.
If anybody on your team finds and deposits a Compressed Gold Chunk, it will count towards the trophy for everybody.

Collect 10 Bittergems.
While exploring caves during missions, keep your eye out for small pink gem clusters on the walls. These will indicate the location of a Bittergem.
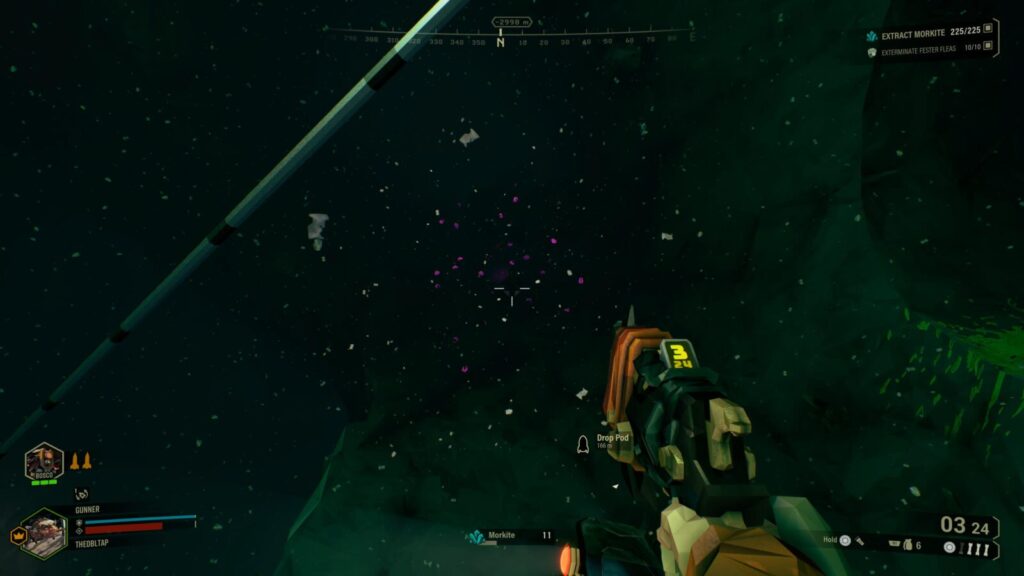
Look at the center of the cluster and try to see where the pink glow is emanating from and then dig to it. At the center, you should find the source of the glow: a huge Bittergem.
Do this 10 times in total to unlock the Jeweler trophy. It doesn’t need to be done in a single mission as the trophy is cumulative.
Bittergems are exceptionally rare resources. Its spawn rate gives it a chance of appearing approximately once in every 21 Missions.
If anybody on your team finds and deposits a Bittergem, it will count towards the trophy for everybody.

You’ve collected 5 mysterious alien artifacts. They are hot to the touch, and smells faintly of…tarmac?
During Missions, keep an eye out for shimmering silver spikes on the walls/ceilings. These will indicate the location of an Alien Artifact.
Look at the center of the cluster and try to see where the pinkish-red glow is emanating from and then dig to it. At the center, you should find the source of the glow: an Alien Artifact.
They look kind of like Silver Rubiks Cubes and have a glowing white interior. The in-game name of these artifacts is “ ERR://23¤Y%/”, making it look like a legitimate glitch, but this is intentional.
Do this 5 times in total to unlock the “What Are These Things?” trophy. It doesn’t need to be done in a single mission as the trophy is cumulative.
These ERR://23¤Y%/ Cubes are the single rarest item in the game. So rare that they will give you a whopping 4000 EXP if you find and recover one. Its spawn rate means that it has a chance of appearing approximately once in every 28 Missions!
If anybody on your team finds and deposits an Alien Artifact, it will count towards the trophy for everybody.
Difficulty-Specific Trophies

Survive a Hazard Level 3 mission from start to finish.
Difficulty-Specific
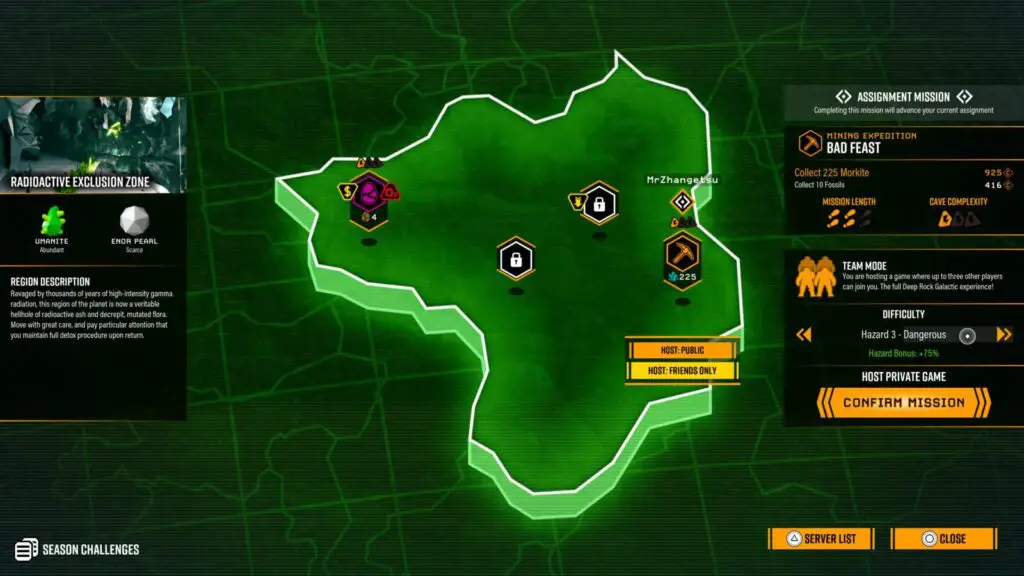
To unlock Stepping it Up, you just need to successfully complete your main objective in one mission set to Hazard Level 3 – Dangerous.
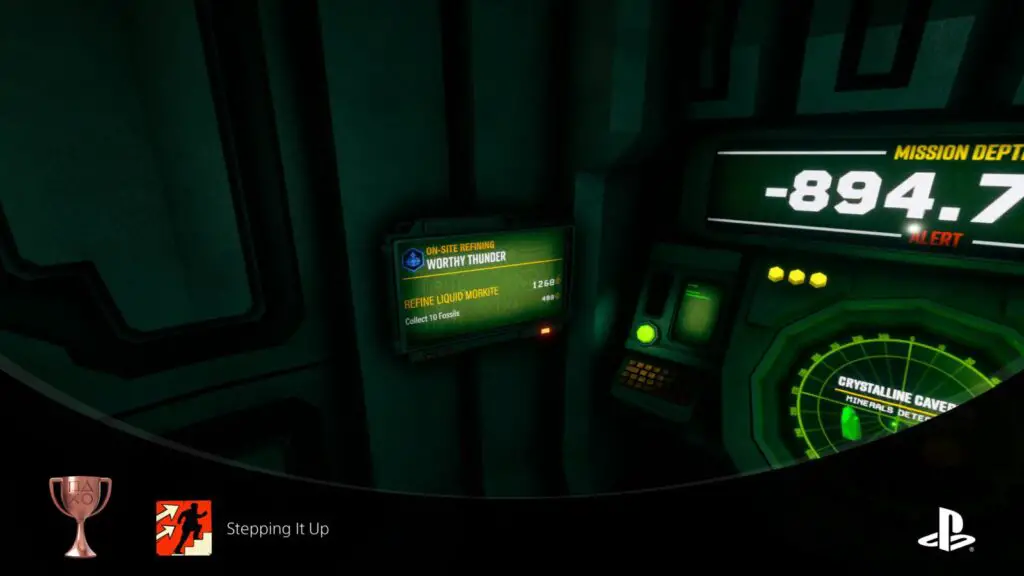
You can choose the hazard level on a Mission Select console. Just refer to the panel on the right-hand side once you have selected the mission you’d like to attempt.
Successfully complete three Hazard Level 3 missions from start to finish in a row.
Non-cumulative
The Consistent Performance trophy is an extension of the Stepping It Up trophy in that you will need to complete missions with Hazard Level 3 active, however, this time you will need to do three in a row without failing .
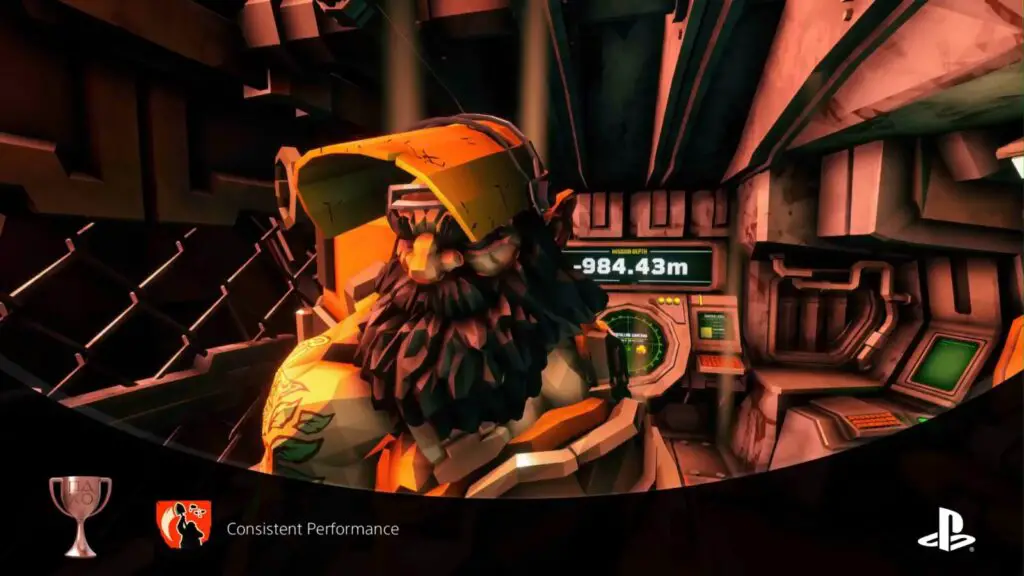
Failure happens when all Dwarves on the team get downed and you’re returned to the Space Rig without the mission objectives being complete.
This will be a lot easier once you and your crewmates have better gear. You can do this in Solo mode, but you’ll have an easier time with friends there who can revive you if/when you go down.
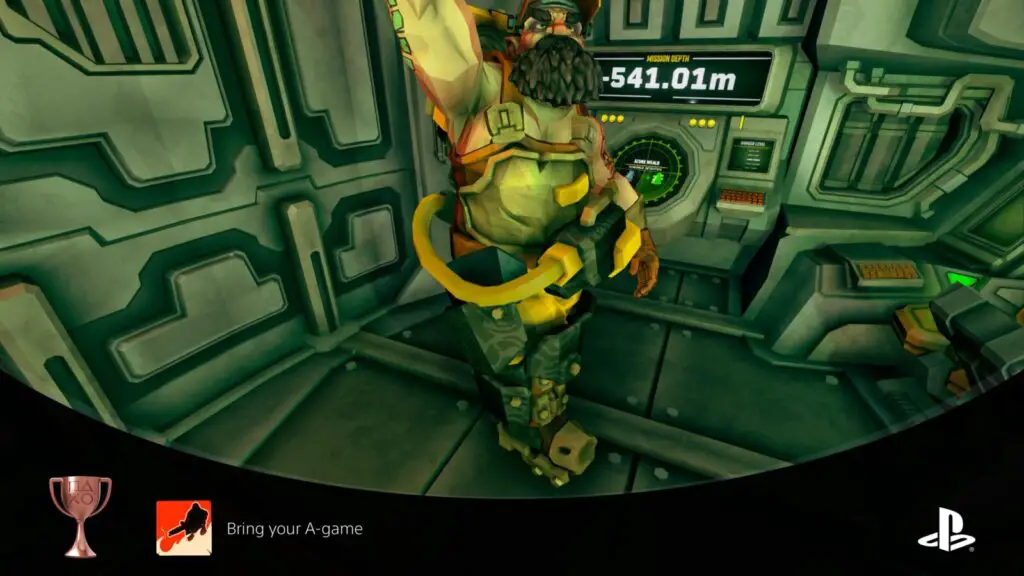
You should try to complete at least one of these three missions without getting downed or calling a resupply, as you will unlock Bring Your A-Game if you are successful.

Survive a Hazard Level 4 mission from start to finish.
To unlock Thick-Skinned, you need to successfully complete your main objective in any mission set to Hazard Level 4 – Extreme .
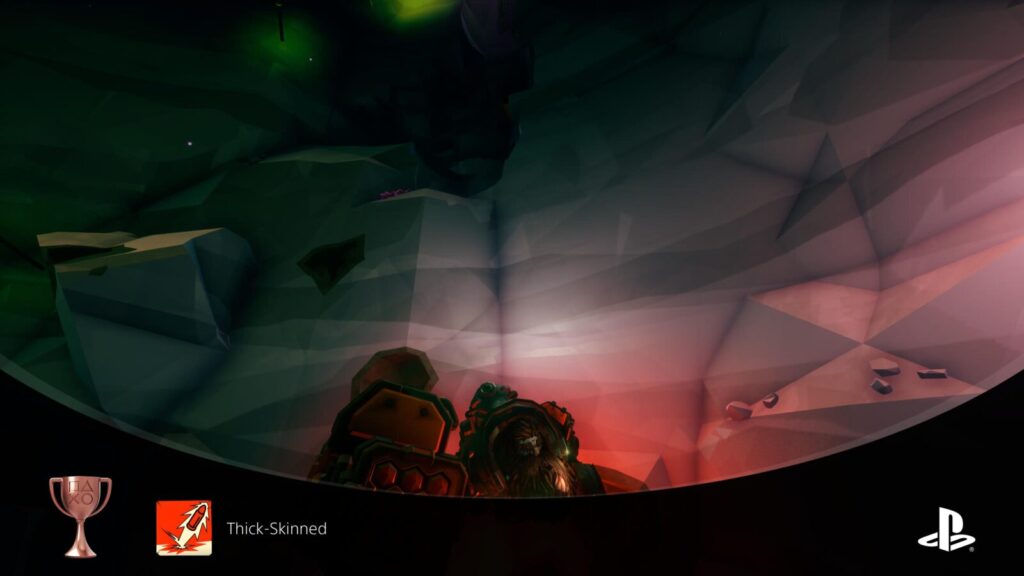
Hazard Level 4 is where the difficulty really starts to ramp up, and you’ll see powerful enemies you may not have run into so far. You will want a fully-upgraded Dwarf who you’re very experienced with, and ideally a full team of experienced players.

Successfully complete four Hazard Level 4 missions from start to finish in a row.
The Employee of the Month trophy is an extension of the Thick-Skinned trophy in that you will need to complete missions with Hazard Level 4 active, however, this time you will need to do four in a row without failing .
Again, you will need to have a fully-upgraded and well-equipped Dwarf. Having a full team of equally experienced players will help you a lot here, too.
Try to only choose missions with low Cave Length and Cave Complexity stats, so that you can at least have a simple, short environment to struggle in.
You should try to complete at least one of these four missions without getting downed or calling a resupply, as you will unlock Like a Well-Oiled Machine if you are successful.

Successfully complete a Hazard Level 5 mission from start to finish.
To unlock Going Lethal, you need to successfully complete your main objective in any mission set to Hazard Level 5 – Lethal .
Hazard Level 5 is not available immediately. You will first need to reach Player Level 10 (blue level in top-right corner of HUD) through normal gameplay.
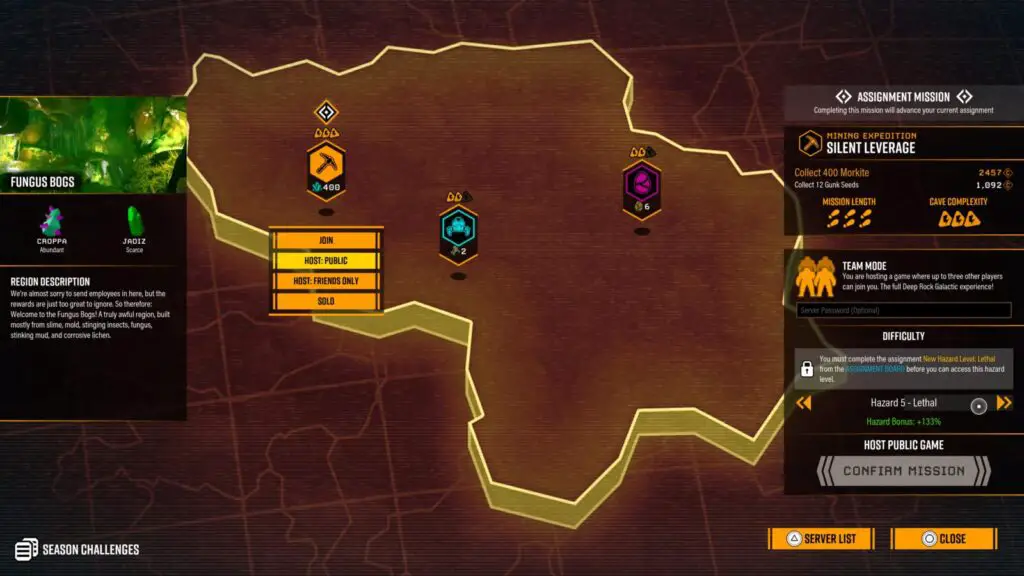
Once you’re Player Level 10, you will be able to start an Assignment from the console next to the drop pod called “New Hazard Level: Lethal”.
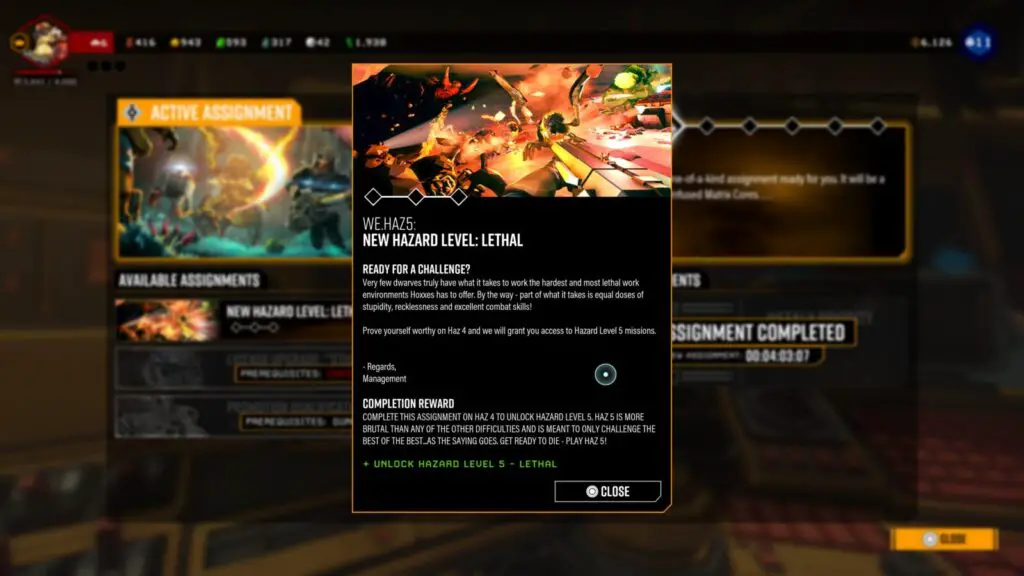
Complete the Missions in this assignment to gain access, allowing you to apply Hazard Level 5 from the Mission Select Screen via the panel on the right-hand side.
Hazard Level 5 is nothing short of a bad time. It’s going to require a very talented and experienced team of players, with fully-upgraded and powerful characters.

Successfully complete five Hazard Level 5 missions from start to finish in a row.
The Rock Solid trophy is an extension of the Going Lethal trophy in that you will need to complete missions with Hazard Level 5 active, however, this time you will need to do five in a row without failing .
Again, you will need to have a fully-upgraded and well-equipped Dwarf. Having a full team of extremely experienced and competent players will help you a lot here, too.
You should try to complete at least one of these five missions without getting downed or calling a resupply, as you will unlock Karl Would Be Proud if you are successful.

Successfully complete a Hazard Level 3 mission from start to finish where no dwarf goes down and without ordering a resupply.
To unlock the “Bring Your A-Game” trophy, you need to complete any mission with the Hazard Level set to 3; Dangerous. You will also need to ensure that none of the Dwarves in your party get downed, and nobody calls a Resupply Drop.
Obviously, this is a lot easier if you progress far enough through the game that you have plenty of perks and upgrades to make your Dwarf tougher. Plus, with more party members you’ll be able to survive better.
Successfully complete a Hazard Level 4 mission from start to finish where no dwarf goes down and without ordering a resupply.
Like a Well-Oiled Machine is the next level up from Bring Your A-Game , and is going to be much more difficult.
To unlock the trophy, you need to complete any mission with the Hazard Level set to 4; Extreme. But you will also need to ensure that none of the Dwarves in your party get downed, and nobody calls a Resupply Drop.
Again, this is a lot easier if you progress far enough through the game that you have a full array of perks and upgrades to make your Dwarf tougher. Plus, with a team of experienced and upgraded party members, you’ll have way better chances of survival.
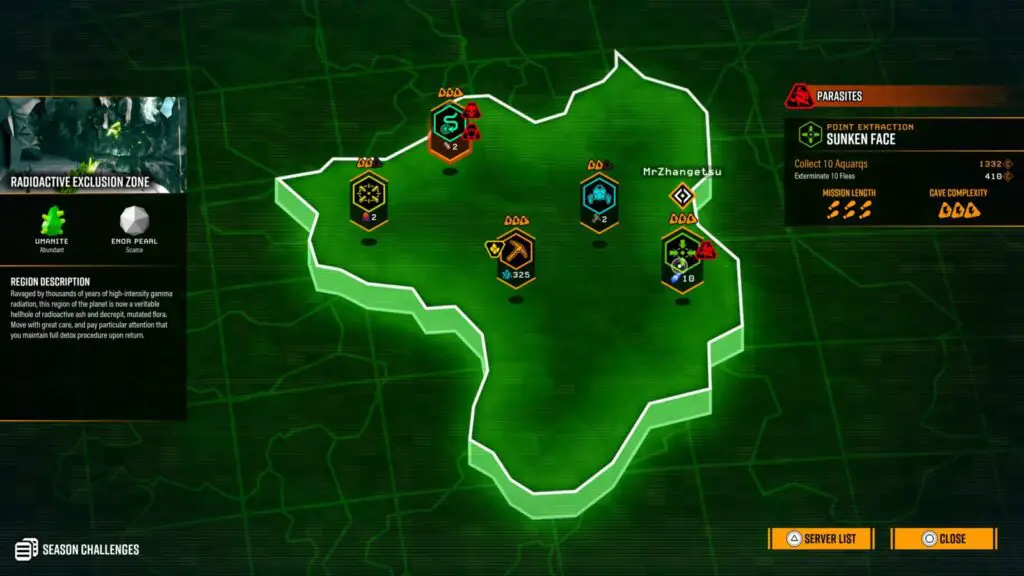
If you choose to attempt this solo, we recommend doing a Point Extraction Mission as a Gunner. You can stay on the central platform and (if you’re lucky with the random cave generation) you can just tell Bosco to dig up the Aquarqs for you. The turrets on the platform will help you survive and Bosco will bring you all the Aquarqs you need to complete the mission.

Successfully complete a Hazard Level 5 mission from start to finish where no dwarf goes down and without ordering a resupply.
Skill-based
Like a Karl Would Be Proud is the next level up from Like a Well-Oiled Machine , and is going to be one of the toughest challenges you face throughout your entire DRG Platinum Journey.
To unlock the trophy, you need to complete any mission with the Hazard Level set to 5; Lethal. But you will also need to ensure that none of the Dwarves in your party get downed, and nobody calls a Resupply Drop.
Note that you need to unlock Hazard Level 5, see Going Lethal .
Again, this is a lot easier if you have a promoted, upgraded, overclocked, and experienced Dwarf. Especially so if you have a whole team of elite top-tier players to help you survive.
I personally found that the easiest missions to avoid resupplying on were short Escort missions, where you just need to defend the Drilldozer as you take it to the Omarran Heartstone.
This trophy will be a breeze if you get lucky and find a BET-C along the way.

Successfully complete 20 missions tagged with Warnings from start to finish.
When looking for missions to play in the map, look for missions with red triangular tags on them. These are Warnings, and they will give you an exp boost (see Legendary Miner for specifics) but will make the Mission slightly more difficult by making enemies stronger, you weaker, or adding more hazards.
To unlock the Mutated Scavenger trophy, you will need to fully complete 20 missions that have one or more of these Warning tags on them.
Miscellaneous Mission Trophies

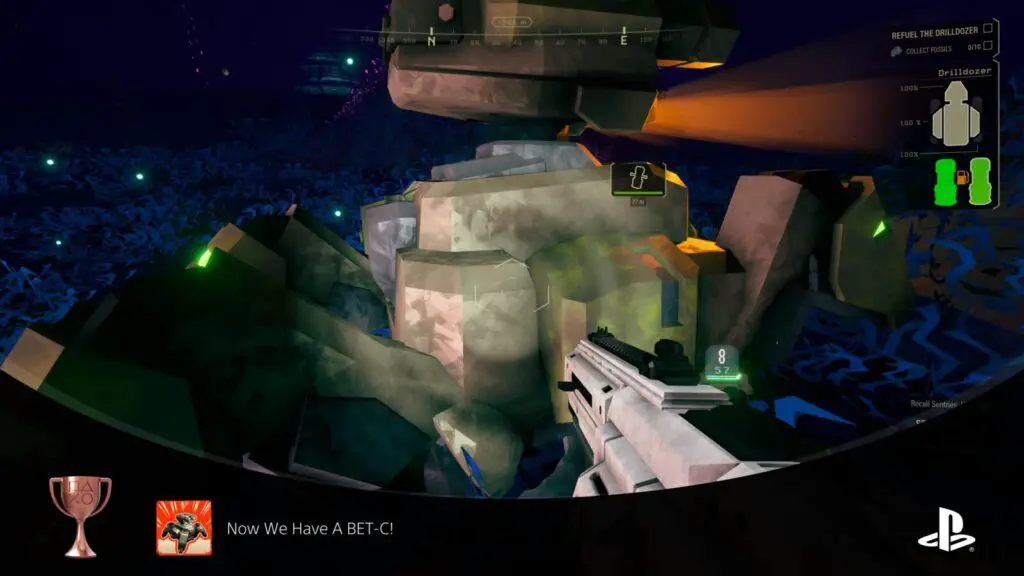
Defeat and fix a BET-C.
A BET-C is a very big M.U.L.E with a turret on top. It’s a devastatingly powerful temporary companion, but unfortunately has very low spawn rates.
There is a 6% chance of a BET-C spawning (3% chance if you’re playing on Hazard Level 1) within any Mission. You will be able to hear it from quite far away, though, as it makes a distinct siren-like sound.
When you find one, it will be deactivated. But as soon as you get close to it, two health bars will appear at the top of the screen, and the machine will get up.
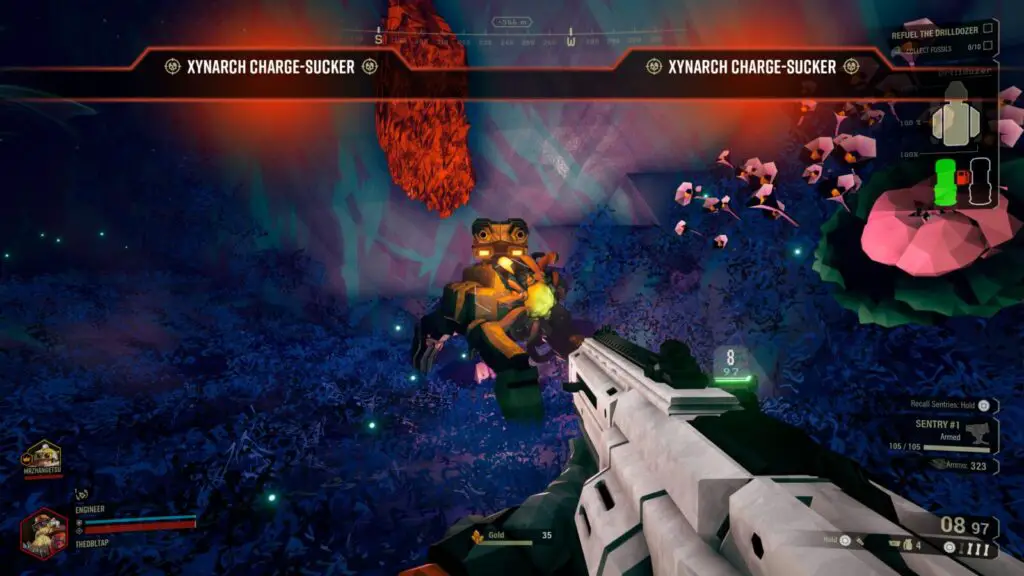
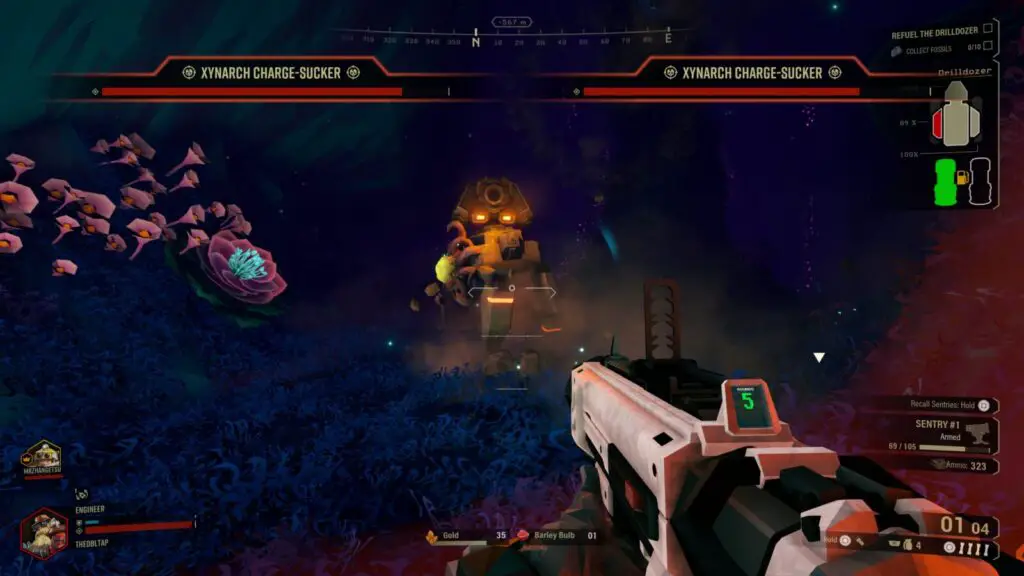
You’ll need to engage in something of a Boss Fight. The BET-C has some incredibly deadly weaponry, so you will need to focus mainly on avoiding the bombs that it launches, only attacking it when it is not under its Bubble Shield.
To defeat it, you need to kill the two Parasites that are controlling it, Metroid-style. Shoot the two Xynarch Charge-Suckers every chance you get, but don’t get greedy and remember to avoid its attacks as much as you can.
Once the two Parasites have been killed, the machine will drop to the ground and the fight will be over. But don’t walk away yet!
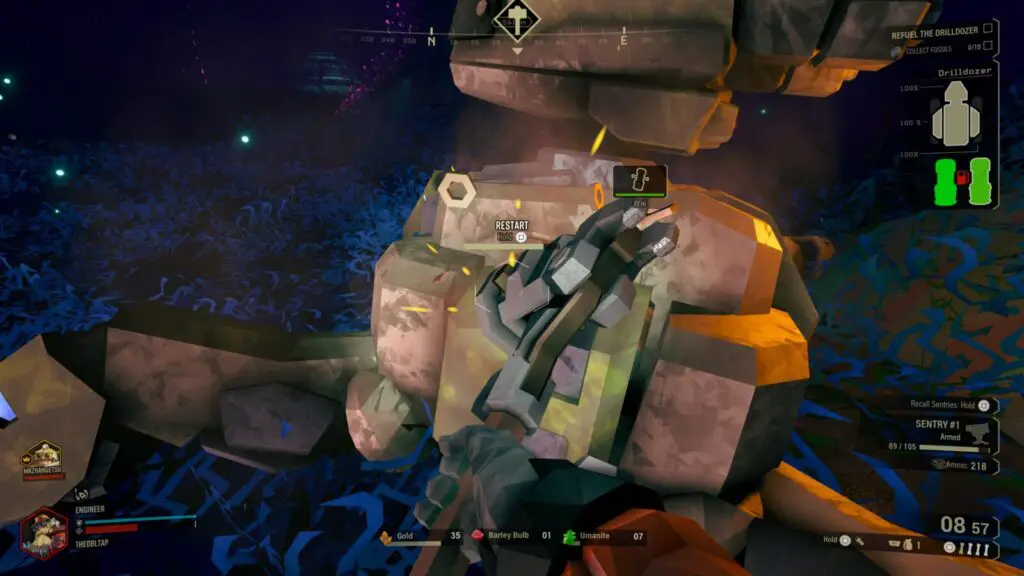
Once it has been repaired, it will follow you for the rest of the mission and completely decimate any enemy that crosses its path. I wish we could have one for every mission…
The trophy will unlock as soon as the repairs are complete and it starts getting up again.
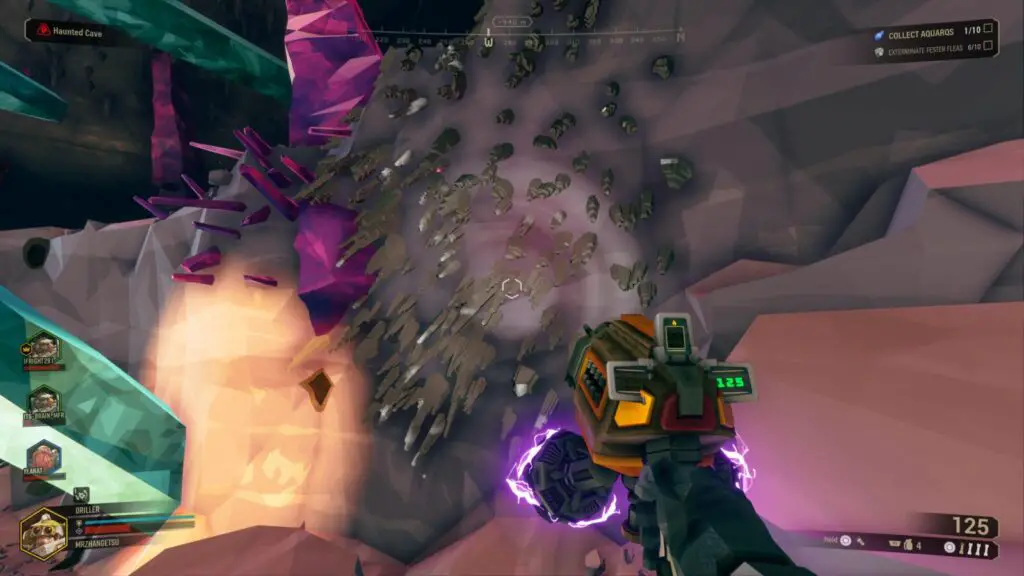
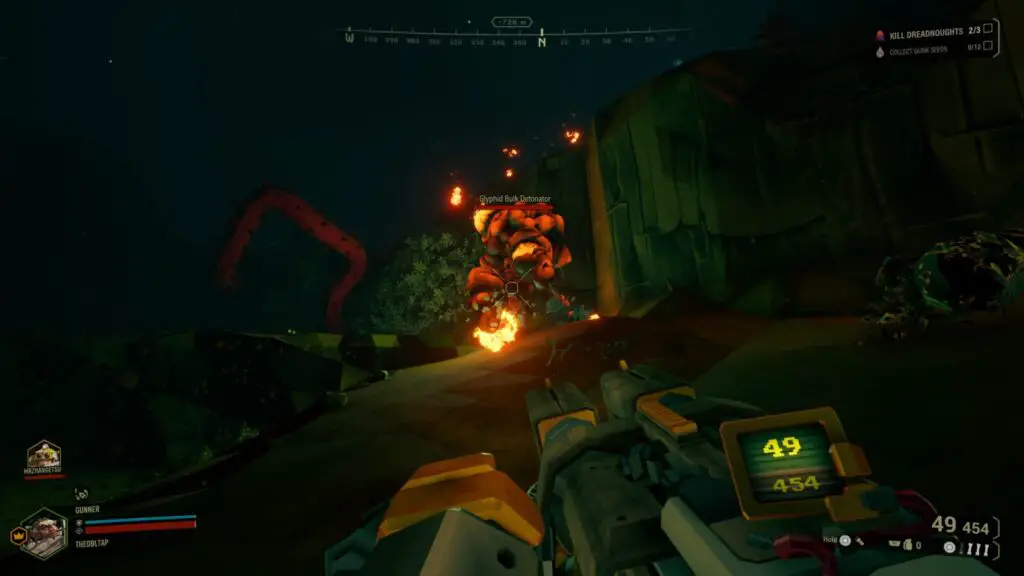
Participate in killing 20 Bulk Detonators.
Bulk Detonators are huge, lumbering, fleshy masses on legs. They glow with a bright orange colour, have three glowing weak points, and will explode in a huge radius when you approach them.
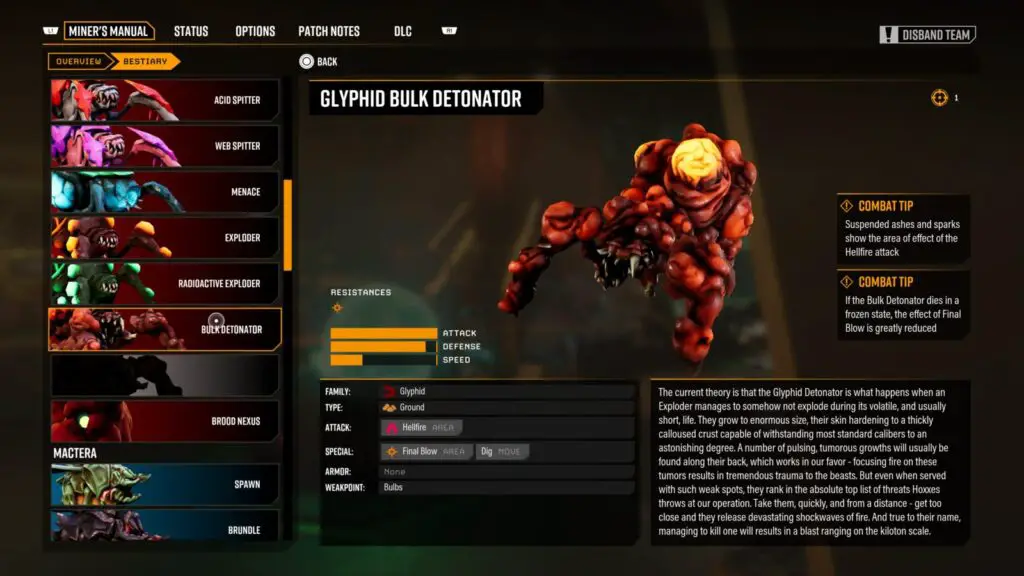
If you’re playing on Hazard Level 3, 4, or 5, the blast can easily be enough to kill you. So if you see one, you should keep your distance.
Don’t just ignore them, though. You should try to break their weak points from a distance (Sorry Drillers, Flamethrowers aren’t very useful here!) and kill them.
Once they are dead, their corpse will explode in an enormous radius, destroying any mine-able surfaces in a huge sphere around its corpse. It also launches several bombs which will also explode in a large radius. Needless to say, don’t be close to it when it dies.
There’s even some special “Bulk Crassus Detonators”, these will coat all surrounding surfaces in mine-able gold which you and your team can dig up and take home with you.

To unlock the “See You Later, Detonator!” trophy, you will need to kill 20 of these. You don’t need to be the one who delivers the killing blow, but you will need to land at least one shot on the creature for it to count towards your trophy total.
If you just run away and avoid the conflict then you’ll get nothing. Help your team!

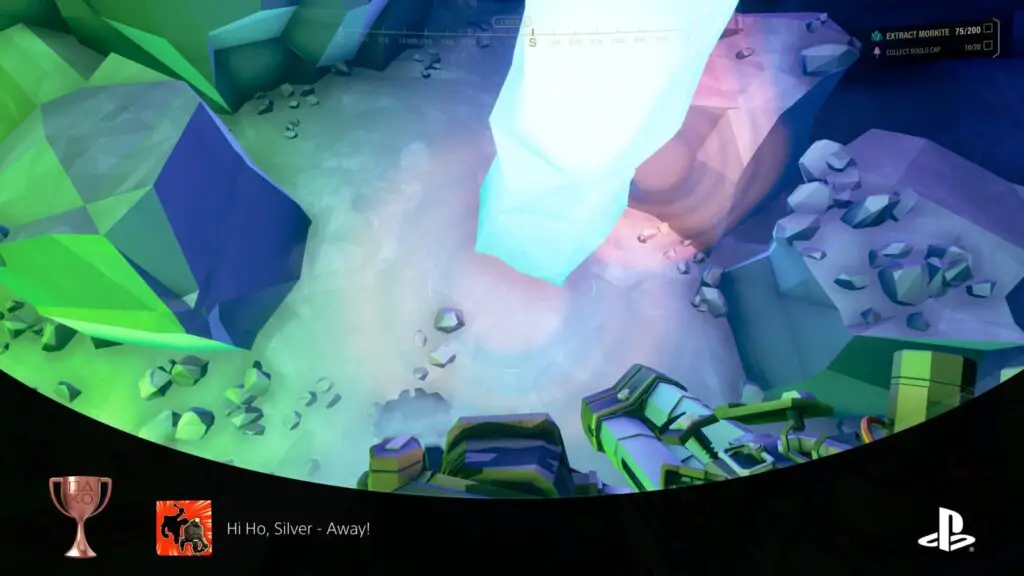
Ride Molly for 15 seconds.
Molly is also known as “M.U.L.E” and is the little robot that follows you and your teammates on missions. To unlock this trophy, you will need to jump onto the top of Molly and then stay on top of it for a full 15 Seconds.
The easiest way to do this solo is to try to ride on Molly at the end of a mission, when it is leading you back to the Drop Pod, but this can be difficult as it will climb up vertical walls.
You could technically do this solo, but you’ll have to travel quite a long distance, call Molly, then double-back and jump on its head while its traveling to the beacon you dropped.
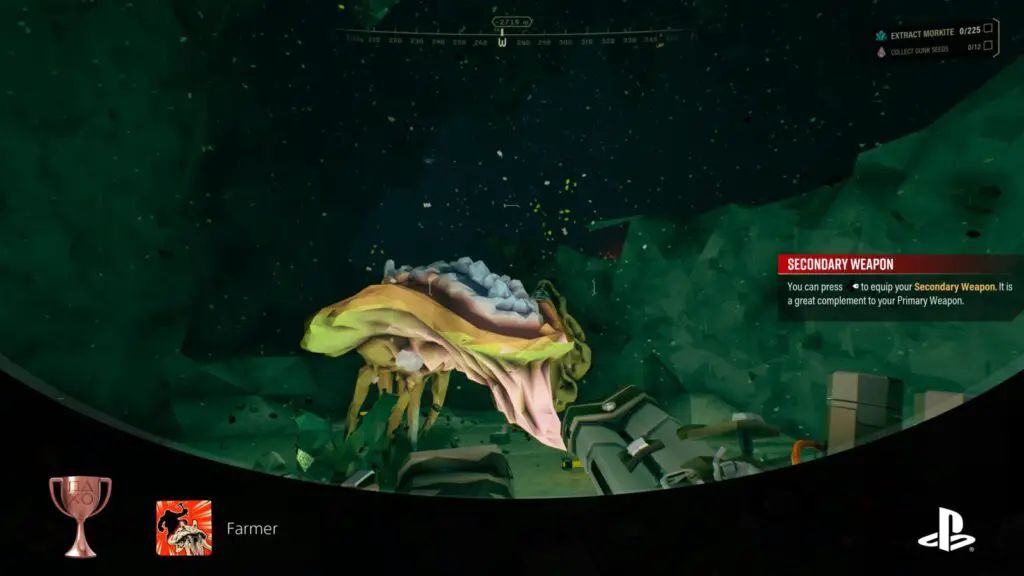
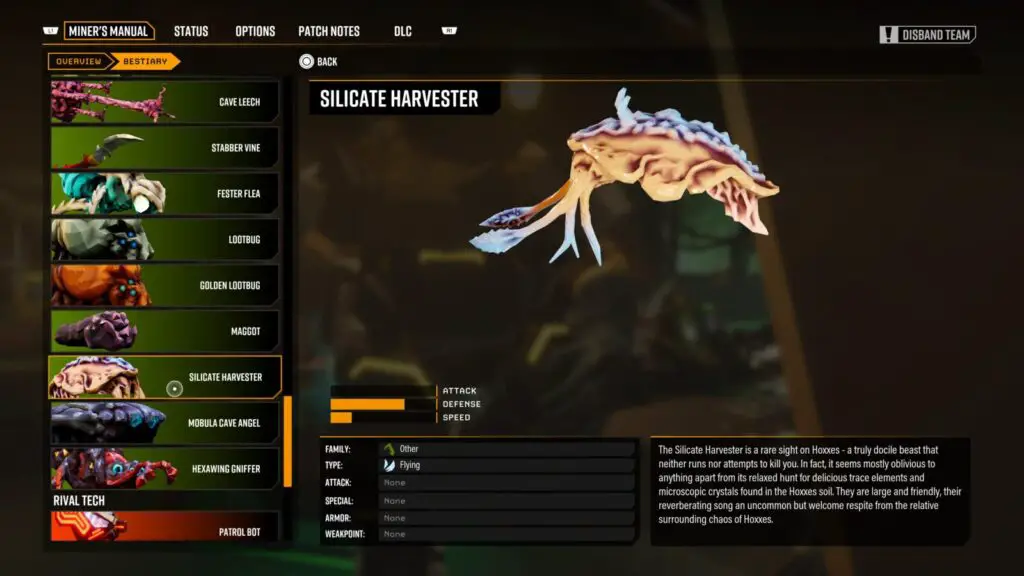
Ride the Silicate Harvester for 30 seconds.
Silicate Harvesters are large floating slug-like alien creatures that are docile and appear randomly in some missions.
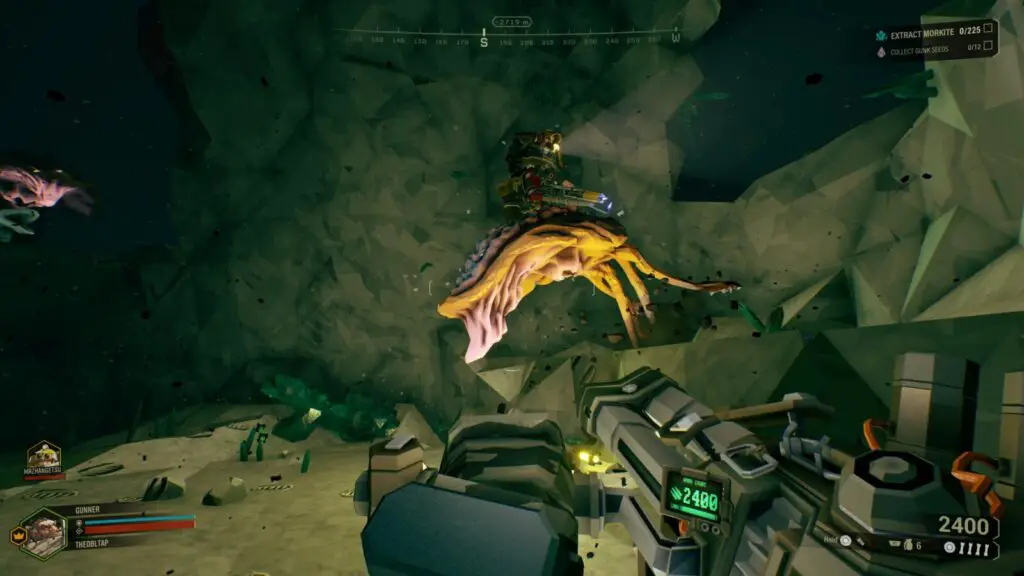
When you see one, jump on its back and try to stay there for a total of 30 seconds. If you are successful, the Farmer trophy will unlock.
You stayed in a mission for an hour or longer.
To unlock I Like It Down Here, you need to stay in a mission until the timer says 1:00:00 or more.
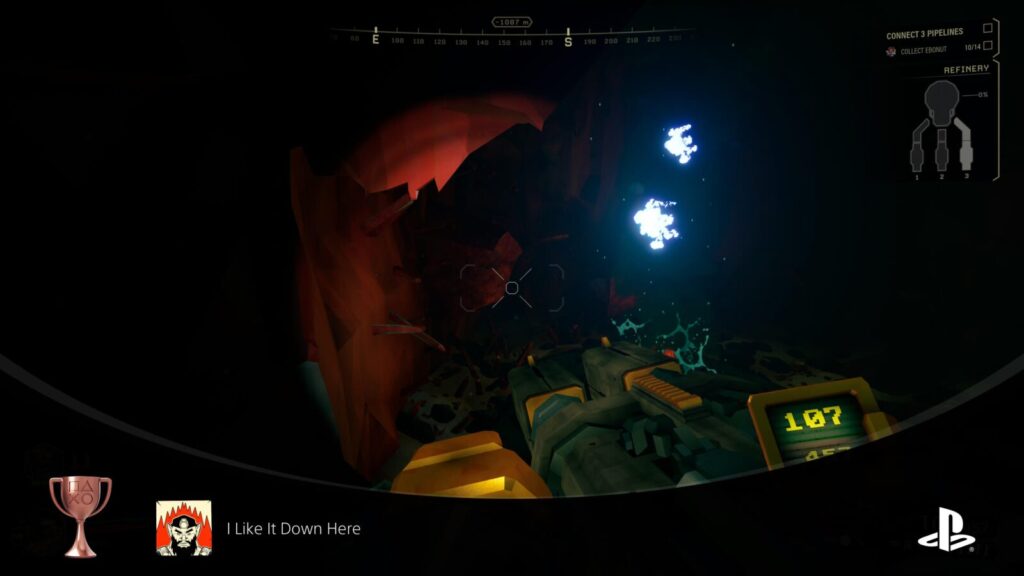
We found this easier to achieve on an On-Site Refinery mission. Firstly, because the caves on refinery Missions are pretty small and completely enclosed.
This means that once you’ve cleared out the initial enemy spawns, you will only get a new wave of enemies once every 5-10 minutes, which is fairly easy to manage.
Secondly, we chose the Refinery game mode because of the pipe-building mechanic. You can grind on a pipe that you’ve built and we entertained ourselves by building a really long pipe that we could enjoy as a bit of a rollercoaster ride. Just something to pass the time.

You scored 1000 weakspot hits. Impressive.
This is very likely to occur naturally, especially while you’re using the Gunner due to his Gatling Gun. Basically, to unlock the “Hit ’em Where It Hurts” trophy, you just need to hit 1,000 weakspots.
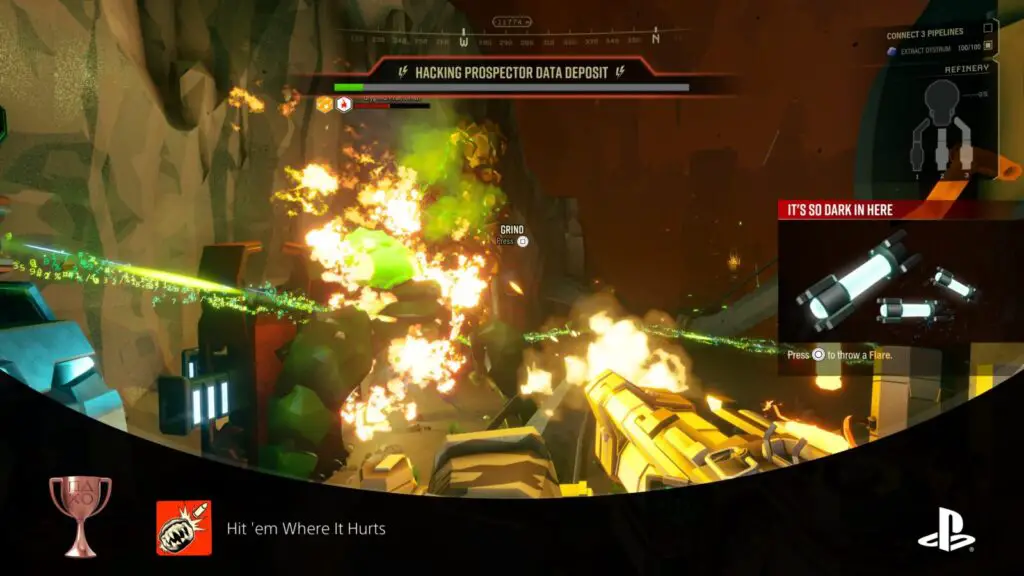
For the basic Glyphid Grunt enemies, this just means shooting them in the mouth. Larger forms of these arachnid creature, such as the Glyphid Praetorian, have their weak spots on their “butts.”
Usually, these weak spots glow, making them obvious where you need to hit. But, again, you’ll more than likely earn this trophy naturally without even thinking about it.
Note that it is difficult to earn this trophy using the Driller because he uses a flamethrower which doesn’t really deal direct specifically-placed damage, but if you’re going for the Platinum you will use other classes anyway.

Ride the Silicate Harvester with three other dwarves and kill five enemies each without leaving.
Online Co-op
The Car Pool trophy relates to the same Silicate Harvester creature required for the Farmer trophy. That being said, this trophy is quite a lot more difficult if you don’t have three friends to play with.
To unlock Car Pool, you and three other Dwarves (4 total, to be clear) must all squeeze precariously onto a Silicate Harvester’s back and then kill five enemies each without any of your jumping or falling off the Harvester.
Pretty tricky, but if you have a full team of friends all communicating over Voice Chat then you should have no problem convincing them to sit on a HArvester’s back with you and wait for a swarm to appear. If you’re lucky, you’ll find one on a Mission with the “Swarmageddon” Warning tag, which causes an infestation of small, easy-to-kill Glyphid Swarmers.
Now, if you don’t have a team of friends to do this with, you’re going to have a much harder time.
Sure, you can just play in public servers to always have a full team of Dwarves, but when you see a Silicate Harvester you’re going to need to convince your whole team to jump on its back and also to just wait there for some enemies to appear.
It’s going to be difficult, even if you use the built-in voice chat and are fortunate enough that the whole team of strangers speak the same language and even have voice chat unmuted.
I can’t even get a team of strangers to stop wasting Nitra on Resupply pods we don’t need, so I can’t imagine getting them to co-ordinate enough to unlock this trophy.
You could try online communities like r/trophies or PSNProfiles, but don’t spam them and try to be a good sport or you’ll just end up banned or disliked.
Miscellaneous Space Rig Trophies

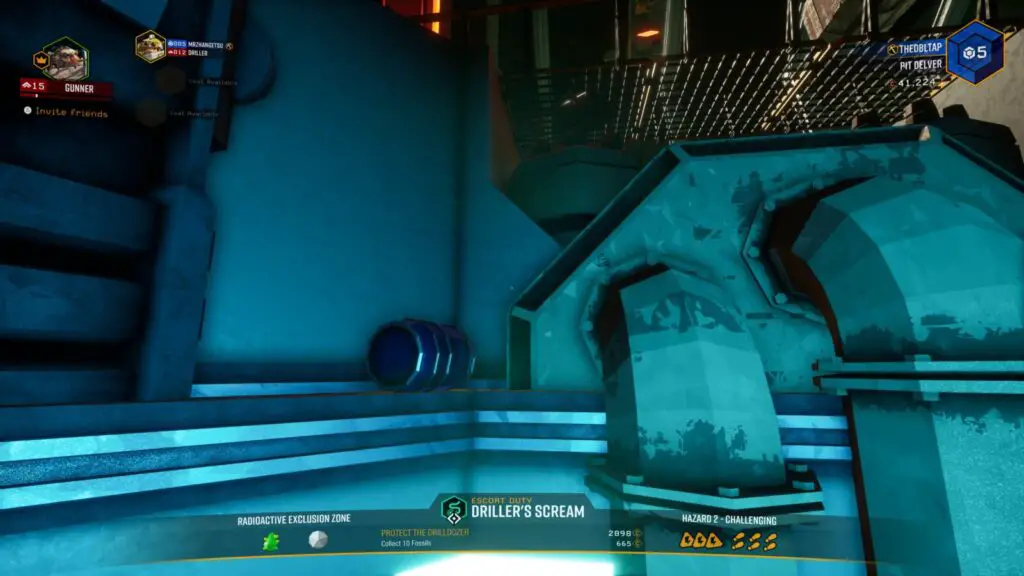
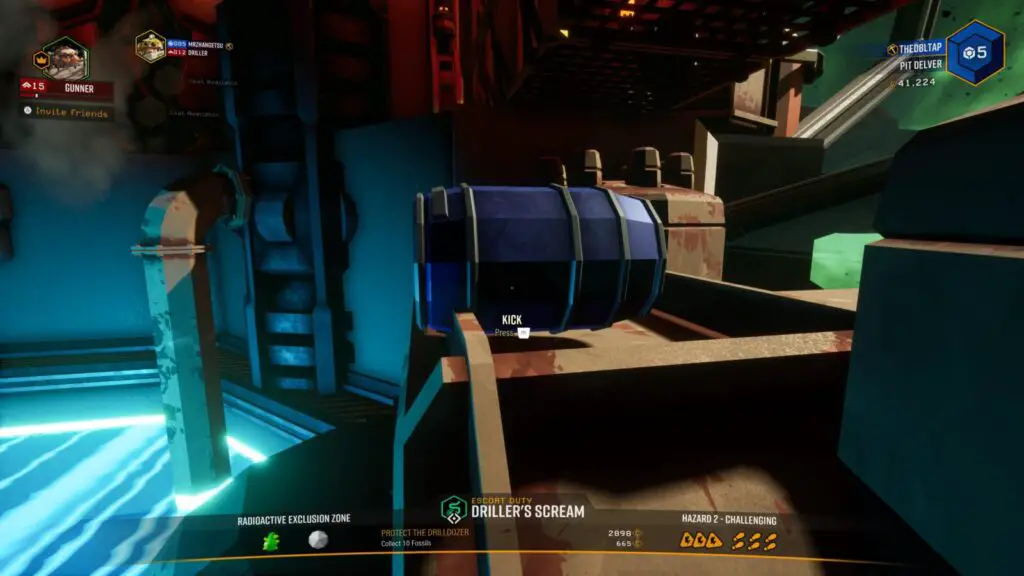
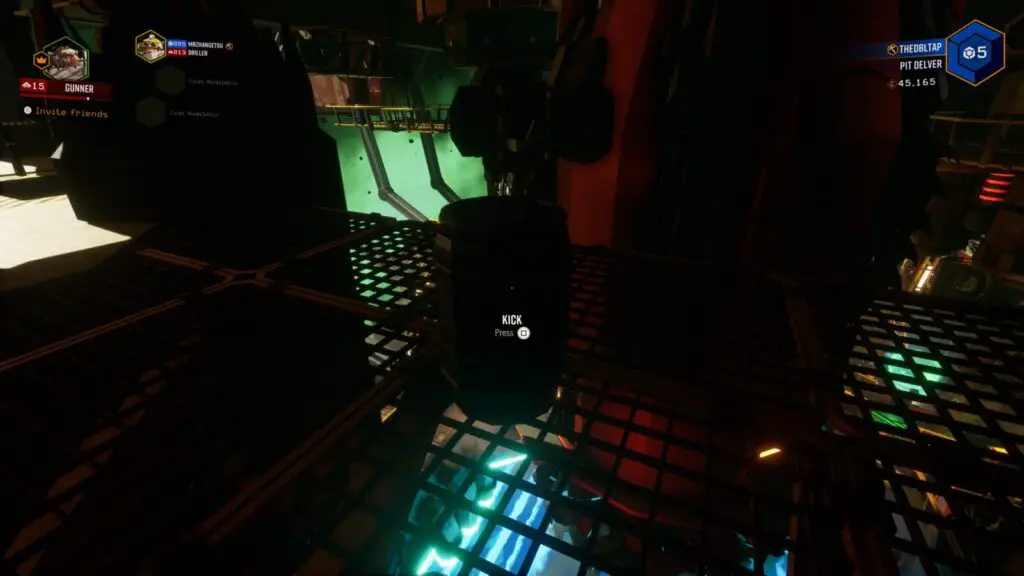
Ride a barrel in the spacerig for three seconds.
The Barrel Rider trophy is quite difficult, as the barrels in the Space Rig actively try to push you off.
You basically need to kick a barrel onto its side, and then stay on it for three full seconds.
Your best bet for pulling this off, other than getting very lucky like we did in the video above, is to push all of the barrels on the Space Rig into one big pile, then jump in the middle of the pile. The awkward physics will bounce you and the barrels around like crazy but, hopefully, the trophy will unlock.
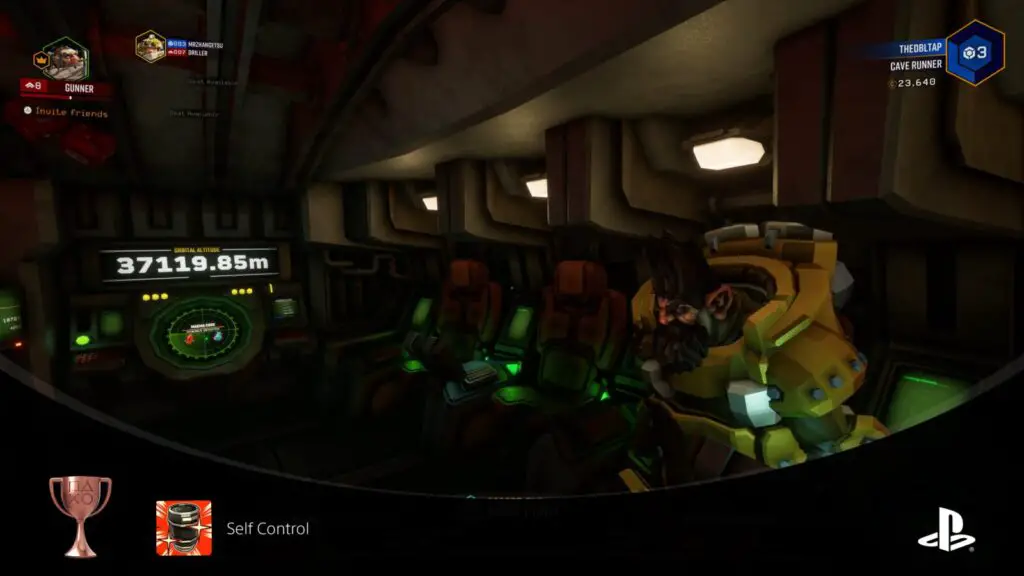
Through skillfull maneuvering, you put a barrel in every seat in the Drop Pod. Well done?
The A-Team trophy will very likely occur naturally while you are unlocking Time Well Spent , provided at least one barrel goes into each of the Drop Pod’s seats.
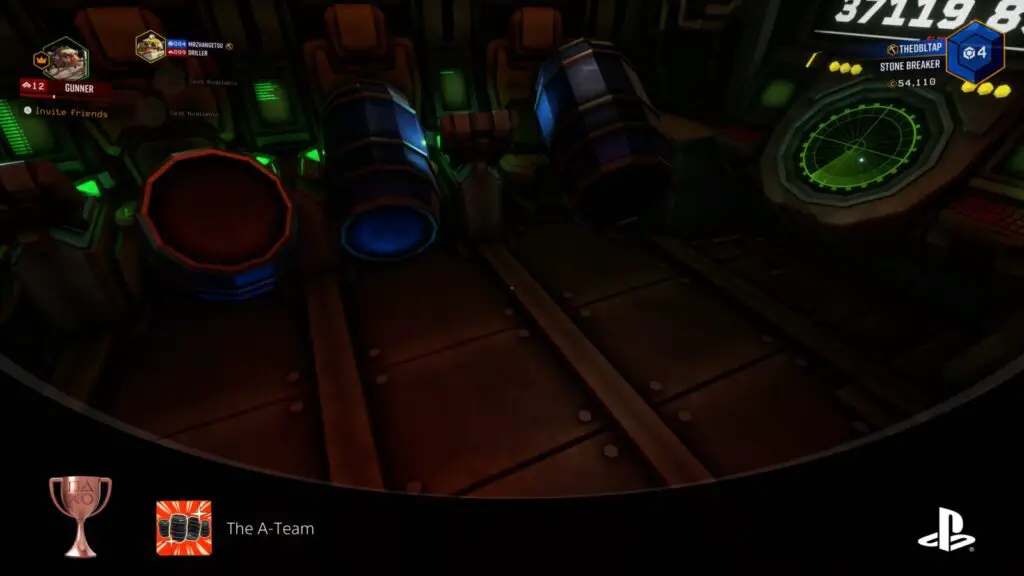
See Time Well Spent for a guide to all barrel locations, as well as tips on getting them into the Drop Pod.

Time Well Spent
You stuffed every single barrel on the Space Rig into the Drop Pod. Management weeps.
The Time Well Spent trophy is a frustrating and long-winded wrestling match with the game’s physics system, but there are a few tricks you can use to make things easier.

The problem is with getting them up the stairs. To do this, you will need to kick a barrel up into the air, and then juggle it by repeatedly kicking it while it’s airborne until it lands on the boarding ramp.
Your next issue is what to do if they fall into the launch bay.
There are three pipes on one side of the bay in something of a triangle formation.
You can juggle barrels up the pipes to the top.
From there, kick them over to the glass and then you can easily get them back over to the stairs leading up to the Drop Pod.
Glitch Warning : The trophy can, unfortunately, glitch and then refuse to unlock. From what we can tell, this is due to the physics going wild and forcing a barrel to despawn.
To avoid this happening, try not to enter the Drop Pod while there are barrels in there, as you will send them flying, causing a chain reaction of explosive physics calculations, resulting in one or more barrels disappearing or even clipping through the pod.
There are 25 barrels in total, bearing in mind that the Yellow Barrel near the bar is not required for this or any barrel trophy, as it will despawn if you kick it too far from its spawn.
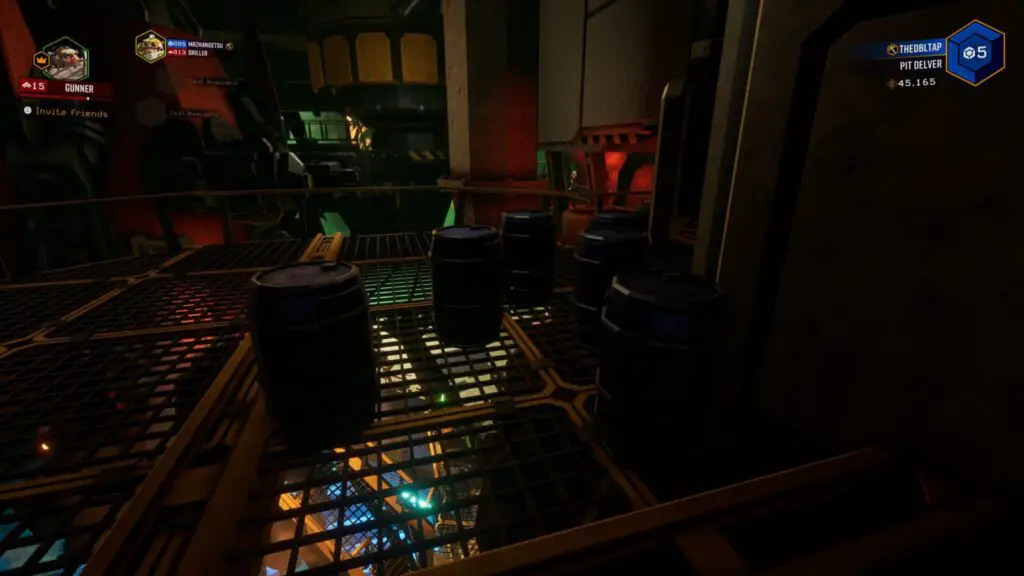
There are three floors to the space rig and two elevator platforms which will transport you between them. The barrel locations are as follows:
The first three are next to the stairs leading up to the drop pod.
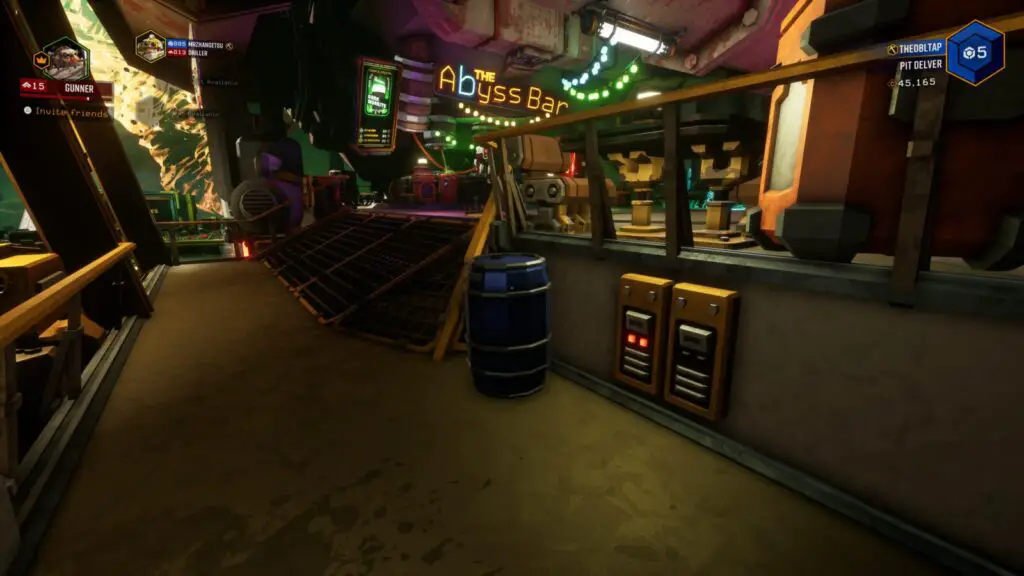
Head towards the bar and you’ll see one near the ramp leading up to the bar.
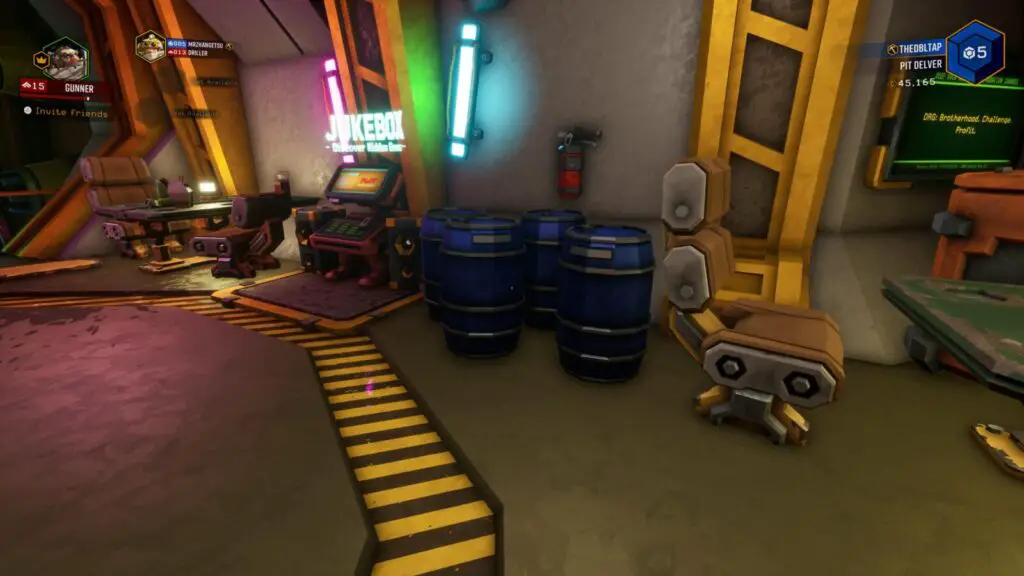
Next to the Juke Box, opposite the bar, there are four more barrels.
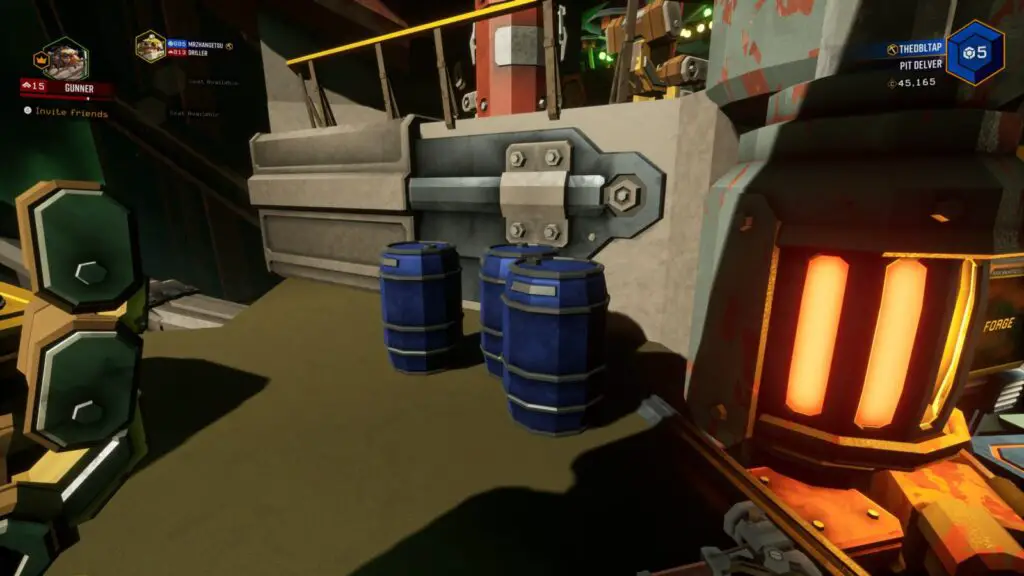
Behind the bar, between the Deep Dives console and the Forge, you’ll find three more barrels.
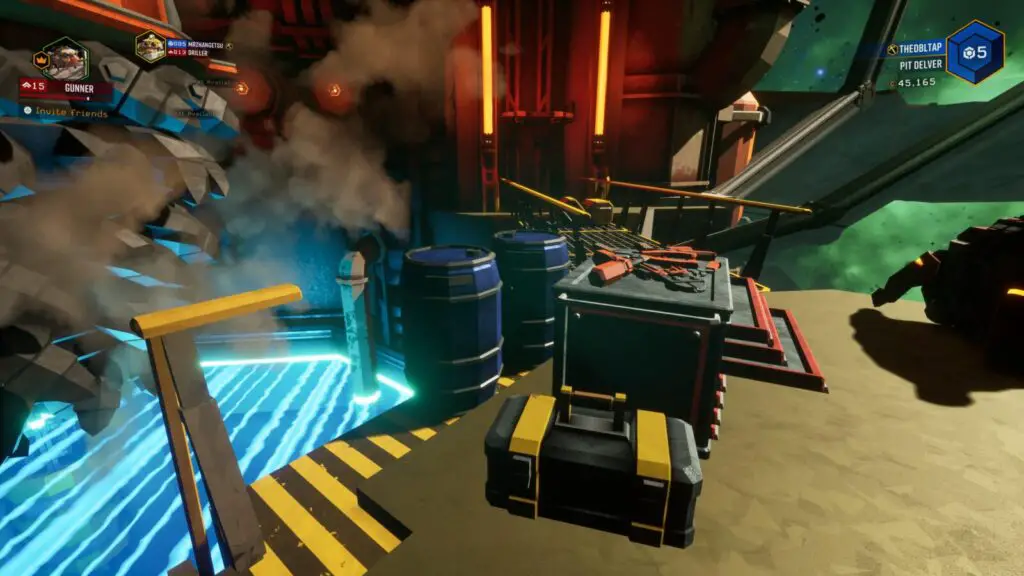
Close to the Drop Pod, next to the catwalk leading to the elevator platform, you can find two more barrels next to a toolbox. Be careful not to knock these ones into the Launch Bay.
Take the elevator up to the second floor, and you’ll see a barrel on its own up on the metal grid behind the Drop Pod.
Head through the tunnel from there, to the platform above the living quarters, and you’ll find 6 more barrels.
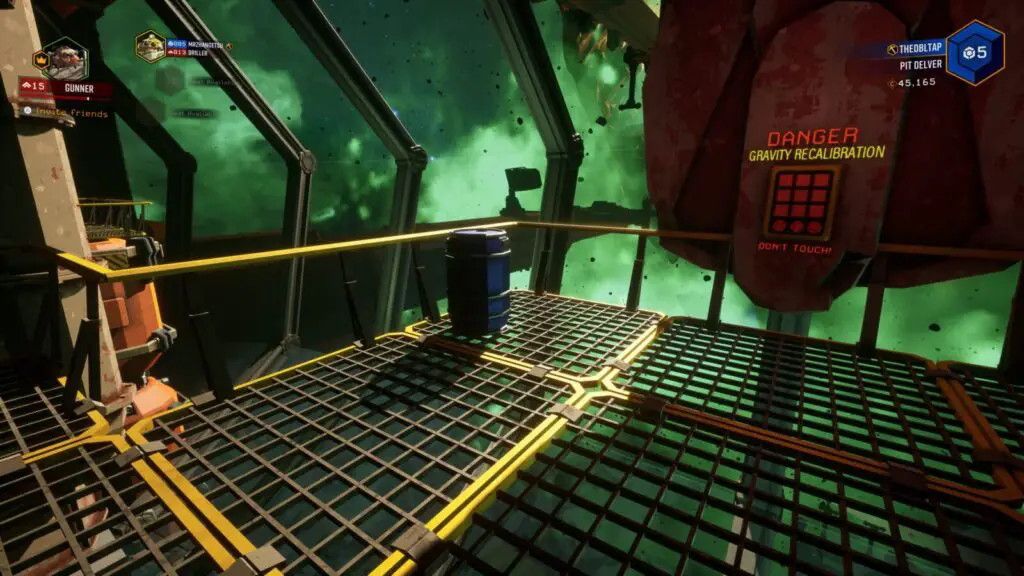
Head to the other side of this second floor, and you’ll see a gravity recalibration button with another barrel next to it.
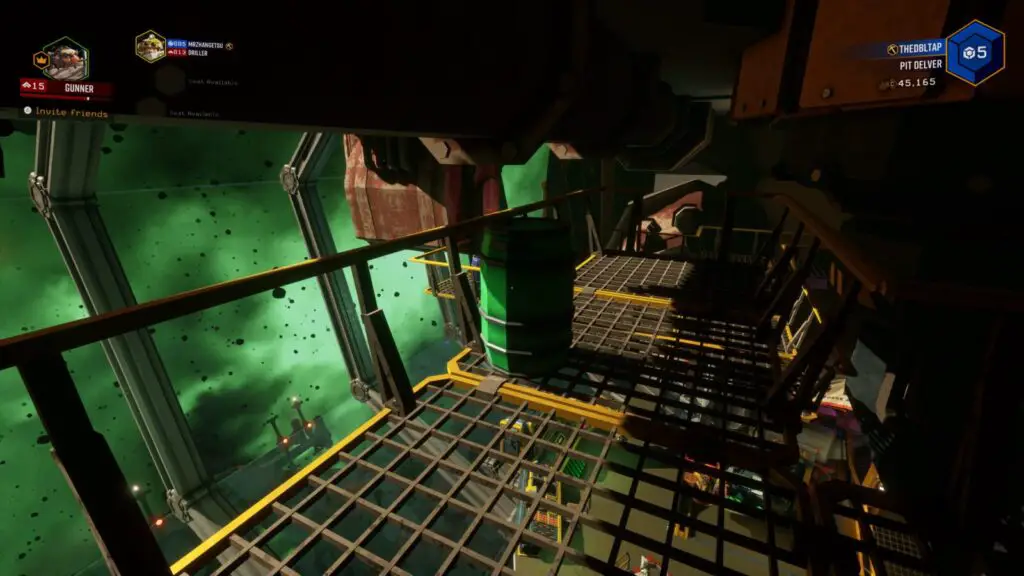
Go up the stairs to the left of this barrel to find a green barrel up on a catwalk.
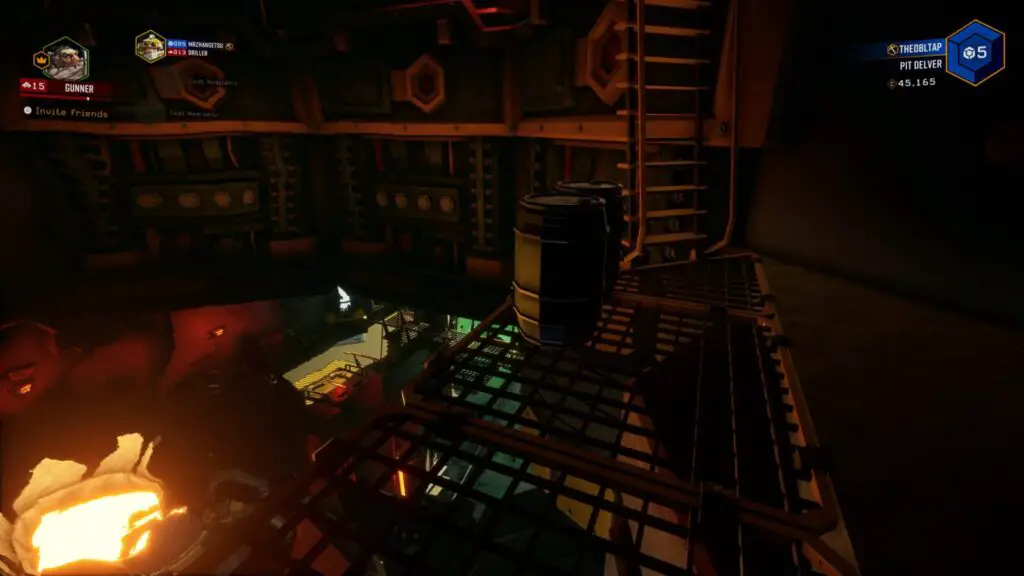
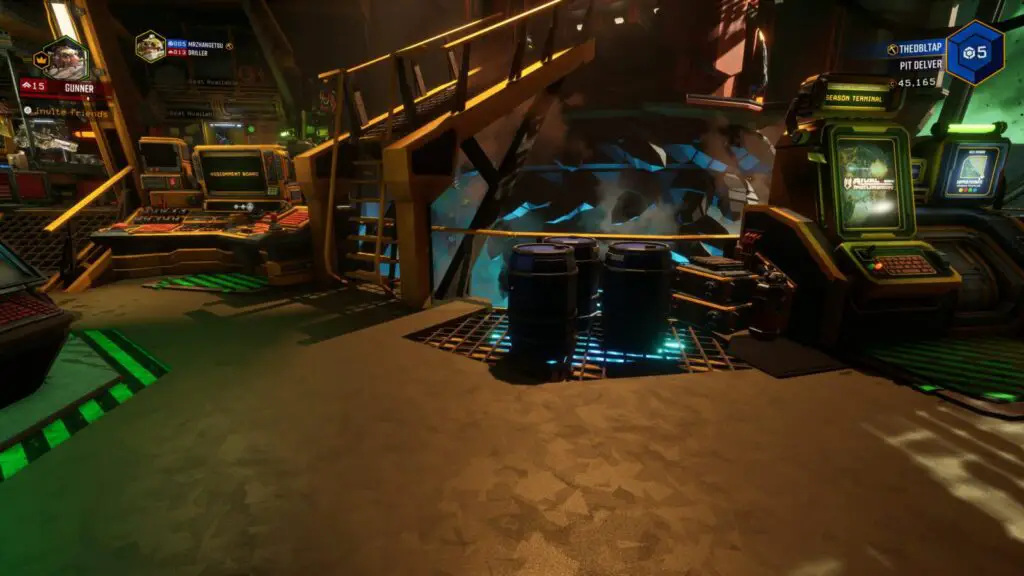
Take the next elevator up to the third floor, where Mission Control will warn you that this area is under construction. Up here, you’ll find two barrels sitting together, overlooking the drop pod’s rocket exhaust.
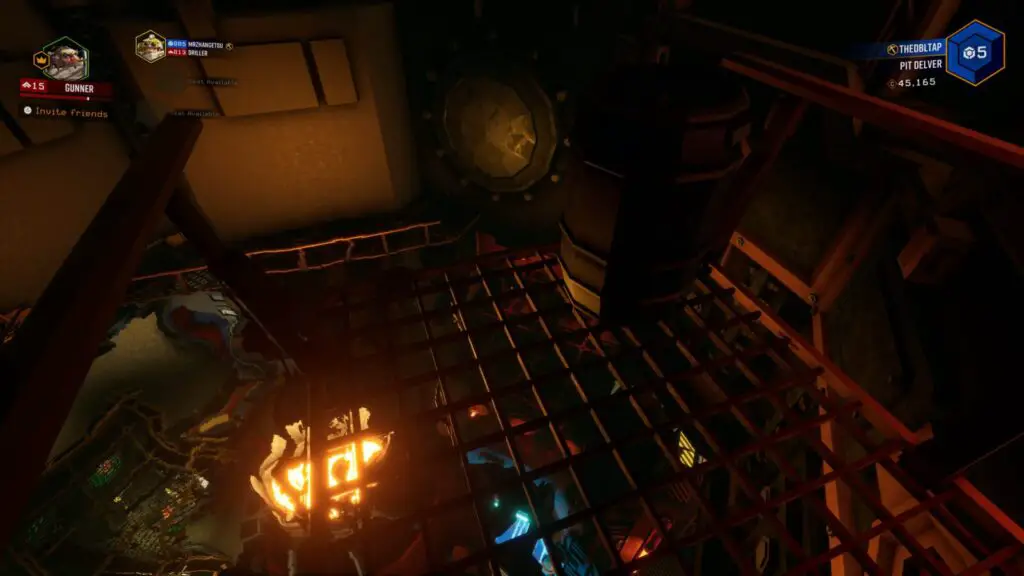
Head up the stairs next to those two and you’ll find the final barrel sitting alone at the highest point of the Space Rig.

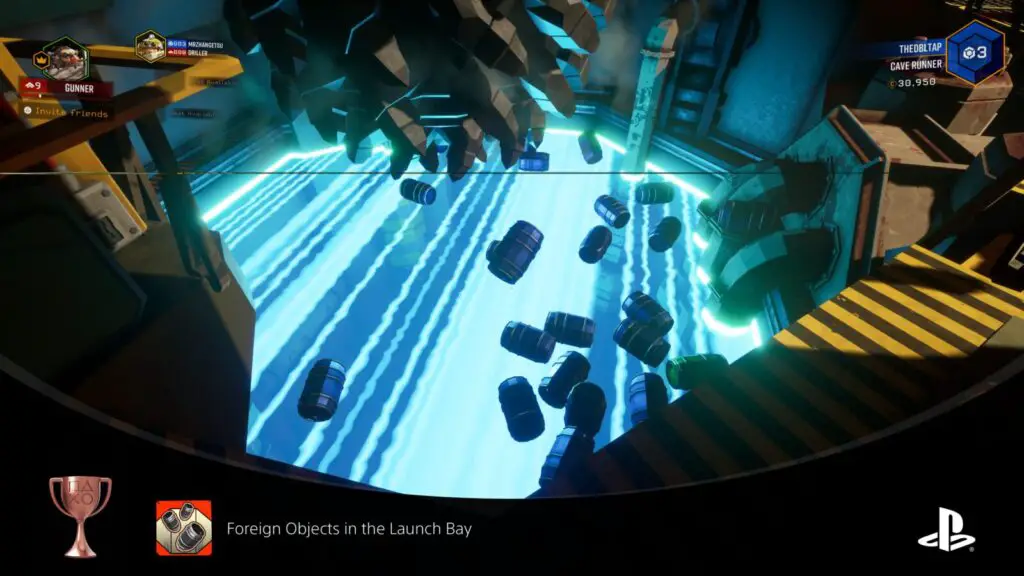
You kicked every barrel into the Launch Bay. You are why Mission Control drinks.
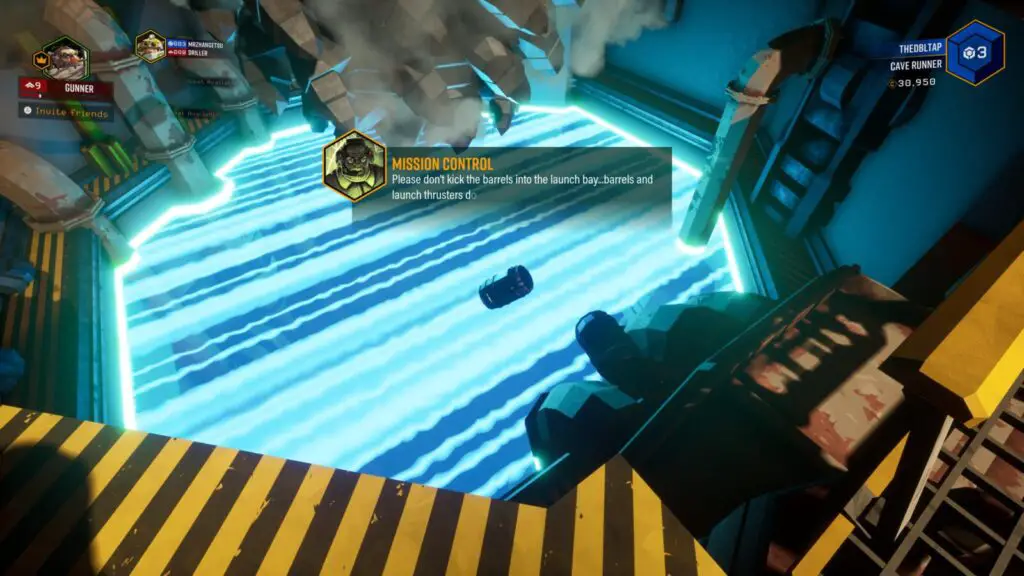
Once all 25 are in the Launch Bay, the trophy will unlock. See Time Well Spent for a guide to all Barrel Locations.
Successfully play 10 consecutive missions without kicking a single barrel on the Space Rig.
You don’t need to successfully complete those missions, you just need to play 10 missions in a row without kicking a barrel on the Space Rig in-between. The trophy unlocks when your 10th mission starts .
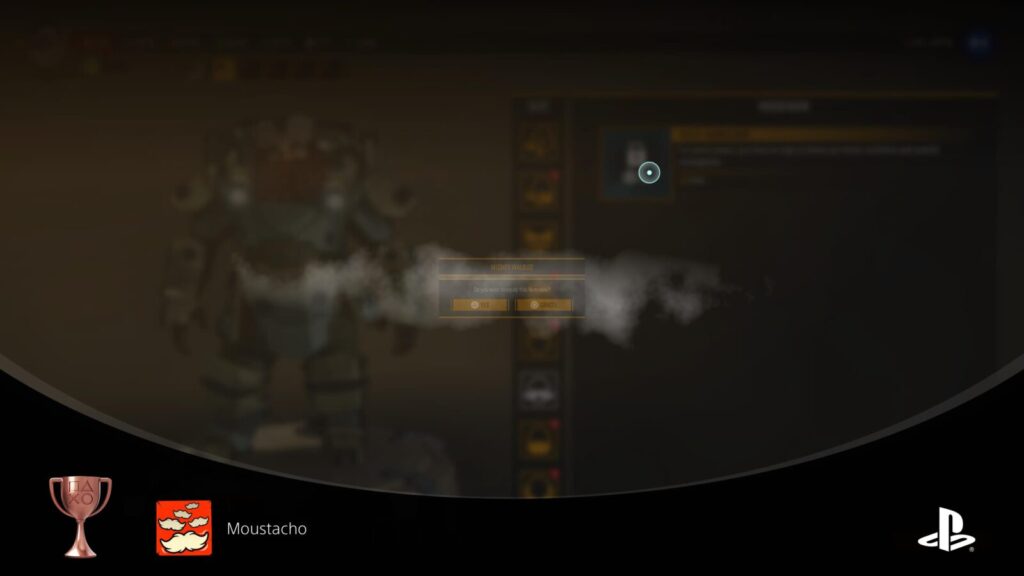
Purchase five moustaches for one character.
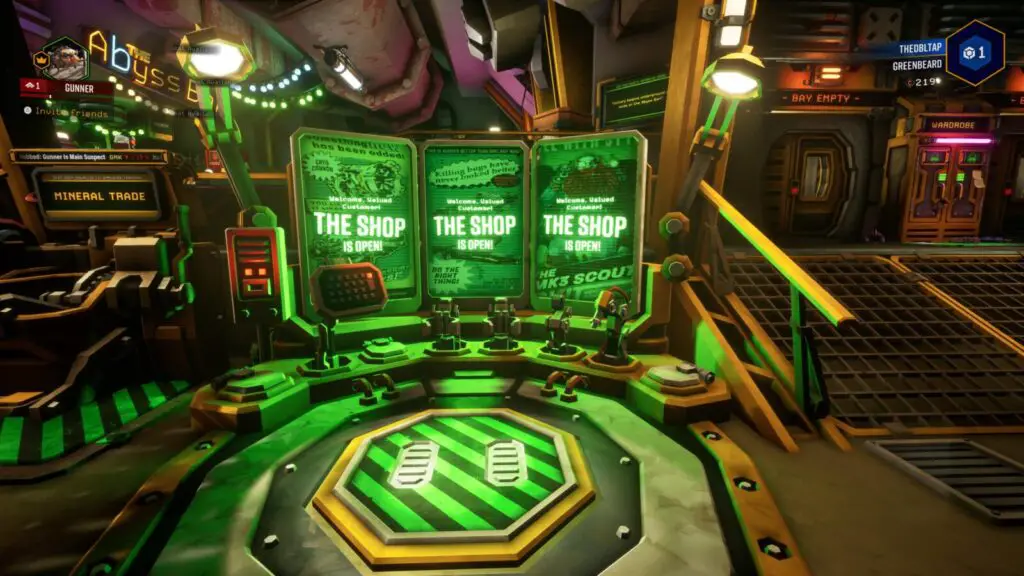
To unlock Moustacho, you will need to buy five moustaches for one Dwarf from the Shop in the Space Rub hub area.
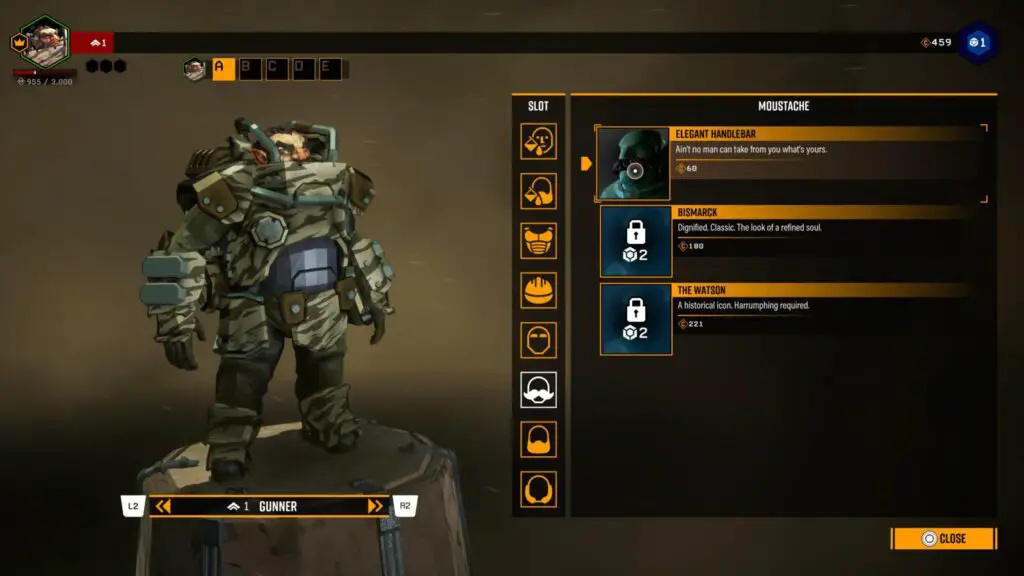
The Shop is a large green console near the Drop Pod in the Rig’s main area.
Before you can buy five moustaches, you will need to reach Player Level 4, which you can do by simply playing the game.
Once enough moustaches have been unlocked, purchase five or more for a single character and the Moustacho trophy will unlock.
Customize each accessory slot of a character.
On the Space Rig, there are a few Lockers just outside the living quarters.
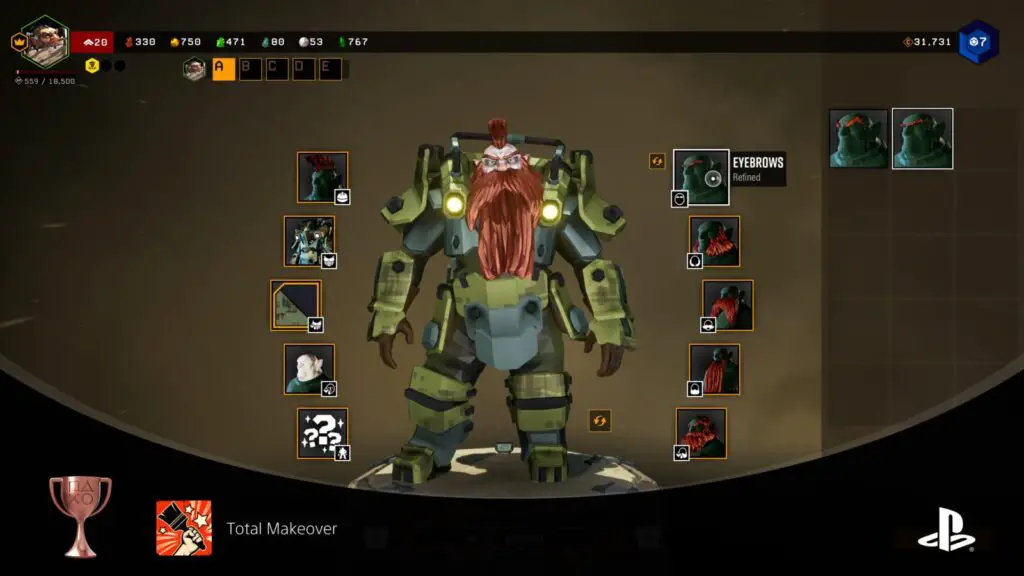
You may need to buy some more items from the shop before you have some alternative options for every slot. You will need at least one of the following:
- Victory Moves*
*You may need to specifically equip a new Victory Move and not leave the option on “Random”. It worked for me while on Random but some users have reported needing to change this.
Note that DLC Content won’t count towards this trophy. You will need to specifically equip new items you have unlocked through the Shop, Cargo Crates in Missions, or Season Pass rewards.
You can tell if an item is DLC content if it has a small “DLC” tag in the bottom-left corner of its icon.
You will need to close the Wardrobe once you are done and the trophy and then walk away, the trophy should then unlock.
Phase Three – End-Game Grind
So, I know what you’re thinking; “I’m on to Phase Three of PlatGet’s awesome Deep Rock Galactic Trophy Guide now! I’m two thirds of the way to my Platinum!”
Wrong. (About the two thirds thing. Our guide is awesome, and thank you for thinking that.)
Unfortunately, this end-game grind is probably about 4 or 5 times as much work as what you’ve done so far. Still up for it? You’re a brave Dwarf.
Here’s a brief rundown of what you’ll need to do here:
- 50 as Party Leader
- 25 with players 10 Player Levels below you
- The rest however you like.
- Promote all Four Dwarves 7 times each (~560 Hours)
You know what they say; You either Rock and Stone, or you ain’t coming home.
But in this case, it’s more like you’ll never leave your home if you want this Platinum. At least not for the next 2 and a half months.
Mission Completion Trophies

Complete 100 missions.
The requirement for the Expert Miner trophy is just to complete 100 Missions. This might not sound like a lot, but each mission can take around 20-30 minutes. So you’re looking at doing up to 50 hours for this trophy alone!
And that’s not the worst of it… Check out Legendary Miner .

Complete 500 missions.
To unlock Legendary Miner, you will need to complete a whopping 500 Missions. At 20-30 minutes per mission, you’re going to need to put in around 170 hours just to get this one trophy.
You could earn Platinum Trophies in around 8 reasonably-sized games in that time!
Sure, you can definitely speed this process up a bit by only playing on the lowest Hazard Level and ignoring secondary objectives but… You’re going to need as much EXP as you can get. This trophy isn’t even the longest grind in the game. Take a look at Legendary Team .
Here’s a breakdown of how these 500 missions should be played, to streamline the whole process:
- You will need to host friends for 50 of these Missions to unlock It’s My Party .
- You should play with someone 10 Player Levels lower than you for 25 Missions to unlock Good Shepherd .
- You should complete 100 of these Missions solo to unlock Bosco, You’re The Best .
- The remaining 350-375 can be completed however you wish, but try to maximise your EXP gain in each one for Legendary Team .

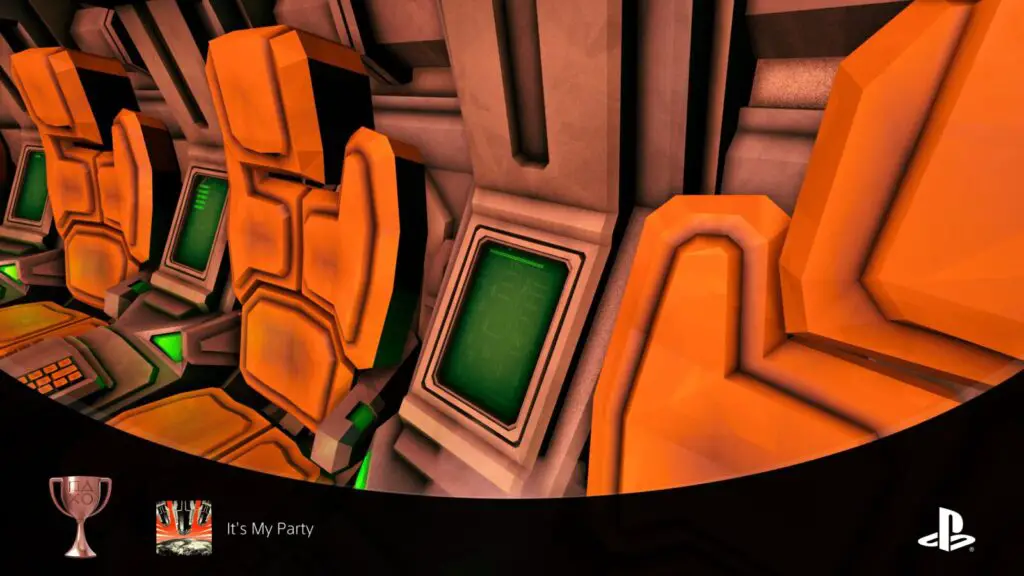
You’ve hosted and successfully completed 50 team missions from start to finish.
To unlock the It’s My Party trophy, you will need to be the Host of 50 Missions, and you will need to successfully complete those missions.
That means you cannot start missions and purposefully fail them to speed up the trophy, you have to complete them from start to finish.
Due to the “from start to finish” specification, it seems you must have teammates with you when the mission starts. Starting a game Solo but keeping the lobby public so that people can join you won’t work.
Another way to do it is to select a mission from the map, choose “Public”, and then wait in the Space Rig until you have at least one Dwarf join your team. Once that happens, you can start the mission.
When you are the Host, you will have a small gold crown icon next to your name.
Complete a grand total of 50 Missions that you’ve hosted and the trophy will unlock.
Successfully complete 25 missions where at least 1 player is 10 player ranks lower than you.
The Good Shepherd trophy pertains to your Player Level. The Player Level is the blue gem-shaped level in the top-right of your screen when you are on the Space Rig.
If you play with strangers frequently in public lobbies, then you’re likely to frequently run into players with 10 fewer Player Levels than you. That being said, it will be impossible to progress this trophy until you are at least Player Level 11, which would mean you’d need to play with players at Player Level 1.
To be honest, if you’re really going to go for it and get the Platinum for DRG, you will need to put in a crazy number of hours and will surely have hundreds of player levels on the average player, so the trophy will no doubt occur naturally.
Alternatively, you could play until you’re around Player Level 20 and then convince a friend to get the game. Then you can just carry them through everything while they’re at Player Level 1-5.
For a Mission to count towards this trophy, you need to fully complete it. Failing the Mission, getting disconnected, or just leaving the game will obviously not count.
You need to successfully complete 25 Missions with at least one Dwarf in your party who is 10 Player Levels lower than you, at which point the trophy will unlock.

You’ve completed 10 Solo missions. Impressive.
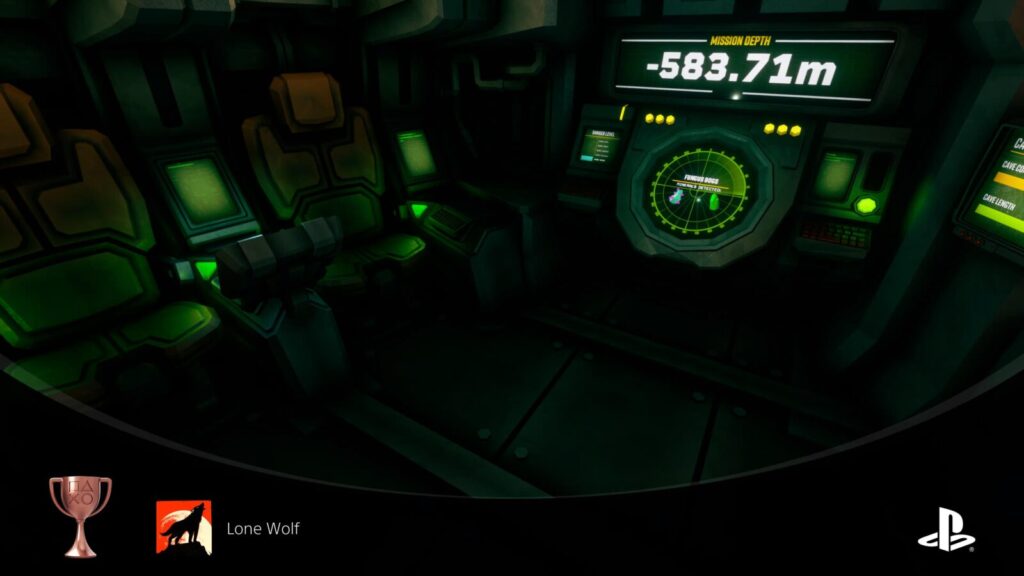
To play alone–just you and Bosco–you need to select “Solo” when choosing a mission from the Map.
The Lone Wolf trophy will unlock when you’ve completed 10 Solo Missions in total.
You’ve completed 100 Solo missions. Most impressive.
Bosco, You’re The Best is an extension of the Lone Wolf Trophy in that you also need to complete Solo Missions, without friends there to back you up.
However, for this trophy, you will need to complete 100.
Promotion Trophies

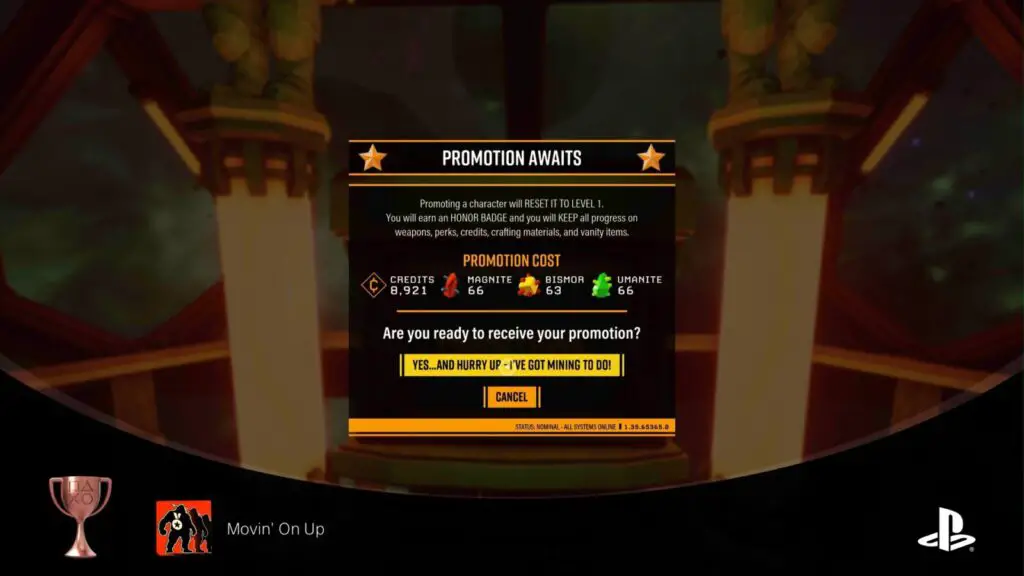
Promote any Dwarf at least once.
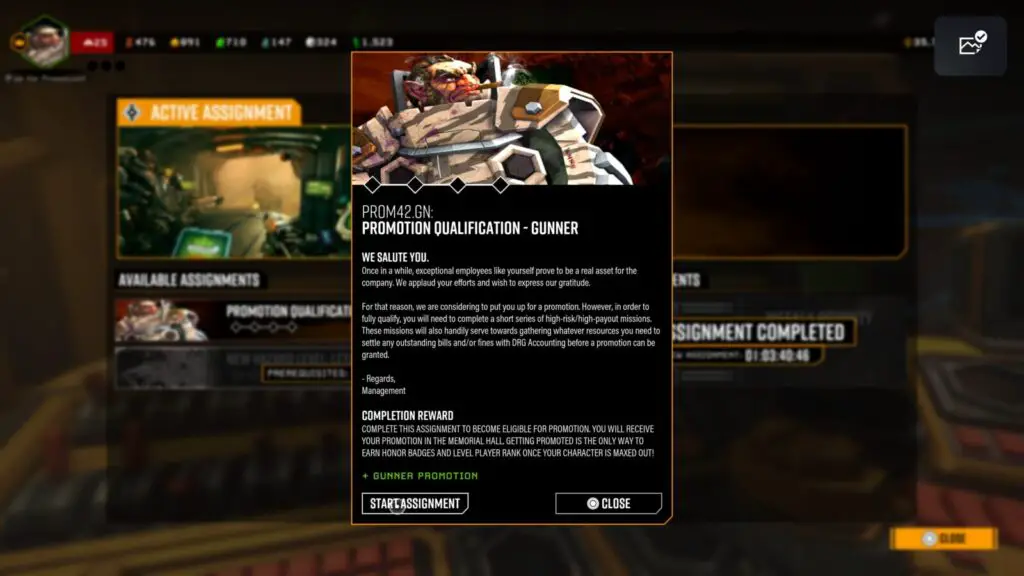
To promote a Dwarf, you will need to complete their “Promotion Qualification” assignment, available from the assignment board next to the Drop Pod.
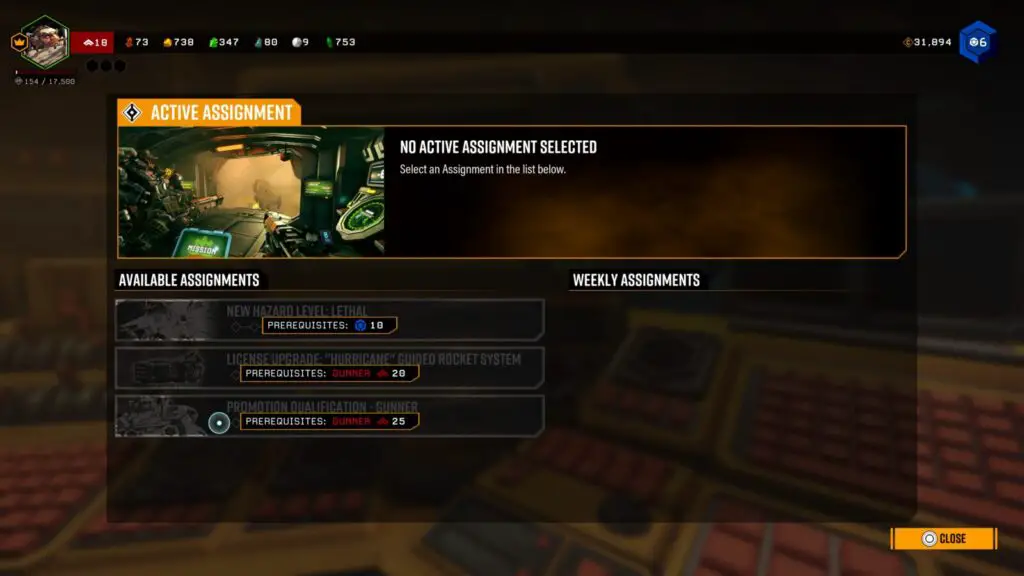
These assignments won’t show up until you reach Level 18 with a Dwarf, and they can’t be started until you reach Level 25.
Completing all of the Missions in the Assignment will allow you to Promote your Level 25 Dwarf.
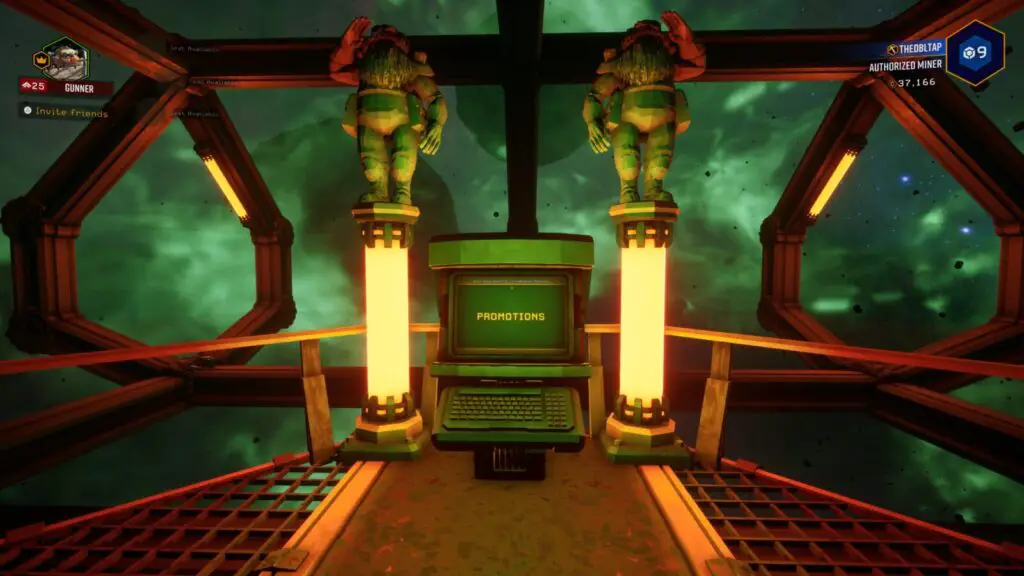
Once Promotion is available, take the Elevator next to the Upgrades Console up to the Memorial Hall.
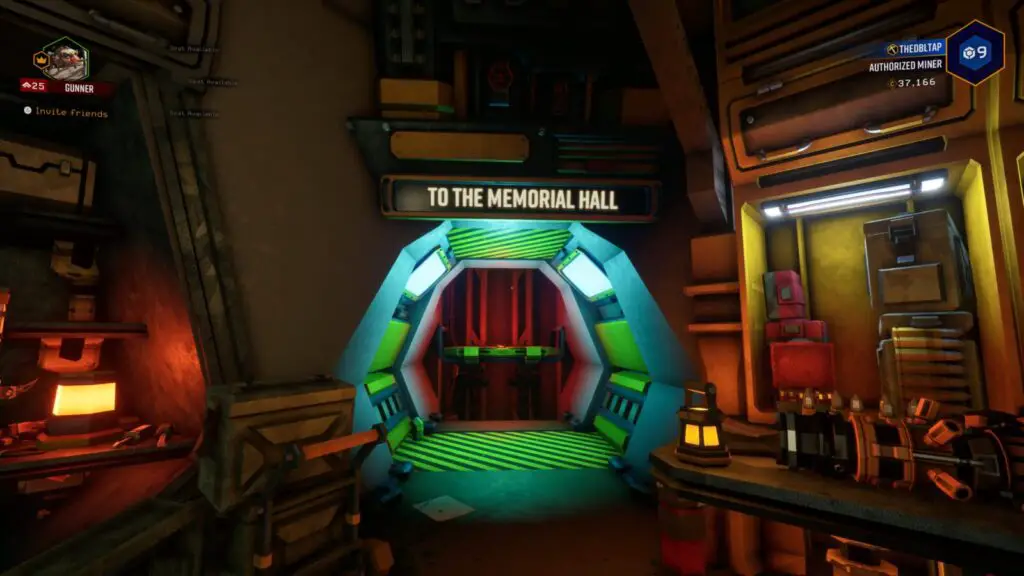
At the back of the hall, there’s a “Promotions” Console, which is where you can purchase your Promotion.
When you promote a Dwarf, it will be reset to Level 1, and will need to be leveled to 25 again in order to be promoted a second time. However, you will keep all of your perks, upgrades, weapons and cosmetic items.
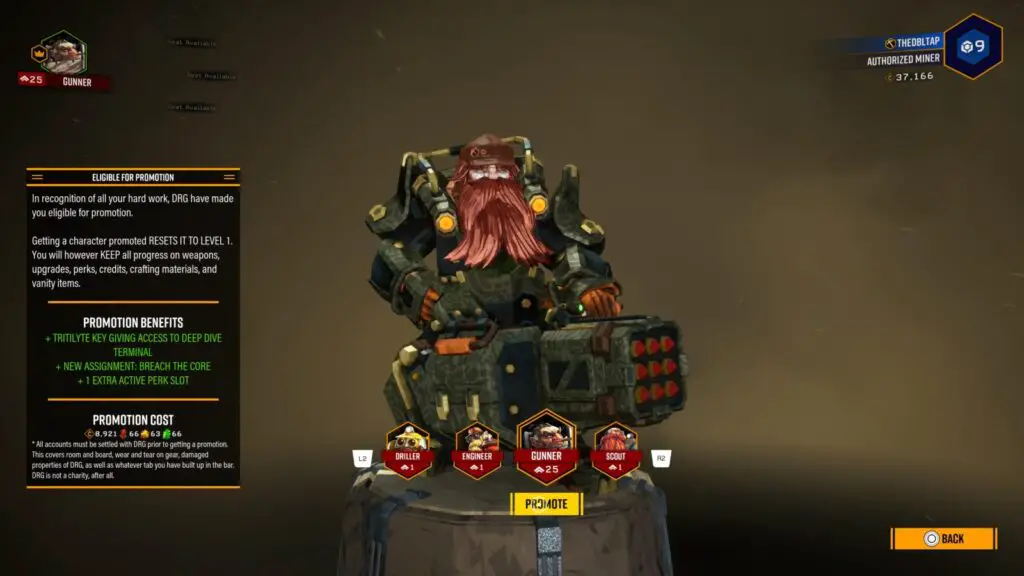
In other words, you don’t lose any progress. You will also get a Tritilyte Key, gain access to all new assignments, gain to access to Deep Dive Missions (for all Dwarves), be able to use the Forge (with all Dwarves), and get an extra Active Perk slot! Nothing but great things!
Do this for the first time with any of the four Dwarf classes and the Movin’ On Up trophy will unlock.
Promote any two Dwarves at least once.
To unlock Corporate Climber, you must Promote two Dwarves for the first time, as per Movin’ On Up .

Promote any three Dwarves at least once.
To unlock Hat Trick, you must Promote three Dwarves for the first time, as per Movin’ On Up .

Promote all four Dwarves at least once.
To unlock Full Team Ahead, you must Promote four Dwarves for the first time, as per Movin’ On Up .

Earn a Silver promotion.
To unlock Silver-Tier Employee, you will need to Promote any Dwarf to Silver Tier for the first time.
Silver I Tier becomes available once you’ve leveled a Dwarf up to Level 25 four times, and Promoted them through Bronze I, Bronze II, and Bronze III tiers. See Legendary Team for more information on Promotions.

Earn a Gold promotion.
Gold-Tier Employee will unlock once you have promoted any Dwarf to Gold Tier for the first time.
Gold I Tier is available for Dwarves who have been leveled up to Level 25 seven times, and promoted through Bronze I, Bronze II, Bronze III, Silver I, Silver II, and Silver III tiers. See Legendary Team for more information on Promotions.

Earn Silver Promotions for all four dwarves.
Unlocking the Pro Team trophy requires you to promote all four Dwarves to Silver Tier as per Silver-Tier Employee .

Earn Gold Promotions for all four dwarves.
Unlocking Legendary Team requires you to promote all four Dwarves to Gold Tier, as per Gold-Tier Employee .
The issue with this is that you’re going to need to earn 2,205,000 exp for each Dwarf, in order to reach level 25 seven times and promote them to Gold Tier I.
Though the process will get faster each time thanks to all the new features you’ll get access to, Promoting a Dwarf takes at least 20 hours of gameplay. Twenty Hours .
That’s about 560 hours of gameplay to unlock this one trophy!
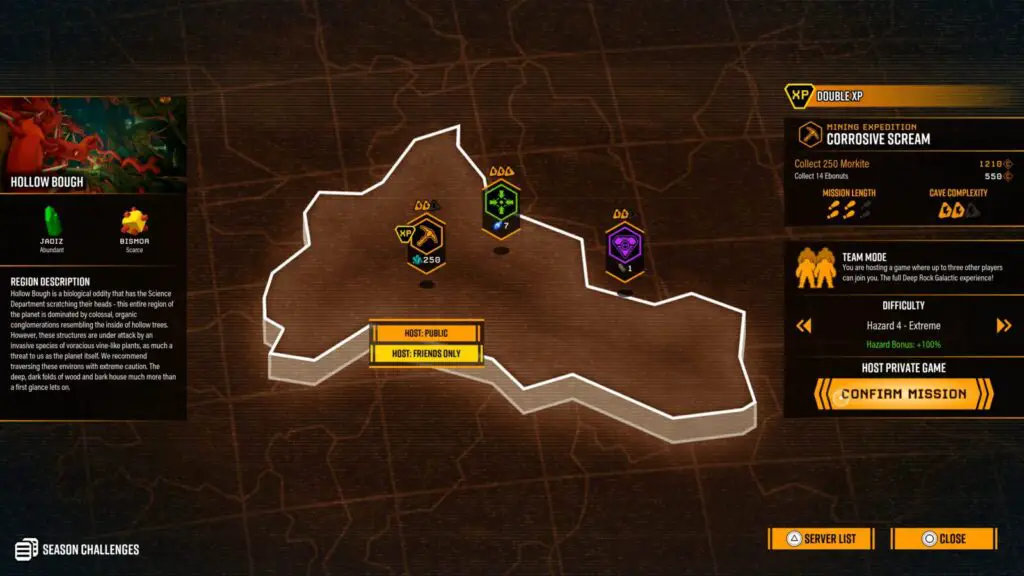
You will need to get the most experience out of every mission that you can. Complete Missions with warnings, high length & complexity stats, and double XP boosts where possible.
You’ll also want to complete all secondary objectives, and bring back plenty of extra resources, like Nitra and Gold, which will provide extra exp.
Here’s a table detailing the base EXP you will get for completing the primary objective in each Mission Type, not including Secondary Objective EXP:
Additionally, you will get bonus EXP based on the Hazard Level, Cave Complexity, Cave Length, and Warnings on the Mission you choose. By combining multiple bonuses, you can get a maximum of 233% more EXP:
Lastly, to help you determine the most valuable resources to bring back, here’s a table detailing the EXP gain for each resource:
Best of luck with this ridiculous grind. ROCK AND STONE!

Collect all other Deep Rock Galactic trophies
Once you have acquired every other trophy in this Deep Rock Galactic Trophy Guide, the Platinum Trophy will unlock.
Thank you for choosing PlatGet as your source for a Deep Rock Galactic Trophy Guide. Consider checking out our other guides !
Follow us on Twitter @GetPlat or Instagram @platget for updates on new reviews and guides, as well as small anecdotes about our platinum journeys.
We've Partnered with NordVPN
Related Trophy Guides

Jurassic World Evolution 2 Trophy Guide

Overcooked! All You Can Eat Trophy Guide
Trailmakers Trophy Guide
Operation Tango Trophy Guide

It Takes Two Trophy Guide
Moving Out: Movers in Paradise Trophy Guide
- Level up. Earn rewards.
- Rank: Nooblet
- Sign in to level up now.
GAMERS DECIDE
Search form.

Deep Rock Galactic Ultimate Guide for Beginners

Welcome to Deep Rock Galactic, miners! The business wants to make sure that your work is completed as securely and profitably as possible. You've come here to figure out what to expect from Hoxxes II and what you can do to avoid becoming Glyphid food.
We'll be adding to these courses so you can thrive and survive on the perilous and carnivorous planet known as Hoxxes II. Deep Rock Galactic explains itself rather well already, so we’ll tackle the most complicated parts of the game.
Without further ado, here is our comprehensive guide to Deep Rock Galactic.

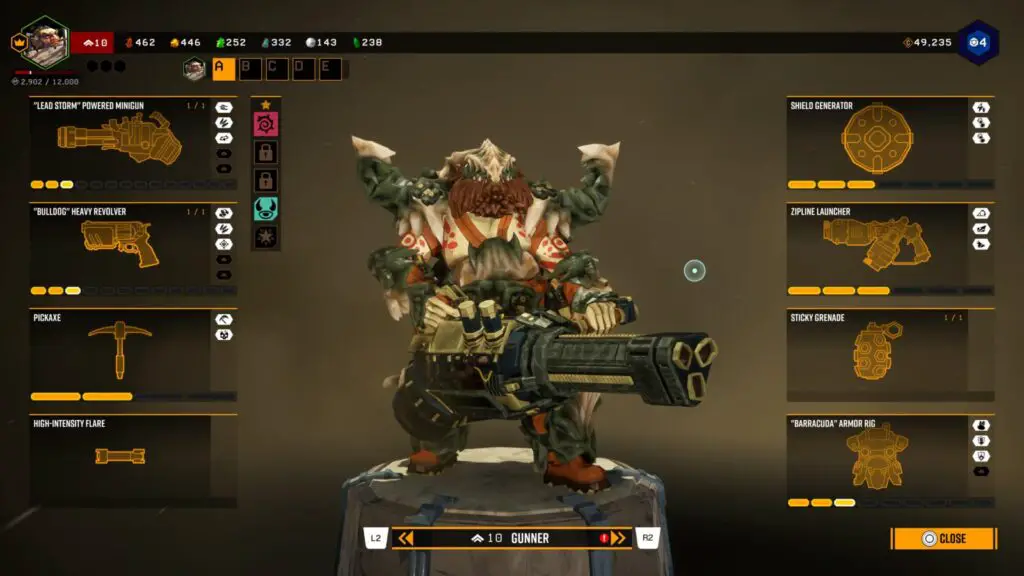
You have a choice between the four classes offered by Deep Rock Galactic: Scout, Driller, Gunner, and Engineer. They are all specialized, and each one has a special set of tools and weaponry that they use to bring you a particular playstyle. To determine which class best fits your playing style, we recommend trying each one. Jump straight to action; a good dwarf knows how to employ every weapon at their disposal!
The Gunner is all about guns, as the name suggests! By selecting him, you'll guarantee that your team has plenty of firepower to slice through the hordes and provide your team some breathing room with your Shield Generator. Additionally, you can utilize a variety of explosives in this class, and you and your team can use a zipline to cross dangerous terrain.
For this class, mobility and high ground mining are the two primary functions. Due to your grappling gun, no one else can traverse the caves as quickly or climb to the heights you can. Since his armory includes guns and grenades that can deal damage to opponents and render them helpless, the Scout is also excellent in kiting and reviving allies. The Scout also contributes with a flare gun, which you can use to illuminate the planet's dark tunnels.
You become the team's mole if you choose the driller. Drill gloves are used in this class, allowing you to easily carve through the ground, build bunkers, and access everything you want. Your guns and explosives will allow you to disperse large swarms of enemies and give your comrades room to move.
The Engineer is competent at everything. He has a wide variety of weaponry in his armory that can handle any attack, and his grenades give the squad some extra usefulness and damage. Turrets can be deployed by this class, which will reduce the number of bugs that are trying to bite you. The Engineer also comes with the Platform Gun, which can build platforms and ledges that everyone may utilize to move over the landscape.
In order to be able to handle any situation that is presented to you, it is generally advised to have members of each class in your squad. There are some tasks when duplicate classes might be helpful, but as you gain experience, you'll be able to decide when this is the case.
Before we dive into the depths of Hoxxes II, let’s talk about how to prepare for them.

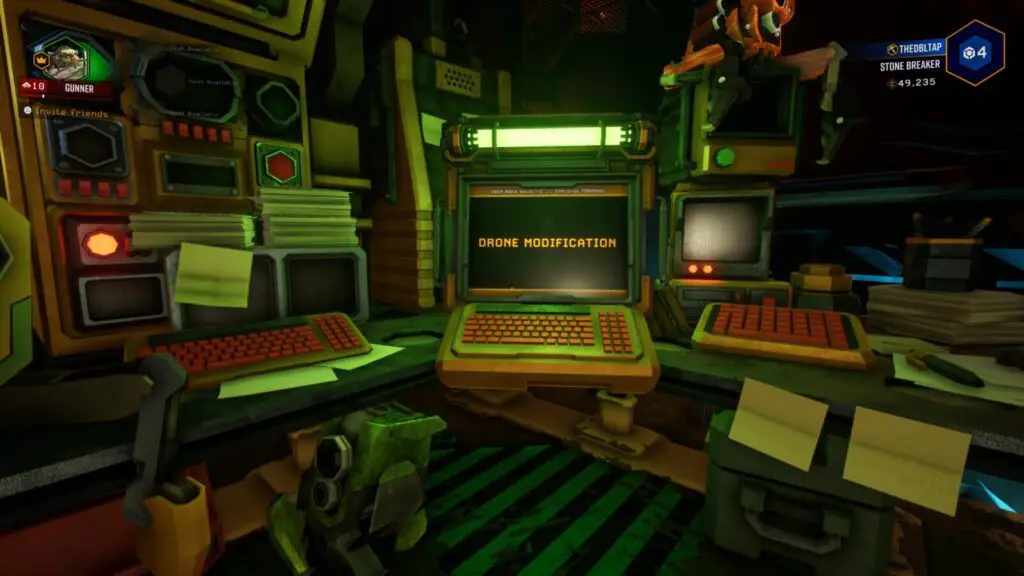
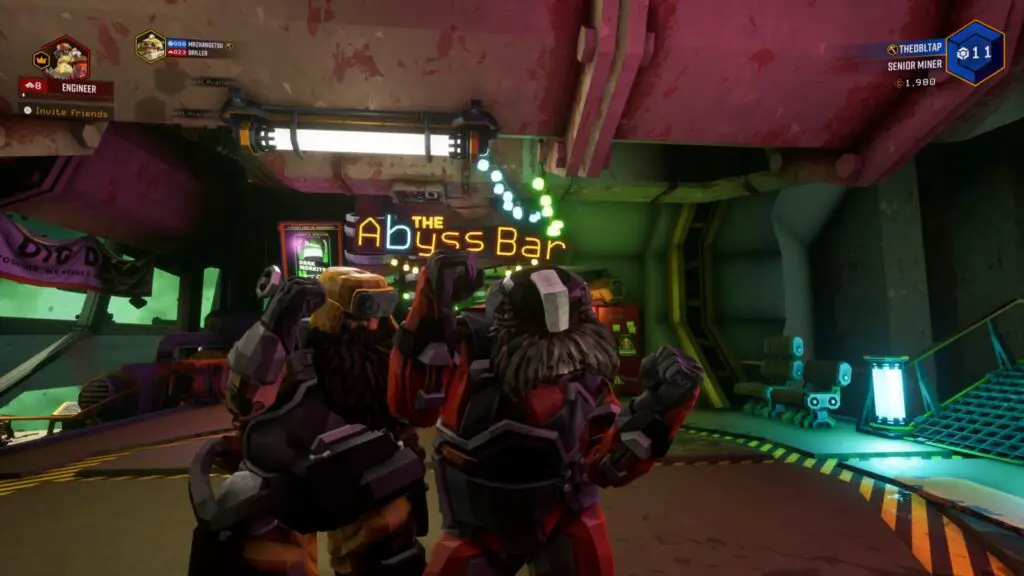
Your center of operations is The Hub, where you can alter equipment, begin your next mission, and sip on a variety of specialty beers.
After each task, you'll respawn at this location, inside one of the dorms (or inside the med bay if you fail a mission). Character Selection, Miner's Manual, and Key Performance Indicators terminals are available in the dorm. The first one is self-explanatory, and the Miner's Manual will provide you with access to all of the game's information. You can keep track of your in-game data, milestone progress, and perk upgrades using the Key Performance Indicator terminal.
Milestones/Perks

Milestones are mini achievements/challenges that award various amounts of stars that you can spend to unlock and upgrade perks for your classes, such as being able to self-revive or carrying more minerals.
- Once unlocked, perks are available for all classes.
- Each class starts out with 1 passive and 1 active perk slot.
- You can unlock 2 more passive perk slots at Tier 4 and 9 of the milestone page.
- 1 more active perk slot is unlocked upon promoting each class once.
- There are enough milestones to unlock every perk and upgrade in the game. Just prioritize whichever ones you’re most interested in using.

Your equipment determines your chances of success and survival, so you should experiment and make adjustments to it frequently. This is something you can perform using the equipment terminal.
You won't be able to change anything at first, but as you level up, you'll have rapid access to these upgrades. Here, you can also equip your bonuses. To enter the upgrade tree for a piece of equipment, click on it. The tree is equipped with a handy stat block so you can see what changes when you choose any upgrade.
Each upgrade has an unlock cost in minerals and credits, which can be acquired through missions. Although grinding for all the resources you'll require at first may seem overwhelming, soon you'll be swimming in minerals that you actively loot on trips.
Every upgrade is unlockable, but you can only equip one each row. Selecting synergistic upgrades will improve your chances of surviving. You'll eventually be able to discern what suits you the most as you gain experience in the game and create your own builds.
Additionally, you may create loadouts for various mission types, switch between unlocked weapons, and alter how your armament looks. Additionally, each weapon has a place for an overclock, a significant weapon modifier that is unlocked later in the game (we'll talk about it later).
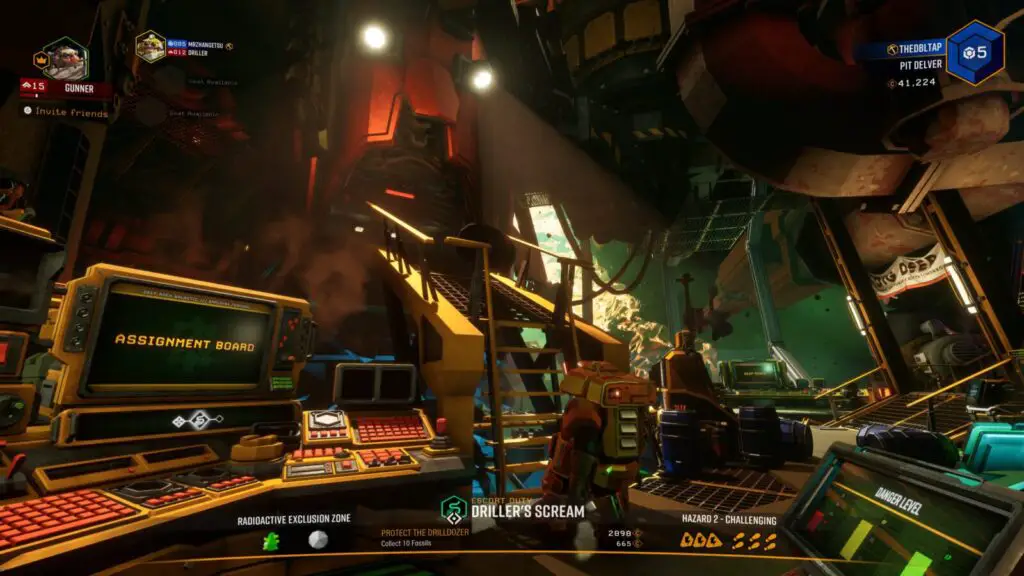
Assignment Board

You can go through a series of missions on this terminal, which is across from the mission console, to get access to additional weapons and gameplay elements. The selection map will show these tasks, and they can be accomplished at any level of difficulty (unless stated otherwise).
You won't be hindered from completing the current assignment if you fail a mission, so don't be concerned. Just start over again!
One assignment can only be enrolled in at once. You will halt progress on the current one if you begin a new one. As progress is individual, if you're playing with a team, we advise participating in the same assignment at the same time.
Take note that some assignments have a fixed expiration date. If you begin an assignment before it expires, you have until completion or cancellation (seasonal ones are the exception, they disappear regardless when the holiday ends).
Memorial Hall (Promotions)

Any class at level 25 will allow you to sign up for a promotion assignment. Any class can complete this assignment.
You can promote the dwarf after completing this task, which lowers the class level to 1. To achieve this, visit the Memorial Hall, where DRG honors the contributions made to keep the business running. You'll locate a terminal that lets you prestige the class at the far end of this area. No upgrades or other benefits are lost when you promote.
Additionally, you gain the following features upon promoting for the first time:
- 1 extra active perk slot (for that class only, you can unlock this for all classes)
- Ability to activate Trilyte Key Events during missions (more on that in the Mission section)
- Assignments to unlock Core Hunts (weekly chances at weapon/cosmetic overclocks)
- Access to Deep Dives (series of back-to-back advanced missions) and The Forge (the ability to unlock certain overclocks upon obtaining the necessary materials).

Dwarves cannot live without beer; it’s as important to them as oxygen. While the majority of the drinks are intended to help you get wasted and have a good time, you can also receive buffs for the upcoming assignment by drinking the special of the day. Before you explore the depths of the tunnels, make sure to verify these because they are random and reset after each mission. Always check since they can provide you with significant benefits even though sometimes they may not be effective for you.
The next assignment will also consider how drunk you are. When seeking a... Interesting experience, have a beer or two before launching the drop pod. You can get sober, but you're not a human; you're a dwarf.
Mineral Trade

A brief task must be completed before the mineral trade may be found next to the shop terminal. You can sell some of your extra minerals if you don't have enough credits for an upgrade, or you can buy more minerals here if you do. On this terminal, a new bargain will be posted every actual day, so be sure to look it over.

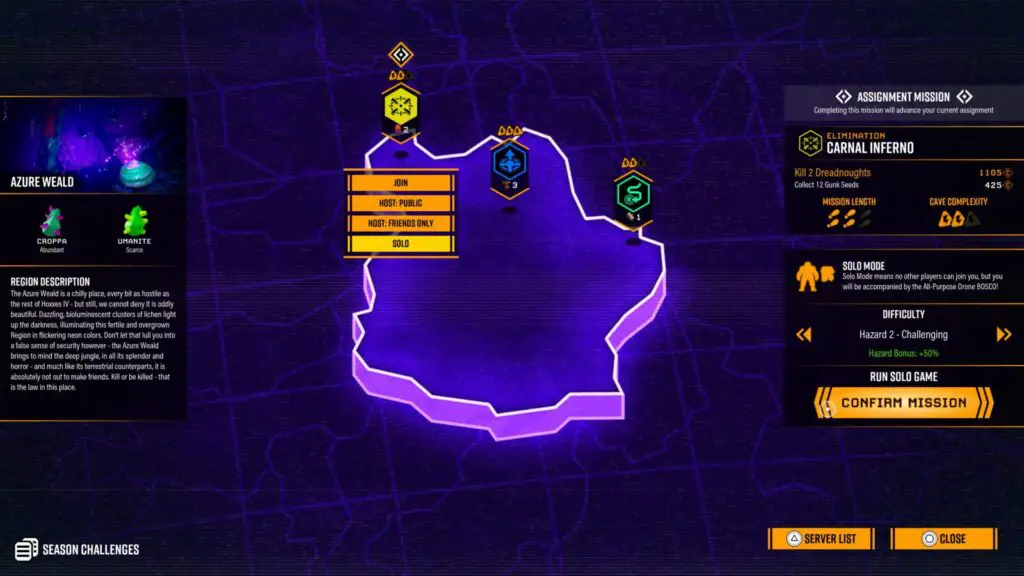
Missions are the most crucial aspect of this game. The large glowing terminal in the center of the room is the mission terminal. When you interact with it, all of the regions and mission types that are available are displayed. Each region has a unique biome and dangers/minerals that go along with it. The timer in the bottom left corner shows when the missions and regions will be randomly chosen.
- Hover over each region to examine the minerals that are offered if you're hunting for a certain mineral.
- The phase or task that is currently indicated with a white diamond indicates that you are on an assignment.
- The criteria for the main objective and how much exploration you must complete vary depending on the cave complexity modifier in each mission, which has a length range of 1 to 3. Be sure to plan beforehand!
Although the sheer number of symbols may at first seem overwhelming, they are mostly there so that seasoned players may simply glance at them and know what to anticipate. The fact that you can gauge the level of difficulty is crucial. This difficulty ranges from Hazard 1 to Hazard 5, the latter being the hardest.
The game is intended to be played in the reasonably balanced Hazard 3 environment. Lower the difficulty if you feel that it is still too much for you to manage until you are comfortable with the game. More experience and well upgraded equipment will be needed for higher levels.
Considering how important missions are in this game, pay special attention to the next sections!
Mission types

Eight distinct mission types are available (two of which are unlocked through assignments). We'll briefly discuss each, what to anticipate, and how to succeed.
But first, let's review some fundamentals that are relevant to any endeavor, regardless of the circumstance:
- Your best friend is Nitra. You can buy resupplies with the angular, vivid red mineral, which is present in every mission. Your ammo will run out during longer or harder missions, so it's critical to always have enough Nitra on hand.
- One resupply pod can be called down for 80 Nitra.
- Nitra is shared by the entire squad, so call the resupply when you need it!
- You can check the amount of Nitra accessible by using your Laser Pointer.
- Each of the four packs in resupply pods recovers 50% of your resources. When playing with a 4-man squad, resist the urge to hoard all the packs for yourself.
- On death, loot bugs will leave behind huge pieces of Nitra. We know they’re cute, but don’t think about it too much..
- By mining bright red sugar crystals or obtaining supplies from an ammunition pod, you can regenerate your health. When anticipating harm, pay attention to the location of the sugar crystals.
- There are only so many minerals you can carry at once! Frequently deposit your loot in Molly the M.U.L.E.
- Work as a team to avoid unintentionally pushing Molly back and forth for an extended period of time.
- There is typically a deposit place on the exit rocket or equipment that travels with you on missions if Molly isn't available.
- Use your standard flares frequently to illuminate the area and indicate the route you went. In the end, they regenerate!
- Mark resources and entryways frequently with your laser pointer. It's in every class!
- An average 'ping' lasts for about 20 seconds.
- With the Laser Pointer, you can see Molly and your team's silhouettes!
- It'll also highlight significant mission goals, supply pods, and other noteworthy interactables.
- No obvious way to proceed? Look for adjacent caverns and tunnels with your terrain scanner (map display).
- You can bet there's a trail hidden beneath any bright brown compacted dirt you see.
- Continually work as a team. In big caves, it's simple to get lost, and if you get killed by some enemies, you'll need a partner to help you.
- You can revive indefinitely. You can recover as long as a dwarf is still standing! Plus, when you're weak, you're virtually unstoppable (and make for wonderful bait).
- A fall hurts. Reduce the distance you fall, even if it's just a tiny ledge or platform. Try to land on a teammate's head if you can to mitigate fall damage (dwarf skulls are apparently made of rubber).
- Avoid becoming overly greedy. Concentrate on the main goal. Only get extra stuff if you can afford it.
- You will only receive 25% of the standard amount of loot, credits, and experience points if you fail a mission.
- You'll succeed in your task as long as at least one dwarf makes it to the evacuation pod. However, more survivors mean a bigger payoff.
- Most enemies have a weakness. usually their butts and face. Shoot it if it's glowing.
- Gray health bars on enemies make them temporarily invincible. So quit wasting ammunition.
- Molly marks a route to the capsule with light green markers when you exit a mission. You can always go back by following it. You might also make your own way. Keep in mind that whether you are in the escape pod or not, it will depart.
- Molly occasionally chooses a course that is nearly usable. Clear the path to the escape pod by working as a team (dig tunnels, build platforms, set up ziplines, etc.).
After all of this, let’s get onto the mission types.
Mining expedition

This is the most basic mission. You're at this location to mine and deposit a specific quantity of dark-green Morkite.
- There will always be more Morkite in hand than you require to finish the task. However, you might need to go back a little distance if you miss too many Morkite clusters.

You're here to gather and deposit all of the dispersed alien eggs on the map. Check your terrain scanner (map) for nearby eggs (they glow orange). When the surrounding area turns purple and appears to be alive, you are close to a nest.
- Bringing a Driller is recommended in order to make straight routes to each egg.
- Every time you dig up an egg, be prepared to battle a swarm. There may only be a few bugs, or there may be many more.
- If you don't want to feel overwhelmed, don't dig up too many eggs at once.
- While within the nest, the eggs "pulsate" like a visible heartbeat.
On-site Refining

In order to use the three Liquid Morkite geysers, you must install a fuel pump at each one after being dropped off in a sizable cavern. Then, as the machinery pumps the Morkite, you must construct a pipeline from the refinery to each pump and guard the lines. You will need to move enemies out of the way and repair the pipelines since they will constantly attack and damage them.
- The distance to the geysers depends on how long and difficult the task is. Some caverns are vast.
- It is strongly suggested that you bring a Scout and Driller. Send the Scout to find and set up the geysers, while the Driller digs a clean, straight path to each geyser for the pipelines.
- A pipeline segment can be destroyed by a melee attack if it is laid out incorrectly.
- The ground can occasionally be a little uneven. You can place the pipeline section as long as it is blinking blue, so simply push the place button and reposition it until it functions.
- The pipelines can be traveled on. Use them to sprint between locations and flee from foes. If you ride on the pipes, enemies will have a difficult time hitting you.
- Damaged lines will show red when the pipelines are being attacked, while fixed lines will flash green.
- Keep the pipe repairs off if you need a break. The next swarm that is set to begin won't show up until they are all repaired.
Salvage Operation

One to three tiny M.U.L.E.s that were damaged on an earlier mission need to be recovered. To fix each Mini-M.U.L.E., dig up three neighboring legs, then press the button to return them home. The next step is to turn on the uplink and the fuel pod that are close to the escape pod. Until the bar is full, remain in the green area around the machines. When the value approaches 0, the mission will fail if there are no more dwarfs in the region.
- When you see a green glow or hear a beep, you know you're close to a small M.U.L.E.
- You can upload the locations of the legs to your terrain scanner by interacting with the broken mini-M.U.L.E. if you're having difficulties finding them.
- You have some time to get ready before the uplink/fuel pod is activated. Platforms, ziplines, and tunnels made by dwarfs will help you take use of your surroundings.
- The uplink and the fuel depot charge more quickly the more dwarfs there are in the green area.
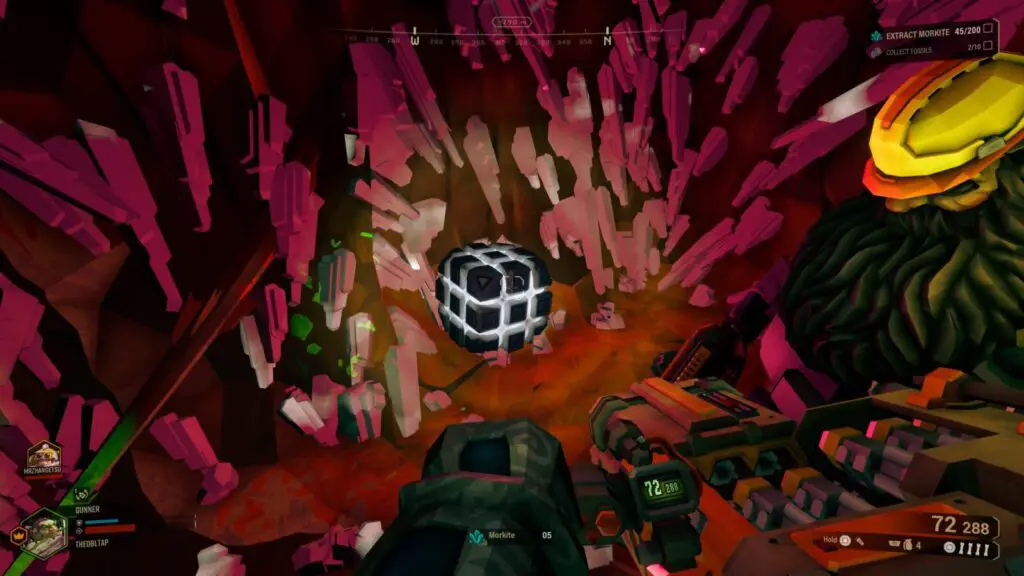
Point Extraction

You're thrown into a gigantic cave once more, but this time you have to search for hidden bright blue Aquarqs. If you notice any glowing blue areas, an Aquarq is concealed there. After gathering enough and returning the goods, you will have to fend against an endless swarm for two minutes before the escape pod is made accessible.
- It is very advised to have a driller so you can rapidly dig out the aquarqs and find your way back.
- The Gunner's Ziplines can make it much simpler to return the Aquarqs (especially on inclines).
- Focus on the nearby Aquarqs first because there are frequently more of them than are necessary.
- Don't overly rely on the Minehead's (the enormous machine you deposit at) turrets, which are armed but have limited ammo.
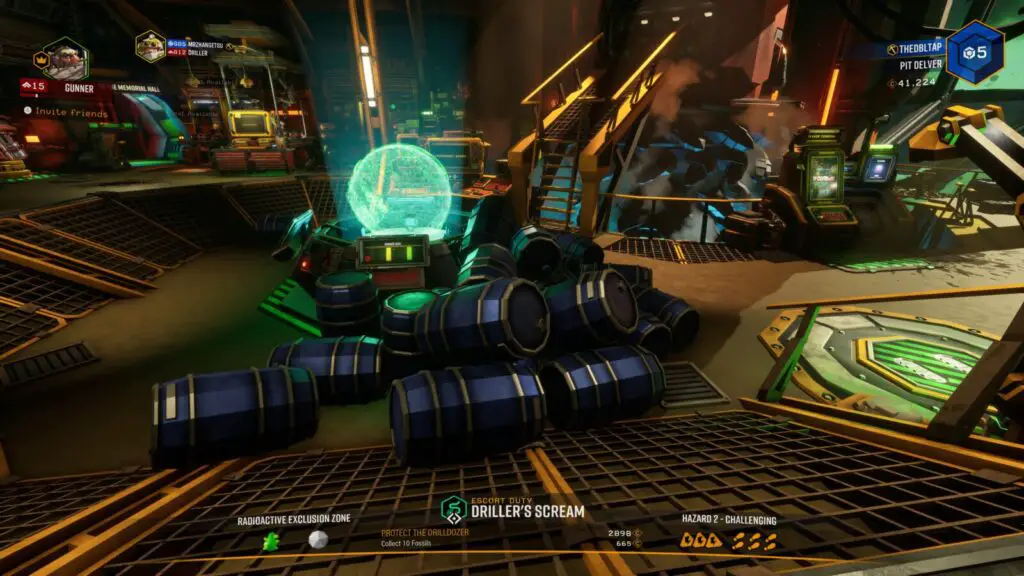
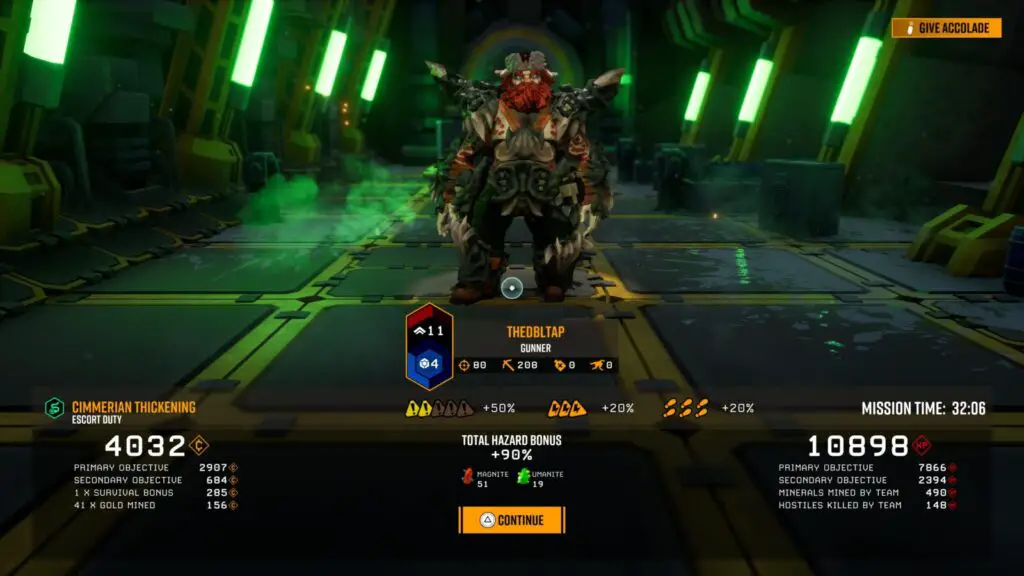
Escort Duty

This time, you accompany a massive drill that performs the mining work for you. While it digs to your destination, guard and maintain the enormous machine. The two batteries on the back must be taken when it runs out of gas on occasion. For charging the batteries, you can use them as laser drills on the black oil shale rocks (you'll need to get very close to drill the oil, though). Plug them back in and repeat the process until you reach the massive luminous Ommoran Core (you'll know it when you see it).
The core must then be "fought" effectively as it is being destroyed. There are four stages that you need to navigate. An initial swarm of baddies is followed by flying laser-firing crystal towers and burning rocks that must be shot down before they strike the drill. You can either mine the spires' bases to destroy them or use enough firepower to take out the glowing spires (we recommend mining). Deposit the core you were after and then extract.
- Before returning the batteries, make sure they are fully charged. When they are fully charged, the indicator turns green.
- If you're having difficulties bringing the battery up to a high level of oil shale, it could be simpler to mine the oil normally and absorb the falling chunks.
- Anytime you have a moment to breathe, actively fix the drill-dozer. It features three health bars, with only one active at any given moment. If it entirely malfunctions, the mission is a failure. Leave at least one dwarf behind to protect her at all times.
- The Drilldozer is resistant to friendly fire, so shoot without hesitation.
- When one of the Core's health bars is empty, leave the area. It will blow up.
Elimination

Threats must occasionally be neutralized before they escalate into larger issues. To kill Dreadnoughts before they can fully hatch, you'll be sent into the caves. To liberate the beast in advance, use your terrain scanner to locate the enormous, glowing orange eggs and destroy them.
There could be one of three categories of enemy. The first is the armored tail of the Glyphid Dreadnought, which must be damaged in order to inflict harm on its health bar. It can spit fireballs at you, use pheromones on you to strengthen its swarm attacks, and after roaring, it may launch a powerful stomp attack.
The Dreadnought Hiveguard is the second class of monster. It starts the combat by summoning smaller guards, all of which must be killed in order to disclose the Hiveguard's three glowing weak points. Take out these weak spots to reveal his real body. Work quickly or you'll run out of ammunition because if it has sustained enough damage or enough time has passed, it will restart and repeat the sentinel phase. It strikes in a way that is comparable to the Glyphid Dreadnought.
The Dreadnought Twins round out the list. You battle two smaller enemies rather than one huge one. The Lacerator, a more melee-focused foe, can send slow rock waves and possesses a flamethrower attack and slam move. The Arbalest, on the other hand, wants to cling to walls while launching a volley of bursting fireballs your way. Both should receive an equal amount of damage. They will become immune and restore their armor/health if the discrepancy in health is too great. During the fight, this will likely occur once, but don't allow it to happen again!
- Because you expend so much ammunition in these missions, there are a lot more Nitra. Don't forget to stock up!
- The chance that a specific boss may spawn from an egg is purely random, at 1/3.
- Create an arena before the boss appears. platforms, ziplines, tunnels for escape, etc.
- When the boss's armor rips before the beast can patch it, concentrate on doing damage to it.
Industrial Sabotage

The newest mission to be included in the game. You want to sabotage your robot competitors and collect their data. You'll have to track the power lines to the two stations that need to be compromised because their primary station is protected by a force field.
Pick up the transmitter nodes on the side of the Hacking Pod once you've located one by calling it down. Connect the Hacking Pod to the power plant using a series of nodes, then turn it on. In order to avoid having to restart the process, defend the transmitter nodes and the hacking robot from any oncoming adversaries. If the nodes' connection is broken as a result of terrain changes, the problem can be fixed by moving the nodes' positions or adding new nodes.
You must remove the batteries from the force field projector and battle the Caretaker boss after both power plants have been shut down. The boss's appendages shoot projectiles at you, startling any enemies in the area and unleashing blast waves that you must avoid. Throughout the battle, he also drops turrets and warp bombs on you.
When the glowing corners of the pyramid are visible, you must shoot at them to injure the boss. One of its side eyes will open and become vulnerable after they are damaged. Till the boss is dead, keep doing this. When he dies, there will be a massive explosion, so take caution. Before extracting, take the data rack that appears and return it back with Molly.
- Throughout the fight, the appendages will continue to appear. We advise avoiding the others and merely destroying the nearest appendage.
- Focus on avoiding strikes; for the most part, this is an endurance battle.
- Kill any spawned sniper turrets right away. If not, they'll terminate you quickly.
- Another top priority target are drones because they'll keep coming at you.
- As the battle progresses, make sure you have enough Nitra to order several resupply drops.
- Get out of the pyramid before the shock nodes fully charge if you get within melee range of it.
- When one of its "eyes" becomes vulnerable, concentrate all your efforts on it.
Secondary objectives

There is a secondary objective for every mission you take on that you can fulfill to earn more experience points and credits. Most of the time, it's merely to get some local resources, like flowers or fossils.
However, a few of these aren't as evident, so we'll go over them.
- Ebonnut: Use melee strikes to break these tiny, brown objects that resemble walnut pods in order to take their bounty.
- Fester flea: annoying little blue insects that take off right away at the first sight of trouble. Murder them.
- Gunk Seed: There is no other way to describe Gunk Seeds but as ball sacks suspended from the ceiling. Shoot them, then drop them.
- Fossil: Usually located on the walls and at great heights. It is strongly advised to send a Scout to capture them.
Mission modifiers

Sometimes missions will have three modifiers. Typically, yellow modifiers (anomalies) are positive; for instance, every enemy drops some gold upon death. On the other side, red modifiers (mutators) greatly increase the difficulty of missions while simultaneously adding extra hazard pay.
Some mutators, especially when combined, can make an assignment nearly impossible. These are the warnings' meanings:
- Cave Leech Clusters: Ceiling leeches spawn frequently and in groups in caves. If someone is grabbed, stay together and save them right away.
- Exploder Infestation: Small, luminous suicide bombers constantly spawn and pounce on your team during the explosion infestation.
- Haunted Cave: Your team will be stalked by a huge, unstoppable ghost. Although not as dangerous, narrow cave tunnels can be highly problematic.
- Lethal Enemies: All melee attacks from lethal opponents hit twice as hard.
- Low Oxygen: Extremely challenging, you must constantly replenish your limited supply of air by hugging Molly, using a resupply pod, the entry drop pod, or the Minehead (for Aquarq missions). We advise staying away from these missions.
- Mactera Plague: Numerous flying foes, such as Grabbers, spawn during the Mactera Plague.
- Parasites: When an enemy dies, little baby leeches emerge and attack. Generally annoying.
- Regenerative Bugs: If an enemy goes 3 seconds without being struck, they will start to regenerate 5% of their health. Keep going till something dies!
- Shield Disruption: Personal shields are not functional throughout this expedition. We strongly advise that you change your armor to include health enhancements.
- Elite Threat: Enemy elite variations will appear. They behave differently and are stronger and faster.
- Swarmageddon: You will frequently come under attack from simple Glyphid swarmers. This can require a lot of ammunition. They might quickly become overwhelming and deplete your health. Use AoE strikes or hope your Driller is carrying his flamethrower to create a wall of flames.
- Lithophage Outbreak: The most recent mutator. Be prepared to lather up on infected areas and suck blisters off them. By doing this, diseased bugs will appear and try to eat you. Since this threat will expand and have the potential to overwhelm you later in the mission, you should deal with it right away. Additionally, avoid becoming totally infected.
Mini-bosses
You might run into some... troublesome adversaries on your explorations through the perilous depths of Hoxxes. Fortunately, as long as you keep out of their domain and don't mistakenly shoot them, they normally don't bother you.
However, killing them will net you valuable loot, and occasionally they will obstruct your path to a mission objective. So let's talk about what to anticipate from them and—more importantly—how to get rid of them.

It appears that parasites have the ability to control machines. Who would have imagined that? There are two parasite suckers that operate this heavily armed machine. Naturally, you'll want to fire these bastards with a yellow light. Unfortunately, BET -C will respond.
The machine gun turret on BET-C fires in spurts, occasionally launches a grenade, and occasionally forms a shield before launching land mines at you.
We advise you to approach the mines closely and use your strongest shots. You have two options when it expands the shield: either run for cover or boost the offense by entering the shield and firing more shots at the suckers.
If you're successful in eliminating her, your group can repair her and use her as an ally for the remainder of the mission. She is unstoppable and has complete control over her arsenal. In a challenging assignment, it will be much simpler to acquire her if you run into her early on.
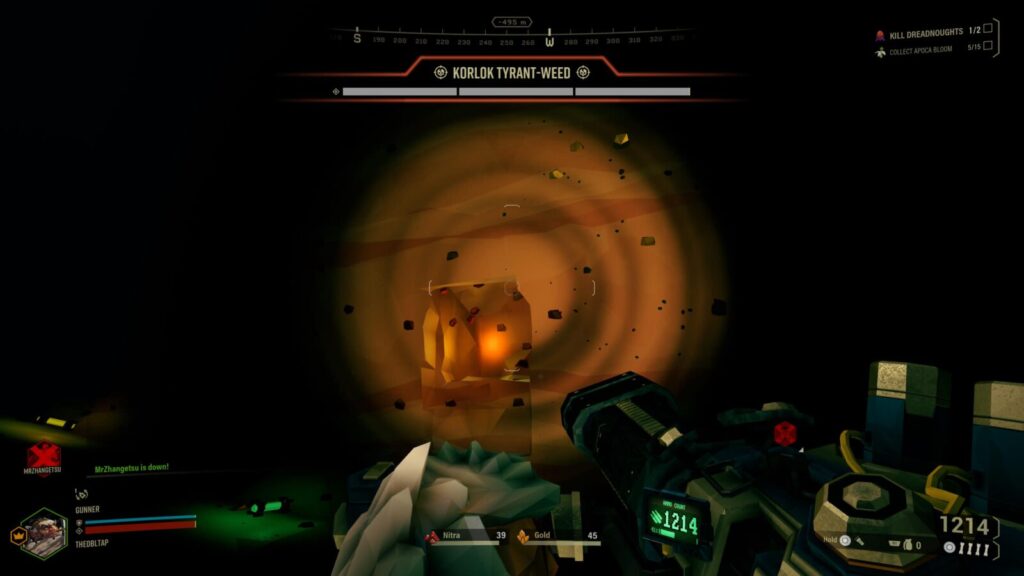
Korlok Tyrant-Weed

The Hoxxes' vegetable top predator. Either the enormous onion-shaped brain or the numerous green sprouts that surround it will catch your eye first. The vines come to life when you trigger them, spitting toxic bolts towards your crew.
Enough of the attacking sprouts must be eliminated for the primary bulb to reveal its fleshy inside. Before it retreats back into its shell and you have to start over with the newly created sprouts, you will have a little window of time to deal enough damage to it. Although you can shoot the bolts the sprouts fire in the air to stop them, it's usually simpler to just keep shooting the sprouts themselves.
The plant will occasionally spew out pink healing capsules that must be destroyed right away. They may heal the main capsule through the terrain, and their presence is indicated by a weak pink ray. Before they undo all the harm you've done, you should find them right away.
Continue doing this until the primary pod dies and takes all the sprouts with it. You can deposit the light green gems she drops into Molly for significant amounts of experience points and credits.
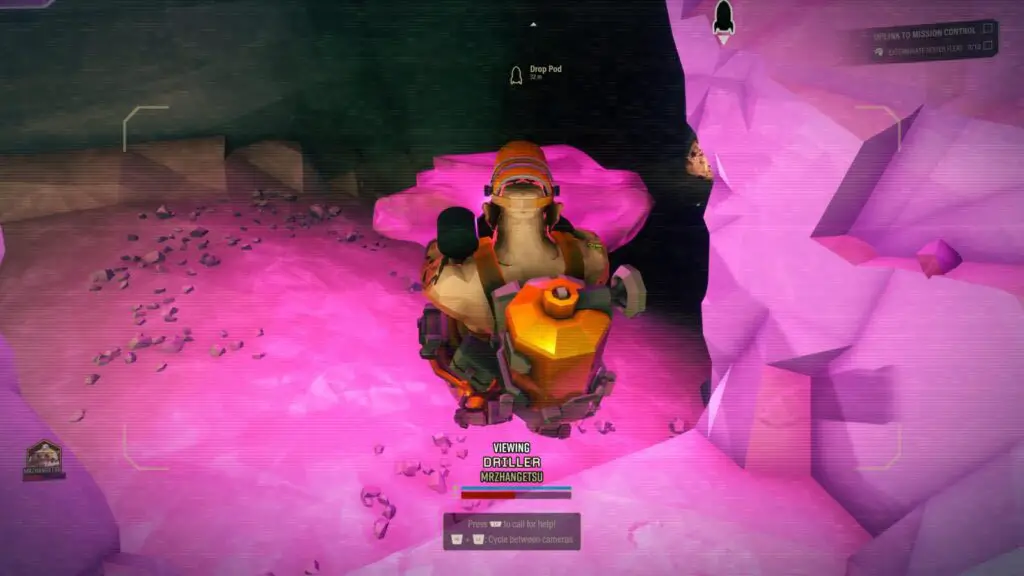
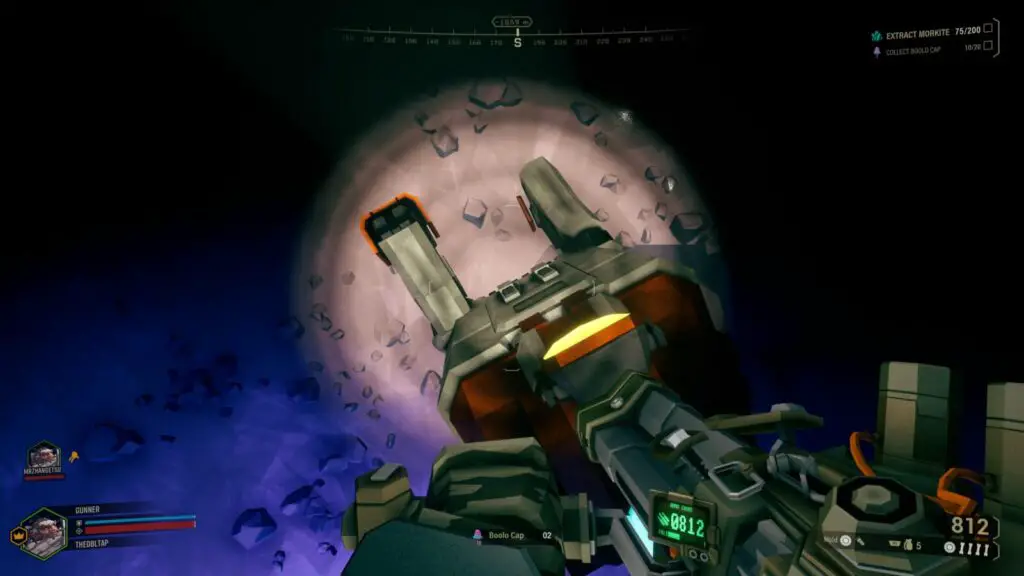
The Prospector

The Prospector itself isn't dangerous, technically. In practice, he's entirely harmless until you strike him. He keeps flying around, which is a problem. In certain cases, right next to the enemies you're up against. If a stray bullet hits him, terrible things could happen.
The Prospector will continuously call a swarm of drones and patrol bots that will destroy anything they come in contact with. He'll also attempt to flee. You must pursue him and hurt him enough to remove a portion of his health bars. He will then become impervious and call forth additional foes.
Continue doing this until either he dies or thinks he has had enough and wants to leave. It seems easy, doesn't it? Well, if you're interacting with the Prospector while not occupied, then yes. Fighting a swarm while accidently triggering him can quickly spiral out of control (especially on higher difficulty levels).
On harder difficulties, it can produce an incredible number of enemies, so it's necessary to discuss attacking it with your team before doing so. Before moving on with the objective, you should take care of the Prospector if you need to defend yourself or engage in combat.
The Nemesis

Because it attempts to sound like a dwarf, you frequently hear this robotic threat before you see it. You'll rapidly come to detest this evil contraption as it glides boldly at your team.
Nemesis's lengthy, tentacle-like grapples are the greatest obstacle to defeating it. The only way to escape is to have a teammate shoot the arm that is holding you or use the ability "Heightened Senses," which doesn't kill him. If you approach too close to him, he will grip you and strangle the life out of you.
Unless you hide behind a barrier, it's difficult to dodge this grip. He can take you down in less than 2 seconds on harder difficulty settings, therefore you need always maintain your distance. The Nemesis will fire plasma barriers at you if you do so, although it's preferable to being put in a choke grip.
When the Nemesis finally dies, it has a terrible surprise. After a short while, a large number of phase mines teleport around your area in an attempt to murder your team suddenly. Search for an open area, then prepare to jump between the blasts.
You should aim for his large glowing eye and the two orange openings on his flanks if you want to kill him (right under his arms). He is quite tough and can withstand a lot of shots, but if you completely light him up, he will be quickly killed. We’re hoping you have a flamethrower-equipped Driller.
This foe is typically relatively rare. If it arrives at a bad time, it can quickly wipe out your crew. If you spot one of them approaching, you should run away and find a safer location with enough room to battle it.
Random events
Machine events.

Due to the lack of an explanation or hint when a player first encounters it, this is typically the sole thing that causes them the most confusion. Occasionally, when performing missions, you'll come across random machine constructions. Once you have advanced at least once in any class, you can interact with these. You then receive reusable Tritilyte keys from the game to initiate these events.
These events are only worthwhile if you have a blank matrix core, so let's dig into the specifics before moving on. Deep Dives and unique weekly objectives can be used to earn Blank Matrix Cores. You can write one of three random weapon/cosmetic overclocks into an empty matrix core and create it in The Forge in HQ after successfully completing the machine event. You will also receive a sizable amount of bonus experience points whether you succeed or fail.
There are currently 4 different machine events, all of which are timed:
- Ebonite Mutation – You must eliminate a certain number of yellow mineral enemies that can only be destroyed by a pickaxe's attack. A nearby sprinkler will pop out canisters, lowering the cooldown of your power attack to nearly nothing. Run over and grab them.
- Kursite Infection – A number of monsters will spawn in groups and develop blue skin and yellow crystals. These particular foes drop a yellow crystal that must be put in the machine when you kill them. Crystals must, however, be returned as soon as possible because they degrade quickly.
- Omen Modular Exterminator – The AI tower of doom must be turned off. To find the weak points at the top, middle, and base of the tower, your team must spend enough time standing on three separate empowered platforms. Attack drones, lasers, machine gun targeting lasers, and jumpable laser beams must all be avoided in the meantime.
- Tritilyte Crystal – With nearby bombs that are delivered, you must destroy a massive spike crystal. The bombs must be launched towards the spike because they are large, heavy items.
Rival Communications Router

There are several Antenna Nodes all around the Rival Communications Router. The router will begin a self-destruction sequence when the relays have been disabled. The flickering antenna will change to a different antenna every 30 seconds, therefore the Dwarves must locate them in the allocated time and proceed to disable them. The active antenna can be neutralized by interacting with it to remove your dwarf's hacking tool, which then launches a brief hacking minigame. In the minigame, you must choose both sides of one of the two wires shown on screen and then locate the wire's "weak point" to cut it. To successfully hack the node, repeat the process for both of the two wires.
The dwarf will be electrocuted and kicked out if the sequence time expires, and another node will take its place as the active node. The number of nodes that must be successfully compromised depends on the size of your team. The Communications Router will explode in a 30 meter radius if an event fails, doing extremely high damage. The self-destruct will be stopped if the event is successful, and access to the data cell inside the router will be made available.
Prospector Data Deposit

The Prospector Data Deposit is a randomly discovered obelisk-like construction inside the caves. In an Industrial Sabotage task, a Dwarf can engage with it to summon a Hacking Pod, the same kind that is called down when engaging with a Power Station. Players must use Transmitter Nodes to attach it to the Deposit once it has arrived, much as they did during the previously stated mission type. It is the building where the Prospector Drone stores its data according to folklore.
A button will show on the Hacking Pod once the connection has been made, and pressing it will initiate the hacking process. During this time, waves of opponents will spawn close to the Hacking Pod, frequently aiming directly at it rather than the Dwarves. If the drone sustains enough damage, just like in sabotage missions, it will return to its housing and need to be reactivated. Along with the usual enemy spawns, a wave of Patrol Bots and Shredders will appear once the hacking progress meter has been filled to 1/3 and 2/3, respectively.
Meteor Impact

This random event was added in Season 3: Plaguefall. In normal missions, the Meteor Impact event has a 25% to 33% base chance of occurring once or twice; however, missions with the Lithophage Outbreak warning will not experience this event. After the collision, two Rock Cracker pods can be summoned down and linked to the meteorite. It will kill anything in the impact zone, including anything that can open Dreadnought eggs during Elimination or harm the Drilldozer during Escort Duty. As waves of creatures are drawn to the machines, maintenance and protection are required. 3 to 4 Plaguehearts can be found inside the meteor once it's finished. As soon as all of the Plaguehearts from the meteorite have been deposited, Mission Control will respond.
Small Extras

Every now and then, you might notice some strange colorful lumps in the landscape. Digging beneath them will yield some precious minerals that are worth depositing. Watch out for the many varied patterns there are!
You might come upon a freight box once in a while. You can fix the crate for a ton of minerals and peculiar cosmetics if you can locate the two neighboring batteries (they beep like mini-M.U.L.E.s) and bring them back.
Additionally, occasionally you can come upon the beeping shell of a former dwarf's helmet. When you interact with it, your terrain scanner will download a purple marker. You can find a ton of loot and more valuable cosmetics if you can dig your way there (we strongly advise getting a driller).
You may also be interested in:
[Top 10] Deep Rock Galactic Best Weapons That Are Powerful
Deep Rock Galactic Best Perks That Are Excellent
Deep Rock Galactic Best Class - What Should You Play?
Deep Rock Galactic Best Engineer Builds That Wreck Hard!
Deep Rock Galactic Best Gunner Builds That Wreck Hard!
- Deep Rock Galactic |
- ghost ship games |
- coffee stain studios

- Log in or register to post comments

More Top Stories

Personal tools
- Create account
Navigation menu
- View source
- View history
- Community portal
- Recent changes
- Random page
- Random Page
- Admin noticeboard
- DRG: Survivor
- Accessories
- Update History
- Assignments
- What links here
- Related changes
- Special pages
- Printable version
- Permanent link
- Page information
- Page values
Deep Rock Galactic
Overview DRG
- 1 Key Features
- 2 Description
- 3.1 A letter from Management
- 3.2 Working at Deep Rock Galactic
- 4 Game support
Key Features
- Work together as a team to dig, explore, and fight your way through a massive cave system filled with hordes of deadly enemies and valuable resources. You will need to rely on your teammates if you want to survive the most hostile cave systems in the galaxy!
- Pick the right class for the job. Mow through enemies as the Gunner , scout ahead and light up the caves as the Scout , chew through solid rock as the Driller , or support the team with defensive structures and turrets as the Engineer .
- Destroy everything around you to reach your goal. There is no set path so you can complete your mission your way. Drill straight down to your objective or build an intricate network of paths to explore your surroundings -- the choice is yours. But proceed with caution, you don’t want to stumble into an alien swarm unprepared!
- Explore a network of procedurally generated cave systems filled with enemies to fight and riches to collect. There’s always something new to discover and no two playthroughs are alike.
- Dwarves know what they need to bring to get the job done. This means the most powerful weapons and the most advanced gadgets around - flamethrowers, gatling guns, portable platform launchers, and much, much more.
- The underground caves are dark and full of terrors. You will need to bring your own lights if you want to illuminate these pitch-black caverns.
Description
Deep Rock Galactic is a procedurally generated first person co-op shooter for up to 4 players, developed in Unreal Engine 4 by Ghost Ship Games , It was released into early access on Steam on the 28th February 2018, and launched to version 1.0 on the 13th of May 2020.
Players take on the role of a team of veteran dwarven space miners, venturing into the deepest, most dangerous cave systems of the most hostile planet ever discovered, to gather ores for their corporate overlords, while expanding their roster of class-based skills and unlocking new gear and weapons .
A letter from Management
Congratulations, [NEW DWARVEN EMPLOYEE]! By signing up with DEEP ROCK GALACTIC, you have just taken your first step towards becoming an essential gear in the machine of the MOST TENACIOUS space mining corporation in the known galaxy!
At DEEP ROCK GALACTIC, we pride ourselves on having established practical dominance of some the most lucrative systems in the OUTER RIM. While our foolish and cowardly competitors generally regard these as too volatile or high-risk, DEEP ROCK GALACTIC calls them home.
At this time, we have a total of 89 ORBITAL SPACE RIGS in operation throughout MORE THAN A DOZEN Outer Rim systems, with 16 MORE currently under construction.
However, a NEW MANDATE is upon us! While our digs number in the dozens already, we are currently engaged in our most daring and heavily orchestrated mining operation to date: The COMPLETE SUBJUGATION of the planet HOXXES IV.
HOXXES IV constitutes, to the best of our knowledge, the SINGLE MOST LUCRATIVE mining location in the galaxy, containing the RICHEST AND MOST DENSE concentrations of valuable minerals we have ever encountered. However, it also just happens to be the SINGLE MOST HOSTILE place we have ever mapped. Several competitors before us have tried to tame Hoxxes IV, WITHOUT LUCK.
DEEP ROCK GALACTIC will succeed. DEEP ROCK GALACTIC is not in the business of failing.
MANAGEMENT BIDS YOU WELCOME, NEW MINER. WELCOME ABOARD.
Working at Deep Rock Galactic
TEAMWORK IS KEY At DEEP ROCK GALACTIC we value TEAMWORK above all else! The sheer hostility of Hoxxes IV means anyone caught away from their team will be in for a world of hurt. As a responsible INTERPLANETARY MINING CONGLOMERATE, we depend on our employees to take care of each other. In other words - we won’t be there holding your hand.
As the saying goes: "Dig together - or dig your own grave".
NEXT-LEVEL SPACE MINING At DEEP ROCK GALACTIC we specialise in SPACE MINING at the most dangerous dig sites in the galaxy, and we call upon those with a natural predisposition towards hard, honest work!
We believe in LEAN MINING, and we expect the same of you. Why send in a massive and costly mining operation when a CRACK SQUAD of highly-skilled mining operatives will do?
MYSTERIOUS CAVES At DEEP ROCK GALACTIC we say that any cave can be conquered, so long as our drills remain fueled and lubricated!
While no two caves will ever be the same, our dedicated RESEARCH DEPARTMENT is constantly at work peeling apart the tectonic layers of the planet, locating the most lucrative caves and categorizing them accordingly.
MOVE UP THE COMPANY LADDER At DEEP ROCK GALACTIC we are big on PROMOTIONS! So big, in fact, that we tally up EVERYTHING you do and calculate your Rank based on that!
Upon first joining us, your Rank will be 0 (lovingly referred to as Greenbeards among the employees). You will not remain a Greenbeard for long, however - while your objectives will carry you ever further down, your standing within the company will only go up!*
* Provided, of course, you are fortunate and skilled enough to survive.
Game support
Deep Rock Galactic Wiki is focused on creating the definitive guide to Deep Rock Galactic . But while we make an effort to be complete, which may include game bugs and fixes for them, we are not an official game support channel.
For official game support, the developers or members of the community can be contacted on the official Deep Rock Galactic Discord server if you need support.
Bugs and issues can be reported on the official PleaseFix platform .
- Release date
- How to Play Guide for Deep Rock Galactic
- Deep Rock Galactic Wiki
Deep Rock Galactic how to unlock weapons – Primary and Secondary weapons

Posted in Guides
Video Gamer is reader-supported. When you buy through links on our site, we may earn an affiliate commission. Prices subject to change. Learn more
Do you need to know how to unlock weapons in Deep Rock Galactic? While your class plays an important part in your dive into the mysterious caves of Hoxxes IV, so do the weapons you equip yourself with.
Deep Rock Galactic lets you put yourself in the shoes of the dwarven miners who brave the hordes of alien monsters while mining for materials. With fans getting more information on Season 5 , it’s a great time to get back into the game. Make sure you know how to start a mission to get into the game. But, if you’re here to learn how to unlock new weapons, you’ve come to the right place.
How do you unlock weapons in Deep Rock Galactic?
To unlock weapons, you need to complete the License Upgrade assignments on the Assignment Board. These assignments unlock when you reach a certain level with each class . These assignments will unlock the weapon for you. Hover over which License Upgrade assignment you want, and click Accept Assignment.

Each assignment will have three missions you need to complete. After you’ve accepted the assignment, you can head to Mission Terminal and get started. Be sure to save your progress after each mission! Once all three are done, after returning the ship, you’ll get a pop-up telling you the weapon is unlocked.
All different types
There are three types of weapons you can unlock in the game: grenades, primary weapons, and secondary weapons. Each class gets two new grenades, two new primaries, and one new secondary.
All unlockable weapons in Deep Rock Galactic
Here is a list of all the weapons you can unlock in Deep Rock Galactic, sorted by class. Each one has a different level requirement, starting at level five.
- Cryo Grenade (level 5) – Grenade
- Pheromone Canister (level 10) – Grenade
- M1000 Classic (level 10) – Primary
- Zhukov NUK17 (level 15) – Secondary
- DRAK-25 Plasma Carbine (level 20) – Primary
- Plasma Burster (level 5) – Grenade
- Proximity Mine (level 10) – Grenade
- “Stubby” Voltaic SMG (level 10) – Primary
- Breach Cutter (level 15) – Secondary
- LOK-1 Smart Rifle (level 20) – Primary
- High Explosive Grenade (level 5) – Grenade
- Neurotoxin Grenade (level 10) – Grenade
- Cryo Cannon (level 10) – Primary
- Experimental Plasma Charger (level 15) – Secondary
- Corrosive Sludge Pump (level 20) – Primary
- Incendiary Grenade (level 5) – Grenade
- Cluster Grenade (level 10) – Grenade
- “Thunderhead” Heavy Autocannon (level 10) – Primary
- BRT7 Burst Fire Gun (level 15) – Secondary
- “Hurricane” Guided Rocket System (level 20) – Primary
How to equip unlocked weapons in Deep Rock Galactic
Once you’ve unlocked your shiny new weapon, head to the Equipment Terminal . It will have a notification saying new items are available. Simply activate the terminal, choose which weapon slot you just unlocked a weapon for, and purchase the new weapon. You will have to pay for it, but luckily the price isn’t too high.
That’s everything you need to know about unlocking weapons on Deep Rock Galactic. Be sure to check out how to promote your character if you’re leveling up quickly.
How to unlock weapons FAQ
How do you unlock new weapons?
You can complete License Upgrade assignments once you’ve hit the right level for the weapon unlock. After completing the assignment, you can purchase the weapon at the Equipment Terminal.
How many unlockable weapons are there?
There are 20 total weapons to unlock – five for each class. Each class has two grenades, two primaries, and one secondary to unlock.
IMAGES
VIDEO
COMMENTS
Assignments are short quests, consisting of a series of missions. You can have one active assignment at a time, and choose it at the Assignment Board in the Space Rig. You are free to play any available mission even when an assignment is active, however the assignment only proceeds when you finish the next mandatory mission. Assignment missions are marked with a small white diamond. There are ...
Welcome aboard, Miner! Congratulations on your sound decision to sign up for Deep Rock Galactic! In the following series of missions to the surface of Hoxxes IV (or subsurface, really), you will familiarize yourself with Company mining procedures and on the proper handling of Company gear and resources. Be aware that only the best make it in DRG, the course has a drop-out rate of 67% and 74% ...
Originally posted by Dwarfurious: On the map you will see blinking objectives that point you towards the missions you must complete to further progress the assignment. Showing 1 - 1 of 1 comments. The author of this thread has indicated that this post answers the original topic. Dwarfurious Jul 10, 2019 @ 11:20am.
This achievement guide lists all the achievements and their official descriptions in Deep Rock Galactic as well as tips on how to obtain them and clarifications to their descriptions. ... Complete your first assignment. Assignments can be accepted from the Assignment Terminal, and to complete them, you have to complete a specific mission for ...
Please post it in the Deep Rock Galactic Forum. How to unlock the Approved Greenbeard achievement in Deep Rock Galactic: Complete your first assignment. This achievement is worth 25 Gamerscore.
Starting the game for the first time will launch the player immediately into a tutorial. This tutorial is optional and can be exited out of, it can also be revisited at any time using the Launch Tutorial button in the Miner's Manual, under Getting Started > Basics. The tutorial will teach you the basics of the game and specifically the Gunner ...
Select the assignment in the terminal, then pop on the world map and you will see a white icon on one of the missions. This is the mission you need to complete for the current stage of your selected assignment. The assignment mission is random on each cycle of the missions, happens every 25 mins I think. But will be locked to a certain type ...
Assignments Guide. Completing missions is an integral part of Deep Rock Galactic. Aside from the neverending grind and missions, your progression as a dwarf will depend on the Assignments you complete. In this page, we will discuss the various assignments in the game. Assignments can be considered as the game's main campaign or story mode ...
Complete your first assignment. 46.9% Barrel Rider Ride a barrel in the Space Rig for three seconds. 31.5% Big Game Hunter Participate in killing 40 Dreadnoughts. 13.5% Bring Your A-Game Successfully complete a Hazard Level 3 mission from start to finish where no dwarf goes down and without ordering a resupply. 18.5% Car Pool
Rock and Stone! What do you do when your 9 to 5 includes beer and giant bugs? Have a party! Right?Here is a game play video of me completing my first "Wee...
There are a total of 69 achievements to unlock while playing Deep Rock Galactic. They vary from easy enough to get in your first play, to putting in hours of gameplay. Here's every achievement ...
The assignment will put a flashing icon on the map indicating which specific egg mission you have to complete, this will change when the missions rotate. You can also see the icon for your mission when browsing servers. When playing with a group of friends, only the host is getting credit on the assignment board, leading us through the same ...
Just a quick guide on where to view assignment progression and how to progress current assignment.
9 0 5. You will first need to complete the initial assignment that the game gives you in order to unlock the ability to select new assignments. Then, you will need to level up the character class ...
Complete your first assignment. 46.7% Barrel Rider Ride a barrel in the Space Rig for three seconds. 31.2% Big Game Hunter Participate in killing 40 Dreadnoughts. 13.2% Bring Your A-Game Successfully complete a Hazard Level 3 mission from start to finish where no dwarf goes down and without ordering a resupply. 18.3% Car Pool
Deep Rock Galactic Trophy Guide and Road Map for PlayStation 4 & PlayStation 5. Welcome to our Deep Rock Galactic Trophy Guide. Deep Rock Galactic is a unique resource-management game in which you complete mining missions on an alien planet to gather resources and upgrade your Dwarf. The game's honestly a lot of fun, with a great sense of ...
Learn the basics of Deep Rock Galactic with this in depth guide! ... Any class can complete this assignment. ... The Right Combination of Perks Can Be Hard to Come By In the co-op first-person shooter, Deep Rock Galactic, it doesn't matter how skilled or experienced you are, if you don't have the right perks, you're going to get yourself killed
Visible Achievement. How To Complete. Miner. Complete your first mission in Deep Rock Galactic. Barrel Rider. To complete this achievement just ride any of the barrels scattered around the space rig for three seconds. Big Game Hunter. Kill a total of 40 Glyphid Dreadnoughts that can be found in elimination missions.
Can you start any mission in Deep Rock Galactic? Before you can play any mission you want, you first need to complete the Conquer Hoxxes IV assignment.This is a 10-mission-long assignment that ...
Deep Rock Galactic > General Discussion > Topic Details. PureO ... Jan 23, 2023 @ 7:56am You have to complete or abort your currently active one first. #1. Paintbrush. Jan 23, 2023 @ 12:03pm If I recall correctly some assignments cannot be aborted once started. ... Usually Seasonal Events ( like the recent Lunar one ) or the first assignment ...
We would happily pay some kind of credit tax to make sure we all progress together on different assignments. Bringing new friends into the game is a chore because their assignments don't line up. 300 hours, and I just this week unlocked the first assignment pickaxe. Deep rock is almost the perfect friend group game but this one quirk is driving ...
Deep Rock Galactic is a procedurally generated first person co-op shooter for up to 4 players, developed in Unreal Engine 4 by Ghost Ship Games, It was released into early access on Steam on the 28th February 2018, and launched to version 1.0 on the 13th of May 2020. Players take on the role of a team of veteran dwarven space miners, venturing ...
To unlock weapons, you need to complete the License Upgrade assignments on the Assignment Board. These assignments unlock when you reach a certain level with each class. These assignments will ...