- Start the presentation and see your notes in Presenter view Article
- Add speaker notes to your slides Article
- Rehearse and time the delivery of a presentation Article
- Record a slide show with narration and slide timings Article
- Print your PowerPoint slides, handouts, or notes Article
- Create a self-running presentation Article


Record a slide show with narration and slide timings
You can record your PowerPoint presentation—or a single slide—and capture voice, ink gestures, and your video presence. When completed, it’s like any other presentation. You can play it for your audience in a Slide Show or you can save the presentation as a video file. So, instead of just “handing the deck” to someone, people can see your presentation with the passion and personality intact.
A new feature for Microsoft 365 was rolled out in early 2022. Exactly when your business has this feature is also based on when your admin distributes new features in Microsoft 365.
This article contains procedures for both the new experience and the classic experience:
New experience
Classic experience

All recording tools are in the Record tab in the ribbon, but you can start by selecting the Record button.

You can also record by selecting one of the options in the Record section of the Record tab.

If you have notes in your presentation, they’re turned into text at the top of the screen so you can use them like a teleprompter as you record.
Tip: Use the auto-scroll feature in teleprompter and set it to scroll at your preferred speed.

There are several options you can use when you record a presentation. You can turn your camera and microphone on or off by selecting the icons at the top. There are several options you can use when you record a presentation. You can turn your camera and microphone on or off by selecting the icons at the top. To change your camera or microphone, choose the Select more options <···> icon. You can even add a customizable camera that can be resized, repositioned, and formatted to go with your slide content. Select Edit , then select Cameo . Adjust the formatting for the camera, then select Record again to return to the recording environment.
In the Select the camera mode menu, you can select Show Background or Blur Background .

You can also change the layout in the Views menu to switch between Teleprompter , Presenter View , or Slide View .

When you’re ready, select Start recording and a countdown will begin.
Use the onscreen laser, colored pens, or highlighters in the tray below markup slides and it’ll record as well.
To record narration for a specific slide, use the previous or next arrows.
Note: Narration won’t record during slide transitions so let those play first before you start speaking.
Pause the recording as needed or select Stop if you’re done.
To review the video, select the Play button.
To quickly delete and re-record your video on current slide or on all slides, select Delete . While Clear will delete the recorded narration, Reset to Cameo additionally replaces the recorded narration with the camera feed for an easy retake.

When you’re done, select Export > Export Video .
After you successfully export the video, you can view the video by selecting View and share video .

At any time, you can return to your document by selecting the Edit button.
Want more?
About Record in PowerPoint
Create a self-running presentation
Export or turn your presentation into a video
Classic experience
Turn on the Recording tab of the ribbon: On the File tab of the ribbon, click Options . In the Options dialog box, click the Customize Ribbon tab on the left. Then, in the right-hand box that lists the available ribbon tabs, select the Recording check box. Click OK .

To get ready to record, select Record on either the Recording tab or the Slide Show tab of the ribbon.
Clicking the upper half of the button starts you on the current slide.
Clicking the lower half of the button gives you the option to start from the beginning or from the current slide.

(The Clear command deletes narrations or timings, so be careful when you use it. Clear is grayed out unless you have previously recorded some slides.)
The slide show opens in the Recording window (which looks similar to Presenter view), with buttons at the top left for starting, pausing, and stopping the recording. Click the round, red button (or press R on your keyboard) when you are ready to start the recording. A three-second countdown ensues, then the recording begins.

The current slide is shown in the main pane of the Recording window.
You can stop the recording any time by pressing Alt + S on your keyboard.
Navigation arrows on either side of the current slide allow you to move to the previous and next slides.
PowerPoint for Microsoft 365 automatically records the time you spend on each slide, including any Animate text or objects steps that occur, and the use of any triggers on each slide.
You can record audio or video narration as you run through your presentation. The buttons at the lower-right corner of the window allow you to toggle on or off the microphone, camera, and camera preview:

If you use the pen, highlighter, or eraser, PowerPoint records those actions for playback also.

If you re-record your narration (including audio and ink), PowerPoint erases your previously recorded narration (including audio and ink) before you start recording again on the same slide.
You can also re-record by going to Slide Show > Record .
You can pick a pointer tool (pen, eraser, or highlighter) from the array of tools just below the current slide. There are also color selection boxes for changing the color of the ink. ( Eraser is grayed out unless you have previously added ink to some slides.)
To end your recording, select the square Stop button (or press S on your keyboard).
When you finish recording your narration, a small picture appears in the lower-right corner of the recorded slides. The picture is an audio icon, or, if the web camera was on during the recording, a still image from the webcam.

The recorded slide show timing is automatically saved. (In Slide Sorter view, the timings are listed beneath each slide.)
In this process, what you record is embedded in each slide, and the recording can be played back in Slide Show. A video file is not created by this recording process. However, if you need one, you can save your presentation as a video with a few extra steps.
Preview the recorded slide show
On the Slide Show tab, click From Beginning or From Current Slide .
During playback, your animations, inking actions, audio and video will play in sync.

Preview the recorded sound
In the Recording window, the triangular Play button near the top left corner lets you preview the recording of the slide that currently has the focus in that window.

In Normal view, click the sound icon or picture in the lower-right corner of the slide, and then click Play . (When you preview individual audio in this way, you won't see recorded animation or inking.)

You can pause playback while previewing the audio.
Set the slide timings manually
PowerPoint for Microsoft 365 automatically records your slide timings when you add narrations, or you can manually set the slide timings to accompany your narrations.
In Normal view, click the slide that you want to set the timing for.
On the Transitions tab, in the Timing group, under Advance Slide , select the After check box, and then enter the number of seconds that you want the slide to appear on the screen. Repeat the process for each slide that you want to set the timing for.
If you want the next slide to appear either when you click the mouse or automatically after the number of seconds that you enter—whichever comes first—select both the On Mouse Click and the After check boxes.
You can use manual slide timings to the trim the end of a recorded slide segment. For example, if the end of a slide segment concludes with two seconds of unnecessary audio, simply set the timing for advancing to the next slide so that it happens before the unnecessary audio. That way you don't have to re-record the audio for that slide.
Delete timings or narration
The Clear command is for deleting timings or narration from your recording that you don't want or that you want to replace.
In the Recording window, the Clear command in the top margin of the window allows you to:
Clear recordings on the current slide
Clear recordings on all slides
In Normal view, there are four different Clear commands that allow you to:
Delete the timings on the currently selected slide
Delete the timings on all slides at once
Delete the narration on the currently selected slide
Delete the narration on all slides at once
If you do not want to delete all the timings or narration in your presentation, open a specific slide that has a timing or narration that you do want to delete.
On the Recording tab of the PowerPoint for Microsoft 365 ribbon, on the Record Slide Show button, click the down arrow, point to Clear , and then choose the appropriate Clear command for your situation.

Turn off timings or turn off narrations, and ink
After you've recorded your PowerPoint for Microsoft 365 presentation, any timings, gestures, and audio you performed are saved on the individual slides. But you can turn them all off if you want to view the slide show without them:
To turn off recorded slide timings: On the Slide Show tab, clear the Use Timings box.
To turn off recorded narrations and ink: On the Slide Show tab, clear the Play Narrations box.
Publish the recording to share it with others
Once you've edited the recording to your satisfaction, you can make it available to others by publishing to Microsoft Stream.
With the presentation open, on the Recording tab, select Publish to Stream .
Type a title and a description for the video.
Set other options, including whether you want others in your organization to have permission to see the video.
Select the Publish button.
The upload process can take several minutes, depending on the length of the video. A status bar at the bottom of the PowerPoint window tracks the progress, and PowerPoint shows a message when the upload is finished:

Click the message to go directly to the video playback page on Microsoft Stream.
Create closed captions
To make your video more accessible by including closed captions, choose from these options, which are described in separate Help articles:
Manually write a closed caption file yourself
Get a closed-caption file automatically generated by Microsoft Stream
Once you have a closed-caption file, you can add it to your video file by using PowerPoint .
Record a slide show
With your presentation open, on the Slide Show tab, click Record Slide Show .
(The Clear command deletes narrations or timings, so be careful when you use it. Clear is grayed out unless you have previously recorded some slides.)
In the Record Slide Show box, check or clear the boxes for your recording, and click Start Recording .

More about these options:
Slide and animation timings : PowerPoint automatically records the time you spend on each slide, including any animation steps that occur, and the use of any triggers on each slide.
Narrations, ink, and laser pointer: Record your voice as you run through your presentation. If you use the pen, highlighter, eraser, or laser pointer, PowerPoint records those for playback as well.
Important: Pen, highlighter, and eraser recording are available only if you have the February 16, 2015 update for PowerPoint 2013 or a later version of PowerPoint installed. In earlier versions of PowerPoint, pen and highlighter strokes are saved as ink annotation shapes.
At the top left corner of the window is the Recording toolbar, which you can use to:

If you re-record your narration (including audio, ink, and laser pointer), PowerPoint erases your previously recorded narration (including audio, ink, and laser pointer) when you start recording again on the same slide.
You can also re-record by going to Slide Show > Record Slide Show .
To use ink, eraser, or the laser pointer in your recording, right-click the slide, click Pointer options , and pick your tool:
Laser Pointer
Highlighter
Eraser (This option is grayed out unless you have previously added ink to some slides.)
To change the color of the ink, click Ink Color .
To end your recording, right-click the final slide, and click End Show .
Tip: When you finish recording your narration, a sound icon appears in the lower-right corner of each slide that has narration.
The recorded slide show timings are automatically saved. Timings are shown in Slide Sorter view just beneath each slide.
In this process, what you record is embedded in each slide, and the recording can be played back in Slide Show. A video file is not created by this recording process. However, if you want a video file, you can save your presentation as a video with a few extra steps.
On the Slide Show tab, click From Beginning or From Current Slide.
During playback, your animations, inking actions, laser pointer, audio and video play in sync.
Preview the recorded audio
In Normal view, click the sound icon in the lower-right corner of the slide, and then click Play.
PowerPoint automatically records your slide timings when you add narrations, or you can manually set the slide timings to accompany your narrations.
On the Transitions tab, in the Timing group, under Advance Slide , select the After check box, and then enter the number of seconds indicating how long the slide should appear on the screen. Repeat the process for each slide that you want to set the timing for.
Tip: If you want the next slide to appear either when you click the mouse or automatically after the number of seconds that you enter—whichever comes first—select both the On Mouse Click and the After check boxes.
The Clear command is for deleting timings or narration from your recording that you don't want or that you want to replace. There are four different Clear commands that allow you to:
On the Slide Show tab of the PowerPoint ribbon, on the Record Slide Show button, click the down arrow, point to Clear, and then choose the appropriate Clear command for your situation.
Turn off timings or turn off narrations, ink, and laser pointer
After you've recorded your PowerPoint presentation, any timings, gestures, and audio you performed are saved on the individual slides. But you can turn them all off if you want to view the slide show without them:
To turn off recorded narrations, ink, and the laser pointer: On the Slide Show tab, clear the Play Narrations box.
Turn your mouse into a laser pointer
Animate text or objects
Turn your presentation into a video
Create a self-running presentation
Record your presentation

Toggle video and audio options in the options dropdowns in the recording toolbar.

Note: Your video will be re-recorded just as you had styled.
After you exit Recording Studio with the Esc key (or by clicking End show ) you will see narration (audio/video) applied to your slide along with the proper slide timings and ink animations.
Tip: Audio, video, and inking elements can all be resized and moved in edit view after recording.

Reset to Cameo
To delete your recording and retain your camera style, do the following:
On the Record tab, select Reset to Cameo .

Clear timings or narration
On the Record tab, select Clear Recording

Keyboard shortcuts during the recording process
Related information.
Present with Cameo
Save a presentation as a movie file or MP4
Record audio in PowerPoint for Mac
Add or delete audio in your presentation
Prepare to record
To begin, open the presentation you want and click the Slide Show tab.
Tip: If your presentation has a lot of slides, you might find it more convenient to work in Slide Sorter view. Click View > Slide Sorter to try it out.
Here are some things to check before you begin recording:
If you want to record only part of your slide deck, do one of the following before you begin:
Select the slides you don't want to include, and click Hide Slide .
Click Custom Show > Custom Slide Show > + (add).

Use the Rehearse button to change the timing between slides without affecting the narration or gestures you've already recorded.

Make sure your microphone is set up correctly. On the Mac, go to System Preferences > Sound .
Record your slide show
If you want to add narration or commentary to the slide show, make sure your microphone is set up and working.
To start recording:
Click the Slide Show tab, select the slide where you want the recording to begin, and then click Record Slide Show .

During recording, use Ctrl+click to access the recording commands that let you navigate through the slides, change cursors, or trigger screen blackouts or whiteouts.

Click End Show to stop recording.
A Save dialog box appears. Click Yes to save your recording, or No if you want to record it again.
Saving overwrites anything you've previously recorded. If you want to record another slide show with the same set of slides, save your presentation file with a different name.
Click Play from Start to preview your recording.
You may want to print this list of keyboard shortcuts to refer to while you're recording:
Set playback options
When you've finished recording and are ready to distribute the presentation, click Set up Slide Show and choose the options that are right for your audience.

Show type Show full screen or windowed.
Show options Turn off narration or animations.
Slides Choose a subset of slides, or a Custom show if you've set one up.
Advance slides Set up this version of the slide show so someone can page through it manually.
Add, change, or remove transitions between slides
Start the presentation and see your notes in Presenter view
We're sorry. PowerPoint for the web doesn't support recording a slide show.

Need more help?
Want more options.
Explore subscription benefits, browse training courses, learn how to secure your device, and more.

Microsoft 365 subscription benefits

Microsoft 365 training

Microsoft security

Accessibility center
Communities help you ask and answer questions, give feedback, and hear from experts with rich knowledge.

Ask the Microsoft Community

Microsoft Tech Community

Windows Insiders
Microsoft 365 Insiders
Was this information helpful?
Thank you for your feedback.
Blog > Record voice narration for PowerPoint
Record voice narration for PowerPoint
01.11.21 • #presentation #powerpoint #voiceover #narration.
In this blog post, you'll learn how you can add a narration for your PowerPoint presentation. Adding audio or video narration can be very helpful, especially in a time where many seminars and meetings have to be conducted online. If you would rather give your presentation using a live stream (which has many benefits), scroll down to the bottom and learn how you can do that!
Here's what you need for recording:
- a microphone (your computer's microphone should do)
- a finished set of PowerPoint slides
- a video camera (only if you want to record video as well)
- Open your PowerPoint presentation or create a new one.
- In the taskbar, select Slide Show . Then click Record Slide Show .
- Choose the option Record from Beginning .

- You'll now get to a different view, which we'll call "Recorder View". Here's an overview:

- In the bottom right corner, you'll see three icons. The one on the left is for switching the microphone on/off. Make sure this function is turned on. The icon in the middle is for turning on/off your camera. You can choose if you want to switch the video recording on or not. The last icon is only available if you've chosen the video recording function. If the function is enabled, you'll be able to see a video preview.
- In the top right corner under "Settings", you can choose what microphone (and camera) you'd like to use. This is only relevant if you have an external recording device that you would like to use. If you're recording with your computer, you don't have to set anything here.
- Now it's time to record. Click the big red Record button on the top left and start speaking.
- Tip: You can either record all the slides at once without pressing pause, or you record each slide individually, then click pause, then go on to the next slide and record again. However, it's important to note that PowerPoint creates an individual audio file for each slide, even if you record all at once.
- Important : PowerPoint does not record during transitions, so only speak when you're on a slide.

- You can also draw on your slides with the painting tools on the bottom. These drawings will be saved to your presentations.
- On the bottom left corner, you'll see what slide you're on. You can also see two time counts. The first one is for the recording on the current slide, the second one is for the recording of the presentation overall.
- If you want to delete the whole voiceover, click Clear and Clear Recordings on all Slides . If you only want to delete the recording on the specific slide you are on, click Clear Recording on current Slide.
- If you want to re-record the audio from one slide after deleting it, just go to that slide and click Record again. Record what you want to say, then click Stop when you're done.
- Once you're done, leave the Recorder View. Click the small x in the top right corner or hit Esc .
- You can now either save the presentation as a regular PowerPoint file (just click Save and you're done) or as a video. If you'd like a video, follow the instructions below:
Save Presentation as Video
- Go to File in the PowerPoint taskbar

- Choose Export on the left, then Create a Video .

- Select the quality you'd like. We recommend Full HD (1080p).
- In the following drop-down menu, make sure Use Recorded Timings and Narrations is selected.

- The setting Seconds spent on each slide is only for the slides where there is no recording (if you have recordings on all of your slides, you can just ignore this setting.)
- Click Create Video and choose where the video should be saved. The video creation might take a while, so don't close PowerPoint right away!

Live interaction with polls & quizzes
If you prefer to give a talk where you can also interact with your audience, then the free software SlideLizard is the ideal solution! Using live polls , Q&A and feedback , your presentations will become even more exciting and interactive. SlideLizard integrates directly with PowerPoint, making it a breeze to use.

Can I record a presentation in PowerPoint?
Yes, PowerPoint also allows you to record your presentation with voice and video narration. You can read about how this works in our blog .
How can I record a presentation in PowerPoint with audio and video?
At first create your presentation. For the recording you will need a microphone (the one on your computer should do), your finished presentation and a video camera (if you also want to record a video). We have created a tutorial on our blog where you can read the further steps.
Related articles
About the author.

Pia Lehner-Mittermaier
Pia works in Marketing as a graphic designer and writer at SlideLizard. She uses her vivid imagination and creativity to produce good content.

Get 1 Month for free!
Do you want to make your presentations more interactive.
With SlideLizard you can engage your audience with live polls, questions and feedback . Directly within your PowerPoint Presentation. Learn more
Top blog articles More posts

How to change languages in PowerPoint

Create and insert GIFs in PowerPoint

Get started with Live Polls, Q&A and slides
for your PowerPoint Presentations
The big SlideLizard presentation glossary
A podcast is an audio or video contribution that can be listened to or viewed via the Internet. Podcasts can be used for information on specific topics but also for entertainment.
Online Communication
Online communication is communication over the internet. Online communication is often anonymous and over social media platforms you can communicate with people around the world.
An e-lecture is a lecture that is held online. Many schools and universities offer e-lectures as technical opportunities improve.
Impromptu Speech
A speech that is given without any preparation, notes, or cards, is called an impromptu speech. It is often delivered at private events (e.g., weddings or birthdays) or for training presentation skills.
Be the first to know!
The latest SlideLizard news, articles, and resources, sent straight to your inbox.
- or follow us on -
We use cookies to personalize content and analyze traffic to our website. You can choose to accept only cookies that are necessary for the website to function or to also allow tracking cookies. For more information, please see our privacy policy .
Cookie Settings
Necessary cookies are required for the proper functioning of the website. These cookies ensure basic functionalities and security features of the website.
Analytical cookies are used to understand how visitors interact with the website. These cookies help provide information about the number of visitors, etc.
You’re using an older browser version. Update to the latest version of Google Chrome , Safari , Mozilla Firefox , or Microsoft Edge for the best site experience.
- eLearning Blog
- eLearning Basics
- Instructional Design
- Corporate Training
- Course Selling
- Manufacturing
- Products iSpring Suite iSpring Learn
- Use Cases Onboarding Compliance Training Induction Training Product Training Channel Partner Training Sales Training Microlearning Mobile Learning
- Company About Us Case Studies Customers Partnership Course Development Contact Us Academy Blog Webinars Guides
- Community Academy Blog Webinars Guides Experts on iSpring
- Language EN English Français Deutsch Español Italiano Nederlands Português Polski 中文 日本語 العربية Indonesia
- Shopping Cart
Free Online eLearning Conference | May 2nd–3rd
iSPRING DAYS 2024
Seize the human-centric future of learning
How To Record a PowerPoint Presentation With Audio

Table of Contents

3. Select Record from Beginning if you want to start right from the beginning of a presentation. Select Record from Current Slide if you want to record from a specific slide or wish to re-record a particular slide.

4. By default, PowerPoint records both video and audio. If you don’t need a video in your presentation, turn it off by clicking on the camera button. That way, the tool will only record your microphone along with the presentation file.

5. Click on the Record button to begin recording. PowerPoint will count down 3 seconds in the recording window to allow you to get ready, then you can start speaking.

6. Record your narration for a particular slide or the entire presentation. Use the directional arrow buttons to switch slides. You might want to make a one-second break when you go to the next slide, so that nothing will get cut out. Click on Pause if you want to stop and then resume speaking. When you finish, click on Stop in the recording window.

7. Save the file as a PowerPoint presentation. Then go to the File menu and click on Export . Select Create a Video .
For Mac users : You will be directed to the settings menu right after you click Export .

8. Set the desired video quality. Select Use Recorded Timings and Narrations to maintain slide timings for all of the slides. Then, click Create Video .
For Mac users : You can select the desired video format at this point. Once you’ve set the parameters, click Export .

9. Select the video format and the PC location where you want to save your video presentation with narration. Then, click Save .

Congratulations! Once the export process is complete, your video with the complete presentation will be ready.
How to add an existing audio recording to a PowerPoint presentation
Follow these steps if you have an existing audio file with narration that you’d like to add to your presentation.
1. On the main menu, click on the Insert tab.
2. On the sub-menu, select Audio .

3. Choose Audio on My PC .
4. Then, browse your audio files, select the narration, and click Insert .
How to Record PPT Presentations with Narration in iSpring Suite Max
MS PowerPoint allows you to export presentations with narration in a video format. However, PowerPoint does not offer any audio editing options, so it can be challenging to get good-quality sound and a clear recording without unnecessary breaks, volume differences, and other problems.
If you don’t have time to re-record your audio narration and want great quality with minimal efforts, you might need a more advanced tool like iSpring Suite Max. It works as a PowerPoint add-in and is extremely easy to use. iSpring Suite Max offers many audio recording and editing options for your slide show.
For example, you can synchronize narration with slide animations, remove background noise, and improve slide transitions in your PowerPoint file. You can even create voice-overs without ever recording your own voice by converting text to lifelike AI-generated speech.
Here’s a step-by-step guide on how to record presentations with narration in iSpring Suite Max:
Step 1. Install iSpring Suite Max
Download a free 14-day iSpring Suite Max trial and install it on your computer.
Step 2. Choose your presentation
Open your PowerPoint presentation and go to the iSpring Suite tab.

Step 3. Record slide show with audio narration
The next step will vary depending on your needs. iSpring Suite offers 3 recording options:
- Create a simple recording with preset parameters like noise removal and volume options
- Record audio that synchronizes with the PowerPoint slide and animation timings
Convert text to speech
Let’s look at each of these options.
Record audio with preset parameters
Follow this approach if you don’t have any animations or effects in your presentation and just want to add high-quality narration to your presentation.
1. Click on Record Audio in the top left corner of the menu.

2. Use the intuitive menu and record your narration.
Please note that you can apply some settings before recording. For example, you can set noise removal and volume, which will make your narration more comprehensible and easier to edit. Click on Options to set the desired parameters.

3. Once your recording is ready, click OK to save it.
Synchronize audio with animations
Use this approach if you have animations in your presentations and want them to appear at specific points during your speech.
1. Click Manage Narration.

2. Click Record Audio .

3. Now, you can start recording, save, or cancel the changes you’ve made, and preview your presentation. When you click Start Record , that button will change to Next Slide or Next Animation , offering you an easy transition between slides – as though you were delivering the lecture live using a projector. Each of your live clicks will automatically preserve those specific timings for slides and animations.

4. Click Save & Close to save your recording.
Use this approach if you don’t want to record your own voice or that of a voice-over artist, but need to record and play narrations for your presentations.
1. Click Manage Narration on the iSpring Suite Max toolbar.
2. Click the Audio button and choose Text to Speech .

3. Select the language, speaker, and type of voice.

4. Add the text that you wish to convert, and click the Insert button. Then you’ll be able to choose when to start playing narration: right after you open the slide or later.

5. Click Save & Close to save your recording.
Step 4. Save and export your presentation with audio narration
No matter which option you had selected earlier, you now have an audio file. Your next step is to export your presentation. Click Publish on the iSpring Suite toolbar.

Step 5. Publish your presentation
Select where you want to publish your presentation and in which format. You can either publish it as a video or in one of the different online formats. Select:
- Video – if you want to upload your presentation to YouTube.
- SCORM or xAPI – if you want to upload your presentation to an LMS and track learner progress as they study your presentation.
- HTML5 – if you want to upload your presentation to a website.
Then click Publish .

Congratulations! Your presentation with narration is ready.
Useful resources
We’ve selected some tutorials that can make you a more effective PowerPoint user.
- How to Record a Voice-Over for PowerPoint Presentations
- How to Create a Video Lecture
- How to Add Narration to a PowerPoint Presentation
- How to Create a Video Presentation
- How to Insert a YouTube Video into a PowerPoint Presentation
- How to Convert a PowerPoint Presentation to an MP4 Video on Windows and macOS
- The Ultimate Guide to Lecture Capture
Fast eLearning authoring toolkit
Have you ever searched for a way to create a course but found the tools and resources too complex to use? What if you could design and produce courses in a familiar environment like PowerPoint with full audio or video narration?
The eLearning authoring toolkit by iSpring allows you to create courses from within PowerPoint with just a few clicks. You can also convert your Word and PDF documents into interactive e-books.
Some of the other features include:
- Content Library
- Adaptive player
- Extensive LMS compatibility
- Video Editor
- Interactive assessments
- Screen recordings
- Conversion of PowerPoint slides into mobile-ready courses
- Combination of videos with slides
- Course localization in 42 languages with text-to-speech capabilities
There’s so much more you can do with the iSpring Suite 11 fast eLearning authoring toolkit.
Takeaways
Recording PowerPoint presentations with narration and audio is pretty easy if you follow our guide. And your recordings will sound great and synchronize with your animations perfectly when you use iSpring Suite Max.
The tool also allows you to:
- Create complex online courses
- Build engaging online quizzes
- Create interactive dialogue simulations
- Record video lectures
- Collaborate with your colleagues on simple courses and quizzes right in a browser
- Use over 81,000 ready-made eLearning assets (templates, backgrounds, characters, and icons)
Download a free 14-day iSpring Suite Max trial and start designing engaging learning content right away!
Fast course authoring toolkit
Create online courses and assessments in record time.

Content creator:
Helen Colman
She enjoys combining in-depth research with expert knowledge of the industry. If you have eLearning insights that you’d like to share, please get in touch .
You might also like this

Subscribe to our blog
Stay tuned to get our latest eLearning tips and tricks!
By clicking “Subscribe”, you agree to our Privacy Policy . All emails include an unsubscribe link, so that you can opt-out at any time.
We use cookies to give you the best possible experience on our website and also for analytics and marketing purposes. You can enable or disable optional cookies as desired. See our Cookie Policy for more details.
Manage your cookies
Essential cookies are always on. You can turn off other cookies if you wish.
Essential cookies
Analytics cookies
Social media cookies
How to Record PowerPoint Presentation with Audio & Video on Mac

Recording a PowerPoint presentation with audio and video on Mac is very useful for creating video tutorials, webinars, online courses, and more. With the right tools and techniques, you can easily capture your screen, voice, and face as you present your slides.
Why Record Your PowerPoint Presentation
Here are some of the key reasons to record your PowerPoint presentation:
- Create engaging video tutorials and webinars to share online
- Add narration and visuals for more impactful presentations
- Capture presentations to view later or share with others
- Create online courses and lessons with your slides and commentary
- Explain concepts more clearly by pairing visuals with your voiceover
Tools You Need
To record your PowerPoint presentation with audio and video on Mac, you will need:
- A Mac computer – with macOS 10.14 Mojave or later
- PowerPoint – Microsoft PowerPoint for Mac or Apple Keynote
- Microphone – built-in or external USB microphone
- Webcam – built-in FaceTime HD camera or external USB webcam
- Screen recording software – such as QuickTime Player (built-in) or a third-party tool
Step-by-Step Guide
Follow these steps to record your PowerPoint slides with narration and video on a Mac:
1. Set Up Your Equipment
Make sure your microphone and webcam are connected and enabled if using external devices. Position the webcam properly to capture yourself.
2. Configure Software Settings
Open System Preferences > Security & Privacy and grant access to the microphone, camera, and screen recording for PowerPoint and your recording software.
3. Prepare Your PowerPoint Slides
Open your presentation in PowerPoint and organize your slides. Add transitions and animations if needed. Rehearse your narration for clarity.
4. Launch the Recording Software
Open QuickTime Player or your preferred screen recording software. Configure the audio and video input settings.
5. Record Your Presentation
Click record and start presenting your slides. Speak clearly into the microphone as you progress through the slides. Remember to pause between slides.
6. End the Recording
After the final slide, stop the recording. The software will process and save the video file to your Mac.
7. Edit the Video (Optional)
Use video editing software to trim the start/end, add captions, insert b-roll footage, etc. Export the final edited video.
QuickTime Player Method
Here are more details on using QuickTime Player to record your PowerPoint presentation on Mac:
- Open QuickTime Player on your Mac
- Click File > New Screen Recording
- Click the arrow next to the Record button
- Select microphone and webcam inputs
- Adjust audio levels
- Click record and present your slides
- End the recording when finished
- Trim the video if needed
- Export video to share online
Using QuickTime Player works well for basic PowerPoint video capture on Mac. Third-party software like ScreenFlow offer more customization for high-quality video productions.
Recording your PowerPoint presentation enables you to create dynamic videos to share and educate audiences both live and on-demand. Follow the best practices outlined here for recording on Mac with audio and video. With some preparation and the right tools, you can produce professional videos of your slides to publish and promote online.
About The Author
Vegaslide staff, related posts.

How to Write Meter Square in PowerPoint

How to Search for Online Templates and Themes in PowerPoint

Here is a 1500-word article on “How to Remove Animation from PowerPoint 2010”:

How to Insert Multiple Pictures in One PowerPoint Slide

Genuine software, legally FREE - no cracking required!
Edit Word, Excel, and PPT effortlessly
Read, edit, and convert PDFs with the powerful PDF toolkit.
Microsoft-like interface, easy to use.
Windows • MacOS • Linux • iOS • Android

- Articles of Office solution
How to Record Voice on PowerPoint on Mac (A Comprehensive Guide)
If you've ever wondered how to record voice in PowerPoint on your Mac, you're not alone. This guide is tailored for those seeking clarity on PowerPoint's voice recording feature. Whether you're familiar with PowerPoint or facing uncertainties, this article will demystify the process, offering a clear answer to the question: "How to record voice on PowerPoint Mac?" We'll not only guide you through the steps but also recommend a perfect software solution.
Part 1: Steps to Record Voice in PowerPoint on Mac (Quick and Easy)
To record voice in PowerPoint on Mac, follow these steps:
Step 1: Navigate to the Slide Show tab, typically located at the top of your screen. On Mac, find and select “Record Narration” slightly lower in the list.
Step 2: Click “Record,” and your initial slide fills the screen. Begin speaking. To progress to the next slide, hit the return key.

Step 3: Once all slides are complete, press Esc. Upon finishing the last slide and hitting return, click ‘yes’ in the ensuing message.

Step 4: The subsequent box will ask if you want to review timings in slide sorter view. Choose your preference.
Note: Make sure to save your presentation.
Step 5: For practice presentations, save and showcase in your usual manner. Open the presentation, click on the “Slide Show” tab, and select show, or use the slide show icon at the bottom of your screen.

Part 2: Fix PowerPoint Not Recording Voice on Mac
If you're facing issues with PowerPoint not recording audio on your Mac, follow these simple steps to troubleshoot and resolve the problem:
Fix 1. Let PowerPoint Access Your Microphone:
Step 1: Navigate to Settings > Privacy > Microphone.
Step 2 : Click on the Microphone icon and select MS PowerPoint.

Step 3 : Toggle the switch to grant microphone access.
Fix 2. Reset PRAM:
Step 1 : Shut down your Mac, then power it on while pressing Command, Option, P, and R.

Step 2: Release when the second chime sounds.
Step 3 : Check microphone options in Sound settings.
Fix 3. Use Safe Mode:
Step 1: Restart your Mac, holding the Shift key for Safe Mode.
Step 2: Troubleshoot issues caused by apps or unwanted cache files.
Fix 4. Remove Cache Files:
Step 1: Navigate to Library > Group Containers > Microsoft.powerpoint.

Step 2: Delete the folder to clear cache for MS PowerPoint.
Fix 5. Install Audio Recorder:
Consider using Wondershare DemoCreator for advanced screen recording.
Ideal for students and content creators with integrated editing features.
Let's compare the five methods for fixing PowerPoint not recording voice on Mac:
Methods 1 and 2 are system-level fixes.
Method 3 is a diagnostic approach.
Method 4 targets cache files specific to PowerPoint.
Method 5 introduces external software.
Choose the method that aligns with your comfort level and the specific nature of the issue. For users seeking a comprehensive solution, trying these methods sequentially or combining them may yield the best results.
Part 3: A Free Alternative Choice — WPS Office

Meet WPS Office, your cost-free solution for versatile office tasks. Embrace the freedom as WPS Office comes without any price tag, offering robust compatibility as an efficient office tool. This user-friendly software ensures a seamless experience, enabling you to effortlessly create, edit, and enhance your presentations on Mac.
Pros of WPS Office
Free Access: WPS Office provides robust functionality without any cost, making it budget-friendly.
Strong Compatibility: It seamlessly integrates with various file formats, ensuring efficient collaboration and compatibility.
User-Friendly Interface: The software offers an intuitive and easy-to-navigate interface, enhancing user experience.
Diverse Functionality: WPS Office encompasses a range of tools for creating, editing, and enhancing documents, presentations, and spreadsheets on Mac.
Say goodbye to subscription fees and hello to a reliable, budget-friendly alternative. WPS Office's strong compatibility makes it the ideal choice for users seeking functionality without the hefty cost. Upgrade your office experience today with the power and affordability of WPS Office.
Use Word, Excel, and PPT for FREE, No Ads.
Edit PDF files with the powerful PDF toolkit.
Microsoft-like interface. Easy to learn. 100% Compatibility.
Boost your productivity with WPS's abundant free Word, Excel, PPT, and CV templates.
How to Add Background Music for All Slides in PowerPoint
To include background music in PowerPoint, go to the Insert tab, choose "Audio on My PC," and select your music file. Once loaded, click on the audio icon, head to the Playback tab, and choose "Play in Background" for automatic playback across multiple slides during a presentation.
Where is the Record Button on PowerPoint?
To record a presentation in PowerPoint, open the desired slide, click "Record" near the upper right corner, and choose between immediate recording with the red button or selecting a specific slide to begin. Follow the prompts to enhance your PowerPoint experience.
In closing, this helpful 2023 guide shows Mac users how to easily add voice to PowerPoint. With clear steps and solutions, it makes presentations smoother. Explore the free alternative, WPS Office , for a better experience. Bring more clarity to your slides with audio, boosting your confidence. Elevate your presentations, be creative, and connect better with your audience.
- 1. Top 10 AI Voice Translator Apps Updated in 2024
- 2. How to Record Voice on PowerPoint Online –A Comprehensive Guide
- 3. How to Record a Macro in Word: A Comprehensive Guide
- 4. How to Record a Presentation on Mac (Step-by-Step)
- 5. How to Record PowerPoint Presentation with Audio & Video on Mac
- 6. How to Screen Record Using WPS Office: A Comprehensive Guide

15 years of office industry experience, tech lover and copywriter. Follow me for product reviews, comparisons, and recommendations for new apps and software.
- Screen Recording RecExperts For Windows Screen recorder for PC RecExperts For Mac Screen recorder for macOS Online Screen Recorder Record screen online free ScreenShot Take Screenshot on PC
- Buy Now Buy Now
- Resources Screen Recorder Windows 10 Record Zoom Meeting Record Internal Audio Mac Record Gameplay on PC Video Recording Software
- Support Support Center Guides, License, Contact Chat Support Chat with a Technician Pre-Sales Inquiry Chat with a Sales Rep
- Free Download For Windows For macOS
Record PowerPoint Presentation with Audio and Video Mac/PC
Sometimes we need to record our PowerPoint presentation into a video and share it through the internet. How to record PowerPoint presentations with audio and video on Mac and Windows using excellent recording applications? This post can solve your problem. It provides you with the introduction of some helpful recorders and the detailed step.
Trustpilot Rating 4.7
Don’t forget to share this post!
Page Table of Contents
Updated on Mar 12, 2024
Sometimes it's inconvenient to have a face-to-face presentation, especially in a period of coronavirus pandemic. But you can do that task through a Zoom meeting or record yourself presenting a PowerPoint with video and audio. It is useful to offer much greater flexibility for audiences since they can watch the video and listen to the content in their free time.

How to record PowerPoint presentation with audio and video Mac and Windows ? If you are worried about those issues, keep reading this post, and you can get all the answers in the following parts.
Recommended Ways to Video Record PowerPoint Presentation on Mac
Other options to record yourself presenting a powerpoint.
To record yourself presenting a PowerPoint on Mac, choose effective screen recorders. Two advised tools are here.
Tool 1. QuickTime Player to Capture PowerPoint with External Sound
It is a reliable screen recording tool for Mac. Its multifunctionality helps users in many aspects. For instance, you can record the screen and audio. Featured with basic functions, you can use it to capture the PowerPoint presentation with screen and external sound. It can capture your voice as long as the microphone is accessible.

A simple guide for recording PowerPoint presentations with screen and audio, using QuickTime Player.
Step 1. Open QuickTime Player on Mac, Click "File". Then, choose the "New Screen Recording".
Step 2. When a new window appears, click the down-arrow on the right of the Record button, and select the microphone. Then, click the red circle to start the recording. Also, you can capture the webcam when presenting the PowerPoint.

Step 3. To record PowerPoint presentation with audio and video Mac, you flip the slides when it's necessary. Use the microphone to present the content. Your voice and what is happening on your screen will be recorded.
Step 4. When you finish the presentation, switch back to QuickTime Player, and go to the top right of the toolbar to click "Stop". Then you can save the video to a suitable folder.
Tool 2. EaseUS RecExperts to Capture PowerPoint with System and External Sound
This tool allows capturing the internal and external sound independently. Unlike QuickTime Player which cannot record system sound on Mac, EaseUS RecExperts offers this option. Also, it deals with the screen, game, and webcam on Mac. With these useful functions, you can easily record PowerPoint with audio .
To explore more useful features, try it yourself!
Main features of this screen and audio recorder on macOS:
- Record screen with audio on Mac
- Choose the audio resources from the system or external
- Allow the webcam option on Mac
- Deal with the online meetings and gameplay
Steps to capture the screen for PowerPoint slideshow on Mac:
Step 1. Download and launch EaseUS RecExperts on your Mac. To capture the whole screen, click on the "Full Screen" button from the main interface. If you want to customize the recording area, choose the "Region" button.

Step 2. To record the screen with audio, hit the Sound icon from the bottom left side of the toolbar. The audio resources can be your external sound or system audio. Based on your needs, enable the target option.

Step 3. Before capturing, you can change the output format of the recorded video by clicking "Settings" from the main interface. Then, scroll down the menu of Output format for Video. Choose the output type as you like.

Step 4. Once done, click the REC button to begin recording. It captures anything displayed on your Mac screen. When you are done, click the Stop button. Then you can watch the recorded video from "Recordings".

Besides the two recorders shown in the above part, there are more options if you want to try different functions when capturing PowerPoint presentations with audio and screen.
Option 1. OBS Studio to Video Record PowerPoint Presentation
Compatibility: Windows/Mac/Linux
OBS Studio is famous for its screen and audio recording functions on different operating systems. As a powerful open-source recorder, it supports live streaming and you can extend its functionality as well.
Meanwhile, this tool allows capturing and mixing audio with high quality. For you to capture PowerPoint slides with screen and audio, it's easy to apply the related functions in OBS Studio.

- Powerful configuration option
- Able to work as an intuitive audio mixer
- Easily record screen with audio on Mac
- Frequent updates
- High learning curve
Option 2. VLC to Capture PowerPoint Presentation with Audio
Compatibility: Windows/Mac
VLC offers more powerful features than just playing videos. You can consider this application as a professional one because it supports nearly all next-generation codecs like HEVC, MPEG-4, MPEG-2, and so on. As open-source software, it supports adding plugins to enrich its functionality.
To record PowerPoint presentation with audio and video Mac, you need sound equipment to capture your voice. When the software and hardware are prepared, you can start to record whatever you like.

- Its interface is straightforward and friendly
- Support keyboard commands
- Allow a wide range of encodings
- Don't support burning CDs
- Lack some editing functions for audio
Option 3. Bandicam to Video Record PowerPoint Slides Presentation
Compatibility: Windows
It is an easy-to-use screen recorder. You can choose any part of your screen as the recording area. It supports you to record the webinar, gameplay, online lectures, and Skype calls. Also, Bandicam allows adding a webcam overlay to the screen so that you can easily record yourself presenting a PowerPoint, like making reaction videos, tutorial videos, and so on.

- Support real-time drawing to explain the content in slides
- Add special effects while recording PowerPoint presentation
- The file directories are confusing
- Sometimes the audio quality is not stable
Option 4. Camtasia to Record Slideshow PowerPoint
This software offers features that help record videos to teach, train, and explain concepts. After several updates, it becomes capable of adjusting your audio tracks so that you can obtain consistent sound levels in every video project.
You can use the Theme in Camtasia to add a logo or a representative image to your recordings, which makes your videos impressive and also protects your intellectual property. Try to apply those effects to your PowerPoint presentations!

- Advanced editing features
- Possibility of organizing media
- Various output formats
- Limited cross-compatibility with different versions
- Lack some editings functions for video capturing
This post mentioned several useful recorders that allow recording PowerPoint presentations on Windows and Mac. Among those tools, EaseUS RecExperts is regarded as the most versatile one with its rich features. Download it and have a try!
EaseUS RecExperts

One-click to capture anything on screen!
No Time Limit, No watermark
Melissa Lee
Related Posts

[A Quick Guide] How to Clip Last 30 Seconds on PS4

Record Audio in FL Studio with Ease

How to Stream PS5 to Discord [Quick Guide]

[Easy Steps] How to Screen Record on Motorola in 2024
Success, thanks for submitting!
- Refund Policy
- Terms & Conditions
- Do Not Sell
Copyright © 2004 - 2023 EaseUS. ALL RIGHTS RESERVED.
- Blu-ray Player HOT!
- Blu-ray Ripper
- Blu-ray Creator
- DVD Creator
- Screen Recorder NEW!
- Video Converter
Record Powerpoint Presentation With Audio And Video on Mac
Recent innovations in web design made it possible for people to share their knowledge with others. Examples of these are platforms such as SlideShare, Office Way, and Google Slides. Sharing your slides on this platform will allow others to make use of your work. You won’t get paid but at least you’re making the community of scholars healthier. The world is full of fake information nowadays, and doing this simple thing will help a lot.
Still, the best way for you to share your Powerpoint presentation is through video format. You can do a lot of things with PPT (short term for PowerPoint presentation) if you convert it to a video. It’s possible for you to add voiceovers, effects, and other fancy things.

Does Mac Have A Screen Recorder to Record PowerPoint?
Mac has a built-in function for recording Powerpoint presentations. Mac users may record PPT with the QuickTime software. Quicktime is very straightforward. All you have to do is open it, click the record button, and play the slides one after another.
However, Quicktime is “too straightforward”. Running it at the same time with Powerpoint might lead to unnecessary lag spikes or program crashes. Also, the sound quality of the audio recorded with Quicktime isn’t that great. We only recommend you to utilize QuickTime for personal use. For sharing PPT videos, to the web, classmates, or friends, there’s a better program for you.
Record Powerpoint Presentation With Audio And Video Mac with PPT Recorder
Aiseesfot is much better than QuickTime in a lot of aspects. It has a built-in sound editor, video editor, and image editor. Apart from these, it even has an internal sound recording function. This is especially useful if your Powerpoint contains sound effects and videos. With this feature, your PPT video will be lively and won’t be a wall of boring texts.
Aside from Aiseesoft PPT Recorder, What Are The Essential Tools for Recording Powerpoint on Mac?
Aiseesoft can stand alone on its own. It will work perfectly if it’s okay for you to record Powerpoint without using a lot of techy stuff. However, you need to have these items if you’re planning to record Powerpoint in a geeky manner:
- Noise-canceling headset with mic (usually wireless for Mac)
- Video editor (CyberLink is good in case Aiseesoft’s video editor doesn’t impress you)
- Working Web Camera or Front Camera.
Guide to Recording Powerpoint With Aiseesoft
Let’s begin this guide by installing Aiseesoft.
Step 1 : Click on the button below and download the trial version. By the way, you can also purchase the premium version if you’re feeling lazy to upgrade.
Win Download Mac Download Win Download Mac Download
Step 2 : Download it then open the download folder and locate the Aiseesoft installer. The installer might be named “screen recorder”.

Now that Aiseesoft is installed on your Mac, it’s time to record your Powerpoint.
Step 1 : Connect the noise-canceling headset, and web camera on your Mac ( you don’t need the external web camera if your MAC’s front cam is working fine.)
Step 2 : Open your Mac’s Powerpoint software.
Step 3 : Open one of the PPT’s stored on your Mac.
Step 4 : Go back to Aiseesoft’s interface and click on the video recorder option (this is the first option from the left).
Step 5 : After doing step 4, Aiseesoft will take you to the video recorder interface.
Step 6 : The video interface has 4 options:

- The third option is the internal sound toggle. This allows videos and sound effects within the Powerpoint to be recorded too.
- The fourth option is the microphone. This will allow your voice to be recorded with the Powerpoint.
Step 7 : Click the “REC” button and go back to the Powerpoint.
Step 8 : Play the PowerPoint as usual. Also, don’t forget to talk if you want the Powerpoint video to have voice-overs.
Step 9 : When you’re done, click the stop button ( this is the big red square ).
Step 10 : After doing step 9, you’ll be taken to the video editor interface. Clip the video, or edit it.
Step 11 : Click the save button, rename, choose a format. and store on the folder that you prefer.
Conclusion: Where To Go From Here?
All Powerpoint presentations that you record using Aiseesoft can be opened by all. This means that you can upload them on Youtube, Facebook, Instagram, Twitter, or Pinterest. You can also use recorded Powerpoint in customized reporting and online classes. That said, Aiseesoft is a great choice for giving unique and creative discussions to the class with ease.
Get Aiseesoft now and do things the high tech way!
Share this Post

PowerUninstall
Weekly Sale
Try it Free
How to Record Audio on PowerPoint (Mac&Windows)

Written By Pamela Garcia
Last updated: February 27, 2024
Technical Writing Expert who is good at writing troubleshoot to any Mac issue and have helped lots of readers rescue their Macs.
As time passes by, more and more things are now being accomplished online. Regardless if you are a student or an employee, it would be an advantage to learn technology improvements as they make life a lot easier.
Relative to technological advances, this article will focus on and deal with ways on how to record audio on PowerPoint . If you are someone who has a great need when it comes to creating presentations via Microsoft PowerPoint, this post’s content will surely be beneficial to you especially if you aren’t aware yet of how to do that. Some might find this a dilemma but, it’s simple to resolve. Let’s now try and make your PowerPoint outputs more engaging and more appealing.
Contents: Part 1. Why Can't I Record Audio on PowerPoint Mac? Part 2. How to Record Audio on PowerPoint on Windows? Part 3. How to Record PowerPoint Presentation with Audio and Screen? Part 4. How to Record Audio on PowerPoint Online? Part 5. In Conclusion
Part 1. Why Can't I Record Audio on PowerPoint Mac?
Most Mac users are trying to figure out the reason why they can’t record audio on PowerPoint Mac. This led them to guides like this which tackle methods on how to record audio on PowerPoint using different devices.
If you are one of them, you should know that there could be two probable causes of this issue – outdated microphone permission or user profile problems. All you have to do is to make sure that you allow PowerPoint to access your Mac’s microphone and try creating a new user profile as your old profile could be the culprit.

How to Record Audio on PowerPoint on Mac?
Upon addressing the abovementioned issue, you may now go ahead and follow the below tutorial on how to record audio on PowerPoint on your Mac. The built-in “Record Slide Show” function shall be used in this instance.
- Open the PowerPoint on your Mac PC. Head over to “Slide Show”. From here, choose the “ Record Slide Show ” option.
- Using the icons that you’ll see on the screen’s bottom-right corner, turn on your microphone. Make sure to check your microphone and some other setups via the “Settings” menu.
- Press the “Record” icon to begin recording audio on PowerPoint on Mac. You are allowed to pause, stop, or clear the recordings as you like. Controlling the slides or adding notes can also be done.
- Once you have finished recording, exit from the recording mode. Press the “File” menu, and then choose “Export…” to save the recorded file. You can also go ahead and change the format and quality as you prefer. You just have to ensure that the “Use Recorded Timings and Narrations” menu has been ticked off.
- Upon completing the setup, tap the “Export” button at the bottom of the window. The recorded PowerPoint presentation with audio should be saved to your Mac PC accordingly.

Part 2. How to Record Audio on PowerPoint on Windows?
If you are a Windows PC user and are also thinking of how to record audio on PowerPoint, you’ll be offered a detailed guide as you read this section of the article.
Microsoft PowerPoint ’s “Slide Show” recording feature can directly be used. You just have to prepare and open your PowerPoint presentation and then just follow the below.
- From PowerPoint’s menu bar, press the “Slide Show” menu. Look for the “Record Slide Show” button. Tap the dropdown arrow to select the “Start Recording from Beginning…” option.
- Icons at the bottom are provided to switch the microphone and camera on. If video recording has been selected, the “video preview function” (third icon) shall show up.
- To select the microphone (or camera) to record with PPT, you may tap the “Settings” button.
- The recording will begin once the “Record” icon is pressed. You may now narrate through the microphone. While recording, you may utilize the editing bar, control and monitor the slides, clear recordings on any slide as you like, or restart as you wish.
- Once the recording is completed, save the recorded file by tapping “File”, “Export”, then the “Create a Video” option. Specify the quality you want to use, and then press the “Create Video” option. Don’t forget to click “Save” afterward.

Part 3. How to Record PowerPoint Presentation with Audio and Screen?
Using PowerPoint to record audio is convenient and simple. However, you might find that it has limited functions. For better results, it is a must to try using a professional tool like the iMyMac Screen Recorder to record your PowerPoint presentations with audio and screen. This software is a powerful tool that lets you screen record high-definition webcam and screen while letting you set your audio preferences. Editing functions, annotation tools, and buttons for taking screenshots or opening the webcam are also available.
If you are curious about how to record audio on PowerPoint presentations with a screen easily, the below guide is what you need the most right now.
Get A Free Trial Now! Normal Mac M-Series Mac Get A Free Trial Now!
- Install the iMyMac Screen Recorder on your computer and open it right after. Look for the “ Screen Recorder ” option from the app’s main interface and tap it.
- You may record only the screen (via the “Screen Only” option) or both the screen and camera (via the “Screen and Camera” option) simultaneously. If the second one is chosen, the webcam shall automatically be detected. Tap the “Recheck” button if this does not happen. Go ahead and choose the recording area next – Full, Window, or a custom size.
- Proceed to set up the audio settings. Recording only the microphone is possible through the “ Microphone ” menu or only the system sound through the “ System Sound ” menu. Alternatively, if you wish both to be captured, you may select “System Sound & Microphone”. If you don’t want any sound at all, choose the “None” button.
- The recording shall comment once the “ Start Recording ” button is pressed. If “Window” was selected as the recording area, a window displaying multiple window programs shall be shown. Just select the preferred window (PowerPoint).
- You may conclude the recording process by pressing the red “Stop” button. Automatically, the recording will be saved to your computer. Take note that the “Pause” and “Restart” buttons are also available in case you’d like to stop for a while or begin recording from scratch again.

Surely, using this software will lead you to have the best experience when recording PowerPoint presentations with both audio and screen.
Part 4. How to Record Audio on PowerPoint Online?
If you happen not to have access to PowerPoint’s desktop version, would it be possible to do it online? How to record audio on PowerPoint online then?
You must know that unlike when using the desktop version of PowerPoint, audio recording isn’t directly possible if you are to do it online (as it can only be done directly through the PPT app). But you can still add audio to your presentations. It’s just that you have to do the recording separately and then have it embedded in your PPT presentation afterward.
You may check out the below guide.
- On your PC’s browser, head to “ office.com ”. Make sure to log into your Microsoft account to begin.
- On the left side area of the screen, find the PowerPoint presentation section. Just simply tap it. You may decide to use an existing presentation or create a new one.
- Upon opening a PPT file or creating a new one, go to the “Insert” tab. From here, look for the “Audio” menu.
- Once you press the “Audio” option, there will be a window popup where you will be asked to choose an audio file from your device. You may choose whichever you like.
- After inserting the audio file, a “speaker” icon will be visible on the screen. Moving this to any area on the slide should be fine. Try to click the icon and you’ll see options to adjust the audio or determine how you can better incorporate it into your PPT file.

Part 5. In Conclusion
You are surely delighted knowing that directly recording audio on the PowerPoint app is possible. For Mac and Windows PC users, the procedure is totally simple and even first-timers would find it manageable to do. At this point, you should no longer be asking how to record audio on PowerPoint because aside from the PowerPoint app itself.
You may also take advantage of professional tools like the iMyMac Screen Recorder when recording your PPT presentations (with both audio and screen). With this powerful tool, customization on the recorded files can be achieved as well as the flexibility to define your audio preferences. There are even annotation tools and buttons for additional functions. Additionally, just in case you are wondering if you can record audio on PowerPoint online, it’s a bit sad knowing that it’s not allowed. Fortunately, embedding audio files into the presentations can be done online.
Rating: 4.6 / 5 (based on 73 ratings)
Screen Recorder
Record screen, webcam, audio, and make a screen capture.
People Also Read:
Comment( 10 )
Copyright © 2024 iMyMac. All rights reserved.
You're almost done.
Subscribe to our best deals and news about iMyMac apps.
Warm Prompt
This software can only be This software can only be downloaded and used on Mac. You can enter your email address to get the download link and coupon code. If you want to buy the software, please click store .
This software can be used on Mac and Windows. You can enter your email address to get the download link and coupon code. If you want to buy the software, please click store .
Please enter a valid email address.
Thanks for your subscription!
The download link and coupon code has been sent to your email [email protected] . You can also click the button to purchase the software directly.
- DemoCreator > Easy video recorder and editor for PC & Mac
- DemoAir > Online screen recording tool for everyone
- Effects Store > NEW Creative video effects for DemoCreator
- Virbo > Easily convert text into spokesperson videos
- Screen Recorder >
- Webcam Recorder >
- Voice Recorder >
- Game Recorder > HOT
- Video Presentation >
- Screen Drawing >
- Schedule Recorder >
- Video with Virtual Camera >
- Video Editor >
- Cut/Merge Video >
- Resize Video >
- Change Video Speed
- Batch Processing >
- Video Overlay >
- Audio Editing
- Online Screen Recorder >
- Online Voice Recorder >
- Online Webpage Screenshot >
- Screen Recorder for Chrome >
- Online Video Presentation Maker >
- HOT Video Editor > Take your videos to the next level
- NEW DemoCreator > Easily make a visual video presentation
- AI Avatar Video Generator > HOT
- AI Denoise >
- AI Voice Changer >
- AI Teleprompter > HOT
- AI Subtitle Generator >
- AI Speech Enhancer >
- AI Background Remover >
- AI Text to Speech > HOT
- AI Video >
- AI Voice >
- AI News >
- Hot Spot >
- Best AI Avatar Generators >
- AI Audio to Video >
- AI Virtual Friends Apps >
- Best AI Face Generators >
- Online Course >
- PPT Recording >
- Demo Video >
- Game Recording >
- Record on Windows >
- Record on Mac >
- Record on Mobile >
- Game Recording >
- YouTube Videos >
- Creative Effects >
- Audio Editing >
- Video Conference >
- Zoom Recording >
- Remote Work >
- Demo Video Tips >
- Online Class > NEW
- Teacher Skills >
- Elearning Tips >
- Lectures Recording >
- HOT DemoCreator Camp Take your videos to the next level

- User Guide >
- Video Tutorial >
- Tech Specs >
- What's New >
- Download Buy Now Download Buy Now
- How To Record a Powerpoint Presentation With Audio and Video on Mac

- How to Record Webcam on Windows and Mac
- 6 Best Ways to Take a Scrolling Screenshot in Windows 11 or 10
- Top Tips on How to Record Video on Windows 11
- How to Use a Screen Video Recorder in Windows 7
- Steps on How to Record Videos on Windows 8
- 7 Most Efficient Screen Video Recorders for Windows 10
- 10 Best Free Screen Recorders for PC To Capture Every Moment
- 10 Best Voice Recorder Apps for PC To Enhance Your Recording
- Top Offline Screen Recorder for Mac OS (Free & Paid)
- 10 Best GIF Recorders for Mac
- 10 Best Screen Recorders for Mac [2024]
- How To Record a YouTube Video on a Mac – All Methods
- The Ultimate Race: Top 10 Skype Call Recorders for Mac
- Screen Recorder App for PC, Android, iPhone, and Chrome
- Top 9 Best Android Apps for Screen Recording
- 6 Best Free Webcam Recorders
- Top 8 Secret Screen Recorder Apps in 2023
- How To Record Console Gameplay
- How to Take screenshots in Windows 11
- How to Record YouTube Videos on Your PC [Only 5 Steps]
- How to Record a Zoom Meeting
- Record Facecam on Windows 11 – Top 8 Tools to Try on Windows 11
- Best Webcam Recorder with Facial Beauty Function
- Top 10 Audio Recording Software for Mac
- How to Record Screen on Mac with Audio
- Top Online Sound Recorders
- Audio Extractor: 8 Best Software to Extract Audio from Video
- 6 Best Ways to Record YouTube Audio [Easy]
- 2 Best Ways to Record Audio in Windows 11
- Top 2 Methods for Screen Recording With Audio on Windows 10
- Windows 11 Screen Recorder
- Best OBS Settings for Low-End PC
- Best Windows Game Capture Programs
- 12 Best Android Screen Recorders with Internal Audio
- 10 Best 60 FPS Screen Recorders for Windows/Mac
- Top14 HD 1080P Screen Recorders for PC
- Best Facial Recognition Software
- How To Record Audio in PowerPoint on Mac - Full Guide
Are you a teacher wanting to make remote learning fun for your students? Or a business person needing to give powerful virtual presentations? Recording PowerPoint presentations with audio and video on a Mac can help.
In this tutorial, we will show you how to record PowerPoint presentations with audio and video on a Mac . This will help you create interesting lessons, meetings, or ads that grab your audience's attention. Whether you're running an online workshop or showing off a product, learning this skill will boost your content.
How To Record a PowerPoint Presentation on Mac With Audio and Video Using DemoCreator
The best way to record a video presentation on Mac is by using powerful third-party software solutions. We advise you to try Wondershare DemoCreator to take your recording experience to the next level.
It's a powerful, all-in-one solution that allows you to record and edit your videos and supports up to 4K/8K recordings and 120 FPS, making it suitable for your presentations. Moreover, you can discover the most amazing AI-powered features, such as AI teleprompter, virtual avatar , AI background remover, to elevate your experience and bring your content to life.
Another useful feature that can elevate your video presentation is annotations, where you can draw and interact with the creation during the recording process.
To use the tool, head to the official Wondershare DemoCreator website, download the tool, and follow the steps below:

How To Record a Presentation on Mac Directly in PowerPoint
PowerPoint is also a universal tool that allows you to record your presentations with audio and video on a Mac device. However, you must have a licensed Office account to access this feature. If you do, follow the steps below to learn how to record your creations:
- Open the presentation you want to record.

- Next, select the recording area.

The program will start recording, and you can begin your presentation journey. Beware that the program won't catch any audio elements during transitions, so ensure you don't talk during that period to avoid mistakes.
We don't recommend using this feature to record your PowerPoint presentations because the outcome may be buggy. Moreover, the videos you play within the presentation may be lower in quality, and the audio sequels may also encounter issues.
If you need to record a presentation for professional purposes, you may need more powerful solutions, such as the one above.
Another reason why you should avoid this solution is because it doesn't offer customization features. You cannot create unique recordings, and the journey may be more overwhelming than with third-party software solutions.
- Record screen, audio, and webcam simultaneously
- Various annotation tools to emphasize important points
- AI teleprompter to ensure a smooth presentation
- Compatible with video conference applications like Zoom and Google Meet for live-streamed presentations

Tips for Recording PowerPoint Presentations With Audio and Video on Mac
Recording a professional presentation on a Mac device can be stressful, especially if you have yet to gain experience in the recording field. Thus, we've prepared some tips and guidelines you can follow for the best, most efficient journey.
- Record in a quiet environment - By choosing a quiet place to record your presentations, you'll avoid unnecessary background noises and distractions, leading to more professional results.
- Test your recordings - Before creating the final draft, you should test the recording process and create the most efficient setup. Reviewing your creations lets you see which issues you can work on.
- Ask for opinions - once you record the presentation, you can ask your friends and family members to review the creation and provide honest opinions. It will also help you review your work from an objective perspective.
- I mplement annotations - annotations can help you emphasize the most critical parts of your presentations and convey the appropriate message through your recordings.
- Use captions and subtitles - these textual elements will make your content more accessible and reach a larger audience accordingly.
By using these tips, you'll undoubtedly take your experience to the next level and master the art of presentation recording.

PowerPoint provides some of the best tools and features for creating professional presentations. Once you create your masterpiece, you may want to record it with audio and video elements to enhance its importance. We've covered the best methods you can try to meet your goals and master the art of presentation recording on Mac.
However, to get the most professional results and amaze your audience, you should use powerful third-party software solutions such as Wondershare DemoCreator. This feature-packed tool will allow you to edit and customize your videos, leading to the best presentation experience.
How can I record a PowerPoint presentation on a Mac with audio and video?
What is the best way to record presentations on a mac.
- Open the app and click on the All-in-One Recorder feature.
- Select recording preferences.
- Click the REC button or press the F9 key to start recording.
Can I use DemoCreator to create PowerPoint video presentations on Mac?
You may also like.

Video Presentation Maker
Make your ideas stick with Descript as your free video presentation maker. Get everything you need to record, edit, and share great video presentations, whether you're presenting a pitch, project feedback, course content, or a quick async video message.
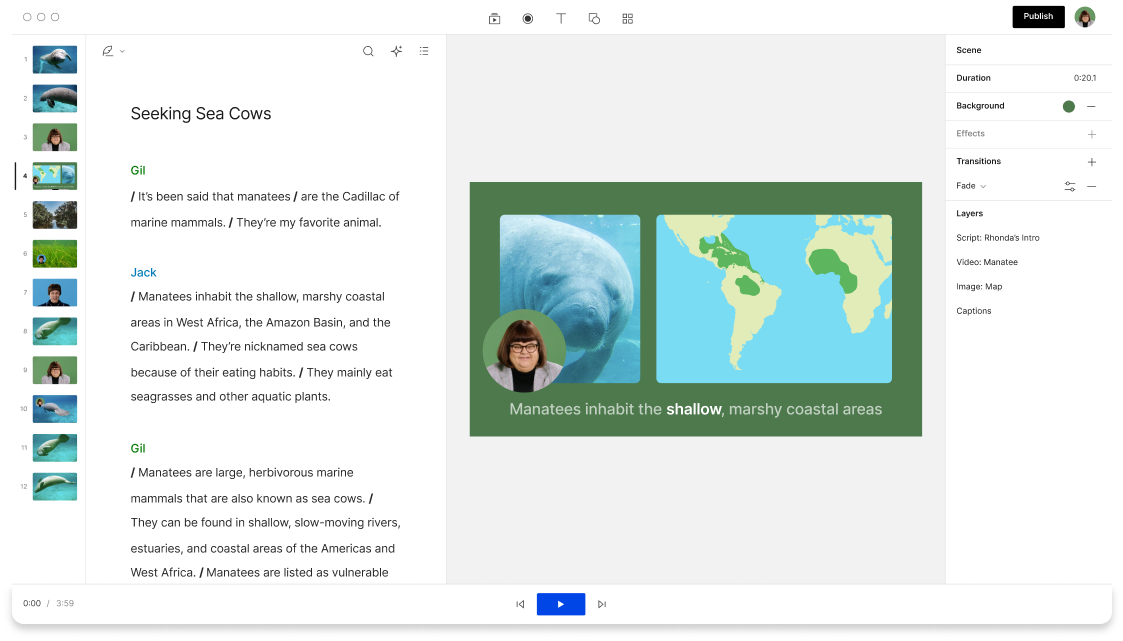
How to create a captivating video presentation
Write your script or paste in an existing draft directly into Descript where you can Ask AI to help you with brainstorming and rewriting. Descript's text-based editor makes it easy to edit and organize your script by adding a '/' to create new scenes and mark transitions between slides.
Highlight your script and hit Record to capture your camera, mic, screen or slides while you read your script. Select Replace selection to replace your script with a fresh transcript synced to your recording. Don't worry about memorizing your lines since Descript lets you fix eye contact, remove filler words, and delete bad takes in a couple of clicks.
Edit the transcript to make cuts, apply transitions, add visual elements or stock media to make your presentation stand out. When you're ready, go to Publish to download your presentation as an MP4 file, or generate a web link you can share or embed anywhere.
Download the app for free
More articles and resources.

The best AI tools for podcasters: From scriptwriting to audio editing to marketing your show

How to optimize your podcast for YouTube

New in Descript: Transcript Correction Wizard and more
Other tools from descript, silence remover, video compilation maker, business video maker, video brightness editor, youtube transcript generator, article to video, youtube description generator, split-screen video editor.
- 3 Create a new project Drag your file into the box above, or click Select file and import it from your computer or wherever it lives.
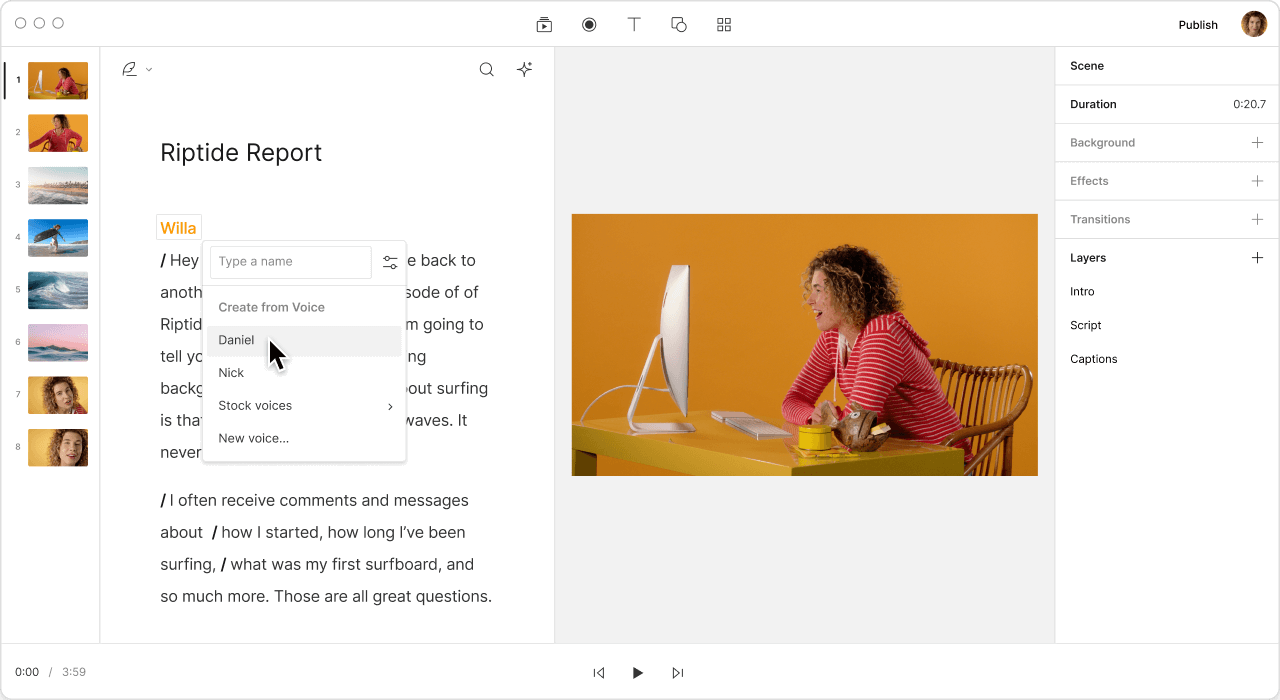
Sound like you recorded in a studio mic using the Studio Sound effect. Don't worry about rehearsing either—with eye contact correction and filler word removal, you can read your script while your record and make it look like you weren't, while removing filler words like "um" or "like"—all in a few clicks.

Design video presentations from scratch in Descript scene by scene. Or record as you present your slides in presentation tools like PowerPoint, Keynote, Google Slides, and Canva, directly into Descript where you can edit and polish.
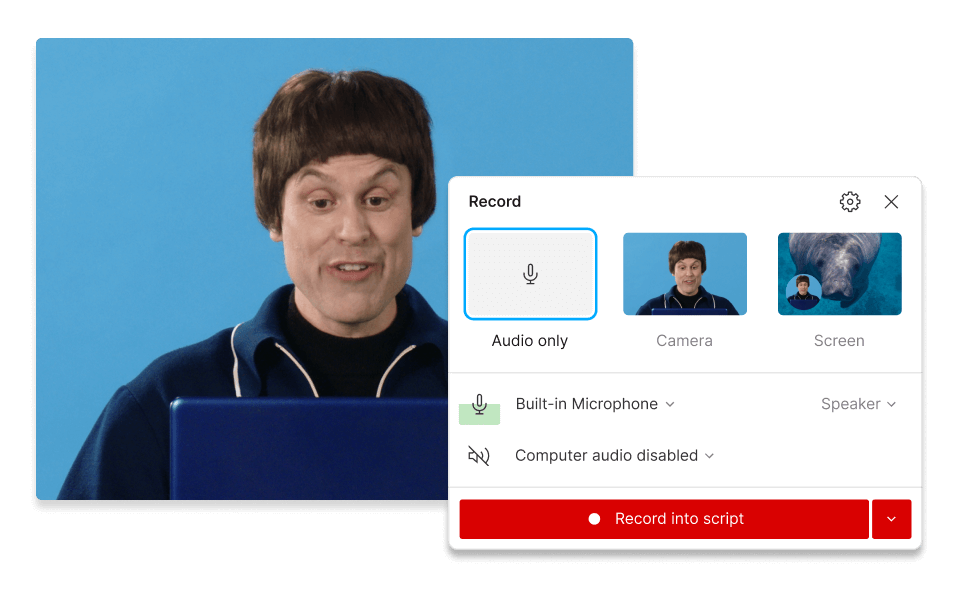
Draw from Descript's extensive library of stock media and templates to enhance your video presentations. Incorporate stock footage, images, GIFs, AI voice overs, music, and sound effects with impeccable timing.

A good video presentation combines a strong host with a visually appealing design that uses examples and infographics to simplify complex information, and concise copy to ensure ideas are clear and easy to follow. Each slide should focus on one idea at a time and ensure reasonable pacing from slide to slide.
You can screen record directly in PowerPoint as you narrate along. Or you can use Descript's built-in screen recorder to record your PowerPoint presentation , then edit, polish, and publish in one seamless workflow.
To record a Google Slides presentation with audio and video using Descript, open your Google Slides presentation and set it up for presenting. Then, open Descript and select Record from the toolbar. Choose to record your entire screen or just the presentation window, and make sure to enable both microphone and camera if you want to include audio commentary and a video of yourself. Start recording, switch to your presentation, and begin. Once done, stop the recording in Descript, and you can edit or share your video as needed.
You can deliver better video presentations using AI features like Eye Contact and Filler Word Removal in Descript. Eye Contact adjusts your gaze to ensure you're always looking directly at the camera, creating a more engaging and personal connection with your audience. Meanwhile, Filler Word Removal automatically detects and eliminates unnecessary words and pauses ("um," "uh," "you know," etc.), making your presentation smoother and more professional.
IMAGES
VIDEO
COMMENTS
In the Options dialog box, click the Customize Ribbon tab on the left. Then, in the right-hand box that lists the available ribbon tabs, select the Recording check box. Click OK. To get ready to record, select Record on either the Recording tab or the Slide Show tab of the ribbon.
Do you want to be able to record your PowerPoint presentations with audio on Mac? 👉In this tutorial, we'll show you two easy methods for recording audio on ...
Step 2 | Start Recording. To record narrations in PowerPoint, start of by finding the Slide Show tab on PowerPoint's ribbon. Click on the Slide Show tab to change the available options. Make sure that you start on the first slide in PowerPoint to record audio and timings for the entire presentation. Now, find the Record Slide Show buton and ...
Tutorial. Open your PowerPoint presentation or create a new one. In the taskbar, select Slide Show. Then click Record Slide Show. Choose the option Record from Beginning. You'll now get to a different view, which we'll call "Recorder View". Here's an overview: In the bottom right corner, you'll see three icons.
1. Open your PowerPoint presentation. 2. Go to the Slide Show tab and click the Record Slide Show box. 3. Select Record from Beginning if you want to start right from the beginning of a presentation. Select Record from Current Slide if you want to record from a specific slide or wish to re-record a particular slide. 4.
In summary, gaining proficiency in the skill of recording audio and video-enhanced PowerPoint presentations on Mac has become an imperative asset in today's realm of communication. This guide has systematically unveiled the steps, tools, and methodologies essential for crafting compelling presentations that deeply resonate with your intended ...
Learn how to record a PowerPoint Presentation with audio and video simply by using the build-in PowerPoint functionalities and tools. You will learn how to...
Open QuickTime Player on your Mac. Click File > New Screen Recording. Click the arrow next to the Record button. Select microphone and webcam inputs. Adjust audio levels. Click record and present your slides. End the recording when finished. Trim the video if needed. Export video to share online.
To record voice in PowerPoint on Mac, follow these steps: Step 1: Navigate to the Slide Show tab, typically located at the top of your screen. On Mac, find and select "Record Narration" slightly lower in the list. Step 2: Click "Record," and your initial slide fills the screen. Begin speaking.
Click the Arrow next to the red Record button and select Internal Microphone. Tap the red Record button, open your PowerPoint presentation, and start narrating. When you're done, click the squared Stop recording button. Head to File > Save and export the video to your Mac.
Want to record and add audio to PowerPoint Presentation? Check the 2 easiest ways and try the user-friendly tool👉: https://bit.ly/3oC2CZUWhile making PowerP...
A simple guide for recording PowerPoint presentations with screen and audio, using QuickTime Player. Step 1. Open QuickTime Player on Mac, Click "File". Then, choose the "New Screen Recording". Step 2. When a new window appears, click the down-arrow on the right of the Record button, and select the microphone.
Now that Aiseesoft is installed on your Mac, it's time to record your Powerpoint. Step 1: Connect the noise-canceling headset, and web camera on your Mac ( you don't need the external web camera if your MAC's front cam is working fine.) Step 2: Open your Mac's Powerpoint software. Step 3: Open one of the PPT's stored on your Mac.
Open the PowerPoint on your Mac PC. Head over to "Slide Show". From here, choose the " Record Slide Show " option. Using the icons that you'll see on the screen's bottom-right corner, turn on your microphone. Make sure to check your microphone and some other setups via the "Settings" menu. Press the "Record" icon to begin ...
Open your PowerPoint presentation and the app and click on the All-in-One Recorder option. Next, customize your recording preferences in the next window, as presented in the image below. Set the capture area and decide whether you want to record system audio, microphone, or webcam simultaneously. After completing the customizations, click the ...
1. Open the PowerPoint slides that you want to record and select the "Record Slide Show" option under the "Slide Show" tab. 2. Set the desired video and audio options in options dropdown in the recording toolbar. Here you can select the input settings and devices for video and audio. 3.
Descript is an AI-powered audio and video editing tool that lets you edit podcasts and videos like a doc. Transcription. Automatically create transcripts and captions to enhance the accessibility of your presentations. Remote recording. Record video presentations with co-hosts in different locations—perfect for interviews or team-based projects.