Urban Book Publishers: The Final Revival of Opal & Nev
Urban Book Publishers: Philip Roth: The Biography
Urban Book Publishers: The Hill We Climb: An Inaugural Poem for the Country
Urban Book Publishers: The Midnight Library: A Novel
Urban Book Publishers: Eight Hundred Grapes
Urban Book Publishers: The Hate U Give
Urban Book Publishers: The Lost Apothecary: A Novel
Urban Book Publishers: Good Company: A Novel
- Let's Get Started
- Book Writing
- Ghost Writing
- Book Marketing
- Autobiography & Memoir
- Ebook Writing
- Book Editing
- Author Website
- Book Video Trailer
- Article Writing/Publication
- Book Publishing
- Book Cover Design
- Custom Book Illustration
- Professional Audio Book

A Step-by-Step Guide: How To Write A Book On Google Docs
Table of Contents:
1. understanding the basics of google docs, 2. what is google docs, 3. benefits of using google docs for writing a book, accessibility, collaboration, revision history, formatting and styles, 4. getting started with google docs, creating a new document, organizing your writing, using headers and footers, setting up the table of contents, writing your book, formatting your book on google docs, page layout, adjusting margins, styling text, inserting page breaks, collaborating and revising your book on google docs, 5. inviting others to collaborate, 6. tracking changes and revisions, publishing your book on google docs, exporting your book, 7. collaborating with urban book publishers, how do i organize my book in google docs, can i collaborate with others in google docs, how do i format my book in google docs, essential feature and benefits insights.
To Listen To The Article, Press The Play Button.
It can be scary to try to write a book. But with the right tools, a little drive, and a pinch of creativity, you can get your story out of your head and onto paper, or in this case, a digital document. This detailed guide will show you how to write a book using Google Docs, a famous, easy-to-use, free word processor.
Before you delve into the world of writing your book on Google Docs, it’s vital to understand the tool itself.
Google Docs is a word processor with Google Drive, a free web-based office suite that Google offers. This tool lets you make documents, edit them, and store them online. You can access your files from any computer with an internet connection, making it a great tool for writers who are always on the go.
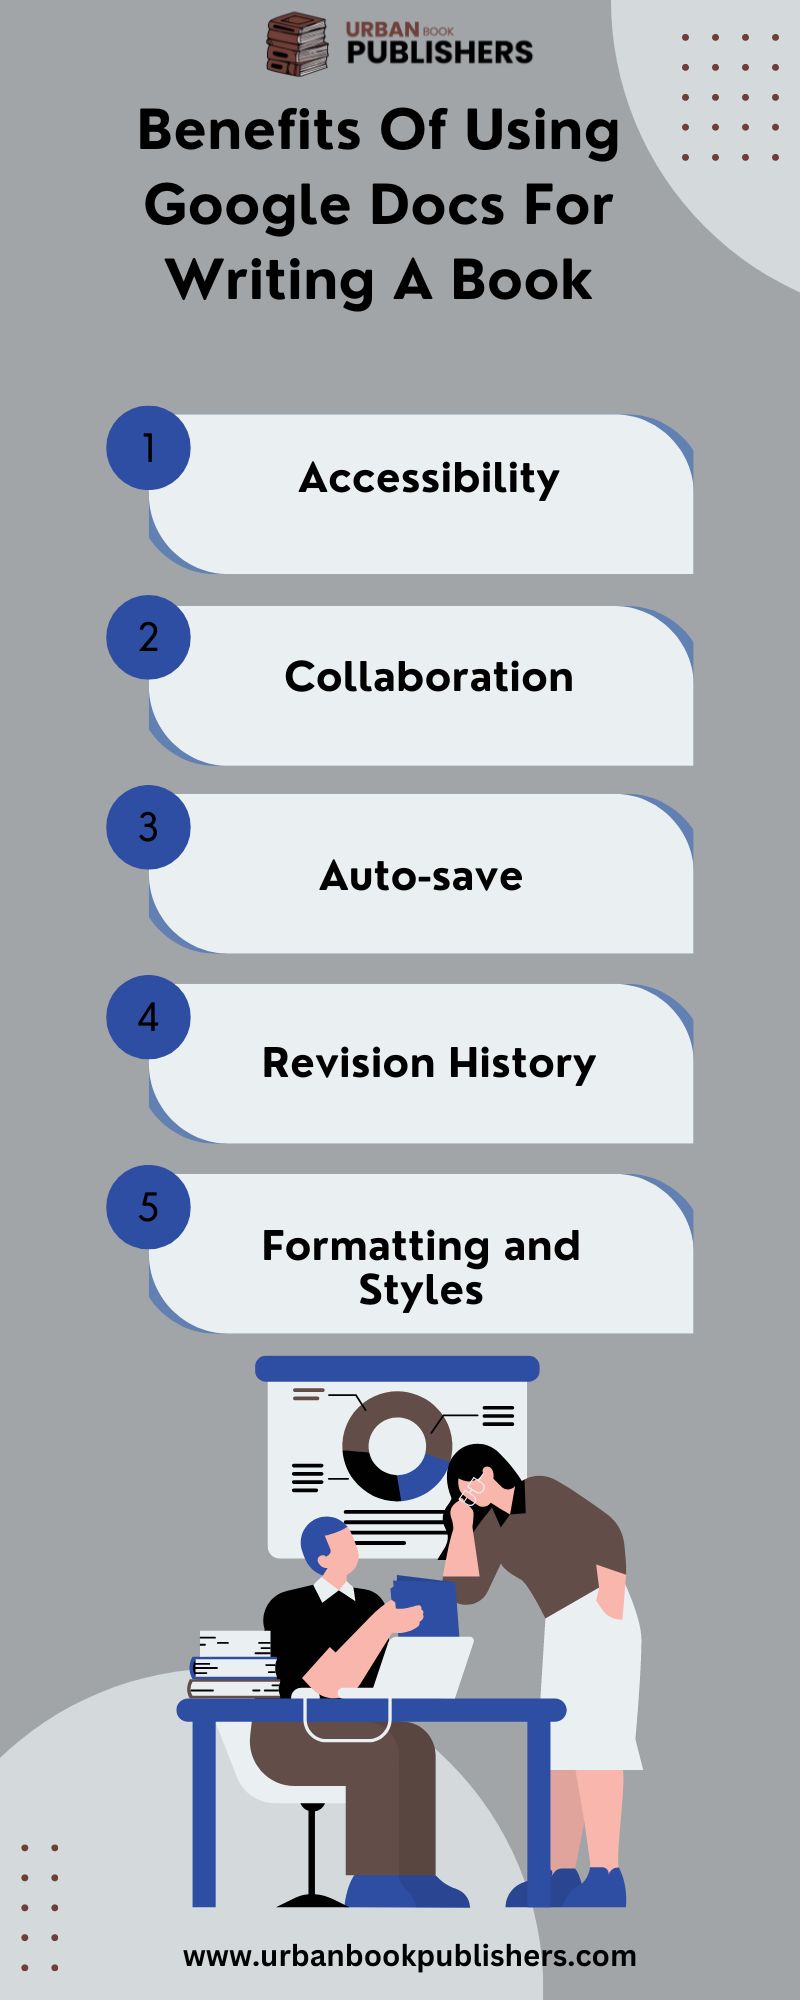
There are several advantages to using Google Docs to write your book, including:
You can access your work from any device… Read about The Future of Book Publishing Embracing Digital Innovation for more insights.”
Google Docs lets more than one person work. Discover more on collaboration in How to Find a Ghostwriter Your Guide to Collaborative Storytelling . This function is very helpful if you are writing with someone else or need feedback from others.
Never lose your work due to a sudden power outage or computer crash. Google Docs, by design, saves your document as you type.
You can track changes and revert to older versions of your document if necessary.
Google Docs provides the essential formatting and style options for writing a book.
Now that you understand why Google Docs is an excellent choice for writing your book, let’s dive into the step-by-step guide on how to write a book on Google Docs.
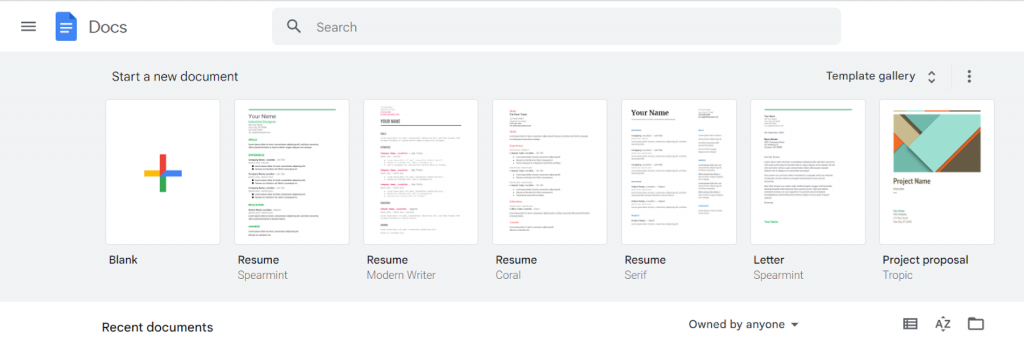
The first step in your writing journey is to create a new document:
- Go to the Google Docs homepage (docs.google.com).
- Click on the “+ New” button.
- Select “Google Docs” from the dropdown menu.
- You now have a new, blank document to start your book.
The key to successfully writing a book on Google Docs is organization.
Headers and footers can hold crucial information such as chapter titles, page numbers, and your book’s title. To insert a header or footer:
- Click on “Insert” in the toolbar.
- Hover over “Header & page number.”
- Choose “Header” or “Footer.”
For more formatting tips, see Formatting Tips for a Children’s Book Layout .
A Table of Contents (TOC) can help you navigate your book efficiently. It also gives you a clear picture of your work’s structure.
- Click “Insert” in the toolbar.
- Select “Table of contents.”
- Choose the format of your TOC.
You can start writing your book now that your Google Doc is set up. Here are a few tips to make the process smoother:
- Write consistently: Set a daily word count goal… and for maintaining consistency, explore 6 Strategies for Writing Simply Effective Communication
- Don’t edit while writing: Keep your creative and editing processes separate.
- Backup your work: Regularly download a backup of your book.
Proper formatting is crucial when writing a book. Google Docs offers all the necessary tools to format your book professionally.
Adjusting the page layout to your book’s requirements is an essential first step in formatting your book.
Here is how you can adjust the margins of your document:
- Click “File” in the toolbar.
- Hover over “Page setup.”
- Adjust the margins as necessary.
Formatting the text can be done in a few simple steps:
- Highlight the text you wish to format.
- Use the toolbar for the font, size, line spacing, and more.
Page breaks are important for separating chapters… and for more on chapter structuring, check out How to Start a Fictional Story To insert a page break:
- Click where you want the break to be.
- Select “Break,” then “Page break.”
Google Docs’ collaboration features can help you improve your book.
- Click the “Share” button in the upper right corner.
- Enter the email addresses of your collaborators.
- Choose their permission level: They can edit, comment, or view.
- Click “Send.”
By accessing your document’s version history, you can view changes made to your document over time.
- Select “Version history.”
- Click “See version history.”
Once you’ve finished and improved your book, it’s time to share it with the world. This step is about exporting your book in a ready version for publication.
- Click “File” in the toolbar.
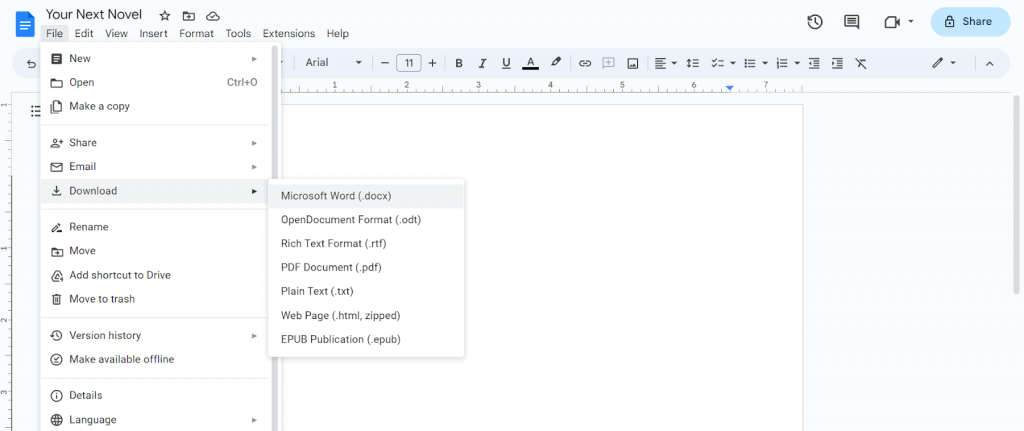
- Hover over “Download.”
- Choose the format in which you want to export your book, such as DOCX or PDF.
Learn about different formats in How to Publish a Graphic Novel .
Once your manuscript is ready, consider collaborating with book publishers new york . They can help with the next steps, such as editing, cover design, and marketing.
You can organize your book using headers, footers, and the Table of Contents feature. You can also use folders in Google Drive to store related documents.
Yes, Google Docs allows multiple people to collaborate on a single document simultaneously.
You can format your book using the toolbar to adjust the font, size, and line spacing. You can adjust the margins and page orientation under “Page setup.”
Thanks to its user-friendly design and wide range of features, Google Docs makes it easy and quick to write a book. Google Docs has everything you need to write, organize, and work together. So start typing and let the writer in you come out.
limited Time offer
50% off on all services.
REDEEM YOUR COUPON: UBP50
Recommended Blogs

Best Selling Nonfiction Books: Chart-Toppers In The World Of Real Stories
How To Make A Comic Book: 2024 Trends

Navigating The Publishing Journey: How To Get A Book Publishing Deal
Ready to share your story with the world.
Take the next step in your publishing journey and turn your manuscript into a published book.
Get In-depth Consultation Today! Connect Now for Comprehensive Book Publishing Support!

BLACK FRIDAY! SIGN UP NOW TO GET 50% DISCOUNT

NEW YEAR SALE! SIGN UP NOW TO GET 50% DISCOUNT

Signup Now to Avail the 50% Discount Offer Get A Free Consultation Call
Dog man: mothering heights: from the creator of captain underpants.
Dog Man and Petey face their biggest challenges yet in the tenth Dog Man book from worldwide bestselling author and illustrator Dav Pilkey.
Dog Man is down on his luck, Petey confronts his not so purr-fect past, and Grampa is up to no good. The world is spinning out of control as new villains spill into town. Everything seems dark and full of despair. But hope is not lost. Can the incredible power of love save the day?
Dav Pilkey's wildly popular Dog Man series appeals to readers of all ages and explores universally positive themes, including love, empathy, kindness, persistence, and the importance of doing good.
Become an author to a best seller
We are here for you. Hire one of our experts and make your dream book come to life.
Philip Roth: The Biography
Appointed by Philip Roth and granted independence and complete access, Blake Bailey spent years poring over Roth’s personal archive, interviewing his friends, lovers, and colleagues, and engaging Roth himself in breathtakingly candid conversations. The result is an indelible portrait of an American master and of the postwar literary scene.
Bailey shows how Roth emerged from a lower-middle-class Jewish milieu to achieve the heights of literary fame, how his career was nearly derailed by his catastrophic first marriage, and how he championed the work of dissident novelists behind the Iron Curtain.
Bailey examines Roth’s rivalrous friendships with Saul Bellow, John Updike, and William Styron, and reveals the truths of his florid love life, culminating in his almost-twenty-year relationship with actress Claire Bloom, who pilloried Roth in her 1996 memoir, Leaving a Doll’s House.
Tracing Roth’s path from realism to farce to metafiction to the tragic masterpieces of the American Trilogy, Bailey explores Roth’s engagement with nearly every aspect of postwar American culture.
The Hill We Climb: An Inaugural Poem for the Country
In New York Times bestselling author Wendy Corsi Staub's riveting thriller, uncovering secrets in the past draws one woman into a killer's web.
On January 20, 2021, Amanda Gorman became the sixth and youngest poet to deliver a poetry reading at a presidential inauguration. Taking the stage after the 46th president of the United States, Joe Biden, Gorman captivated the nation and brought hope to viewers around the globe. Her poem “The Hill We Climb: An Inaugural Poem for the Country” can now be cherished in this special gift edition. Including an enduring foreword by Oprah Winfrey, this keepsake celebrates the promise of America and affirms the power of poetry.
The Midnight Library: A Novel
A dazzling novel about all the choices that go into a life well lived, from the internationally bestselling author of Reasons to Stay Alive and How To Stop Time.
Somewhere out beyond the edge of the universe there is a library that contains an infinite number of books, each one the story of another reality. One tells the story of your life as it is, along with another book for the other life you could have lived if you had made a different choice at any point in your life. While we all wonder how our lives might have been, what if you had the chance to go to the library and see for yourself? Would any of these other lives truly be better?
In The Midnight Library, Matt Haig's enchanting new novel, Nora Seed finds herself faced with this decision. Faced with the possibility of changing her life for a new one, following a different career, undoing old breakups, realizing her dreams of becoming a glaciologist; she must search within herself as she travels through the Midnight Library to decide what is truly fulfilling in life, and what makes it worth living in the first place.
Over twenty years ago, the heiress Patricia Lockwood was abducted during a robbery of her family's estate, then locked inside an isolated cabin for months. Patricia escaped, but so did her captors — and the items stolen from her family were never recovered.
Until now. On the Upper West Side, a recluse is found murdered in his penthouse apartment, alongside two objects of note: a stolen Vermeer painting and a leather suitcase bearing the initials WHL3. For the first time in years, the authorities have a lead — not only on Patricia's kidnapping, but also on another FBI cold case — with the suitcase and painting both pointing them toward one man.
Windsor Horne Lockwood III — or Win, as his few friends call him — doesn't know how his suitcase and his family's stolen painting ended up with a dead man. But his interest is piqued, especially when the FBI tells him that the man who kidnapped his cousin was also behind an act of domestic terrorism — and that the conspirators may still be at large. The two cases have baffled the FBI for decades, but Win has three things the FBI doesn't: a personal connection to the case; an ungodly fortune; and his own unique brand of justice.
The Hate U Give
Sixteen-year-old Starr Carter moves between two worlds: the poor neighborhood where she lives and the fancy suburban prep school she attends. The uneasy balance between these worlds is shattered when Starr witnesses the fatal shooting of her childhood best friend Khalil at the hands of a police officer. Khalil was unarmed.
Soon afterward, his death is a national headline. Some are calling him a thug, maybe even a drug dealer and a gangbanger. Protesters are taking to the streets in Khalil’s name. Some cops and the local drug lord try to intimidate Starr and her family. What everyone wants to know is: what really went down that night? And the only person alive who can answer that is Starr.
But what Starr does—or does not—say could upend her community. It could also endanger her life.
Want more of Garden Heights? Catch Maverick and Seven’s story in Concrete Rose, Angie Thomas's powerful prequel to The Hate U Give.
But with the odds decidedly not in her favor, Amelia knows this feeling can’t last forever. After all, what can?
The Lost Apothecary: A Novel
Hidden in the depths of eighteenth-century London, a secret apothecary shop caters to an unusual kind of clientele. Women across the city whisper of a mysterious figure named Nella who sells well-disguised poisons to use against the oppressive men in their lives. But the apothecary’s fate is jeopardized when her newest patron, a precocious twelve-year-old, makes a fatal mistake, sparking a string of consequences that echo through the centuries.
Meanwhile in present-day London, aspiring historian Caroline Parcewell spends her tenth wedding anniversary alone, running from her own demons. When she stumbles upon a clue to the unsolved apothecary murders that haunted London two hundred years ago, her life collides with the apothecary’s in a stunning twist of fate—and not everyone will survive.
With crackling suspense, unforgettable characters and searing insight, The Lost Apothecary is a subversive and intoxicating debut novel of secrets, vengeance and the remarkable ways women can save each other despite the barrier of time.
Good Company: A Novel
Flora Mancini has been happily married for more than twenty years. But everything she thought she knew about herself, her marriage, and her relationship with her best friend, Margot, is upended when she stumbles upon an envelope containing her husband’s wedding ring—the one he claimed he lost one summer when their daughter, Ruby, was five.
Flora and Julian struggled for years, scraping together just enough acting work to raise Ruby in Manhattan and keep Julian’s small theater company—Good Company—afloat. A move to Los Angeles brought their first real career successes, a chance to breathe easier, and a reunion with Margot, now a bona fide television star. But has their new life been built on lies? What happened that summer all those years ago? And what happens now?
With Cynthia D’Aprix Sweeney’s signature tenderness, humor, and insight, Good Company tells a bighearted story of the lifelong relationships that both wound and heal us.
The Final Revival of Opal & Nev
Opal is a fiercely independent young woman pushing against the grain in her style and attitude, Afro-punk before that term existed. Coming of age in Detroit, she can’t imagine settling for a 9-to-5 job—despite her unusual looks, Opal believes she can be a star. So when the aspiring British singer/songwriter Neville Charles discovers her at a bar’s amateur night, she takes him up on his offer to make rock music together for the fledgling Rivington Records. In early seventies New York City, just as she’s finding her niche as part of a flamboyant and funky creative scene, a rival band signed to her label brandishes a Confederate flag at a promotional concert. Opal’s bold protest and the violence that ensues set off a chain of events that will not only change the lives of those she loves, but also be a deadly reminder that repercussions are always harsher for women, especially black women, who dare to speak their truth. Decades later, as Opal considers a 2016 reunion with Nev, music journalist S. Sunny Shelton seizes the chance to curate an oral history about her idols. Sunny thought she knew most of the stories leading up to the cult duo’s most politicized chapter. But as her interviews dig deeper, a nasty new allegation from an unexpected source threatens to blow up everything. Provocative and chilling, The Final Revival of Opal & Nev features a backup chorus of unforgettable voices, a heroine the likes of which we’ve not seen in storytelling, and a daring structure, and introduces a bold new voice in contemporary fiction.
I’m using Google Docs to write a novel — steal my tips
Feb 22, 2023
[[read-time]] min read
Meet your goals and tell your story.

Writing a book is on many people’s bucket lists, but it's easier said than done. Storytelling involves a lot more than chewing on the end of a pencil and creating genius one-liners that will be quoted for generations to come. It’s a continuous process of drafting, revising and receiving feedback. As someone working on her first novel, I’m well aware of this (sometimes humbling) fact.
I realized I needed help early on in the first draft of my work in progress. Every day, it seemed like I wasn’t writing quickly enough, often enough, well enough. To make matters worse, I lost all my progress when a writing program I was using crashed. I knew if I was really going to do this, I needed a tool to better support my writing. So I switched to Google Docs.
Docs provided me with the flexibility and resources I needed to power through my first draft, and I’ve discovered even more features while doing revisions and working on a few other stories too. If writing a novel is a goal of yours, too, here are some ways Google Docs can help you make it happen.
1. Turn on offline access
One of my favorite places to write is my local park. I’m inspired by the world around me — the hidden trails lined with trees, the hikers sharing stories from their travels, the sun warming my skin — but Wi-Fi’s not always easy to find in the great outdoors. Luckily, I don’t have to be connected to the internet to create, view and edit within Google Docs. Turning on offline access in my Google Drive settings lets me keep working on my draft, no matter where I am.
2. Format your draft with headings
Whether you plot out your novel ahead of time or just go where your muse takes you, a blank page can be intimidating. That’s why I start my stories off with a clean title page, document outline and chapter titles formatted as headings. Rebecca Hsieh, a Product Manager on Docs, is also a fan of headings in Docs.
“As a product manager, I’m writing pretty lengthy Docs all the time,” says Rebecca. “I use headings to help break up the massive wall of text and separate different topics and sub-topics, both for my mental clarity and easier reading for others. I love that with headings, you can customize and save your preferred styles so they become the defaults for new documents.” For the easiest navigation possible, Rebecca also likes to add a table of contents when her documents are more than four pages or so. (As a bonus, all those headings help you get something on the page if you’re nervous to really dive in!)
3. Display word count while typing
The Google Docs “Display word count” feature can be a great tool for short-term writing challenges. Pushing myself to type out 1,000 words in a writing sprint helps me increase my writing speed and combat perfectionism; I’ve also found that it makes writing difficult scenes more exciting. If you also find it motivating to watch that word count climb, select the “Display word count while typing” box when checking your word count in Docs.

Ideal for writing sprints, this feature lets you keep track of the number of words, characters or pages while you type.
4. Try typing with your voice
When I hit a wall, I find that voice typing is an easy way to make my writing more conversational. It also doesn’t hurt that I can give my hands a break. Just be sure to use Docs’ spelling and grammar check to clean up any punctuation before sending your story off to your editor, if you’re working with one.
5. Write across devices
My best ideas seem to come at the least convenient times, like while I’m waiting in line at the DMV, during long bus rides or right after I’ve tucked myself into bed for the night. If I had to race to my laptop every time I thought of new dialogue, I’d probably give up on writing all together. Luckily, Google Docs is cloud-based, making it easy to access drafts on multiple devices. If I come up with a great piece of dialogue in the middle of the night, I can roll over, grab my cell phone and easily jot down my thoughts. In the morning, I can continue working from my laptop.
6. Use Tasks to create a writing to-do list
Writing a novel is admittedly daunting, but like any good hero’s journey, the adventure takes place one step at a time. I find it way less intimidating when I focus on small steps towards my goal, like plotting out a chapter or coming up with character names, than it would be if I just sat down and told myself to write a book. Rebecca recommends using Tasks , located in the Docs sidebar, to break down chapters and edits into actionable chunks.
”If a friend leaves a comment that a paragraph needs to be reworked, you can add a task for yourself and give yourself a deadline,” says Rebecca. “I use Tasks and it saves me a lot of time.”

Tasks created in the Docs sidebar can be viewed in Calendar, Drive, Gmail and other Google Workspace apps.
7. Compare current and previous drafts with version history
There’s a great saying that “the only writing is rewriting.” If you’re anything like me, it’s often more accurate to say, “The only writing is rewriting, then revising just to delete everything and start from scratch again .” Using Docs’ version history allows me to go back and look at things I deleted weeks ago. This can be useful for finding deleted information, but I also find that reading old drafts boosts my confidence and shows how much I’ve improved. I can even restore earlier drafts … or not.
8. Share with beta readers
The most valuable part of the writing process for me is receiving feedback and encouragement from those I trust. Docs’ collaboration features take some pain out of revising, helping me easily collect and review suggestions and comments from beta readers. My writing group also uses Docs to swap scenes. It’s even possible to co-write a story with a friend by giving them edit access.
Writing a novel can be a huge project filled with challenges ranging from correcting spelling errors to overhauling an entire draft. Luckily, if you’ve got big literary dreams, Google Docs is filled with tools to help you along the way.
Related stories

Google Keep reminders will be saved to Tasks
Cloud next 2024: more momentum with generative ai.

5 Workspace announcements from Google Cloud Next '24

5 AI tools to help organize your digital life

New ways Google Workspace customers can use Gemini
Boost your productivity: use gemini in gmail, docs and more with the new google one plan.
Let’s stay in touch. Get the latest news from Google in your inbox.

How to Write a Book in Google Docs: Guide With Template

Since the invention of the personal computer, software developers have been working hard to offer effective word processing tools. In the 21st century, there is more than one writing software: you can use MS Word, Apple’s Pages, Scrivener, Ulysses… The options are endless!
No time to read this article and format a template? Click here .
Among all the book software options available, one is particularly practical for you: Google Docs. It’s free, and all you need is a computer with internet access. You can use Google Docs to write a book from start to finish, after which you’ll be ready to publish your work.
This guide goes over the steps you will need to take to write a book using Google Docs. I will also include pictures for each step to make it easy for you to follow along.
Table of Contents
What is google docs, why write a book in google docs, how to write a book in google docs: 9 easy steps, what to do after writing your book in google docs, book template google docs, what is a book template, why use a book template, writing a book template.

Google Docs is a cloud-based document editor that allows you to collaboratively create and edit your documents. Google Documents (formerly Google Drive) has been around for over ten years now. Still, only recently has it gained in popularity as an alternative to desktop applications such as Microsoft Word or Apple Pages.
Google Docs does what any word processor software can do. But instead of storing files locally on your hard drive, you keep them remotely through the internet. This way, all users involved have access to the documents anytime, anywhere, without installing any other software!
Google Documents allows anyone to create professional-looking texts with style and flair without any complicated formatting usually associated with Microsoft Word and other desktop applications. What’s more, you can use it from any device, from your phone to your tablet to a Chromebook.
Considering the growing popularity of Google Docs, it is not surprising that many people use this service to write their books. There are numerous benefits, including saving time and money. You don’t have to pay a license or waste time with complicated formatting.
Collaborating on a document with your colleagues has never been easier. Google Docs is a free, easy-to-use service that allows you to create and edit documents online in real-time. You can invite others to work simultaneously inside them too.
You can also share ideas privately or publicly for editing and chat while working together around the text (even if one person’s comments are off-screen). You can also see who else is viewing the same file at any given point in time. Using Google Docs is like having an always-available virtual meeting table!
Following is a comprehensive overview of the writing process you can follow step by step to write your book in Google Docs. After reading this article, you will be ready to start writing your book in Google Docs without any issues.
1. Open a Google Docs Document
First, go to www.drive.google.com and open a new document by clicking New and then New Document. If you don’t have a Google Account already, create one here .

Once you have your new document, type in a title. If you don’t have a title yet, name it “My Book Project” to distinguish it from other Google documents in your Drive.

Before you do anything else, create a second Google Docs document by clicking File , then New , then New Document . Name this document “My Book Outline” so you have a Google Docs document where to write your outline and one where to write your book.
2. Find Your Topic to Write Your Book in Google Docs
If you haven’t found your book topic already, make sure you do. You need to find the exact group of people you’re writing for and which conversation you’re going to enter with your unique angle.
Trivium Writing has some of the best, most effective frameworks to help you figure out your target audience and your topic for your book. You can book a free 30-minute consultation call here to speak with us and get clarity.
3. Brainstorm Ideas for Your Book

I suggest using your “My Book Outline” document to write down all your ideas in no particular order. If you’re collaborating with co-authors or need help brainstorming , you can invite other people to collaborate. Click the Share button on the upper right side of the screen and add your friend’s email addresses.
Google Docs lets you write and edit collaboratively with instant synchronization and automatic saving.
4. Write an Outline for Your Book, Including the Chapters and Subheadings, in Your Second Google Docs
Once you’ve brainstormed your ideas , it’s time to put them together. Order your ideas in a way that makes sense. There are multiple ways to order ideas depending on what type of book you’re writing:
- Chronological order : if you’re writing a book on your life or somebody else’s life, it might make sense to organize it based on the chronology of events.
- Thematic order : if you’re writing a non-fiction book (e.g., business, personal development, memoir), you may want to create a concept around a theme and break down this theme into different sections and chapters.
- Practical order : if you’re writing a how-to or self-help book, you may want to organize your ideas based on the lessons, principles, or pieces of wisdom you can share with your audience.
I suggest writing the outline of your book (including the chapters and subheadings) in bullet point form to keep things simple. It’s better to have a sense of direction than a fully mapped-out plan that’s going to stifle your creativity.

At Trivium Writing, we teach clients to use a hybrid planning system (HPS). This system helps create outlines that keep you from getting stuck while never stifling your creativity. The system works with a 4-goal framework that makes writing easy and effective almost effortlessly.
If you’d like to know more about the hybrid planning system, book a free consultation call with us here .
5. Create the Title Page by Entering the Title, Subtitle, and Author’s Name

I suggest you find a font you like and a font size you find easy to read. This way, you’ll have a pleasant time writing your book in Google Docs. In Episode 154 of The Word Leader Podcast, “ The Best Book Writing Software ,” I talk about the importance of getting a format and layout you like.
It helps to think of your Google Docs document as a house you're renting while on vacation. Even though you won’t inhabit the house for long, you do want it to be nice, orderly, and pleasant.
In addition, you can add the date you started writing this book as well as the location.
6 . Create a Table of Contents to Organize The Chapter Titles of Your Book
Before you start writing your content, create a table of contents to keep your sections and chapters organized. Click Insert , then Table of Contents , then the first icon on the left. On the page will appear a text box displaying “ Add Headings (Format > Paragraph styles ) and they will be displayed in your table of contents.

To fill out your table of contents, you need to add your sections and chapters throughout the document. To create new pages, click Insert , Break , and then Break Page . Alternatively, you can press the keys CTRL and Enter on PC or Command and Enter on Mac. Place your section titles in the middle of the page and your chapter titles at the top.

Also, don’t forget to add the page numbers. Click Insert , then Page Numbers , and select the page numbers layout you prefer. You will see the page numbers in the location you picked.

7. Start Writing. Check Your Word Count as You Go Along to Keep Yourself Accountable
You’re ready to get started writing! It’s important to set goals and milestones. A good goal is 500/day or 3,500 words/week . At this pace, you’ll have a 30,000-word book in 2 months and a 60,000/word in 4 months.
To check your word count, click Tools and then Word Count . The word count page gives you:
- the page count
- the word count
- the character count
- the character count without spaces

Note that you can check the box to display the word count at the bottom of the page. Keeping an eye on your word count will help you stay accountable for your goal, especially if you’re on a deadline.
8. Add Subheadings to Your Chapters as Needed
Most books, especially non-fiction genres, have subheadings to their chapters. If you need them, add subheaders to your headers by adding a line before your next paragraph, bolded and without an indent.

Subheadings are important because they make your book more easily skimmable. If someone picks up your book to see if they’re interested in reading it, they will see the subheadings first.
Your subheadings should clearly indicate what you are writing about below, and they should be catchy enough to grab the attention of your target readers—the people who can be greatly impacted by reading your book.
9. Send Your Work to Beta Readers and Edit/Proofread Before Publishing
Once you’ve finished writing your first draft, share your book with beta readers who can critique your work and suggest improvements. Make sure you do your revisions before proceeding to any type of copy editing or proofreading. You will waste precious time if you do any editing or proofreading before revising your work.

You can share your Google Docs document by clicking Share on the upper right corner of the screen. After you’ve entered their email addresses, your beta readers will receive an invitation to view, make suggestions, or edit (depending on the permission you’ve granted them). Note that there is an important difference between copyediting and proofreading. Copy editing consists of editing for grammar, style, and flow, while proofreading consists of fixing typos, mistakes, and consistency errors that slipped during the copyediting process.
Make sure you know who is in charge of each task during the revision process.
Now that you’re done writing your book in Google Docs, it’s time to publish. Make sure your book is edited, proofread, and up to industry standard; then, you can either reach out to publishers or take the self-published route . Either option is fine as long as you choose the one aligned with your goals.
If you’re unclear whether you should seek a publisher or self-publish, book a free 30-minute consultation with us here . We will help you get clarity on your book and what’s best for your goals. If you decide to self-publish, we will tell you how to go about the process.
The Trivium Writing team has prepared a book template in Google Docs that you can start using right away to write your book. The book template is the one presented in this tutorial and is easy to use whether or not you feel comfortable with technology.
To access the book template, click here .
A book template is a document already formatted for the goal you seek to achieve. For example, our Google Docs book template is designed for you to write your book. You will find a table of contents already set up, as well as sample paragraphs to show you how the pages should flow.
A book template is a tool many writers use. There are several different book templates, and every genre requires a somewhat different template. Trivium Writing's Google Docs book template is designed for nonfiction books, but it works just as well for fiction novels. However, it is not suited for poetry.
A book template can save you a lot of time. Formatting a book can be long and tedious, and you are an aspiring author, not an aspiring book designer. While it is possible to format your book yourself (as shown in this tutorial), it's often best to use a template that was already built by someone else.
Using a book template will help you focus on what matters the most: your book. You should be thinking about your ideas and how you express them—not how to format the document in which you write them. Formatting is important to keep your manuscript orderly, but it cannot take nearly as much time as writing itself.
Writing a book template takes time and experience. The Trivium Writing team is able to offer you this Google Docs book template thanks to a decade of experience and trial and error. Unfortunately, many book templates available online simply aren't effective. They don't do a good job of keeping the writer's manuscript clear and organized.
If you are looking to shortcut your way through the book writing process, consider Trivium Writing's Google Docs book template.
Google Docs eBook Template
Trivium Writing's Google Docs book template works well whether you are writing a book for print or an eBook. This eBook is designed to serve you as you write the manuscript. Once you are done writing your eBook, you can use a tool such as Reedsy to create your publishable document, or you can follow Amazon KDP's guidelines. Ultimately, your publishing format depends on how you are publishing.

Article by Leandre Larouche
Leandre Larouche is a writer, coach, and the founder of Trivium Writing.
Share this post
Subscribe now.

Recent Posts
- What Is Developmental Editing? A Comprehensive Guide for Writers
- How to Write a Book Proposal to Get Published Traditionally?
- Understanding the Role of a Writing Consultant
- How to Find a Literary Agent: The Complete, Trusted Guide
- The Thought Leadership Guide: How to Become a Thought Leader

How Long Does It Take to Write a Book? Budgeting Your Time
There are many benefits to writing a book, like increased credibility and visibility. But despite...

The Trivium Writing Standard: The New Gold Standard for Writing
Writing matters. It shapes ideas, and ideas shape the world. The quality of writing has been...

Trivium Writing’s War Chest: Our Best Book Resources
Many entrepreneurs and business owners are looking to write a book to grow their business and...
Call today for a free consultation
We offer a free introductory consultation to help you understand your needs and find the best solution for you or your business.

How To Write A Book In Google Docs
If you’ve used Google Docs for school or writing blog posts, you know it’s versatile, intuitive, and free to use.
So, while it may not be the first word-processing tool you think of for writing books, there are plenty of reasons why it should be one of your top three.
After looking through this post, it might even become your number-one option.
This guide will get you from a blank page (or blog post) to a finished book, with simple step-by-step instructions and screenshots that show you exactly what to do.
- Is Google Docs a Good Place to Write a Book?
Step 1: Break Up Your Outline
Step 2: set and update your styles, step 3: add supporting body text, step 4: insert images and other visuals, step 5: create front and back matter pages, step 6: insert a table of contents, step 7: download your book, step 8: make a print copy, step 9: add page numbers and modify your toc. , is google docs a good place to write a book .
The short answer: Yes. It can be — if you know how to use it.
If you’re asking, “Why use Google Docs when there’s Microsoft Word, Scrivener, etc.?” consider the following perks of using Google’s cloud-based word processing program:
- Cloud-based means you can access it on all internet-ready devices, using the app.
- Google makes collaboration easy with the “Share” feature.
- Draftback saves every change you make and can record and replay your work.
- Voice Typing lets you write your book using your voice instead of your fingers.
- You can convert your book to a Word document download for formatting, etc.
- You can also download your book as a PDF to share it with beta readers.
- It’s FREE to use — no up-front cost and no need for an annual subscription.
As you’ll see in the steps that follow, Google Docs has all the tools you need to create, format, and self-edit your manuscript.
From there, it’s just a matter of downloading it in the form you need for professional editing, interior book design, and publication.
Related: 101 Hobbies for Characters in Your Book
How to Write a Book in Google Docs : 9 Easy Steps
Writing a book in Google Docs will take longer than writing a blog post — mainly because it involves a LOT more writing and a few tricks you may yet be unaware of. We’ll start with a titled outline for your book in a Google Doc (using a numbered list) and go from there.
To insert page breaks, position your cursor where you want the break and either go to the “Insert” menu and select “Break” and then “Page Break,” or hit Ctrl+Enter.

Continue breaking up your outline with page breaks until you have a separate page for each of your chapters and for your book’s title (i.e., your title page).

Knowing how to use page breaks will come in handy when it’s time to add other pages at the front and back of your book.
Now that you’ve got the beginnings of your book template, it’s time to set the styles for your book’s title, chapter headings, and body text.
Start with the Chapter 1 page, select the title, and choose the “Heading 1” style from the style menu. Once you apply the H1 style, you can then modify the text to make it look just the way you want.

Center your chapter title using the alignment tool on the toolbar.

Then choose your fonts, font size, and line-spacing for the Heading 1 (H1) style, which you’ll use for Chapter titles and other page titles in your book.

Once you’ve got your heading looking the way you want it, select the text and go back to the style menu to update the Heading 1 Style with your new formatting.

Do the same for each of your subheadings (subtopics), this time applying the Heading 2 or Heading 3 style. Once you’ve set the font, size, and spacing, go back to the style menu and update your chosen heading style.

Choose from left, right, center, or justified alignment for body text and headlines by selecting the text, going to the top ribbon menu, and selecting the alignment you want.

If your chosen alignment isn’t the default for body text, you can go into the style menu and update the style for “Normal Text” (or for the particular heading style you want to change).

As for margins (top, bottom, left, and right), Google Docs sets those at one inch (1”) all around by default, but you can change that in the Page Setup (under the File menu).

You can also change the page size , though Google Docs doesn’t offer custom sizing.

If none of the sizes offered are what you have in mind for your book, select the one that comes closest. You can always change the page size (in Word) after downloading your book as a Word document.
Now that your subheadings are in place and properly formatted (with fonts, sizes, and line-spacing), you have writing prompts on every page to get your mind working and the words flowing.

This step will take the most time, unless you already have your content ready to copy (say, from your own blog posts) and paste into your document.
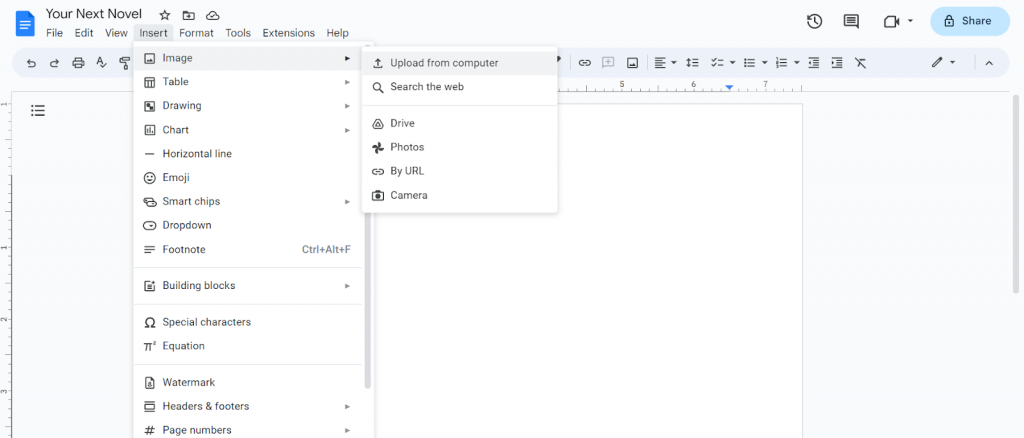
First thing you’ll want to do is position your cursor where you want your inserted visual to appear. Then go to the “Insert” menu, select “Image” and then “Upload from Computer,” if you have the visual saved to your drive, or find your image with an internet search or by accessing Google Drive or Google Photos. You can even use your device’s camera.

Note: Only images that are labeled for commercial reuse and modification will appear in the image search results.

Once you insert your chosen visuals, you can use the image tools to resize each one. Each visual’s alignment depends on the position of your cursor, but you can change that by selecting it and using the alignment tool.
The very first page of your document should have your book title. Add your subheading (if you have one) and your author name to that, center the whole, and modify your fonts, font-sizes, and spacing to create your title page .

After that comes your copyright page , which will use a smaller version of your normal body text — centered and near the bottom of your page.

Add an Introduction (typical for a nonfiction book) by positioning your cursor at the beginning of your Chapter 1 heading, hitting Ctrl-Enter (or going to the “Insert” menu and then to “Break→ Page Break”) to add a page before it.
Go to the top of this new page and add the word “Introduction.” Then select it and apply the Heading 1 style to it, so its formatting will match that of the Chapter titles.
After a carriage return, add the text for your Introduction.

The end pages of your book will likely include the following:
- Conclusion (wrapping things up)
- “Thank you” page (with a review request)
- About the Author page
- Other Books by Author page (optional)
- Appendices, Index, and/or Glossary (optional)
Go to the end of your book and add a new page by inserting a page break. Then title your new page as “Conclusion,” “Now that you’re finished…(or “Thank you”),” “About the Author,” etc. Select your page titles and apply the Heading 1 style to each of them.

Once you’ve written the body of your book — with all your chapter titles and subheadings in place, as well as all your other pages — it’s time to create a Table of Contents (TOC) .
Between your copyright page and the first page of Chapter One, insert a break for a new page with the words “Table of Contents” (or “Contents”) set in Heading 1 style at the top.
Once your page title is all set, go to the “Insert” menu again and scroll down to the bottom to find “Table of Contents.” From there, you’ll choose the second of two options — the hyperlinked TOC, without numbers (for an eBook).

While you can simply share your finished book with an editor using the “Share” function and send it to their email address, if they prefer working with Word documents, you can download your book in Word format.

You can also download your finished book as a PDF to share with beta readers or to upload to your publisher’s website. Simply choose PDF from the download options and click on the download to open it in your browser.

Go into the “File” menu and “Make a copy” of your document. Title this new copy as your “Print Edition.”
Make a copy of your finished eBook and rename it as your “Print” copy. Now, you can add page numbers and modify your Table of Contents to include them.

Make sure you set your starting number at zero (0) if you’re skipping the first page (title page) and you want the first appearing page number to be one (1).
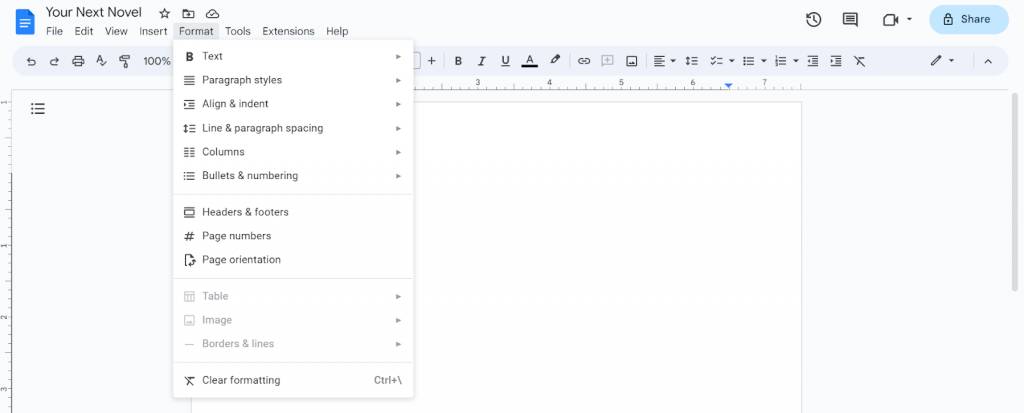
To make your page numbers appear in opposite corners for a two-page spread, go to Headers & Footers in the “Format” menu and make sure there’s a check-mark in the “Different odd and even” option (as well as the “Different first page”).
You’ll have to add page numbering to both the “Odd Page Footer” and “Even Page Footer,” making sure you keep the first page (title page) number-free and keep the starting number at zero (0).

Wherever your cursor happens to be in your document, Google Docs will set page numbering for the entire book, so the “Different first page” is always the title page.
Note: At the time of this writing, the page numbering function only accepts Arabic numerals for page numbering. If you want Roman numerals for pages between the title page and the first page of Chapter 1, you’ll need to download your book as a Word document and modify page numbering there.
Once you’ve got your page numbers in place, you can delete your hyperlinked Table of Contents and insert one with page numbers ( and hyperlinks, which will work in the PDF).

More Related Articles
33 Poetry Publishers Who Can Publish Your Poetry Book
16 Best Self-Publishing Companies For Your Writing Business
List Of Standard Books Sizes To Make The Right Size Selection
At the very least, now, you know how to create book template Google Docs of your very own. From there, it’s just a matter of swapping out the placeholder text for your own content.
The question remains: How soon will you get started on your first book in Google Docs?
You decide what you do with it — whether you give it away as a gift, offer it as a free download from your website, or publish it with an online bookseller.
How will you make the most of your newest book idea?
Leave a Comment Cancel reply
This site uses Akismet to reduce spam. Learn how your comment data is processed .
How to Use Google Docs as a Book Writing Software
For writers who don't want to spend a lot of money on writing software, Google Docs is a great alternative! Here's how to write a book in Google Docs.
You're writing a book, but you're not a rich author yet. Nonetheless, you still need free writing software. An auto-saving program. Software that allows you to access the draft from anywhere, track changes, and control who can edit it. Google Docs gives you a lot of tools that let you use the platform as your novel writing software.
This article won't explore all of Google Doc's tools. Most of those tools are probably already familiar to you. Instead, we'll look at those editing and formatting tools you may have overlooked, but that are vital to the writing and formatting of books.
Can You Use Google Docs as a Book Writing Software?
Google Docs is a free writing software made by everyone's favorite tech juggernaut. If you have a Google account, you probably have access to Google Docs, even if you've never used it. In case you forgot, you need an account to use Gmail and most of the other Chrome features.
RELATED: Google Opens Workspace to Everyone With a Google Account
If you're familiar with Google Docs because you've used it for work or school, that's great. However, you really should be drafting your novel in your own personal Google account—even if that means creating a new account.
This might sound like a hassle, but you won't need to worry about losing access to your docs, or about coworkers and colleagues seeing what you're up to. Both of these can be wildcards using moderated accounts.
What Google Docs Features You Should Use When Writing Your Book
Some of the features that make Google Docs a contender for the best program to write a book are nested pretty deeply in menus and toolbars. Others are right on the surface. However, even those tools that are hiding in plain sight often have secret powers when it comes to writing longer-form content. Let's take a look!
How to Effectively Use Headings
You can insert headings in Google Docs by changing the text style. Click on the field in the top toolbar that reads Normal text to open a dropdown menu. Unless you're writing a textbook, you probably won't need to use anything smaller than Heading 3 . You can also use this tool to insert a Title and Subtitle .
Of course, you should be thinking about headings in terms of end-reader navigation. However, using headings can also help you stay on top of your manuscript as it develops.
Using headings allows Google Docs to automatically create an outline of your manuscript as it comes together. To view your outline, click on the small gray notebook icon to the left of the page view but below the toolbars.
This outline is tiered based on the text styles used in the document. If you don't need that degree of organization or don't want to bother with text styles, putting text in bold will also add it to the outline, even if you don't use headings at all. To collapse the outline, click on the left-pointing arrow in the upper left corner of the outline field.
How to Insert a Table of Contents
Using headings also allows Google Docs to generate a table of contents for you. Select Insert from the toolbar across the top of the panel. The very last item in the dropdown menu is Table of Contents .
The table of contents can either include page numbers (for the reader's convenience) or links to different sections (for the author's convenience). Even if you choose page numbers, you can use the table to click to destinations in the document.
Be aware that Google Docs will put the table of contents wherever your cursor is, and you can't drag and drop it as easily as you can drag and drop other elements on the page. Further, the Table of Contents tools doesn't include bold text, only text formatted using the heading styles.
RELATED: How to Create a Clickable Table of Contents in Google Docs
Left-click the table of contents to see a refresh arrow in the upper left corner. Click this tool to update the table of contents to reflect any edits that you've made. Left-clicking within the table of contents also allows you to manually make changes.
For example, if you have a formatted title page, Google Docs will automatically include it in the table of contents, but you can manually delete it.
How to Make Headers, Footers, and Numbered Pages
Text styles and a table of contents aren't the only organizational features that Google Docs gives you. You can also include headers, footers, and page numbers. In the same Insert menu from above.
Hover your cursor over Page numbers to explode a graphic menu of basic options, or More options . If you don't want to look at page numbers, that's okay—you don't need to have visible page numbers for a numbered table of contents.
If all that you want in the header or footer is the page number, then you don't need to open any additional menus. However, if you want to include other content in the headers and footers or adjust other elements of their display, there are a few more steps involved.
RELATED: Neat Ways to Create Beautiful Google Documents
To include text in a header or footer, just double-left-click above the top margin to add a header or below the bottom margin to add a footer. This opens a text field, but it also lets you open simple formatting options without the need to deal with toolbars and dropdown menus.
However, you can also access header and footer controls through the Insert dropdown menu or the Format dropdown menu.
How to Insert Footnotes
No matter what kind of book you are writing, footnotes can be a handy way to organize supplemental information. There are two ways to insert footnotes: through the Insert dropdown menu, or by pressing the Ctrl+Alt+F keys. Either one of these methods places a note at the bottom of the page, just above the footer margins.
Sharing and Tracking Changes
If you need another pair of eyes on your document, Google gives you all the tools that you need for that too. Select the blue Share button in the upper right corner of the pane. From here, you can share the draft directly with other emails or organizations linked to your Google account.
You can also get a link to share your document with anyone. Underneath the link permissions, select Change to adjust these settings.
These settings allow you to allow another user to edit the doc, make changes, or make comments. You or other editors can also go between making edits and suggesting edits by selecting the icon just under the Share button.
This icon appears as a pencil when you're in edit mode, as a pencil in a speech bubble when you're in suggesting mode, or as an eye when you're in viewing mode.
Remember that you can also select Version history from the File dropdown menu to see previous edit versions of your document.
RELATED: How to Use Version History in Google Docs
Play Around to Explore More Features
There are many, many tools in Google Docs. So many, that it can absolutely serve as your primary novel writing software. The tools in this article are a few of the more essential ones, but there are certainly more tools under the hood.
If you're serious about creating a book with Google Docs, don't be afraid to spend a day pushing buttons and opening menus just to see what's available.
- Link to facebook
- Link to linkedin
- Link to twitter
- Link to youtube
- Writing Tips
The Complete Guide to Writing a Novel in Google Docs

4-minute read
- 17th April 2023
In this guide, we’re breaking down how you can write a best-selling novel in Google Docs in 12 easy-to-follow steps.
Why Google Docs Is a Great Option For Authors
Google Docs is a great platform for authors for many reasons. Google Docs is a cloud-based platform, meaning you can access your writing from any device with an internet connection. You can easily switch from your phone, laptop, or tablet whenever and wherever you’re inspired to write.
Authors can also appreciate the auto-save function and version history, so you never have to worry about losing your work.
Google Docs is also a great platform for collaborating and getting feedback since you can seamlessly share your novel with your editor, beta readers, or publisher. Other helpful features include built-in research tools, easy organization and navigation, integration with other apps, and offline access to documents.
Twelve Steps to Writing Your Novel in Google Docs
1. create a new document.
Open Google Docs in your web browser and sign into your Google account. Click on the Blank option to create a new document.
2. Set Up Your Document
Give your document a title by clicking on Untitled document at the top-left corner and entering the desired title for your novel.
3. Organize Your Novel
It’s helpful to create a structure or outline of your novel before you start writing it. Use headings, subheadings, and formatting options to divide your novel into chapters, scenes, or sections. This will help you navigate through your work easily.
4. Begin Writing
Start typing your novel beginning with the first chapter. Google Docs provides a distraction-free writing environment with a clean interface, making it easier to focus on your writing.
5. Utilize Formatting Tools
Google Docs offers various formatting options to enhance the appearance of your novel. You can adjust font style, size, and color and use bold, italics, underline, and other formatting tools to highlight specific elements or create emphasis.
6. Save Your Work
Google Docs automatically saves your document as you type, so you don’t have to worry about losing your progress. However, it’s a good practice to periodically save your document manually by clicking on File in the menu bar and selecting Save or by using the shortcut Ctrl + S (Windows) or Command + S (Mac).
Find this useful?
Subscribe to our newsletter and get writing tips from our editors straight to your inbox.
7. Add Images and Media (optional)
If you want to include images, graphics, or media in your Google Doc , you can do so by using the Insert menu at the top. You can insert tables and charts or even link YouTube videos if needed.
8. Collaborate and Receive Feedback
Google Docs allows you to collaborate with others by sharing your document with specific people or providing them with a link (do this by clicking the blue Share button on the top right). You can also enable the suggestions or comments mode, allowing others to provide feedback directly within the document.
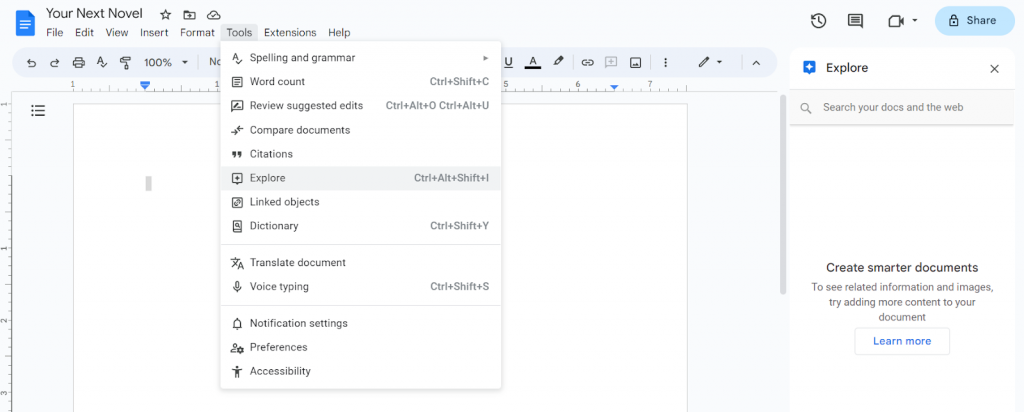
9. Use the Research Tools
Google Docs has a built-in research tool that can be handy while writing a novel. You can access it by clicking on Tools in the menu bar and selecting Explore . This tool provides access to search results, images, and related information that can aid in your research process.
10. Track Changes (optional)
If you’re working with an editor or want to track your revisions, you can use the Suggesting mode . Click on Editing in the top-right corner of the document and select Suggesting . This mode highlights changes and allows others to accept or reject them.
11. Revise, Edit, and Proofread
Once you’ve completed your initial draft, it’s essential to revise , edit , and proofread your novel . Use Google Docs’ editing features like spell check , grammar suggestions, and thesaurus to improve the quality of your writing.
If you are looking to self-edit your novel, check out our proofreading checklist for expert advice.
12. Export or Publish
When you’re ready to share your novel with others or publish it, you can export your document into various formats such as PDF, Word, or EPUB. To do this, click on File in the menu bar, select Download , and choose the desired format.
By following these steps, you can efficiently write your novel in Google Docs while taking advantage of its collaborative features, easy access, and reliable auto-saving capabilities.
If you want to use Google Docs like a pro, check out our other informative Google Docs articles and guides !
Share this article:
Post A New Comment
Got content that needs a quick turnaround? Let us polish your work. Explore our editorial business services.
3-minute read
How to Insert a Text Box in a Google Doc
Google Docs is a powerful collaborative tool, and mastering its features can significantly enhance your...
2-minute read
How to Cite the CDC in APA
If you’re writing about health issues, you might need to reference the Centers for Disease...
5-minute read
Six Product Description Generator Tools for Your Product Copy
Introduction If you’re involved with ecommerce, you’re likely familiar with the often painstaking process of...
What Is a Content Editor?
Are you interested in learning more about the role of a content editor and the...
The Benefits of Using an Online Proofreading Service
Proofreading is important to ensure your writing is clear and concise for your readers. Whether...
6 Online AI Presentation Maker Tools
Creating presentations can be time-consuming and frustrating. Trying to construct a visually appealing and informative...
Make sure your writing is the best it can be with our expert English proofreading and editing.
Become a Bestseller
Follow our 5-step publishing path.
Fundamentals of Fiction & Story
Bring your story to life with a proven plan.
Market Your Book
Learn how to sell more copies.
Edit Your Book
Get professional editing support.
Author Advantage Accelerator Nonfiction
Grow your business, authority, and income.
Author Advantage Accelerator Fiction
Become a full-time fiction author.
Author Accelerator Elite
Take the fast-track to publishing success.
Take the Quiz
Let us pair you with the right fit.
Free Copy of Published.
Book title generator, nonfiction outline template, writing software quiz, book royalties calculator.
Learn how to write your book
Learn how to edit your book
Learn how to self-publish your book
Learn how to sell more books
Learn how to grow your business
Learn about self-help books
Learn about nonfiction writing
Learn about fiction writing
How to Get An ISBN Number
A Beginner’s Guide to Self-Publishing
How Much Do Self-Published Authors Make on Amazon?
Book Template: 9 Free Layouts
How to Write a Book in 12 Steps
The 15 Best Book Writing Software Tools
How to Write a Book on Google Docs
POSTED ON Jul 29, 2022

Written by Sarah Rexford
Google docs is a great resource that can aid you in your writing goals. Not only is it a free writing platform, but it allows you to share your work in real-time with others, invites their feedback via comments, and saves you the effort of sending multiple drafts via email.
If you’ve only written your drafts via Microsoft Word, Pages, or some other offline format, learning Google Docs will be a quick, added bonus for you. This platform is easy to use, has pros that offline formats do not, and is regularly used by writers around the world.

In this article, you'll learn how to write a book on Google Docs. We'll dive into:
What is Google Docs?
How to use google docs, why you should use google docs.
- Organizing your Book
Let’s dive into what exactly Google docs is.
Google Docs is very similar to Microsoft Word, in that it follows a similar formatting layout, allows you to track your word count, insert images, and offers a similar alternative to Track Changes.
This writing software also offers a speak-to-text option which can be extremely beneficial for the writer cranking out hundreds if not thousands of words a day. Additionally, an offline option is offered and Google Docs is compatible with Grammarly .
- Related: Review of Grammarly
But when it comes to writing an entire book, how do you use this software?
When you first open a new, Google document, you will want to insert your title in the upper lefthand corner. This will allow you to easily access your document at a later date. You can also insert your name in the header, just as you can with Microsoft Word.
Both of these options allow you to keep track of your current project.
If you want to share your project with a collaborator, click the Share button in the upper-righthand corner. The Share option provides multiple ways to collaborate with others:
- Share with an individual
- Share with a group
- Share editing access
- Share in view-only
- Allow anyone with the link to access
Choose which option is best for you, and you’re set to go.
As a writer, do you know that dreaded feeling of trying to find which draft – “finaldraft” vs. “FINALfinaldraft” vs. “FORREALFINALv5” – is the real one?
When you write a book on Google Docs, that feeling is no longer a reality. It's a relic of the past. You and your future editor don't have to send endless revisions back and forth. Instead, you can collaborate in one document, with all changes and revision history tracked forever.
In fact, it offers several modes for your collaboration and final product review (which can be great for editors, beta readers, etc):
- Editing mode
- Suggesting mode
- Viewing mode
Suggesting mode is similar to Track Changes, and suggestions can be accepted or rejected by the individual or originally makes them or the final editor.
Google docs also allows you to see editing history and color code changes. This can be extremely helpful if you work with an editor and want to see their most recent changes.
Another side benefit for why you should use Google Docs is this:
If you are on a tight deadline, you can use speak-to-text to get your daily word count down in record time, and use the suggesting mode to make edits later on. Knowing how to hit your word count and finish your rough draft is crucial to your author success, and doing that without typing a single word, can help alleviate stress.
Organizing your book
Google Docs also allows you to create folders with Google docs within. Make use of the folder option in order to keep track of your main manuscript, sections you cut but want to save for another book, or for other book-related resources (like your book description, author bio, etc.)
Folder titles
For instance, when you first start your book and it’s time to organize, create a single folder and title it appropriately. If you’re unsure how to title your folder, consider this format:
- Working Title
- Draft Number
- Author Name
You can also use brackets to make specific projects easier to find. For example:
Title the individual documents accordingly as well.
Google Doc titles
Follow a similar format for individual documents, and don’t forget to start a new document when necessary. If you want to share a single chapter with someone for feedback, you can copy and paste that chapter into a new Google doc, title it, and share it accordingly, then send it directly to that person.
This allows you to:
- Share specific chapters with specific people
- Find certain sections easily without using the Search bar
- Have an additional safety feature
If your friend accidentally screws it up or starts removing whole sections in that one doc, your whole project isn’t unaccounted for. When you have multiple people looking at multiple different sections, this is very helpful to split out each each into separate docs for their review.
Organize with collaborators
Format your manuscript into several folders, specific to your collaborations. For instance:
- Folder 1, your draft, shared only with you
- Folder 2, your draft, editing access shared with your editor
- Folder 3, viewing access only, shared with beta readers
Using Google Docs is especially helpful because it avoids long email threads that can get lost in your Inbox. Again, if you want to collaborate with a co-author, Google Docs are especially helpful because you don’t have to send the document back and forth via email.
- Related: How to Find an Editor
- Related: Beta Readers
Details: headers and footers
If you want your book to look professionally drafted, don’t forget the importance of appropriately using your Google Doc header and footers. Simply double-click the white space of your header and you will be able to type in the available area.
Especially during the drafting stage, it can be beneficial to put the working title in the upper left of the header, align your author name in the middle, and insert page numbers on the top right. If you want to include a copyright in the footer the space is available, but it is likely unnecessary.
Extensions while writing
If you are used to working in Word but want the online option of Google Docs, you don’t need to give up Grammarly, because Google Docs is compatible with it. This can be a monumental bonus when writing. Grammarly helps point out typos, sentence structure issues, and other grammar mistakes that may not be best for your book.
Additionally, the added online feature will help cowriters, beta readers, or your editor be able to edit or proof your book more efficiently. Of course, it’s important not to singularly rely on Grammarly, but this extension, combined with the online features can be very helpful in real-time edits.
Remote work with collaborators
Google Docs can break down the barrier of distance with its cloud-based format. If you work closely with an editor who lives in Colorado, but your home base is Tennessee, Google Docs can closely resemble working together in real-time.
With the option for two to work on the doc at the same time, the added feature of inserted comments, suggestion mode, and even starting a meeting and presenting your Google doc tab, you can easily work in real-time without travel.
Begin your manuscript with Google Docs
Now that you have a grasp of the benefits of working with this free software, it’s time to get back to writing. Google docs can improve your writing efficiency, whether you:
- Use the online or offline mode
- Share your doc with a colleague
- Desire the convenience of accessing your work at any time
Google Docs is not fail-safe, but it's pretty close. If you're paranoid about losing your work, you can always keep an updated version of your manuscript backed up. But all-in-all, Google Docs has a ton of benefits and features that can help you write your book more efficiently.
Make sure not to get lost in the conveniences Google Docs offers. Learn the software and get back to your writing. It’s time to make your dream a reality. We look forward to hearing how this software works for you and seeing your completed draft one day soon.

Related posts
Business, Writing
You Don’t Need to Hire a Business Book Ghostwriter – Here’s Why
Business, Marketing, Writing
Amazon Book Marketing: How to Do Amazon Ads
Writing, Fiction
How to Write a Novel: 15 Steps from Brainstorm to Bestseller
Kindlepreneur
Book Marketing for Self-Publishing Authors
Home / Book Writing / How to Write a Book Using Google Docs
How to Write a Book Using Google Docs
The idea of writing a book using Google Docs may sound strange. Since it's free (with a Google account), it's easy to assume that it's not up to such a monumental task. But it definitely is…most of the time.
Google Docs might not be the top-tier book writing software, but it provides everything I need to jot down my thoughts, refine them (with a bit of assistance), and then determine the next steps for my completed manuscript. This could mean self-publishing or presenting it to literary agents or publishers.
But let's not put the cart before the horse. The first step is writing the book you have in you. So, read on to discover how I go about writing a book using Google Docs.
- Benefits and drawbacks of using Google Docs to write your book.
- How to start writing your book using Google Docs
- What features to use for a streamlined writing experience.
- Formatting your book in Google Docs
The Best Tool for Book Writing
While Google Docs is an option for writing your book, it’s not expressly designed for it. But Atticus is. I, and my amazing team, took the best of Google Docs and combined it with awesome features from other writing tools to make Atticus .
This all-in-one writing and formatting software has a ton of features for writers of fiction and nonfiction books. Drag-and-drop chapters, ProWritingAid integration, customization options, and goal-setting tools are just a few of the features . It’s an easy-to-use word processor in addition to a professional formatting tool. It includes over a dozen pre-built templates to choose from. Or you can design your own! You can export as many EPUB and print-ready PDF files as you like. It’s all included in the one-time price.
I'm also working on a ton of new features. Soon, you’ll be able to collaborate with co-writers and editors right in the app.
If you want to learn more about Atticus , check out this article . To see how to write your book the more complicated way, using Google Docs, read on! I've still got you covered.
Pros and Cons of Writing a Book in a Google Doc
If you have a free Google account, you have access to Google Docs, Google Sheets, Google Slides, and Google Forms. These tools stand toe-to-toe with Microsoft Office and bear striking similarities in their functions. However, as our topic is centered on writing a book, I'll be zeroing in on Google Docs, which presents its own set of advantages and challenges for penning a manuscript.
- Auto-save and cloud storage so you won't lose your work.
- Free and easy to use.
- Provides basic editing tools.
- Provides a collaboration function.
- Allows you to export in multiple file formats.
- Only access your saved work when online. (Although with precautions, you can access it offline.)
- Not ideal for formatting for self-publishing.
What Qualifies Me to talk about Google Docs?
This is an excellent question. The bottom line is that I've been in the publishing industry for well over 10 years, and I have a lot of experience working with various writing tools like Google Docs, Scrivener, and a lot of others.
Plus, I've worked with hundreds of authors, many of them well known, and have a decent sense from what they've told me, and what others in my audience have mentioned in surveys, about what book writing tool they like the most.
So with that, let's take a closer look at how to write a book with Google Docs.
Basics of Writing Your Book in Google Docs
When it comes to the mechanics of writing your book, I sincerely believe there's no one right way to do it . Some people work from an outline they have in another document or file on their computer. Others never outline, letting the creative flow take them where it will. Some people open another document for notes and research, while others keep the notes in the same document in its own section.
You'll have to figure out what's right for you, because what works for me might not for you. But the basics of this section will be handy no matter where you keep your notes (if you even take any) or whether you work from an outline.
Getting Started
To start your Google Document, find your way to your Google Drive dashboard or simply go to the Google Docs home page . Once you're signed in (if you're not already), select a new blank document.
You'll see that there are some Google Docs templates available, but none of the standard ones are book templates. Besides, I don't recommend working from a book template until you know the basics of the word processor. More on whether book templates are any good later. For now, back to your new document.
In the top left corner, type in the name of your book or a placeholder title.
Now, you're ready to write! You can start getting the words down immediately or make the next few adjustments first. Either way, Google will auto-save any changes as they're made, ensuring that you don't lose any work.
Changing Font Size and Style
As you can see from the picture above, Google defaults to Arial text style and 11-point font size. Feel free to change this at any time. Times New Roman and 12-point font are standard for most manuscripts. But at this stage, choose one that you will like and that will be easy on the eyes .
If you want to change the text you've already entered, just highlight it and use the font menu to change it.
Adding Chapter Headings
When you're first starting a book in Google Docs, navigation is easy. But as the story progresses and 1,000 words turns into 10,000, you'll want an easy way to navigate through the document. That's where Chapter Headings come in handy.
To assign a chapter heading, use the Styles menu, which should default to Normal Text unless you change it. Place your cursor next to the text you want to change, and select the appropriate header from the Styles menu. I recommend using Heading 1 for chapter headings and Heading 2 for section breaks or subheadings .
Now that you know how to assign chapter headings, it's important to figure out how to open the navigation menu so you can jump from chapter to chapter. To do this, go to the View dropdown menu and select Show Outline . A document outline will pop up to the left of your article.
If you find this too distracting while you're writing, simply select the arrow at the top left corner of the document outline to collapse it. Then click on the little outline insignia when you want to view it again.
It's good to have goals as you're writing a book. Whether it's 250 words a day, or 2500, you'll need a way to keep track. So to check your word count in your Google Doc, simply click on the Tools dropdown menu at the top of your document. The second option down is Word Count. You can click on this to see the total word count of your document, or whatever section you highlight.
As you can see from the picture above, you also have the option to show the word count as you work by clicking the box at the bottom of the window.
Downloading a Word Document
While Google automatically saves your document as you make changes, you can also download your document for local storage.
I've never had any issues with auto-save in Google Docs, but I still download DOCX files every couple of days, just in case. This is helpful because I can just open the downloaded document in Microsoft Word to continue working if I don't have internet or I just want to use some of MS Word's more robust features.
You can also download other document types, such as ODT and EPUB. You can even download it as a PDF document!
Checking Spelling and Grammar
The built-in spelling and grammar checker is one of the Google Docs features that doesn't stack up well against other word processors. Microsoft Word's editing feature is much more robust and thorough. But that doesn't mean you should use this feature while writing in Google Docs.
There are a couple of different ways to access this feature. You can use the Tools dropdown menu or you can simply click the little A with the check mark next to it.
If you're the type of writer who doesn't like to be distracted by spelling and grammar corrections while you're writing, use the Tools dropdown menu to toggle these selections on and off as you see fit .
Don't forget there are plenty of great proofreading apps that integrate with Google Docs. My top recommendation is ProWritingAid, but you can see our comprehensive list of the best proofreading tools here .
Advanced Book Writing Features in Google Docs
The features I've outlined above are more than enough to get the writing process rolling. If you're just beginning, I'd suggest focusing on getting the words down and little else. It's really easy to get distracted by other things during the novel-writing process — until you develop a writing habit .
And since your doc is online, it's tempting to pop over to social media for a minute — which turns into an hour.
So if you don't yet have a daily or weekly writing habit, that's what you should focus on first. But if you're looking to see what else Google Docs can do for your writing process, I've included a couple more features in this section.
Page Breaks
While not a requirement, I like to put a page break after each chapter. This will ensure each chapter starts on a fresh page. To do this, place your cursor at the end of the preceding chapter. Select the Insert dropdown menu and find the Page Break feature near the bottom. Select Page break and start your new chapter!
Google Docs defaults to 8.5 by 11 inches. However, this is large for most books. So if you'd like to make the document reflect the eventual size of your print book, you can use the Page Setup feature. Simply click the File dropdown menu and you'll see it near the bottom.
You can also change your margins here if you wish!
Accessing Your Document on Mobile
One nice thing about the Google Workspace suite is you can access it from your phone. So if you're on the bus or the train and you have a few minutes to write or edit, you can open the Google app and get some work done.
You can record the work in a dedicated writing Google sheet, and even use Google Forms to create questions for your eventual Beta Readers! Indie authors can definitely get a lot of use out of these free tools beyond writing.
Editing in Google Docs
While most editors like to work using the Track Changes feature in MS Word, you do have a similar option in Google Docs. You can share your document with someone using the blue button in the top right corner.
Then you can choose their level of access, selecting Commenting if you don't want them to be able to edit. You can also have them use Suggestion mode, where they can make changes that you can accept or reject. (It’s always a good idea to make a copy or download your document as-is before sharing it with anyone!)
Formatting in Google Docs
There are two main types of formatting. Which one you end up doing will depend on your goals as a writer. If you're going to submit your book for traditional publication, you'll want to check out this article on manuscript formatting .
If you're looking to publish your book on a platform like Kindle Direct Publishing, you'll need to do a different kind of formatting. Namely, turning your manuscript into a professional-looking EPUB file for eBook distribution and a print-ready PDF file for print distribution.
You can format for submissions in Google Docs itself (see the link above). And while it's technically possible to format for indie publishing in Google Docs, I wouldn't do it if you value your sanity.
You may be tempted to use a book template for your Google Doc, then download an EPUB and call it a day. Unfortunately, even the best book template for Google Docs (or even MS Word) won't look nearly as good as 98% of the competition.
Formatting for indie publishing is more than adding a title page, adding page numbers, and making sure your table of contents is in good shape. To succeed in the world of indie publishing, your book needs to look as good as possible . Luckily, this is easy to do.
Use a Formatting and Writing App
Google Docs is a great tool for getting the words down. But when it comes time to format your book, save yourself the time and trouble by using a formatting and writing app .
As mentioned above, I recommend Atticus because it's easy to use and you can transform your manuscript with a few clicks of your mouse. You can upload your finished manuscript, and Atticus will automatically populate a table of contents, a title page, and a copyright page. Then you can choose from over a dozen templates , and Atticus will automatically take care of the formatting so you don't have to spend hours figuring it out. Once you add a book cover, you can download a store-ready EPUB for eBooks and a print-ready PDF for your paperback or hardcover book.
If you want to know why I think Atticus is the best, I have an article that details the best book writing software you can check out now!
Novel writers and non-fiction authors alike can get much of their work done in a simple Google document. It has all the basics to help you get the words down. You can also do some light editing and proofing before bringing on a professional editor — either inside Google Docs or by downloading a Word document.
Formatting is a bit of a different story, which you can learn more about in this article .
The bottom line: you can absolutely write a book using Google Docs. When it comes down to it, the tool you use to write doesn't really matter. Even the greatest writers of all time write their books one word at a time!
Dave Chesson
When I’m not sipping tea with princesses or lightsaber dueling with little Jedi, I’m a book marketing nut. Having consulted multiple publishing companies and NYT best-selling authors, I created Kindlepreneur to help authors sell more books. I’ve even been called “The Kindlepreneur” by Amazon publicly, and I’m here to help you with your author journey.
Related Posts
Parts of a book [from cover to cover], how to write a whodunit, top 8 best scrivener alternatives for writers (+ the only one that matters), sell more books on amazon, amazon kindle rankings e-book.
Learn how to rank your Kindle book #1 on Amazon with our collection of time-tested tips and tricks.
Join the community
Join 111,585 other authors who receive weekly emails from us to help them make more money selling books.
How To Write A Book In Google Docs
by Stefanie Newell | Dec 16, 2020 | The Writer's Tool Box

Wondering how to write a book in Google Docs? In this video, I’ll be sharing how to use Google Docs to format your manuscript. This video is perfect for aspiring writers who don’t want to invest in expensive writing software and looking for a good free alternative!
Video Transcript for How To Write A Book In Google Docs

You’ve always wanted to be a published author! In this video, I’m going to show you how to write a book in Google Docs.
So first let’s start off with why I love Google Docs for new writers! First, it’s entirely online, which means that you can be anywhere with Internet access and update your manuscript. Traveling? In the office? At Starbucks? You can write your book.
Google Docs – Page Setup
Formatting your manuscript is easy starting with the page setup. In the menu click File > Page Setup and set it for a one-inch margin on the top, bottom, left, and right. The page orientation should be portrait and the letter size should be 8 ½ x 11.
These settings should already be set as the default, but just confirm it to be sure.
Next is the font. The most common font for formatting a manuscript is Times New Roman.
The font size should be 12.
Now let’s format your title page.
On the very first line type your first and last name. Of course, this should be your real name. If you’re writing under a pen name, I’ll show you where to include that later.
Tab over to the right and type word count. This is a key step because your writing coach, editor, and formatter will provide you quotes based on your word count. And a literary agent also needs to know your word count to determine whether your manuscript falls within the guidelines of the genre you write.
Google Docs – Word Count
Here is the simplest way to find your word count!
Click Tools > Word Count. You’ll find your word count here, but you can also select Display word count while typing, click Ok. And now your word count will always be present in the bottom left corner.
Now that you know your word count…
On the next line, type your address. On the next line type your city, state, and zip code. Drop down a line and include your email address, make sure that it’s an email that you check regularly. This is going to be the email that you share with your editor, writing coach, literary agent, or publishing company.
Drop down to the middle of the page and type the title of your manuscript in all capital letters. Drop down two more lines and type “By” and then your author name. If you’re writing under a pen name, you can include, writing as Pen Name.
This is your title page.
How To Write Your Book In Google Docs – Formatting
Now let’s format the manuscript itself.
Make sure your cursor is at the end of your name.
In the menu click Insert > Break > Page Break.

You’ve inserted a new page.
With your cursor on page 2 of your manuscript, Click Insert > Headers & Footers > Header, and then enter your name and the title of your manuscript on the left and the page number on the right. To insert the page number, go to Insert > Page Numbers and choose the second option on the top right. Click Options over here on the right, then Header Format, select Different First Page > Apply
Click out of the header by clicking on the blank space below the header.
Now go to Format > Line Spacing and choose Double.
Once you’ve completed a chapter, place the cursor at the end of the chapter you completed. Click Insert > Break > Page Break.
And this is how you start a new chapter.
Center the chapter one-third of the way down the page, and you can write it by either using the number or writing the word out and then click the arrow by this Align icon and choosing Center Align.
Drop down four lines and choose Left Align to begin your paragraph.
If you write fiction, you’ll want to follow the guidelines of your genre by using indented paragraphs. Each paragraph should be indented by .5 inches but you don’t want to space or tab to indent, so here’s how to accomplish this:
Click Format > Align & Indent > Indentation Options, choose “First line” from the drop-down menu and .5 should populate, if not type it in and click Apply.
So, a few things to remember when writing your book . Google Docs automatically saves your manuscript, and you can confirm that by clicking on this cloud.
Despite what we were taught years ago, you should only use a single space after a period.
Don’t put an extra space between paragraphs.
For scene breaks, add a blank line with a hashtag mark or three asterisks in the center to indicate a new scene.
To indicate the end of your manuscript, write the word “END” and center it after the last line.
For more videos like How To Write A Book In Google Docs Click to Subscribe on YouTube!
Trackbacks/Pingbacks
- The 7 Absolutely BEST Google Docs Hacks For First Time Writers! - […] Click to learn how to format your manuscript in Google Docs. […]
How to use google docs for a book report
Use google docs for a book report.
Open Docs app and click the plus on the bottom right. Then click Choose Template.
Scroll down a few times until you see the Education category, and then find the Book Report by Reading Rainbow template. Click on it.
Now you can scroll through this document that's already formatted nicely. It contains good ideas and suggestions, too.
Delete and add text and images as needed throughout the document.
Our students use iOS creation apps for book report alternatives (Book Creator, ThingLink, Padlet, etc.), but this seems like a kid-friendly way to practice more of a typed/essay book report format.

How to format your book manuscript in Google Docs
Are you using Google Docs to write a book? Maybe you’re wondering how you should format your manuscript to send to a publisher or agent. If you’re new to writing, maybe you don’t know that there is a right (and a wrong) way to present your manuscript.
Never fear, I’ve got you covered. This post will show you how to set up your book professionally in Google Docs.
Personally I prefer Word for handling large documents, but there’s many reasons you might want to format your book in Google Docs , especially if you’re working across many devices. Also, it’s free!
Standard manuscript format
Firstly, it’s helpful to know the standard settings for manuscripts or short stories. This applies to any formatting regardless of the software.
- Times New Roman or Courier font (I personally prefer Times)
- Double spaced
- 1 inch margins
- First line of each paragraph hanging (indented)
- Left alignment
- Your name/story title/page number in the top right hand corner

The number one tip I can give is to double check requirements for your manuscript with the publisher before submitting – they will include these requirements with their submission guidelines. But they’re likely to be standard manuscript format.
I’m going to use text from my short story ‘Lady Loveday Investigates’ to set up the document. You can do this on an existing manuscript or on a fresh document. If you’re creating a fresh document, I’d recommend saving it as a template before adding your text, so that you can reuse it in the future.
Formatting the manuscript in Google Docs
Open up Google Docs.
Start a blank document
Rename the document. I like to make sure it is labelled with the DRAFT status, so that I know exactly what copy I’m working on.

The title page header should include:
- Address (some places no longer require this)
- Phone number
- Number of words
Double click into the top of the Google Docs page to add this information into the header. Your first page header should be different to the other pages
Centred in the middle of the page in all caps should be the:
- Title of the book
After the title page is complete, you can work on the manuscript itself.
After your title page, headers should be right aligned and include:
- Title of book
- Page numbers
Double click into the top of the Google Docs page to add this information into the header. To add page numbers, click the Options button.

This will bring up a menu where you can specify the page numbers. List the start number at 0, so that it skips the title page and your first page of text is labelled 1.

Font and paragraph styles
Change font and size.
Convert your text to the following by highlighting it and selecting
- Times New Roman
- Left aligned (not full)
Chapter headings
- Times New Roman Italic
- Center aligned
Fix your paragraph styles
To indent your text with the first line hanging, go to: Format > Align & indent > Indentation options.

In the menu, select Special indent > First line

To double space paragraphs select all and go to: Format > Line & Paragraph spacing > Double.

Once you’ve done that, you can use these styles to update the heading and paragraph styles across the board. This will fix any missed formatting, and ensure all your new text is in the right style.
Click on the style you want to update and navigate to Format > Paragraph styles > (the text style you want to update) > Update to match.

Scene breaks
Add a scene break by using a centre aligned hash (#).
Organising chapters
You can start a new chapter or section by inserting a page break. Remember to put your chapter title in Heading 2 format.
It’s really helpful to keep your chapters organised with heading styles, so that they appear in the sidebar here. While it might not seem like much now, when you’ve got 40 chapters, that navigation pane becomes very handy. It’s especially useful if you’re writing a non-fiction book with lots of sections and sub-sections. Heading styles also make it easier to export a correctly formatted e-book.
Exporting your document
From here, you can export it as a Word document (.docx) if you’re sending it to publishers, or even an EPUB format if you’re sending it to e-readers.
Now that you know how to format your manuscript correctly in Google Docs, you can be confident that your work will appear professional to editors, agents, and publishers. If you have any questions, please feel free to ask in the comments section below, and I’ll do my best to answer them.
10 responses to “How to format your book manuscript in Google Docs”
Shame no one offers a free basic 6×9 chapter template for formatting a normal novel in google docs, even google docs don’t offer any good templates just fancy cooured stuff and menus that no one wants, too much confusion and messy websites clogging up the internet full of adverts, no wonder etsy sellers are making a fortune selling basic templates that are impossible to find anywhere, i guess i’ll have to go back to etsy and buy one
This was so helpful. I usually write on the go and I desperately needed some direction to continue my writing. Thank you for taking the effort to post this!
No problem! Glad it could help you out. 😀
Are there folks who i can share my Google Doc book with that will format it for me for a nominal fee ? I need help
Awesome article, I’m currently working on a novel and needed the guidance!
Hi Ken, I don’t have anyone I can recommend specifically but I’m sure there are people out there.
Fab! Glad it could help!
Thank you so much, Kat for doing this. You were SO very helpful. I needed help with formatting. Your video was super easy to listen to and follow. God bless you for this!
My absolute pleasure! Glad it could help 😀
ive been a writer along time since school really and my writings evolved but i only just started using paragraphs like 3 years ago which ik is bad but i was a kid now im writing much better my only question is how do i moniterize my chapters if there 3 acts with parts in each chapter i was attempting to lesson the blow of how massive it is
Share your thoughts Cancel reply
How to Create A Book Template in Google Docs

Are you writing a book and wondering which platform could make crafting an outline much easier? You may believe that the features you need only come with expensive software. And you aren’t alone.
Other writers feel the same. They don’t know that there’s a free platform with a book template outline available. That’s right. You can use a Google Doc to create a custom template for your book.
Besides being a useful writing platform, Google Docs has a template to structure a book more easily. On top of that, it enables users to create a brochure or a booklet.
In this guide, we’ll walk you through the steps of using the book template Google Docs function. If you follow everything, writing will be much easier.
Still copying content into WordPress?
You’re doing it wrong… say goodbye forever to:.
- ❌ Cleaning HTML, removing span tags, line breaks, etc.
- ❌ Creating your Table of Contents anchor ID links for all headers by hand,
- ❌ Resizing & compressing images one-by-one before uploading back into your content,
- ❌ Optimizing images with descriptive file names & alt text attributes,
- ❌ Manually pasting target=“_blank” and/or “nofollow” attributes to every single link
Table of Contents
What is a book template, why use a book template, how to create a book template in google docs: a step-by-step walkthrough.
A book template is a file with a layout suitable for writing books. The design can be simple or complex, depending on the writer’s needs.
A book template is useful because it enables writers to structure the work efficiently. Moreover, it allows to quickly check particular sections, without scrolling endlessly to find them.
Some software can contain a book template with a few sections, which might sound limiting to writers. But there are platforms like Google Docs that provide a custom book template.
A book template is an efficient solution to structure and organize the writing. It makes the writing look more professional and is better for publishing. You can quickly adapt the same book template structure that your favorite novelist shared in their MasterClass course to help get started ASAP.
Or you can increase your work efficiency with Wordable that will allow you to export from Google Docs to WordPress in 1-click.
Besides, a book template helps writers manage their time and organize themselves better. Because it has a structure, it informs you when it’s time for a new section.
If you’re considering using Google Docs to create a book template, it’s essential to learn several functions. Firstly, you need to access Google Docs:
Log in to your Google account and open Google Docs. You’ll see two options: “Personal” and “Business.” Choose the first option to open the Template Gallery. Remember that you can choose a booklet template or a brochure template besides creating your customized book template.

To make a book template, click on “Blank.” Firstly, you’ll need to manage the page setup. Locate “File” in the main menu and select “Page setup.” Make sure all margins are set to one inch. Then, confirm that the “Page orientation” is set to “Portrait” and that “Paper size” is “Letter.”

The next step is choosing the font and the font size. Generally speaking, most writers prefer Times New Roman or Calibri. The font size should be 11 or 12 so that the editor can see everything clearly.
The middle of the first page should contain the manuscript title in a larger font than the rest of the content. Include your name two lines below. To start writing, include the Page Break first by clicking on “Insert” and then “Break.”
It’s time to insert Headers and Footers. The Header should contain the writer’s name and the book title, while the Footer should display the page number. To add Headers and Footers, go to “Insert” and tap on “Header and page number.”

When you start writing, adjust the Heading. The title should be H1, while each chapter needs to be H2. If there are subchapters, they should start from H3. This is the basics of your book template.
Can you write a book in Google Docs?
Yes. In fact, many writers choose this platform because it’s free but has all the options writers need to craft a book.
Can you use Google Docs to make a resume?
Yes, there’s a Google Docs Resume template you can find in the Template Gallery.
Is Google Docs free?
Yes, Google Docs is a free platform. That’s one of the reasons many writers use it to create a template for various needs.
Can I access my manuscript anytime?
As long as you have an internet connection, it’s possible to access the manuscript on Google Docs. The great news is that it also automatically saves everything, so you won’t have issues losing the manuscript.
A Creative Solution
As you can see, writing a book using Google Docs is relatively simple. Not only can you create a template to suit your needs, but you can also access it anywhere with a good broadband connection. With the steps we’ve provided, we’re sure you won’t have any problems making a free template.

Publish perfectly-optimized content from Google Docs to WordPress in 1-click.
Get publish-ready content in 1 day (or less)..
How To Put Google Docs In Book Format? (A Step-By-Step Guide)
Are you looking for a way to create a professional-looking book with ease? Google Docs is the perfect solution for turning your written work into a beautiful book.
This step-by-step guide will walk you through the process of putting your book together and formatting it so it looks exactly the way you want.
From establishing the layout to adding images and illustrations, formatting text, and exporting to PDF or e-book formats – we’ll cover it all.
We’ll also provide tips on designing professional-looking books, as well as how to use Google Docs to publish your work.
Get ready to create stunning books with Google Docs!.
Table of Contents
Short Answer
Google Docs does not have a built-in feature to convert documents into book format, however there are a few different options to achieve this.
One option is to use a third-party add-on, such as BookWright, which allows you to turn your Google Docs into a printable book.
Alternatively, you can export your Google Docs document as a PDF and then use a PDF-to-book converter, such as Blurb, to convert it into a book format.
Finally, you can also use a desktop publishing program, such as Adobe InDesign, to convert your Google Docs document into a book format.
Establishing the Book’s Layout
Creating a book in Google Docs begins with establishing the books layout.
This includes choosing the page size, page margins, and line spacing.
The page size should be appropriate for the type of book you are creating.
For example, a book of short stories may be best suited for a smaller page size, such as 5.
5, while a large novel may require a larger page size, such as 8.
Its important to select the correct page size for your book so that it will look professional and be easier to read.
When you have chosen the page size for your book, you can then set the page margins.
Margins are the spaces between the edges of the page and the text.
Generally, the margins should be at least 1 inch in order to provide a comfortable reading experience.
You can also adjust the line spacing, which is the amount of space between each line of text.
A common line spacing is 1.
15, which is slightly larger than the standard single-spaced line.
Once you have established the books layout, you can move on to adding images and illustrations.
This can help make your book more interesting and visually appealing.
You can also add page numbers and headers or footers to make navigating your book easier.
Finally, you can export your document to a PDF or e-book format to make it easier for readers to access your book.
With these steps, you can quickly and easily put your Google Docs into book format.
Adding Images or Illustrations
Adding images or illustrations to your Google Docs book can help to make it more engaging and visually appealing.
Before you begin, it’s important to check the copyright status of any images you plan to use.
You can find many free images online that can be used without any restrictions.
When selecting an image, be sure to choose one that is high quality and relevant to the content of your book.
You can add an image to your Google Doc by clicking Insert and then Image.
You can also use the Drawing tool to create custom illustrations or diagrams that can be included in your book.
When formatting images in your book, make sure to use consistent sizes and spacing.
This will make your book look more professional and polished.
You can also use the Format tab to customize the appearance of your images, such as adjusting the brightness or contrast.
In addition to adding images and illustrations, you can also insert charts, tables, and other types of data.
This can help to make your book more informative and easier to understand.
By following these simple steps, you can easily add images and illustrations to your Google Docs book.
This will help to make your book more engaging and visually appealing, and will make it easier to share with others.
Formatting Text with Headers, Footers, and Page Numbers
When it comes to creating a professional-looking book from Google Docs, formatting your text with headers, footers, and page numbers is a must.
Headers and footers are a great way to add additional information to your document.
For example, you could use the header to add the title of the book and the footer to add your contact details and a copyright notice.
Page numbers are also important for keeping your document organized and making it easier to reference specific pages.
Page numbers can be added to the footer of each page so they are visible on all pages of the document.
To add headers and footers to your document in Google Docs, go to the Insert tab and select either Header or Footer.
From here you can customize the header or footer with text, images, and other elements.
To add page numbers, first click on the Insert tab and then select Page Number.
You can choose to have the page numbers appear at the top or bottom of the page, or both.
You can also customize the page numbers by selecting a different font, size, and style.
Once youve added the headers, footers, and page numbers to your document, you can easily adjust or remove them at any time.
Making changes to your document is as easy as clicking on the header or footer and making the desired changes.
This makes it easy to keep your document looking professional and organized.
By following these steps, you can easily turn your Google Docs into a professionally formatted book.
Headers and footers allow you to add additional information to your document, while page numbers help keep your document organized and make it easier to reference specific pages.
With these steps, you can quickly and easily turn your Google Docs into a book format.
Exporting to PDF or E-Book Formats
Exporting your Google Docs to a PDF or e-book format is the final step in turning your writing project into a professional-looking book.
This will make it easier to share and distribute your work, whether you are self-publishing or submitting it to a publisher.
The first step is to select File and then Download from the top navigation bar.
You will then be presented with a drop-down menu of available formats.
Select PDF (.
pdf) or E-book (.
epub) depending on the format you need.
Once you make your selection, your document will be downloaded to your computer in the chosen format.
When you export your document to a PDF or e-book format, it is important to pay attention to the page size, margins, and spacing of the document.
To ensure that the document looks professional when it is printed or viewed on a digital device, it is important to make sure that the layout is consistent throughout.
If the document is intended for print, make sure to select the correct page size, such as A4 or US Letter.
If it is intended for digital devices, select a page size that fits the device it will be viewed on.
The same is true for margins and spacing.
For example, if it is intended for print, use 1-inch margins and single-spaced text.
If it is intended for digital devices, use smaller margins and double-spaced text.
Once your document is exported to a PDF or e-book format, you can easily share it with others.
It can be uploaded to websites such as Amazon or Apple Books, or it can be sent to a publisher for consideration.
It can also be printed at home or a printing shop for a physical copy.
No matter how you choose to share your work, exporting to a PDF or e-book format is the best way to ensure that it looks professional and polished.
Utilizing Advanced Features in Google Docs
Using Google Docs to create books can be a great way to organize your thoughts and get your writing project off the ground quickly.
To make your book even more professional-looking, you can access some of the more advanced features available in Google Docs.
One of the most helpful features is the ability to set page size, margins, and spacing.
By setting these parameters, you can ensure that your book looks more professional and polished.
To set page size, you can go to File > Page Setup.
Here, you can set the page size, margins, and the orientation of the page.
Another useful feature is the ability to add images or illustrations to your Google Docs book.
You can insert images into your document by going to Insert > Image.
Once youve inserted the image, you can resize it, add text, and apply various effects.
You can also add illustrations or other graphics to your book by inserting shapes from the Insert menu.
Google Docs also allows you to format your text with headers, footers, and page numbers.
Headers and footers are useful for adding titles, author information, and other content that will appear on every page.
You can create headers and footers by going to Insert > Header & Footer.
You can also add page numbers to your book by going to Insert > Page Number.
Finally, you can export your document to a PDF or e-book format to make it easier to share.
To export your document, go to File > Download As and select the desired format.
Exporting your document to a PDF or e-book will make it easier to share with others, and it will ensure that your document looks the same on every device.
By taking advantage of the more advanced features available in Google Docs, you can easily turn your document into a professional-looking book.
With a few simple steps, you can set page size, margins, and spacing, add images or illustrations, format your text with headers, footers, and page numbers, and then export your document to a PDF or e-book format.
With these steps, you can quickly have a book ready for publication.
Tips for Designing Professional-Looking Books
Creating a professional-looking book doesn’t have to be difficult or time-consuming.
With a few simple tips and tricks, you can easily turn your Google Docs into book format that looks polished and professional.
The first step is to establish the book’s layout, including page size, margins, and spacing.
This is important to ensure that your book looks uniform and professional.
To begin, open your Google Doc and navigate to the “Page Setup” tab.
Here you can select the page size, margins, and spacing that you would like to use for your book.
Next, you can add images or illustrations as needed.
Google Docs allows you to easily insert pictures, shapes, and diagrams into your document.
This can help make your book more visually appealing and add depth to your writing.
To insert an image, click on the “Insert” tab and select the type of image you would like to add.
After you have established the layout and added any images, you can start formatting your text.
Headers, footers, and page numbers are all important for making your book look professional.
To add these elements, open the “Header & Footer” tab and select the type of element you would like to add.
Once you have added the elements, you can customize them further using the formatting options.
To do this, click on the “File” tab and select the “Download as” option.
Here you can select the file format you would like to use and click the “Download” button.
Once the document has been exported, it will be ready to be shared with others.
By following these steps, you can easily turn your Google Docs into book format that looks professional and polished.
With a few simple tips and tricks, you can quickly and easily create books ready for publication.
Using Google Docs to Publish Your Work
Google Docs is an incredibly powerful tool for creating books.
Not only can you create a professional-looking book quickly and easily, but you can also take advantage of Google Docs’ many features to make your project stand out.
With a few simple steps, you can turn your Google Docs into a beautiful book that you can proudly share with the world.
First, you’ll need to establish the layout of your book.
This includes deciding on the page size, margin widths, and line spacing.
Each of these decisions will depend on the type of book you are creating and the final product you are aiming for.
For instance, if you are creating a children’s book, you may want to use a larger page size and wider margins to make the text easier to read.
Once you have established the layout of your book, you can start to add images or illustrations as needed.
Google Docs makes it easy to add images and other media files to your documents.
Simply click the “Insert” tab and select the “Image” option to add photos, drawings, and other media to your project.
You can also add shapes and tables to enhance the look of your book.
Next, you’ll want to format your text with headers, footers, and page numbers.
Headers and footers are a great way to add titles, page numbers, and other information to a book.
You can easily customize the look and feel of your headers and footers by changing the font size, font color, and alignment.
Page numbers are also essential for a professional-looking book.
You can add page numbers to your document by clicking the “Page Numbers” button on the “Insert” tab.
Finally, you can export your document to a PDF or e-book format.
Exporting your document to a PDF or e-book format makes it easier to share your work with others.
PDFs are a popular file format and are supported by most e-book readers.
Exporting your document to an e-book format will give you more flexibility when it comes to formatting your book.
You can also use a variety of online services to convert your PDFs into other formats, such as Kindle or Nook.
With these steps, you can easily turn your Google Docs into a beautiful book.
Once your book is complete, you can proudly share it with the world.
So get started on your project today and turn your Google Docs into a professional-looking book!.
Final Thoughts
Creating professional-looking books with Google Docs is now easier than ever.
With this step-by-step guide, you can easily establish the layout of your book, add images or illustrations, format the text, and export your document to a PDF or e-book format.
If you want to take your book design to the next level, there are plenty of advanced features in Google Docs to make your book look even more professional.
Now, its time to take the knowledge youve gained and put it to use.
Try out Google Docs for your next book project and see the difference it can make.
James Wilson
James Wilson has extensive knowledge in the information technology industry.His second love, besides dealing with computers, is smart home technology. He is continually updating information to better comprehend this problem and has a deep understanding of the apartment’s support system.
Recent Posts
Where is Trash in Airtable? (Step-By-Step Guide to Locating Deleted Records)
In Airtable, you can find the trash bin by clicking on the "Show all bases" option on the top left corner of the dashboard. Scroll down to the bottom of the menu and select "Trash" to access the...
What Is Airtable and How It Works? A Comprehensive Guide to Boosting Your Productivity
Airtable is a cloud-based productivity tool that combines the functionality of a spreadsheet with a database. It works by allowing users to create customizable databases to organize information in a...
- How To Format A Book In Google Docs
Last Updated on July 23, 2023 by Jake Sheridan
In this tutorial, you will learn how to format a book in Google Docs.
If you’re writing a book, you’ll need to make sure the formatting is consistent throughout the document. Google Docs makes this an easy task.
In this guide, we will show you how to format a book in Google Docs. We will go over setting the page size, margins, and spacing, as well as adding headers and footers to the document. We will also discuss how to export your document as a PDF or EPUB file.
How to Make a Book in Google Docs
Here’s our step-by-step guide on how to make a book in Google Docs.
First, open the Google Docs document you want to format as a book.

In this guide, we’ll format an existing document with several paragraphs of content.
The first formatting change we’ll make is adding indentation. To do this, select all the content in your document. An easy way to select everything in a document is with the keyboard shortcut Ctrl+A.

Select Format > Align & indent > Indentation options.

In the Indentation options dialog box, select ‘First line’ as an option under Special indent and choose the length of the indent in inches. Click on Apply to proceed.

In this example, I’ve added a 0.5in first line indent to all my paragraphs.

Next, we’ll change the font style of our text to an option that looks more fitting for a novel or published book.

In this example, we’ve chosen a popular serif font like EB Garamond.

Next, we’ll justify our text. Justified text simply adjusts the spacing between each word in a line so that both edges of the paragraph are straight.

We can also use the keyboard shortcut Ctrl+Shift+J to justify our selected text.

Most books have some form of header. These headers can indicate the name of the book or the current chapter the page is in. To insert a header into your document, click on Insert > Headers & footers > Header.

In this example, I’ll add the title of my novel as the header for each page.

Under the header options, you can also choose to add page numbers. You can also access this option by selecting Format > Page numbers.

In the page numbers dialog box, you can choose whether to add page numbers on the header or footer of your page.

In this example, we’ll place our page numbers at the footer.

Another step we’ll need to consider is adding a dedicated title page for your document.

Click on the different first page option in the header to remove the header from the first page.

You can download your document as a regular PDF file or as an EPUB. EPUB files are great if you want users to be able to view your document in e-readers.

To download the document, click File > Download and select the file type you want.
This guide should be everything you need to learn how to format a book in Google Docs.
Click this link to make a copy of this sample document to try doing it yourself!
You might also like:
How to Make a Booklet in Google Docs: Step-by-Step Guide
Creating a booklet in Google Docs is a simple task that can be done in a few easy steps. You’ll need to set up your page layout, format your content, and then print or share your booklet. Once you’re finished, you’ll have a professional-looking booklet that you can use for various purposes, whether it’s for a school project, a business presentation, or a personal keepsake.
Step by Step Tutorial on How to Make a Booklet in Google Docs
Before you start crafting your booklet in Google Docs, it’s essential to plan your content and design. Think about the purpose of your booklet and how you want it to look. Once you have a clear idea in mind, you’re ready to dive into the steps.
Step 1: Open Google Docs and Create a New Document
Start by opening Google Docs and creating a new document. This will be the foundation of your booklet.
Creating a new document in Google Docs is the first step in making your booklet. You’ll have a blank canvas to work with, and you can begin formatting your booklet to your liking.
Step 2: Set Up Your Page Layout
Adjust your page settings to reflect the layout of a booklet. This typically includes setting the page to landscape orientation and choosing the correct paper size.
Setting up your page layout is crucial because it determines how your booklet will be printed and viewed. Landscape orientation allows you to have two pages side by side, which is standard for booklets.
Step 3: Format Your Content
Format your text and images in a way that is visually appealing and easy to read. This may include using columns, headers, and footers.
Formatting your content is where you can get creative. Use different fonts, sizes, and colors to make your booklet stand out. Remember to keep it readable and professional.
Step 4: Insert Page Numbers
Page numbers are essential in a booklet for easy navigation. Insert them in a consistent place on each page.
Inserting page numbers helps your readers keep track of where they are in the booklet. It’s a small detail that makes a big difference in the overall presentation.
Step 5: Review and Edit Your Booklet
Take the time to review your booklet for any errors or formatting issues. Make edits as necessary before finalizing your document.
Reviewing and editing your booklet ensures that it’s polished and ready to be shared or printed. Double-check everything from spelling to layout alignment.
Once you’ve completed these steps, your booklet will be ready to go. You can print it out to have a physical copy or share it digitally with others.
Tips for Making a Booklet in Google Docs
- Use templates: Google Docs offers a variety of templates that can help you get started with your booklet. This can save you time on formatting and give you design ideas.
- Keep it simple: Don’t overcrowd your pages with too much text or too many images. A clean, simple design is often more effective.
- Use high-quality images: If you’re including pictures in your booklet, make sure they are high resolution so they look good when printed.
- Proofread: Always proofread your booklet for any spelling or grammar mistakes before sharing or printing.
- Explore add-ons: Google Docs has add-ons that can provide additional functionality, such as creating a table of contents or adding special formatting.
Frequently Asked Questions
Can i make a booklet in google docs on my phone.
Yes, you can make a booklet in Google Docs on your phone using the Google Docs app. However, it may be easier to format your document on a desktop or laptop computer.
How do I print my booklet double-sided?
When printing your booklet, look for the option to print double-sided in your printer settings. This will allow you to print your booklet in the correct format for folding and binding.
Can I collaborate with others on my booklet in Google Docs?
Absolutely. Google Docs allows multiple users to work on the same document in real-time, making it perfect for collaboration.
How do I share my booklet digitally?
You can share your booklet by clicking the ‘Share’ button in Google Docs and sending an email invitation or sharing a link to the document.
Is there a limit to how many pages my booklet can be in Google Docs?
There is no specific limit to the number of pages, but keep in mind that Google Docs may start to slow down with extremely long documents.
- Open Google Docs and create a new document.
- Set up your page layout for a booklet format.
- Format your content with text and images.
- Insert page numbers for easy navigation.
- Review and edit your booklet thoroughly before finalizing.
Creating a booklet in Google Docs is a user-friendly process that opens up a world of possibilities for presenting information in a compact and professional format. Whether you’re an educator, a student, a business owner, or just someone who loves to organize and present content creatively, Google Docs provides the tools you need to make an impressive booklet. Remember to use the tips and FAQ section as a guide, and don’t be afraid to get creative with your design. Once you’ve made a booklet in Google Docs, you’ll see how easy and efficient it can be to put together a tangible piece of your hard work and creativity.

Matthew Burleigh has been writing tech tutorials since 2008. His writing has appeared on dozens of different websites and been read over 50 million times.
After receiving his Bachelor’s and Master’s degrees in Computer Science he spent several years working in IT management for small businesses. However, he now works full time writing content online and creating websites.
His main writing topics include iPhones, Microsoft Office, Google Apps, Android, and Photoshop, but he has also written about many other tech topics as well.
Read his full bio here.
Share this:
Join our free newsletter.
Featured guides and deals
You may opt out at any time. Read our Privacy Policy
Related posts:
- How to Do a Hanging Indent on Google Docs
- How to Subscript in Google Docs (An Easy 4 Step Guide)
- How to Insert Text Box in Google Docs
- How to Print from Google Docs on iPhone or Android
- How to Delete a Table in Google Docs (A Quick 5 Step Guide)
- How to Double Space on Google Docs – iPad, iPhone, and Desktop
- How to Clear Formatting in Google Docs
- How to Center a Table in Google Docs (2023 Guide)
- How to Insert a Horizontal Line in Google Docs
- How to Insert a Page Break in Google Docs
- How to Remove Strikethrough in Google Docs (A Simple 4 Step Guide)
- How to Create a Folder in Google Docs
- Google Docs Space After Paragraph – How to Add or Remove
- How to Make Google Docs Landscape
- Can I Convert a PDF to a Google Doc? (An Easy 5 Step Guide)
- How to Create Double Page Layout on Word: A Step-by-Step Guide
- How to Delete A Google Doc (An Easy 3 Step Guide)
- How to Add a Row to a Table in Google Docs
- How to Upload a PDF to Google Drive
- How to Edit a Hyperlink in Google Docs
How to Make Google Docs Look Like a Book

Writing a book? You may be tempted to use Microsoft Word, but Google Docs is a great free alternative for formatting your manuscript. In this tutorial, I’ll walk you through how to set up Google Docs to format your book properly, including setting the correct page size, adding page numbers, creating a table of contents, and more.
Set the Page Size
The first step is to set the correct page size for your book. Here’s how:
- Open a new Google Docs document.
- Go to File > Page setup.
- Under Paper size, choose “Letter” for 8.5 x 11 inches. This is the standard book page size.
- Set all margins to 1 inch under Margins.
- Click Apply to save the changes.
Choose the Font
Most published books use 12-point Times New Roman or a similar serif font. Here’s how to set it in Google Docs:
- Highlight all the text in your document.
- In the toolbar, select the font drop-down and choose “Times New Roman”.
- Then choose 12-point font size.
This will set the font style and size for your entire document.
Add Page Numbers
Page numbers help give your book a professional, polished look. Here’s how to add them:
- Click Insert > Page number > Top of page > Plain number.
- Choose Right alignment and set the number format to start at 1.
- Click Apply to add page numbers starting from page 1, excluding the first page.
Tip: Add the page number in a header or footer so it appears on every page automatically.
Create Sections
Long books are usually divided into parts or sections. Here’s how to add sections in Google Docs:
- Place your cursor where you want the new section to start.
- Click Insert > Section break.
- Choose the “Next Page” option.
- Type a section heading after the break, like “Part I” or “Chapter 1”.
Repeat this for each new section in your book.
Build a Table of Contents
A table of contents makes it easy for readers to jump around your book. To create one:
- Click Insert > Table of contents.
- Choose the first automatic table of contents style.
This will insert a table of contents at your cursor pulling from any headings in your document.
Add Headers and Footers
Headers and footers give you space to display information like the book title and page numbers.
To add a header:
- Click Insert > Header > Blank.
- Type your header text, like the book title.
To add a footer:
- Click Insert > Footer > Blank.
- Type footer text, like the page number or author name.
Use Heading Styles
Creating distinct heading styles for chapter titles, sections, subheads, etc. improves formatting and ensures they are included properly in your table of contents.
To create a heading style:
- Select the text you want to style.
- Click the Normal text drop-down arrow.
- Choose Heading 1, Heading 2, Heading 3, etc.
- Click Apply to save the style.
Repeat this process to style all headings in your document.
Add Images and Charts
It’s easy to spice up your book by adding images and charts. To insert an image:
- Click Insert > Image.
- Choose Upload from computer to add an image from your PC.
- Set image wrapping, alignment, and size options.
Follow the same general steps to insert a chart or diagram.
Use Page Breaks
Page breaks explicitly start new pages and can prevent widows/orphans (single words stranded on a new page).
To add a page break:
- Place your cursor where you want the new page to start.
- Click Insert > Page break.
Check Formatting Issues
Before you export your book manuscript, it’s smart to check for any lingering formatting issues:
- Run a spell check
- Review table of contents
- Confirm page numbers appear correctly
- Check headers, footers and page breaks
- Verify no widows/orphans
- Confirm images sized and placed properly
Fix any issues before exporting your document.
Export Book File
When your formatting looks perfect, it’s time to export your Google Doc as a book file.
- Click File > Download > Microsoft Word (.docx) to save the file as a Word document.
Now your manuscript is ready for publishing! You can upload it to an eBook publisher or print service.
Formatting a book in Google Docs is straightforward once you know the right steps:
- Set page size
- Choose font style and size
- Add page numbers
- Create sections
- Build table of contents
- Add headers/footers
- Use heading styles
- Insert images/charts
- Add page breaks
- Resolve formatting issues
- Export .docx file
With these tips, you can transform Google Docs into a book formatting tool on par with Word. So next time you write a book, consider using Google Docs to save time and money.
About The Author

Related Posts

How to Turn a Photo Upside Down in Word, Apple Pages, and Google Docs

How to Type a Beta Symbol in Google Docs

How to Mirror or Reverse Text in Google Docs

How to Make a Calendar in Google Docs
IMAGES
VIDEO
COMMENTS
Step 2: Set up your document. Configure your document settings, including font, spacing, and margins. Before you begin writing, you'll want to make sure your document is set up for success. Choose a font that's easy to read, such as Times New Roman or Arial, and set your font size to 12pt for standard readability.
Creating a New Document. The first step in your writing journey is to create a new document: Go to the Google Docs homepage (docs.google.com). Click on the "+ New" button. Select "Google Docs" from the dropdown menu. You now have a new, blank document to start your book.
2. Format your draft with headings. Whether you plot out your novel ahead of time or just go where your muse takes you, a blank page can be intimidating. That's why I start my stories off with a clean title page, document outline and chapter titles formatted as headings.
Alternatively, you can press the keys CTRL and Enter on PC or Command and Enter on Mac. Place your section titles in the middle of the page and your chapter titles at the top. Also, don't forget to add the page numbers. Click Insert, then Page Numbers, and select the page numbers layout you prefer.
Make sure your text is center-aligned by clicking on the Center Align icon. Type the title of your book. Press Enter twice, then type your name. Highlight the title of your book, then click on the ...
A step-by-step guide with pictures on how to write an entire book using Google Docs. Learn how to write your book in Google Docs without spending a dime! Tri...
Add an Introduction (typical for a nonfiction book) by positioning your cursor at the beginning of your Chapter 1 heading, hitting Ctrl-Enter (or going to the "Insert" menu and then to "Break→ Page Break") to add a page before it. Go to the top of this new page and add the word "Introduction.".
You can insert headings in Google Docs by changing the text style. Click on the field in the top toolbar that reads Normal text to open a dropdown menu. Unless you're writing a textbook, you probably won't need to use anything smaller than Heading 3. You can also use this tool to insert a Title and Subtitle .
1. Create a New Document. Open Google Docs in your web browser and sign into your Google account. Click on the Blank option to create a new document. 2. Set Up Your Document. Give your document a title by clicking on Untitled document at the top-left corner and entering the desired title for your novel. 3.
Details: headers and footers. If you want your book to look professionally drafted, don't forget the importance of appropriately using your Google Doc header and footers. Simply double-click the white space of your header and you will be able to type in the available area.
Follow the steps below to share your document: Open your book project in Google Docs. Click on the "Share" button in the top right corner. Enter the email addresses of collaborators, or generate a shareable link. Set their permissions to "Can edit," "Can comment," or "Can view.". Click "Done.".
In the top left corner, type in the name of your book or a placeholder title. Now, you're ready to write! You can start getting the words down immediately or make the next few adjustments first. Either way, Google will auto-save any changes as they're made, ensuring that you don't lose any work.
Wondering how to write a book in Google Docs? In this video, I'll be sharing how to use Google Docs to format your manuscript. This video is perfect for aspi...
To insert the page number, go to Insert > Page Numbers and choose the second option on the top right. Click Options over here on the right, then Header Format, select Different First Page > Apply. Click out of the header by clicking on the blank space below the header. Now go to Format > Line Spacing and choose Double.
Open Docs app and click the plus on the bottom right. Then click Choose Template. Scroll down a few times until you see the Education category, and then find the Book Report by Reading Rainbow template. Click on it. Now you can scroll through this document that's already formatted nicely. It contains good ideas and suggestions, too.
Formatting the manuscript in Google Docs. Open up Google Docs. Start a blank document. Rename the document. I like to make sure it is labelled with the DRAFT status, so that I know exactly what copy I'm working on. Title page. The title page header should include: Your name; Address (some places no longer require this) Email; Phone number ...
If you're considering using Google Docs to create a book template, it's essential to learn several functions. Firstly, you need to access Google Docs: Step 1. Log in to your Google account and open Google Docs. You'll see two options: "Personal" and "Business." Choose the first option to open the Template Gallery.
To begin, open your Google Doc and navigate to the "Page Setup" tab. Here you can select the page size, margins, and spacing that you would like to use for your book. Next, you can add images or illustrations as needed. Google Docs allows you to easily insert pictures, shapes, and diagrams into your document.
Google Docs review mode, also known as 'suggesting,' allows users to track changes to documents to accept or reject later.
Step 2. The first formatting change we'll make is adding indentation. To do this, select all the content in your document. An easy way to select everything in a document is with the keyboard shortcut Ctrl+A. Select Format > Align & indent > Indentation options. In the Indentation options dialog box, select 'First line' as an option under ...
Step 3: Format Your Content. Format your text and images in a way that is visually appealing and easy to read. This may include using columns, headers, and footers. Formatting your content is where you can get creative. Use different fonts, sizes, and colors to make your booklet stand out. Remember to keep it readable and professional.
Use a Book Report Outline. After reading the book, you are ready to start the writing process. In writing a book report, or any writing prompt, you'll find writing easier if you follow the proven steps of the writing process: prewriting, writing, revising, editing, and publishing. In the first step, prewriting, you'll plan what you want to say.
Add Page Numbers. Page numbers help give your book a professional, polished look. Here's how to add them: Click Insert > Page number > Top of page > Plain number. Choose Right alignment and set the number format to start at 1. Click Apply to add page numbers starting from page 1, excluding the first page. Tip: Add the page number in a header ...